While this technically isn’t experimental archaeology, this is a good way to facilitate archaeological experiments in metallurgy. I regularly cast bronze and smelt metals using a small clay-lined pit furnace. However, there are occasions when I am asked to demonstrate Bronze Age metalwork, but am not allowed to dig a hole in the ground. Museums and schools do get fussy about grassy areas and holes that could be a tripping hazard.
I found the link below and I thought it would be a good solution to my portable casting problem. The tutorial was for a making a small iron working forge, but I decided to make one that would be a scaled up version that would enable me to do the same sort of casting that I do with a clay furnace. http://www.instructables.com/id/Make-a-Small-Blacksmith-s-Forge/?ALLSTEPS
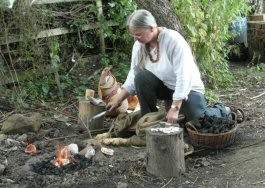
When I say that I do Bronze Age casting, I have to be honest about it. So far, in Britain no intact Bronze Age furnaces have been excavated or properly identified. The furnaces I used are based on the work of others and best guesses as to how the technology was done[1]. I have used short shaft furnaces, similar to, but much smaller than bloomery iron smelting furnaces. I have also used clay bowl furnaces with the air supply coming across the top or from below. The most efficient type I’ve used is a two chamber furnace with the air introduced into a lower chamber with the charcoal and crucible supported above it. It fires up quickly and evenly, plus it has the advantage that the crucible has a stable support, so I don’t have to worry about spilling the metal because the charcoal is moved around.
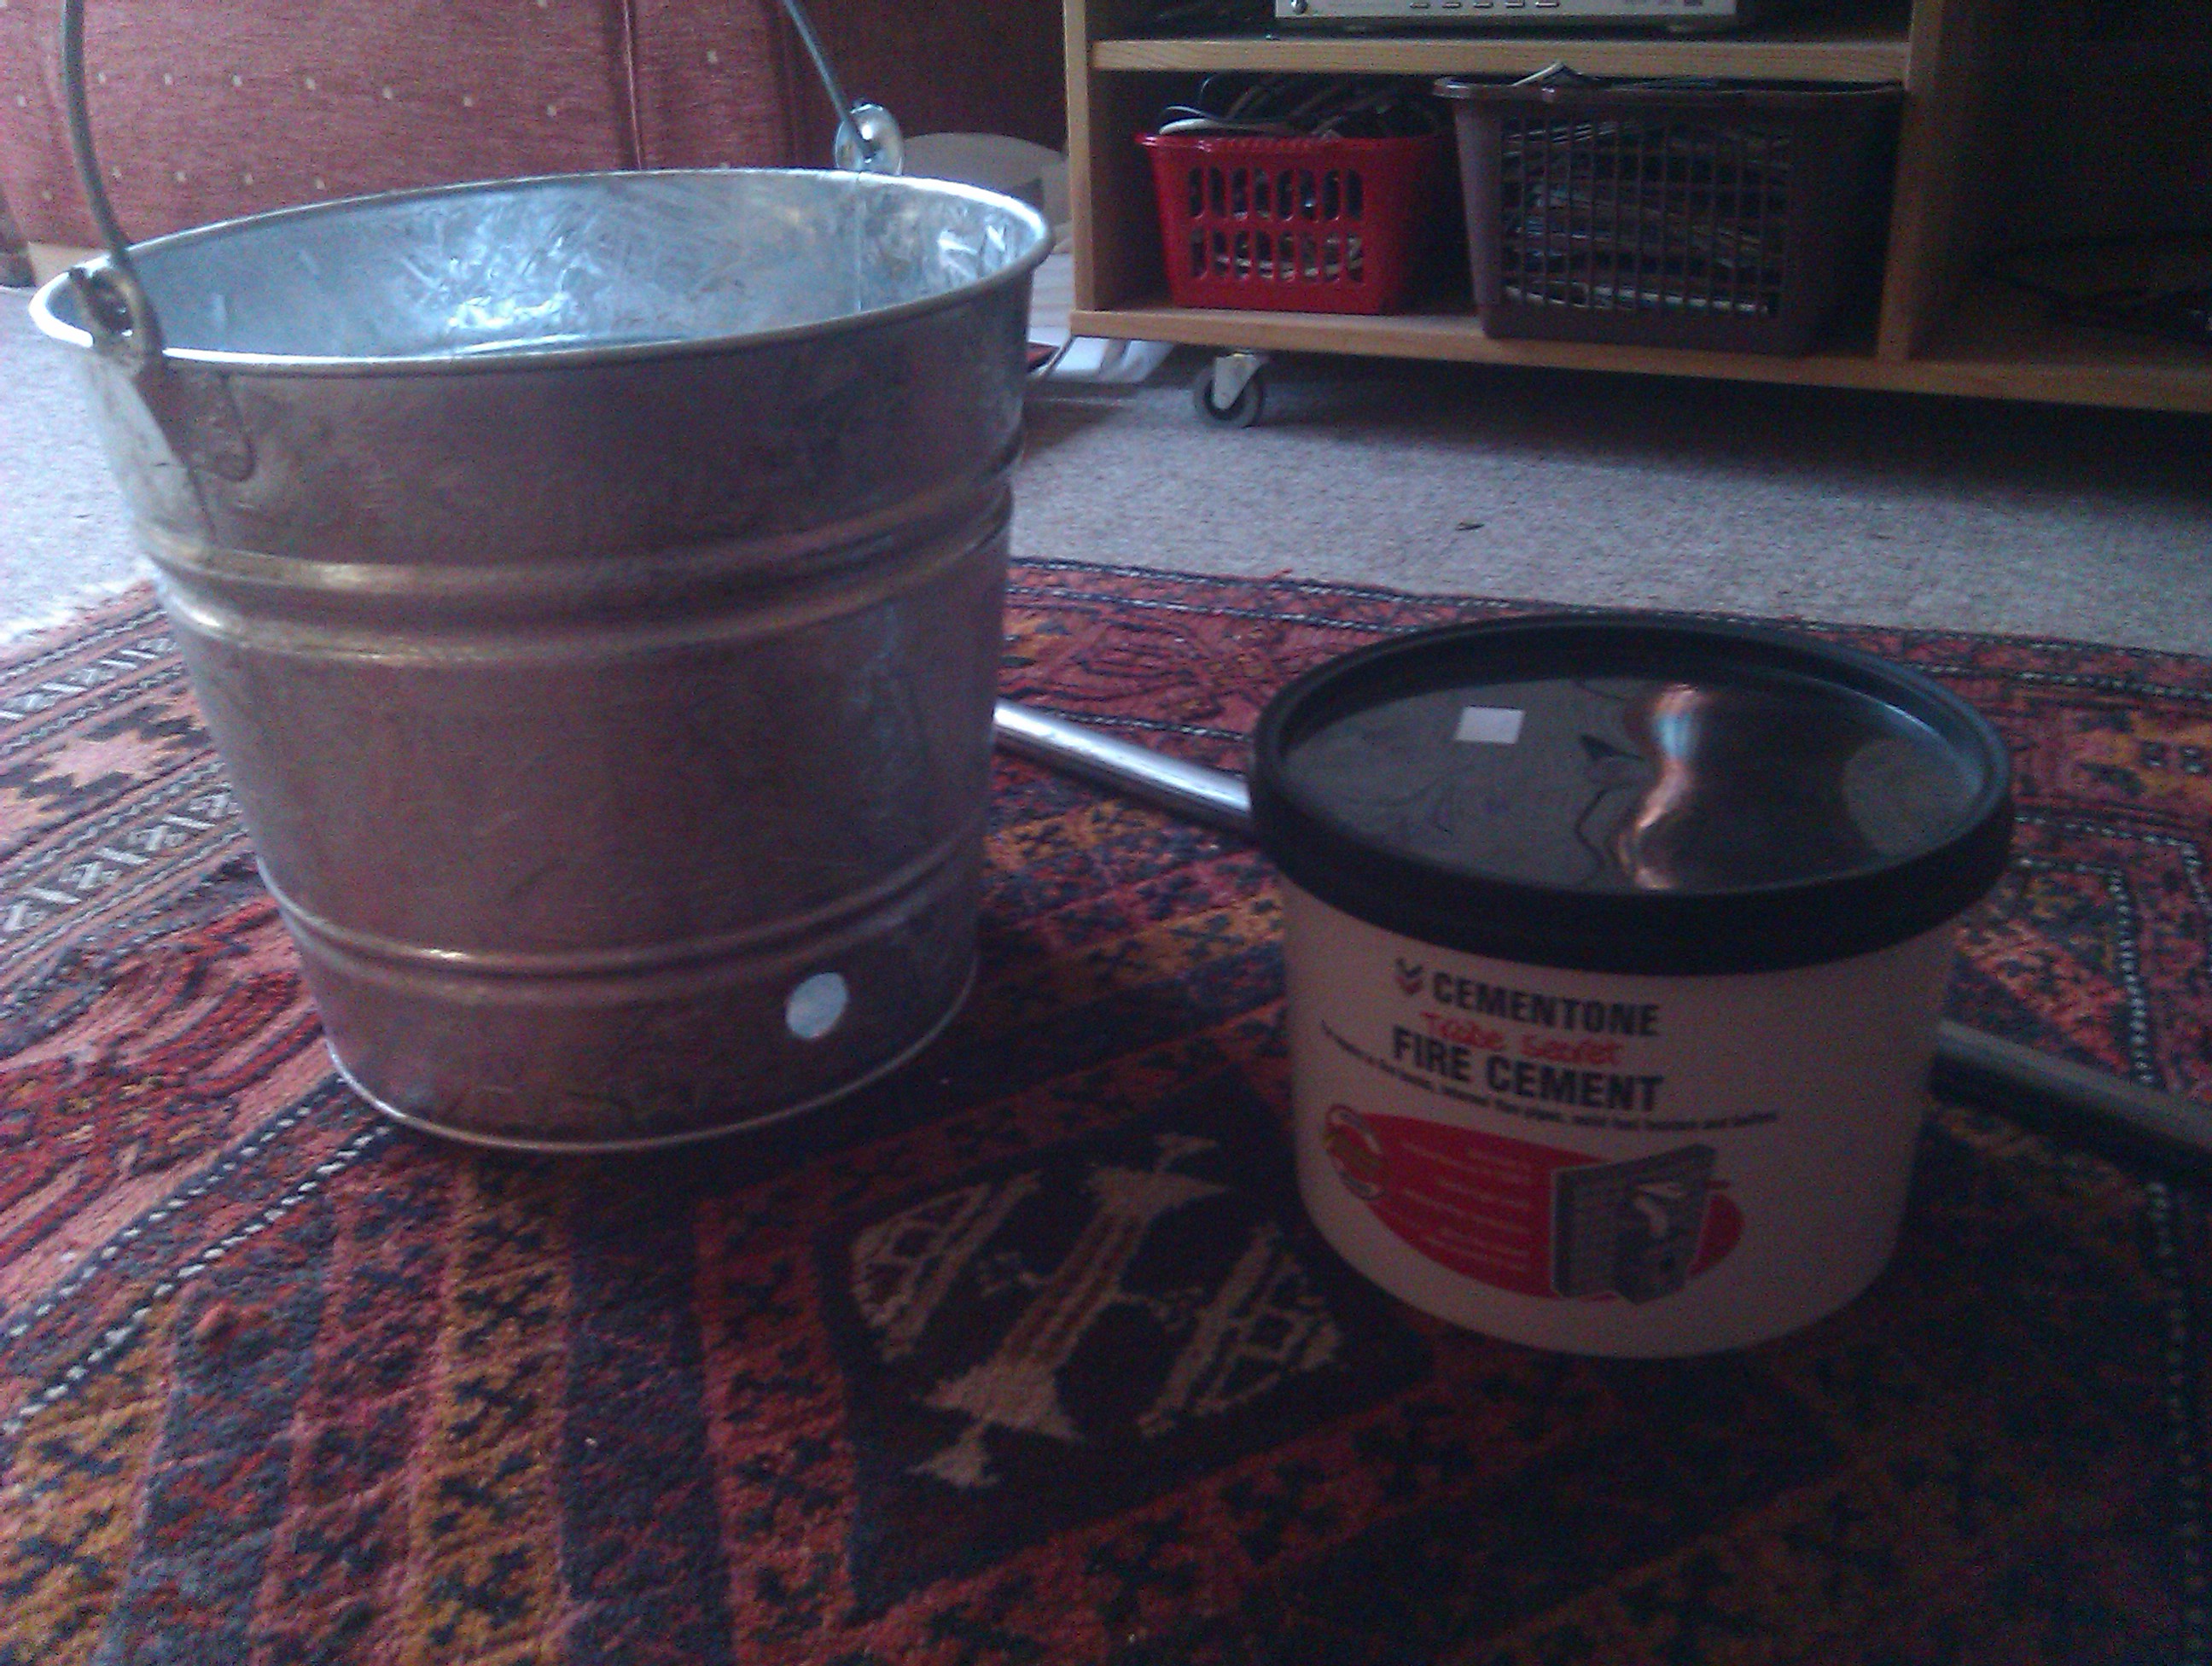
Step one was to find a sturdy steel bucket and drill a hole in the side near the bottom for the tuyere, the tube through which air is blown into the furnace. The air is needed to increase the heat.
A bucket, a steel tube, and furnace cement. Let’s get going!
I had a length of steel tube and a flat drill bit (spade drill bit in the US) of the same diameter. The hole was drilled about an inch and a half above the bottom of the bucket to allow for at least one inch of space for the furnace lining.
The view from above. It all fits nicely.
The original website used furnace clay, but didn’t say much about it. I bought a tub of Cementone Fire Cement for £8 at B&Q. As you can see it did about half the job, with the clay packed about an inch thick. The directions said to use a trowel, however the cement has a texture like gritty plasticene, but not quite as rigid. Getting it smoothed in the bottom of the bucket was awkward with the trowel (I’m more used to removing material with a trowel than adding it) so I put on some plastic gloves and pushed it into place.
That’s how far one 5 kg bucket of furnace cement will go. Time to go out and get another…
Now the instructions didn’t say anything about getting it on your hands, it just had warnings about getting it into your eyes. However, knowing that many materials like this can be caustic I decided to err on the side of caution and wore nitril gloves. The container had a handy link to the MSDS (Material Safety Data Sheet) so I could check out all the possible material hazards. The MSDS is a great online resource that will let you know exactly what’s in a product and every possible statistic for it. Check it out here http://www.bostik.co.uk/diy/product/cementone/Fire-Cement/109. Note that it is caustic and there are precautions against getting it on your skin. It also tells you what to do in case of contact with skin or eyes.
I used to work with someone who was severely health and safety challenged. I survived, but in the process learned the effects of being too intimately acquainted with carbon monoxide. It should go without saying, but I’ll say it anyway. Do this outside with plenty of ventilation and don’t hover over the thing while it’s being heated. It’s not a barbeque (at least not yet, there’s plenty of time for that later).
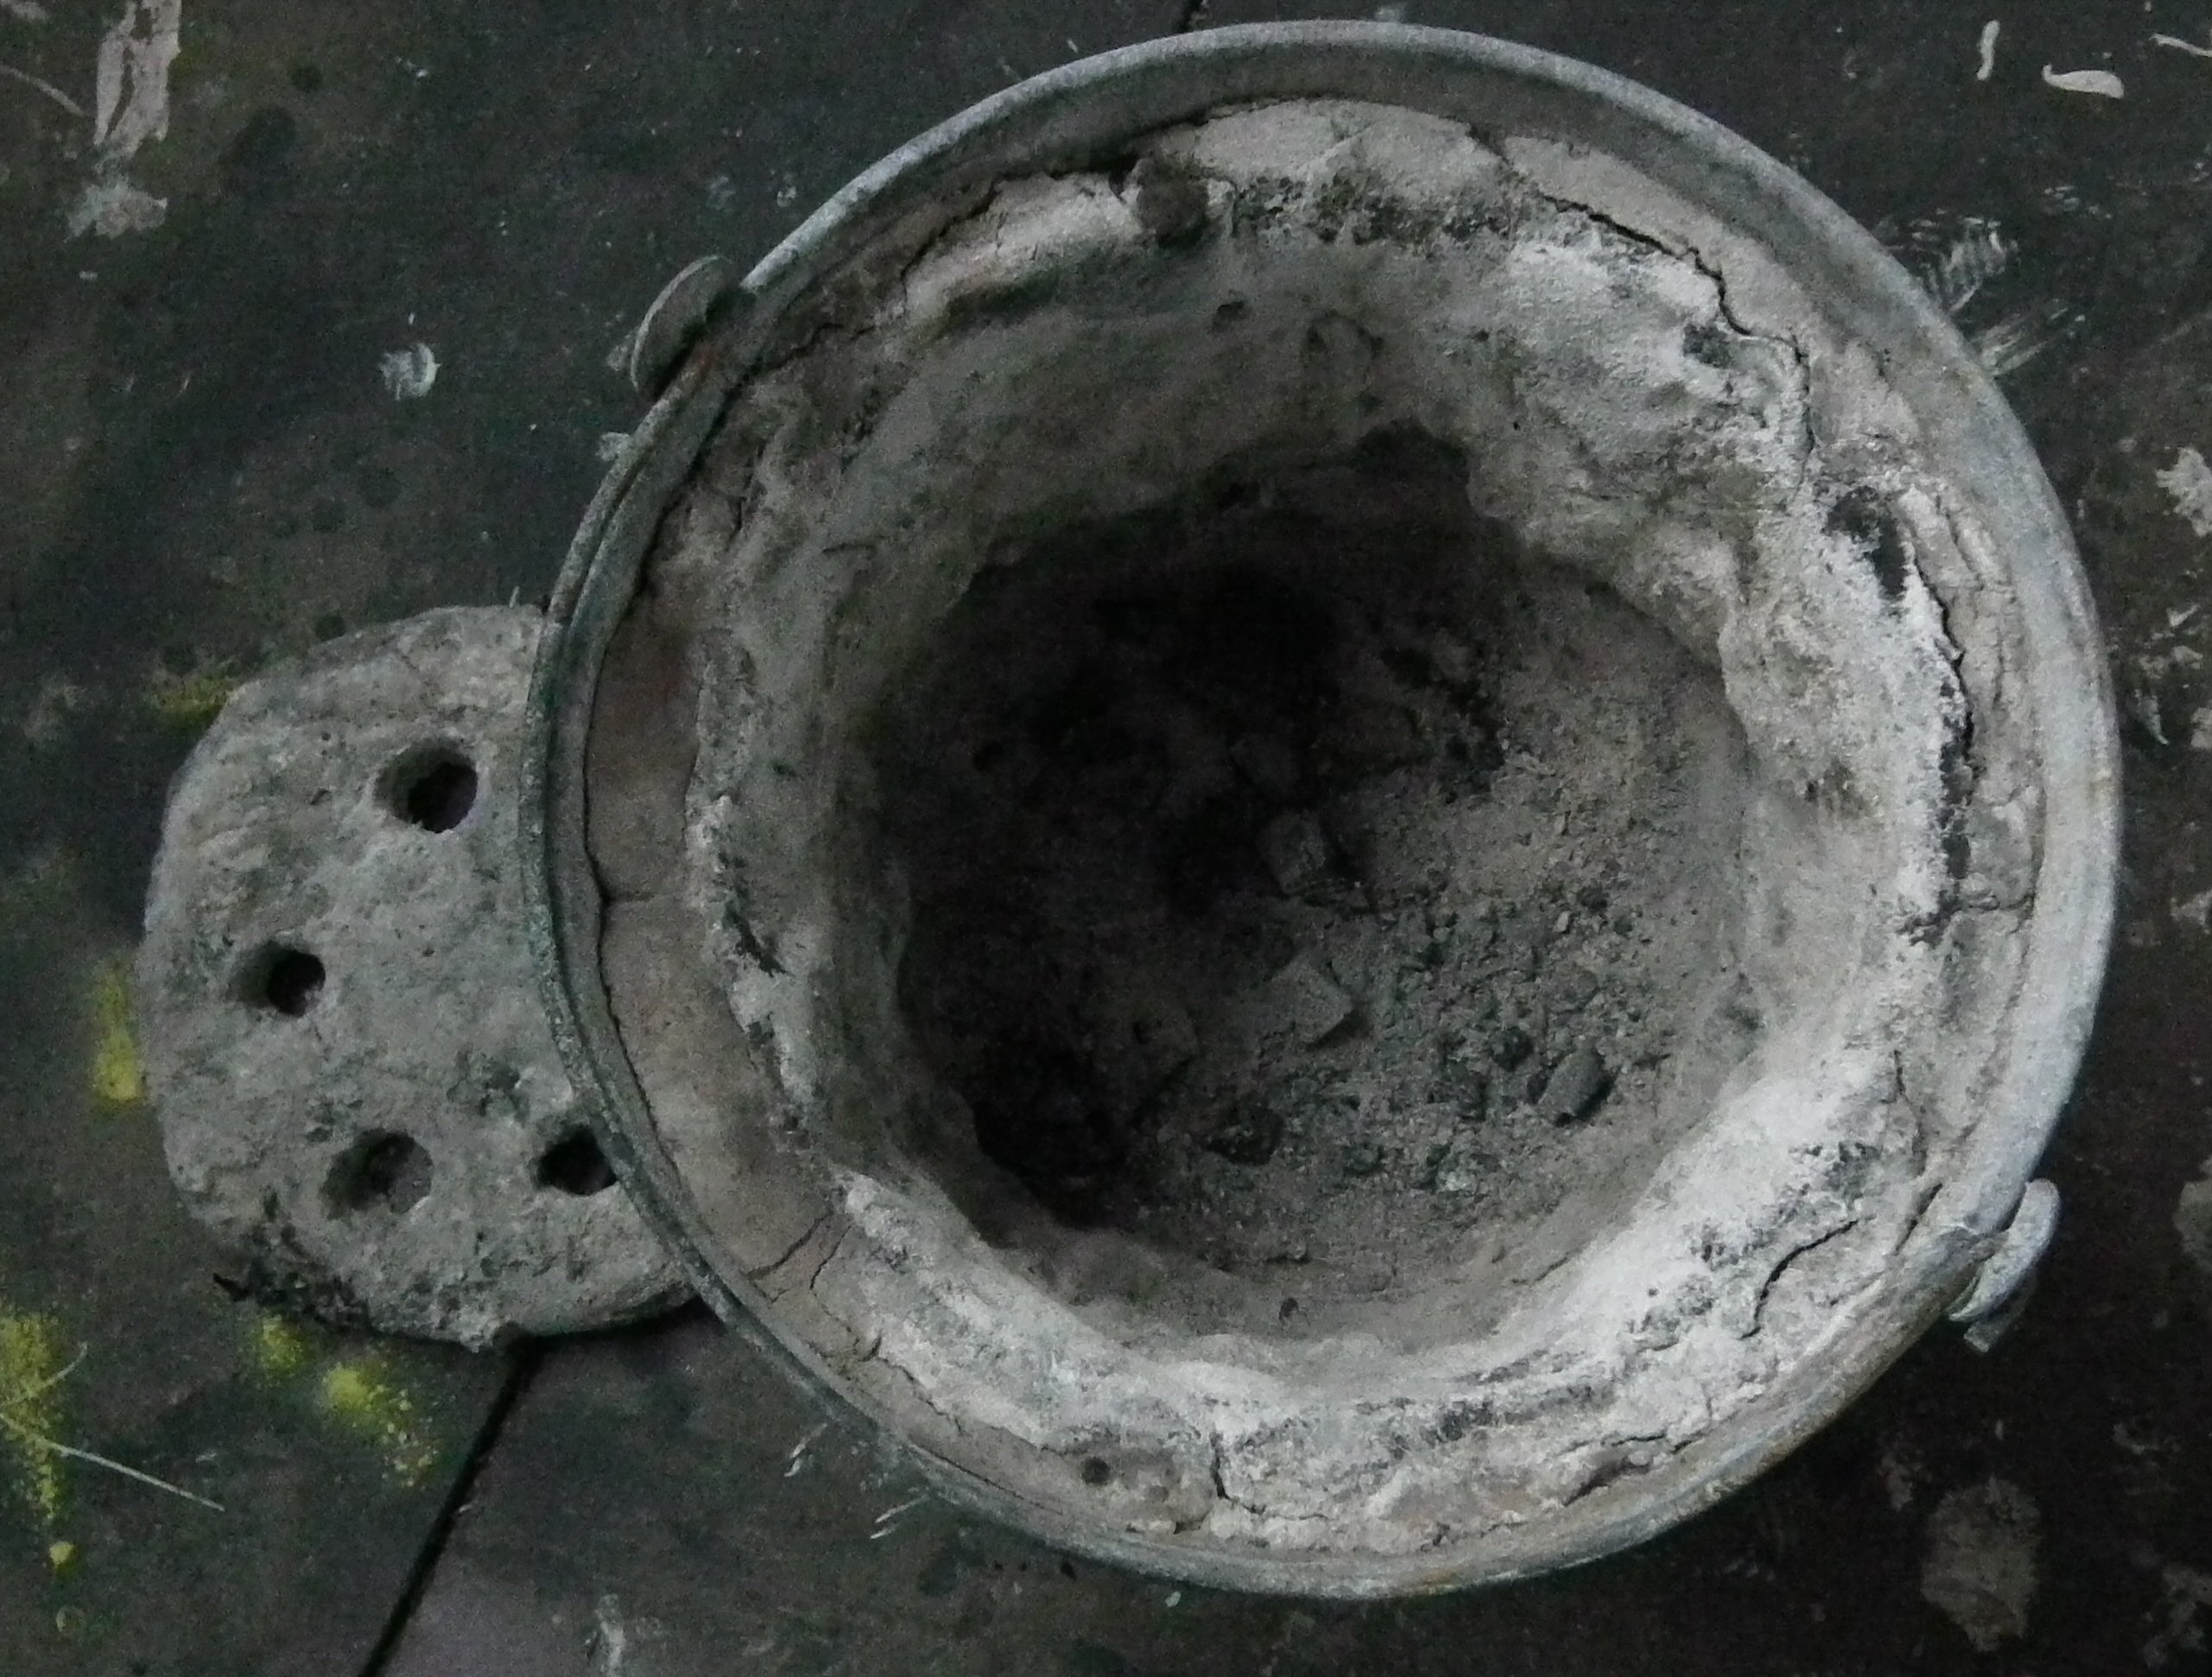
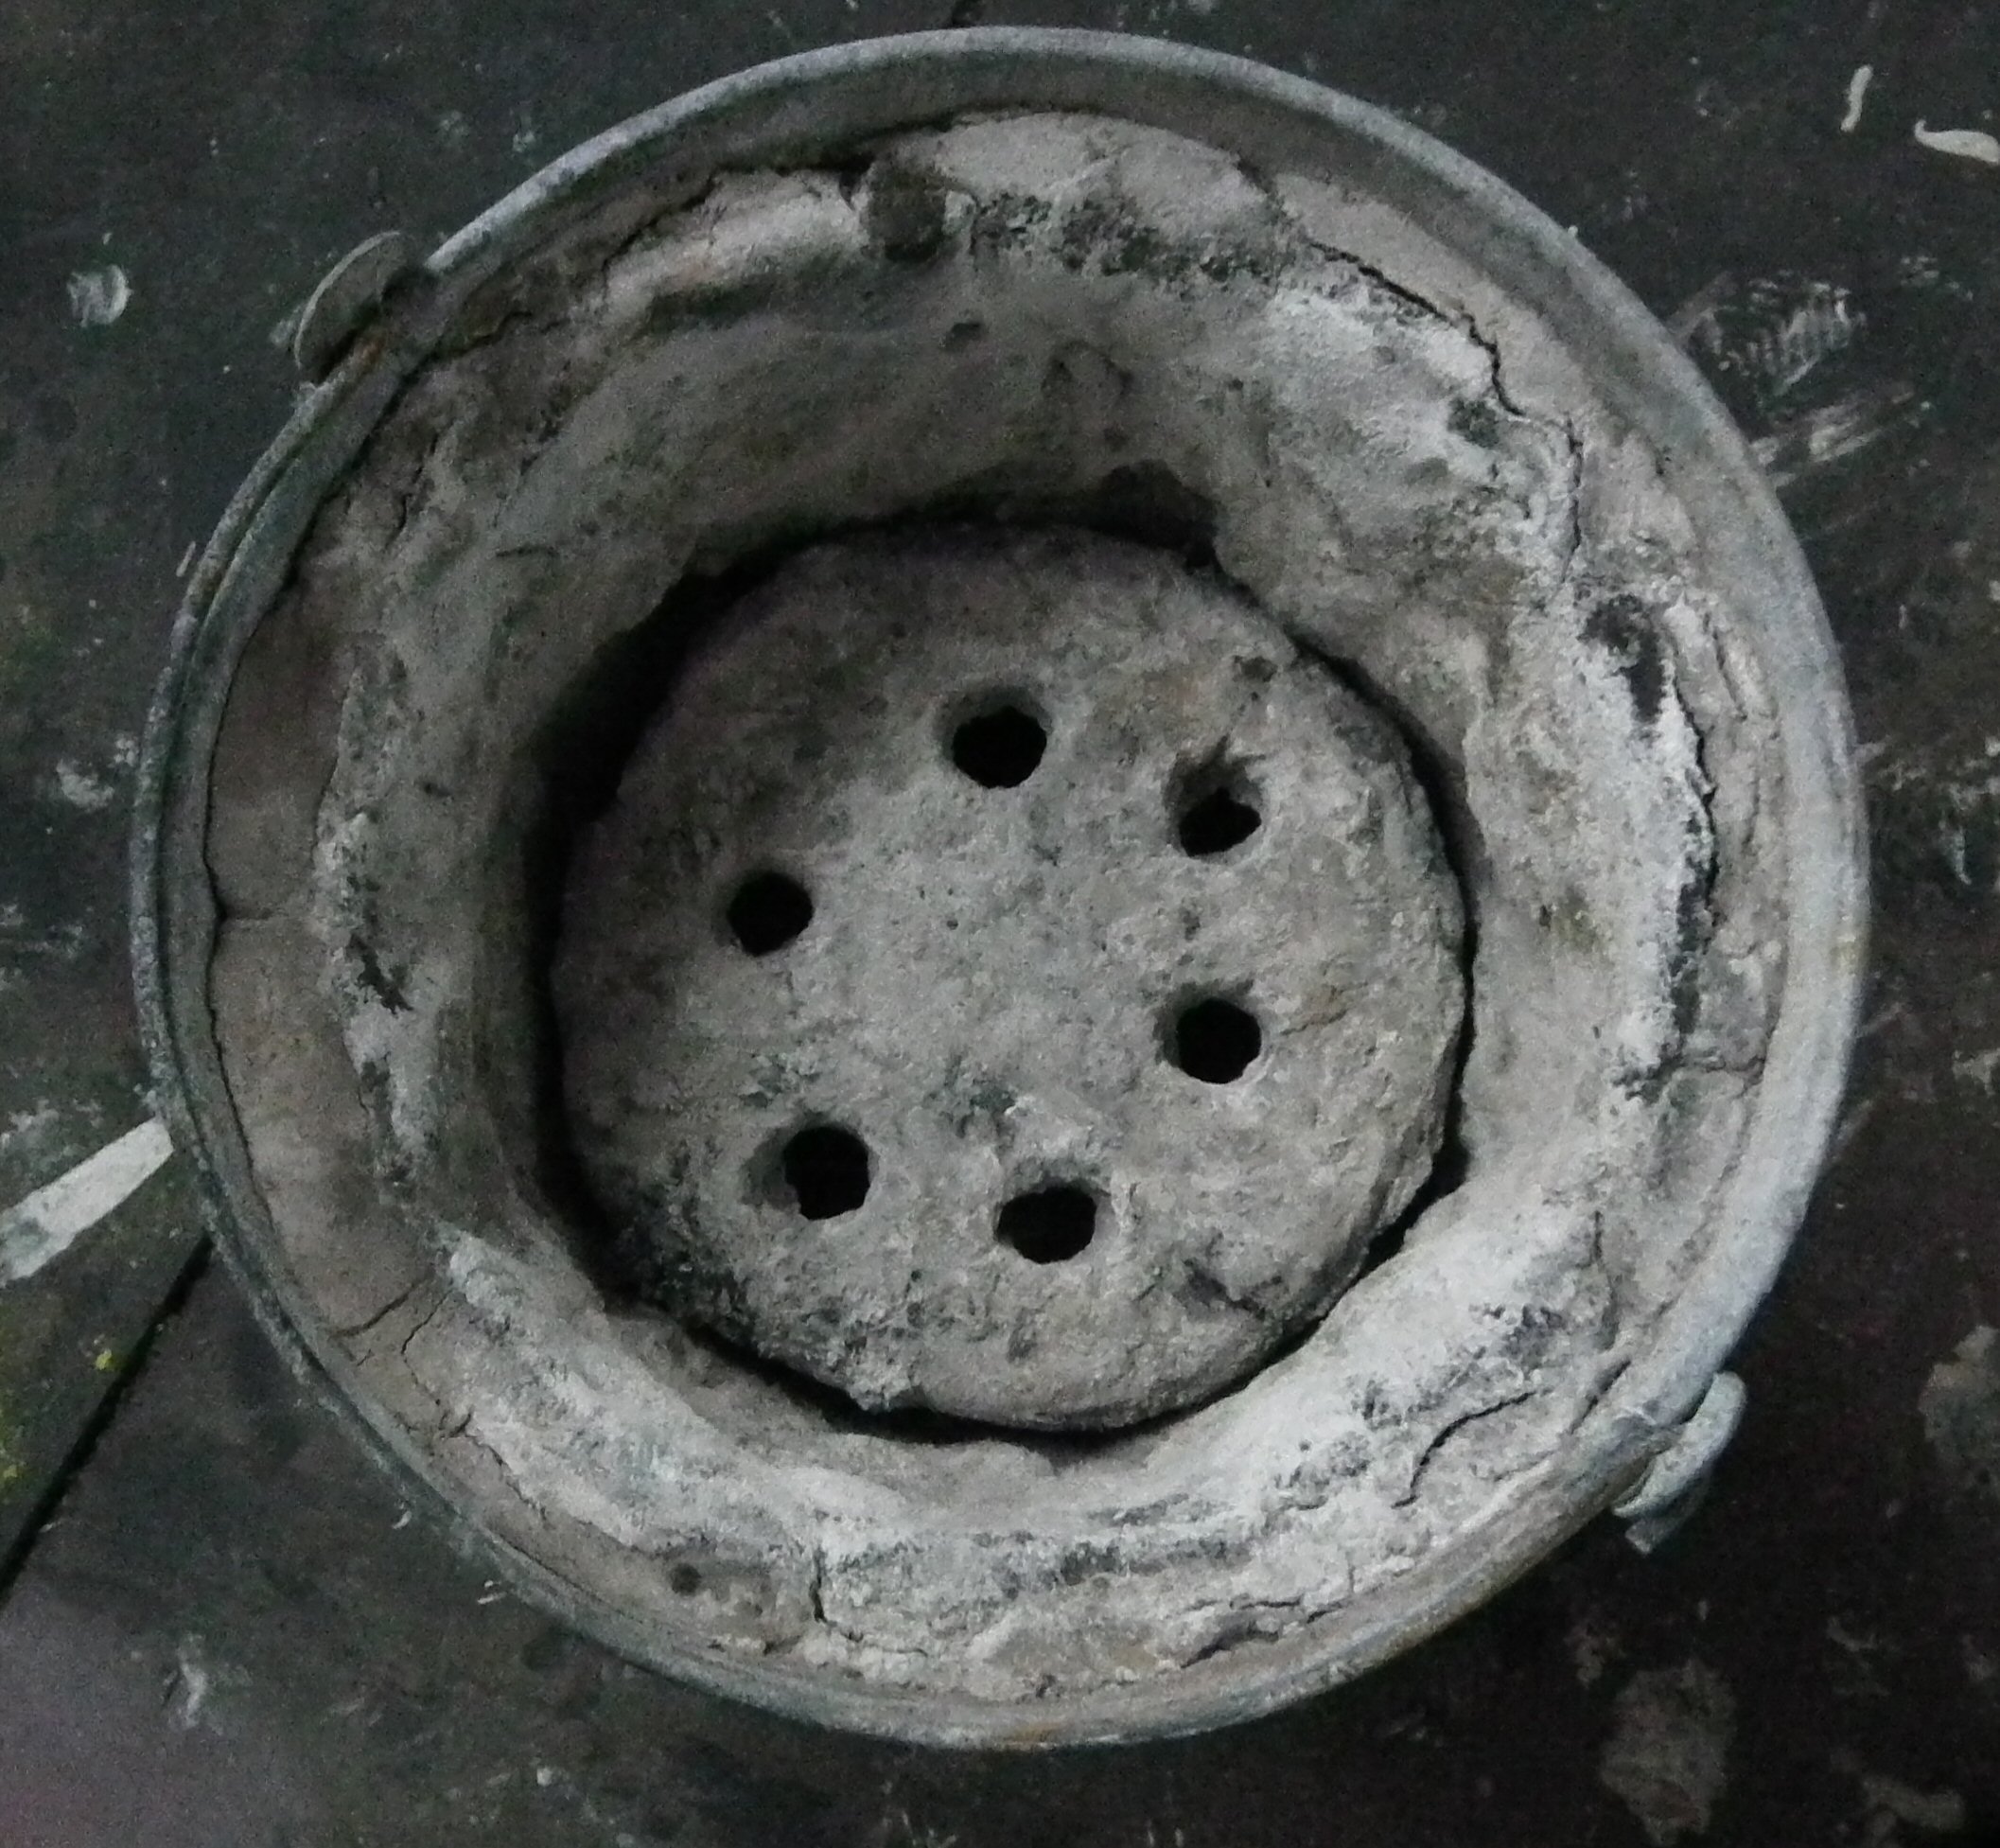
I took out the tube that I was using for the tuyere and built a small wood fire in the furnace and faced it so the tuyere hole faced the breeze. The fire lit quickly and I kept it topped up with scrap wood and a little charcoal and let the whole thing burn down. Once it was cooled, the material was hard as a rock. The next step was to make the tea pot stand. It’s simply a flat plate that fits the diameter of the interior of the furnace with holes about an inch from the edge. The tea pot stand allows the air to circulate freely below and then up through the holes to increase the heat of the charcoal. Once that was fired the furnace was ready to use.
Finished furnace after a few firings.
I’ve used the furnace now several times and it holds up well doing high temperature work. My initial fear was that the seams in the bucket wouldn’t hold, but it remains intact after melting bronze and copper. I’ve used it both with bellows and electric pumps.
Furnace with tea pot stand (AKA perforated clay slab in place.
After I made this, there was some discussion about experimental archaeology and authenticity on the EXARC Facebook Group (a group well worth checking out if you have an interest in any aspect of experimental archaeology). I made the point that this isn’t designed to replicate a Bronze Age furnace, but it replicates the conditions of how we believe Bronze Age furnaces performed. Many early experiments were done using modern gas or electric furnaces, however those have oxygen enriched atmospheres. Charcoal fires have reduced atmospheres, meaning that the air immediately around the crucible is free of oxygen. This is good news because less dross and slag is produced since the environment won’t allow the surface of the molten metal to oxidise.
As for electric pumps, sometimes it’s valuable to have a controlled air-flow. Having an electric air pump means that I can control how much air goes into the furnace and replicate conditions from one pour to the next. This way I will be able to have multiple experiments conducted under conditions as close as possible to each other. It would be difficult to replicate the controlled airflow of an electric pump with bellows since there might be times when I get tired or there is some distraction and the air flow is slightly less than for the previous pour. Control in these situations is important for experiments where I would I want to compare the melting times of different alloys and need to control as many variables as possible.
Another advantage is that this furnace always starts out at the same temperature. While a bowl furnace dug into the ground is well insulated, there are often problems getting it dried out or warmed up after a night of rain. While it’s good to have the experience of getting a cold, damp furnace going, it’s also nice to have one where I don’t use up a couple kilos of charcoal getting it dry and heated.
By the way, it’s not only good for metal casting, but with a small grate, it does a good job as a barbeque.
[1] I should note that while there haven’t been any of these types of furnaces excavated in Britain, twice now when I have been demonstrating using a small bowl furnace, field archaeologists have told me that they excavated something that looks identical to what I was working with, but didn’t know what it was and wrote it up as a cooking hearth.
These were made for a project in conjunction with Weston Park Museum in Sheffield. In the past I cast bronze using bag bellows, but we wanted something slightly more modern for an upcoming exhibit on the Roman presence in South Yorkshire. They were surprisingly easy to make and have held up well after many episodes of casting bronze and even an iron smelt.
In addition to this tutorial, check out the Bellows Forum page where there are variations of bellows designs and some interesting variations.
Materials needed:
Wood board
Leather or vinyl
3 cm Copper coupling
Wooden pegs
Wood glue
Linseed or other oil
Wood screws
Tacks (a box each of 25mm/1” and 13 mm/ ½”)
Upholstery hammer, or other hammer with a small face
Linseed or walnut oil
Contact cement
Tools needed:
Saw (preferably an electric jigsaw)
Drill
Drill bit to match the wooden pegs
3 cm Spade or flat bit
Cord or clamps
A note about health and safety
I am going to assume that you are capable of safely using the tools and materials described in the tutorial. Don’t wear loose clothing when using power tools, or let long hair get in the way. Don’t use electric power tools outdoors in the rain. If adhesive has warning labels, pay attention to what it says. I’m writing this tutorial so that you will have enough information to make a set of bellows. As for everything else, you’re on your own and I would prefer you have a good time making and using a great set of bellows.
Designing the bellows
The first thing to do is to sketch out what you want the finished bellows to look like. Traditional fireplace bellows are teardrop shaped, but since I was making a set of bellows and would be sitting between them, I wanted them to have a narrower shape so I could easily reach both handles without having to rock my body back and forth more than was necessary. I also frequently work with kids and wanted the bellows to be manageable for them as well. This was also a consideration when designing the handles. You’ll be working with these for hours at a time, and so you want something you can hold easily without getting blisters or straining your wrists. Gripping the handles will just stiffen the muscles of your hands and wrists and wear you out. Design something that’s comfortable and enables you to shift or change your grip periodically. The handle I ended up with was one that I could easily lift just using two fingers and push down with the flat of my hand.
The eventual over-all design and size of the bellows was limited by the availability of places to buy boards of the needed thickness, by the size of board I was able to find, and the fact that I don’t have a car. Mega-hardware stores like B&Q in Britain don’t have proper boards. They have composite shelving, which if you look at it closely will have seams running the length of the board where two narrower boards were glued together. I worried that this would weaken and possibly break, so I had to find a place that had solid boards. I went to a small shop that does custom woodworking. It would have been nice to make them of oak, but all they had was 2 cm/ ¾ inch pine. I was extremely glad when the man there cut the board into lengths for me. It was a bit tricky since the board had knots and one large hole. We managed to figure out how to cut around the worst of them and I happily carried my supplies home.
Making the pattern
The next step was to make a pattern. I drew it out on newspaper, cut, taped, adjusted, and fiddled with it until I had it right. This really was the most time consuming part and rightly so. Take time to get the pattern perfect. Play with it. Pretend it’s finished and try pumping it. The time spent tweaking the pattern is time well spent.
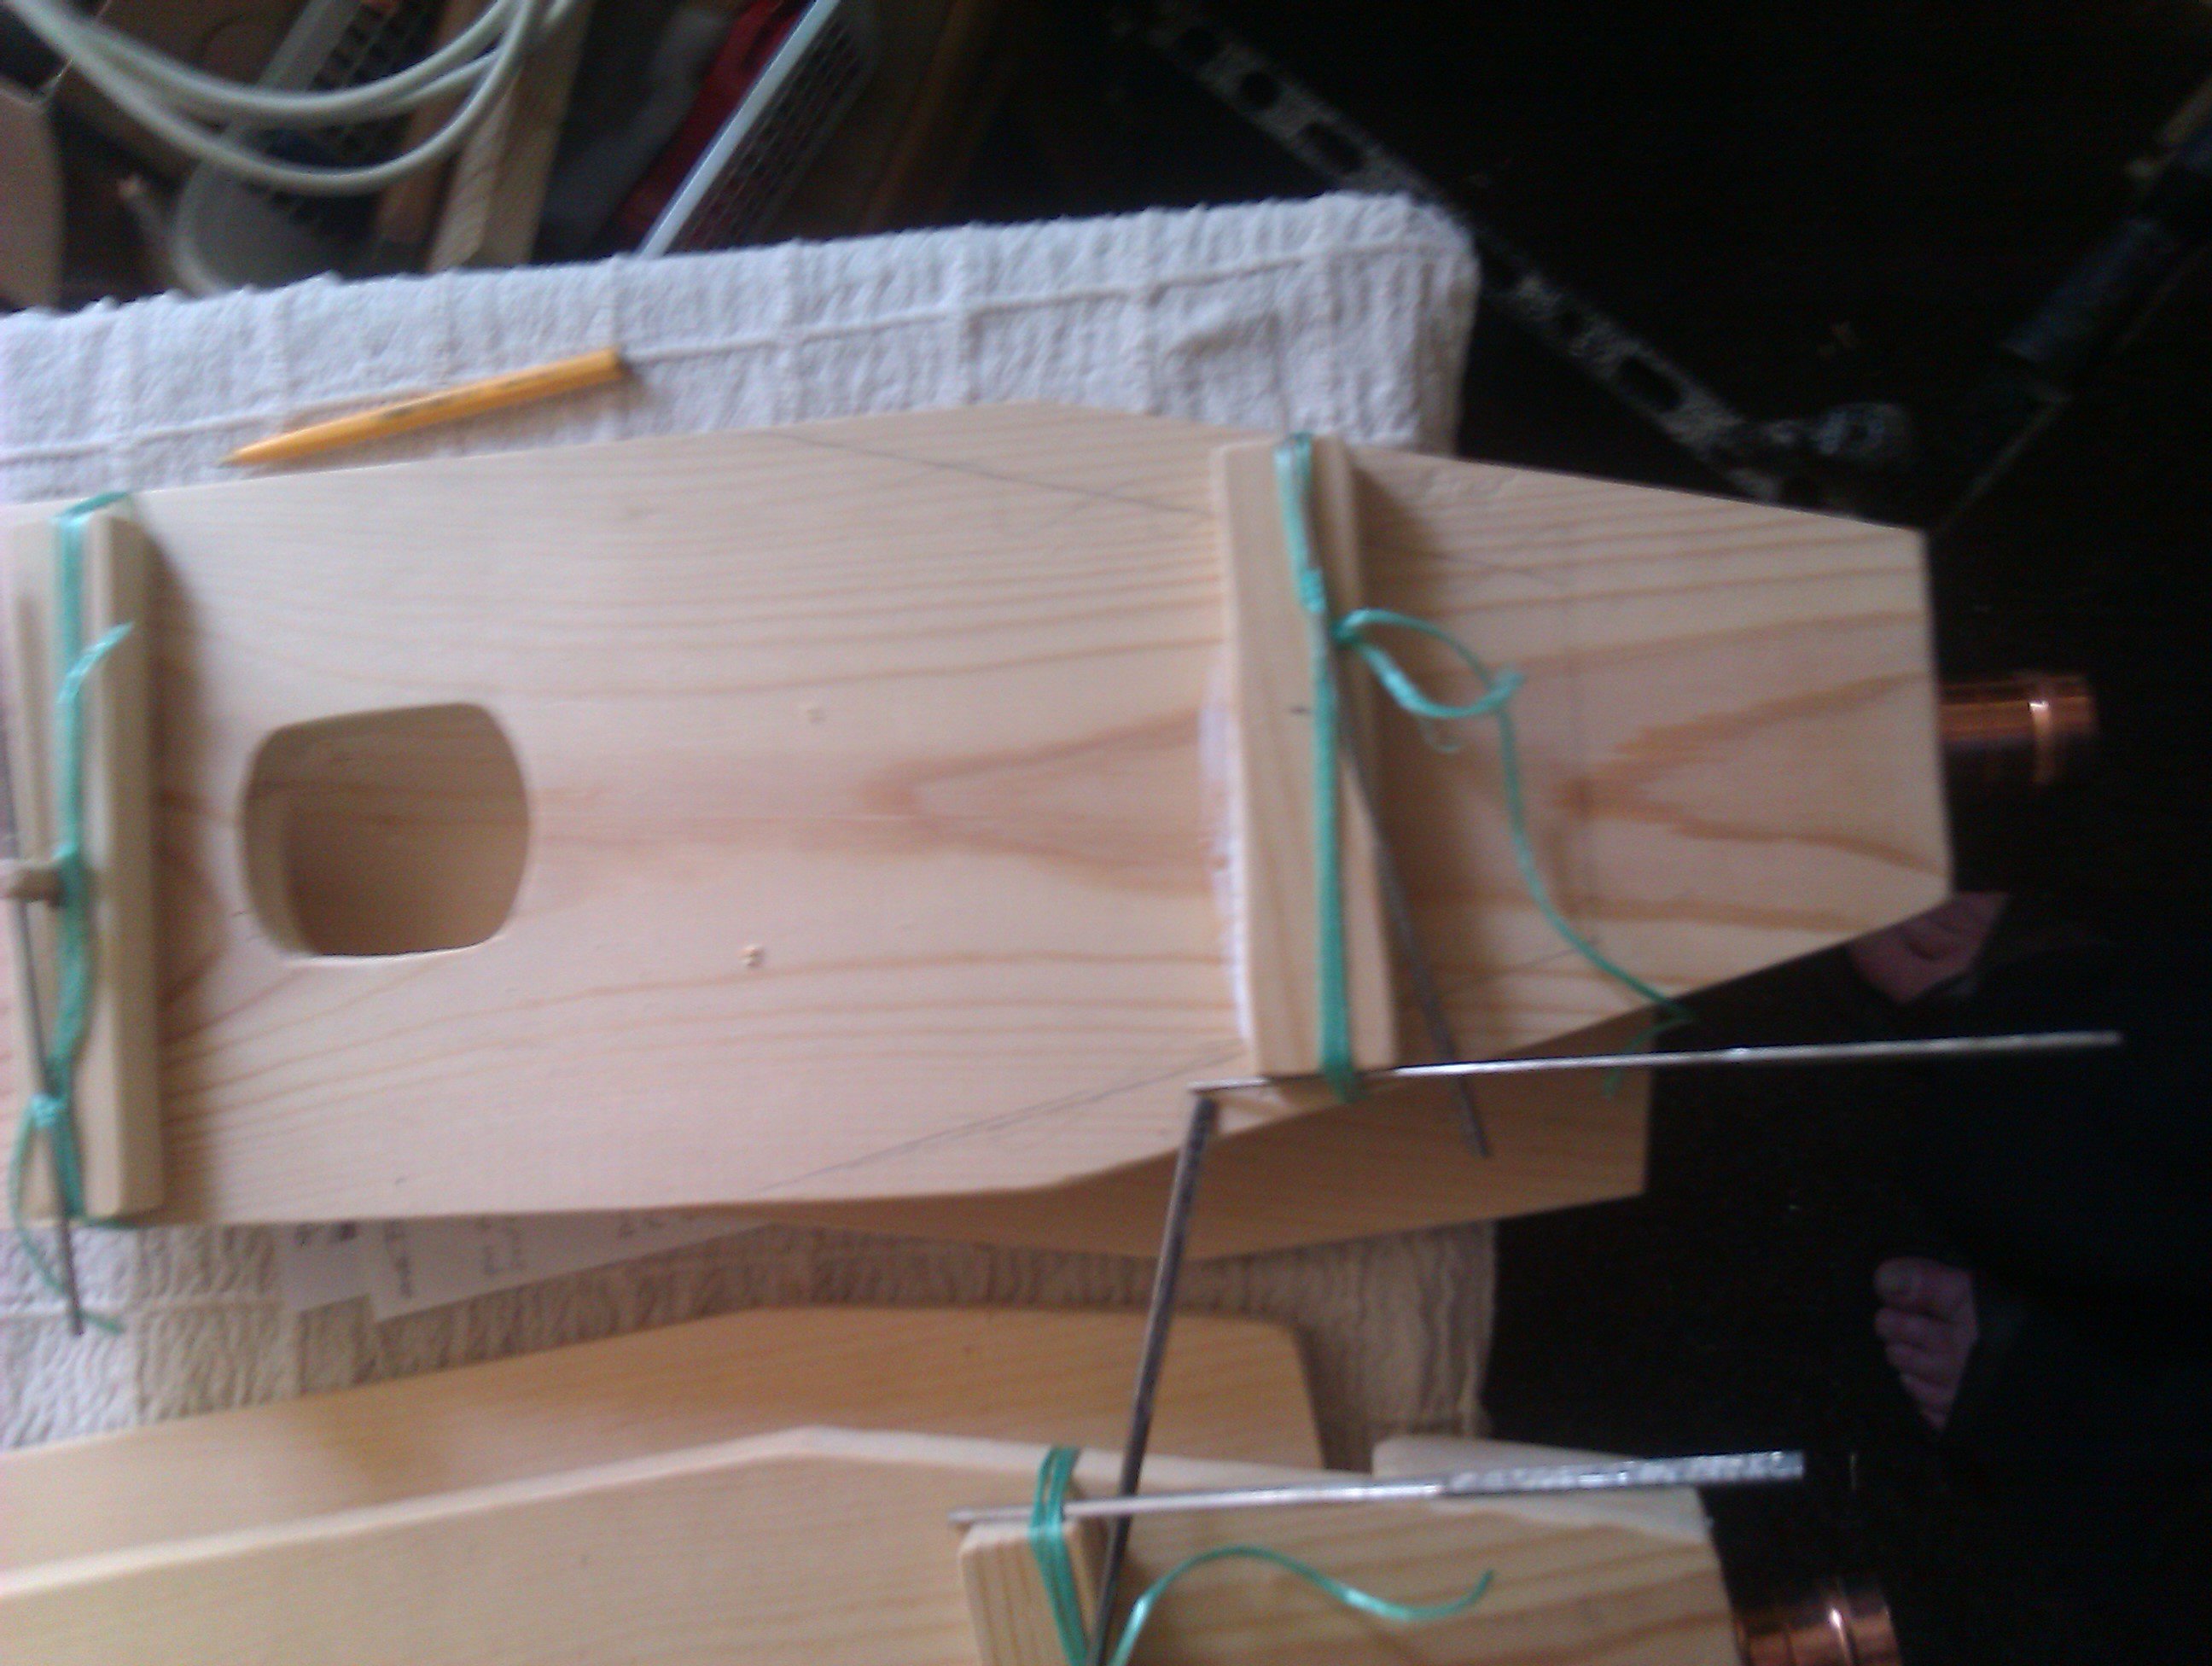
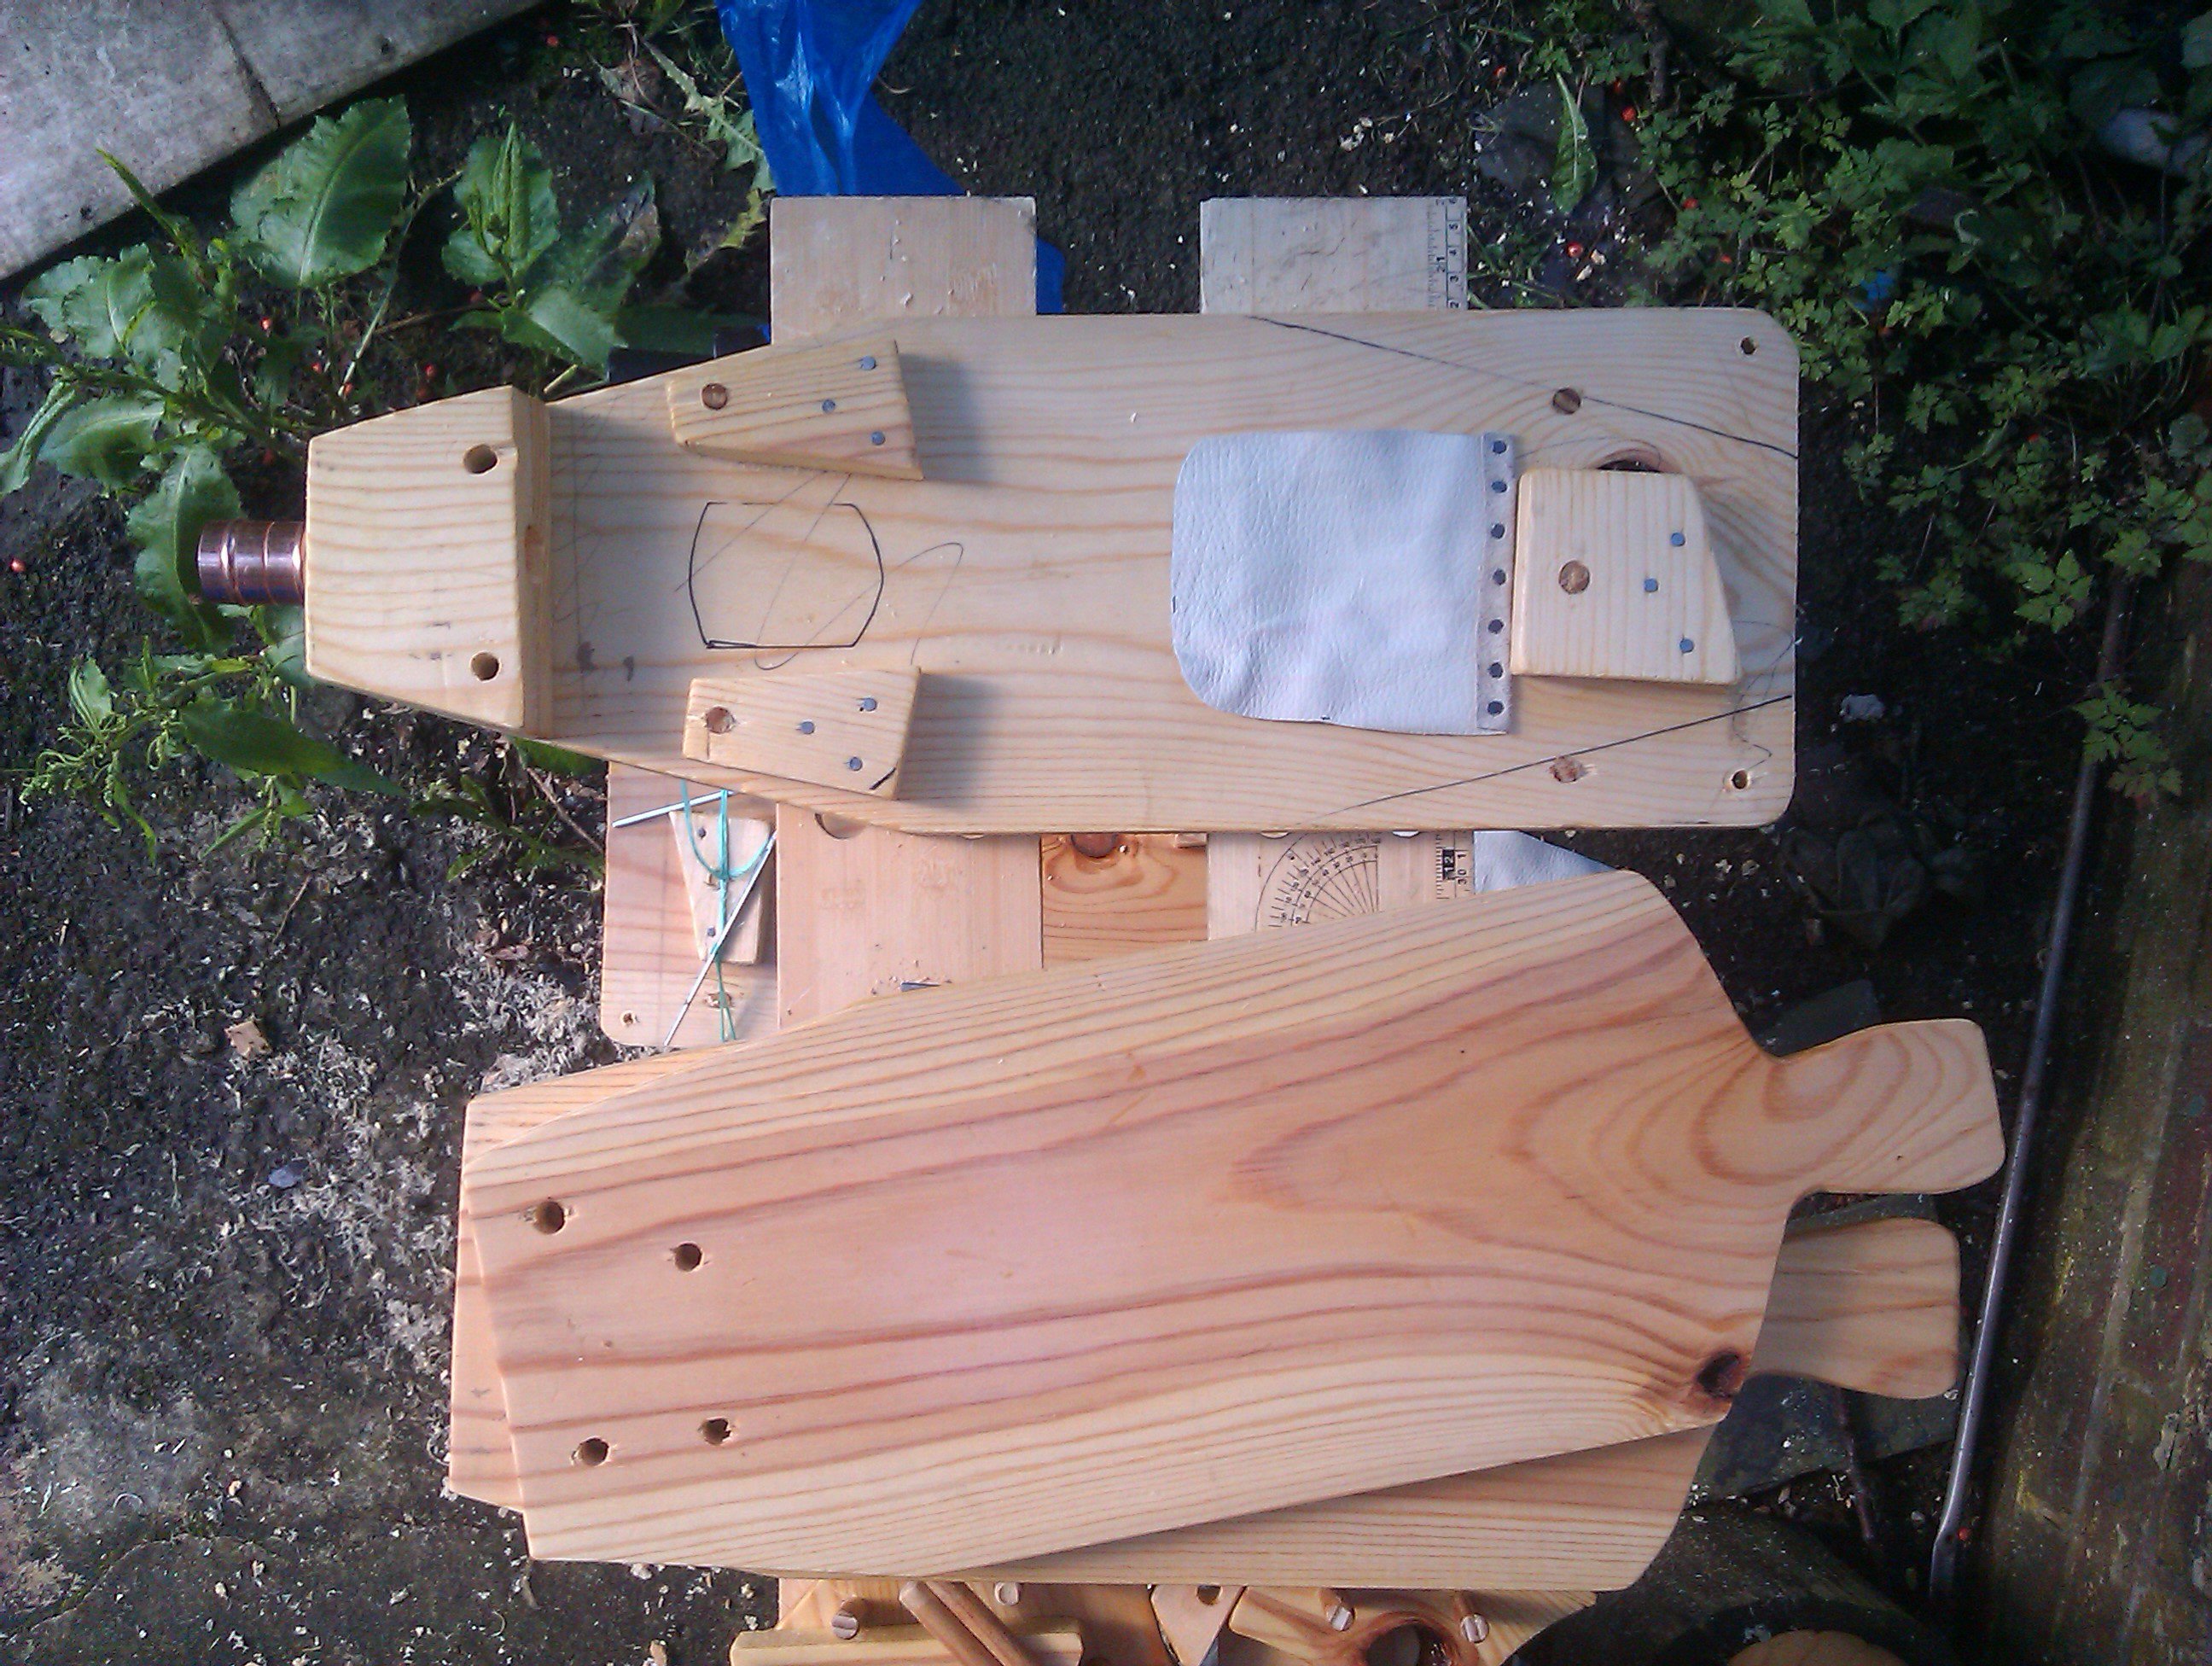
Now, about the pattern. There are two large sections for the base and the top. The bottom piece would run the length of the bellows from the nose to the back. Rather than have two handles (like a fireplace bellows), the bottom would come just short of the handle (so I don’t knock my knuckles into the wood every time I pressed the bellows down. I did drill two holes in the bottom corners so that I could put tent pegs in to hold it down. My experience working with kids and plenty of adults) is that they tend to overcompensate and lift the bellows clear off the ground. (Figure 1 photo pattern)
There are also two small pieces for the nose that will be laminated together with the bottom of the bellows. There are another two pieces that will serve to hold the leather hinge in place, and then the scraps that will be used for internal supports and feet. Just about every bit of the board was used in one way or another.
Once the pattern was made, I laid it out on the boards, working around knots and splits, so that it would be as solid as possible. I traced around it, and in one case changed it at the last minute, you’ll see some of the crossed out lines in photos of the interior. The important thing is to make any changes before cutting the wood.
The wood is cut and the pieces fit together before gluing and pegging.
The thing I worried about most was the valve. I searched, but nowhere could I find a formula for the size of the valve hole in proportion to the rest of the bellows. I looked at as many as I could and from what I could tell something about one third of the width of the bellows would be sound. The valve itself would be a thick, but fairly flexible piece of leather, so if the valve was too long it might have difficulty making a good seal. I remember one set of bellows that a friend from New Zealand had that were enormous, but had a problem with the valve. The valve was large enough that when drawn up the leather would flip backwards on itself. The bellows had to be flipped over and the leather pulled back down before work could continue. I fussed and fretted awhile, but knew that if I erred on making the valve hole too small, I could always enlarge it. I ended up with a valve hole 6 cm by 8 cm.
The other decision was if the valve would be on the top or bottom. For this I got some input from friends who told me that having the valve on the top was more in keeping with Viking/Scandinavian traditions and that in order to close the valve I would have to push down more forcefully. This is not as much of a problem if I was primarily using these for an iron forge, but casting bronze and smelting iron blooms goes on for hours. I need something that will be efficient and not require any extra effort. In addition, when I work with kids, I want them to be able to help with casting without having them concentrate solely on trying to get the bellows to work.
The disadvantage of having the valve on the bottom is that leaves and debris can get sucked in. I decided to put the valve on the bottom of the bellows and to put small risers underneath. Then I just have to make sure that where I set them up is free from debris. If I was worried about anything getting sucked in I could put a bit of wire mesh on the outside the valve. So far this hasn’t been a concern.
For convenience sake, I decided to make the tuyere (the pipe where the air exits the bellows) out of a 3 cm copper coupling. For this I needed a spade or flat wood drill bit of the same size.
Assembling the bellows
Now to the cutting. That was pretty much straightforward, and I found that the two pieces leftover from cutting the handle made a nice design when put back to back. I later glued them together and they became the shield shape of the hinge. Of course if you want to save time, you could just use a door hinge or some fancy looking strap hinges.
attaching the risers
Long scraps were used for the risers on the bottom of the bellows. Miscellaneous pieces became the internal supports. These support the top of the bellows and prevent it from being pushed too far down and straining the hinge. Another support was placed at the back for the same reason. It also prevents the leather from being trapped and abraded.
Internal supports and valve
Once everything was cut, it was fit together and small adjustments made. The next step was to sand everything. You want the wood to be smooth and comfortable to work with, but also to remove any sharp edges might scrape and wear holes in the leather.
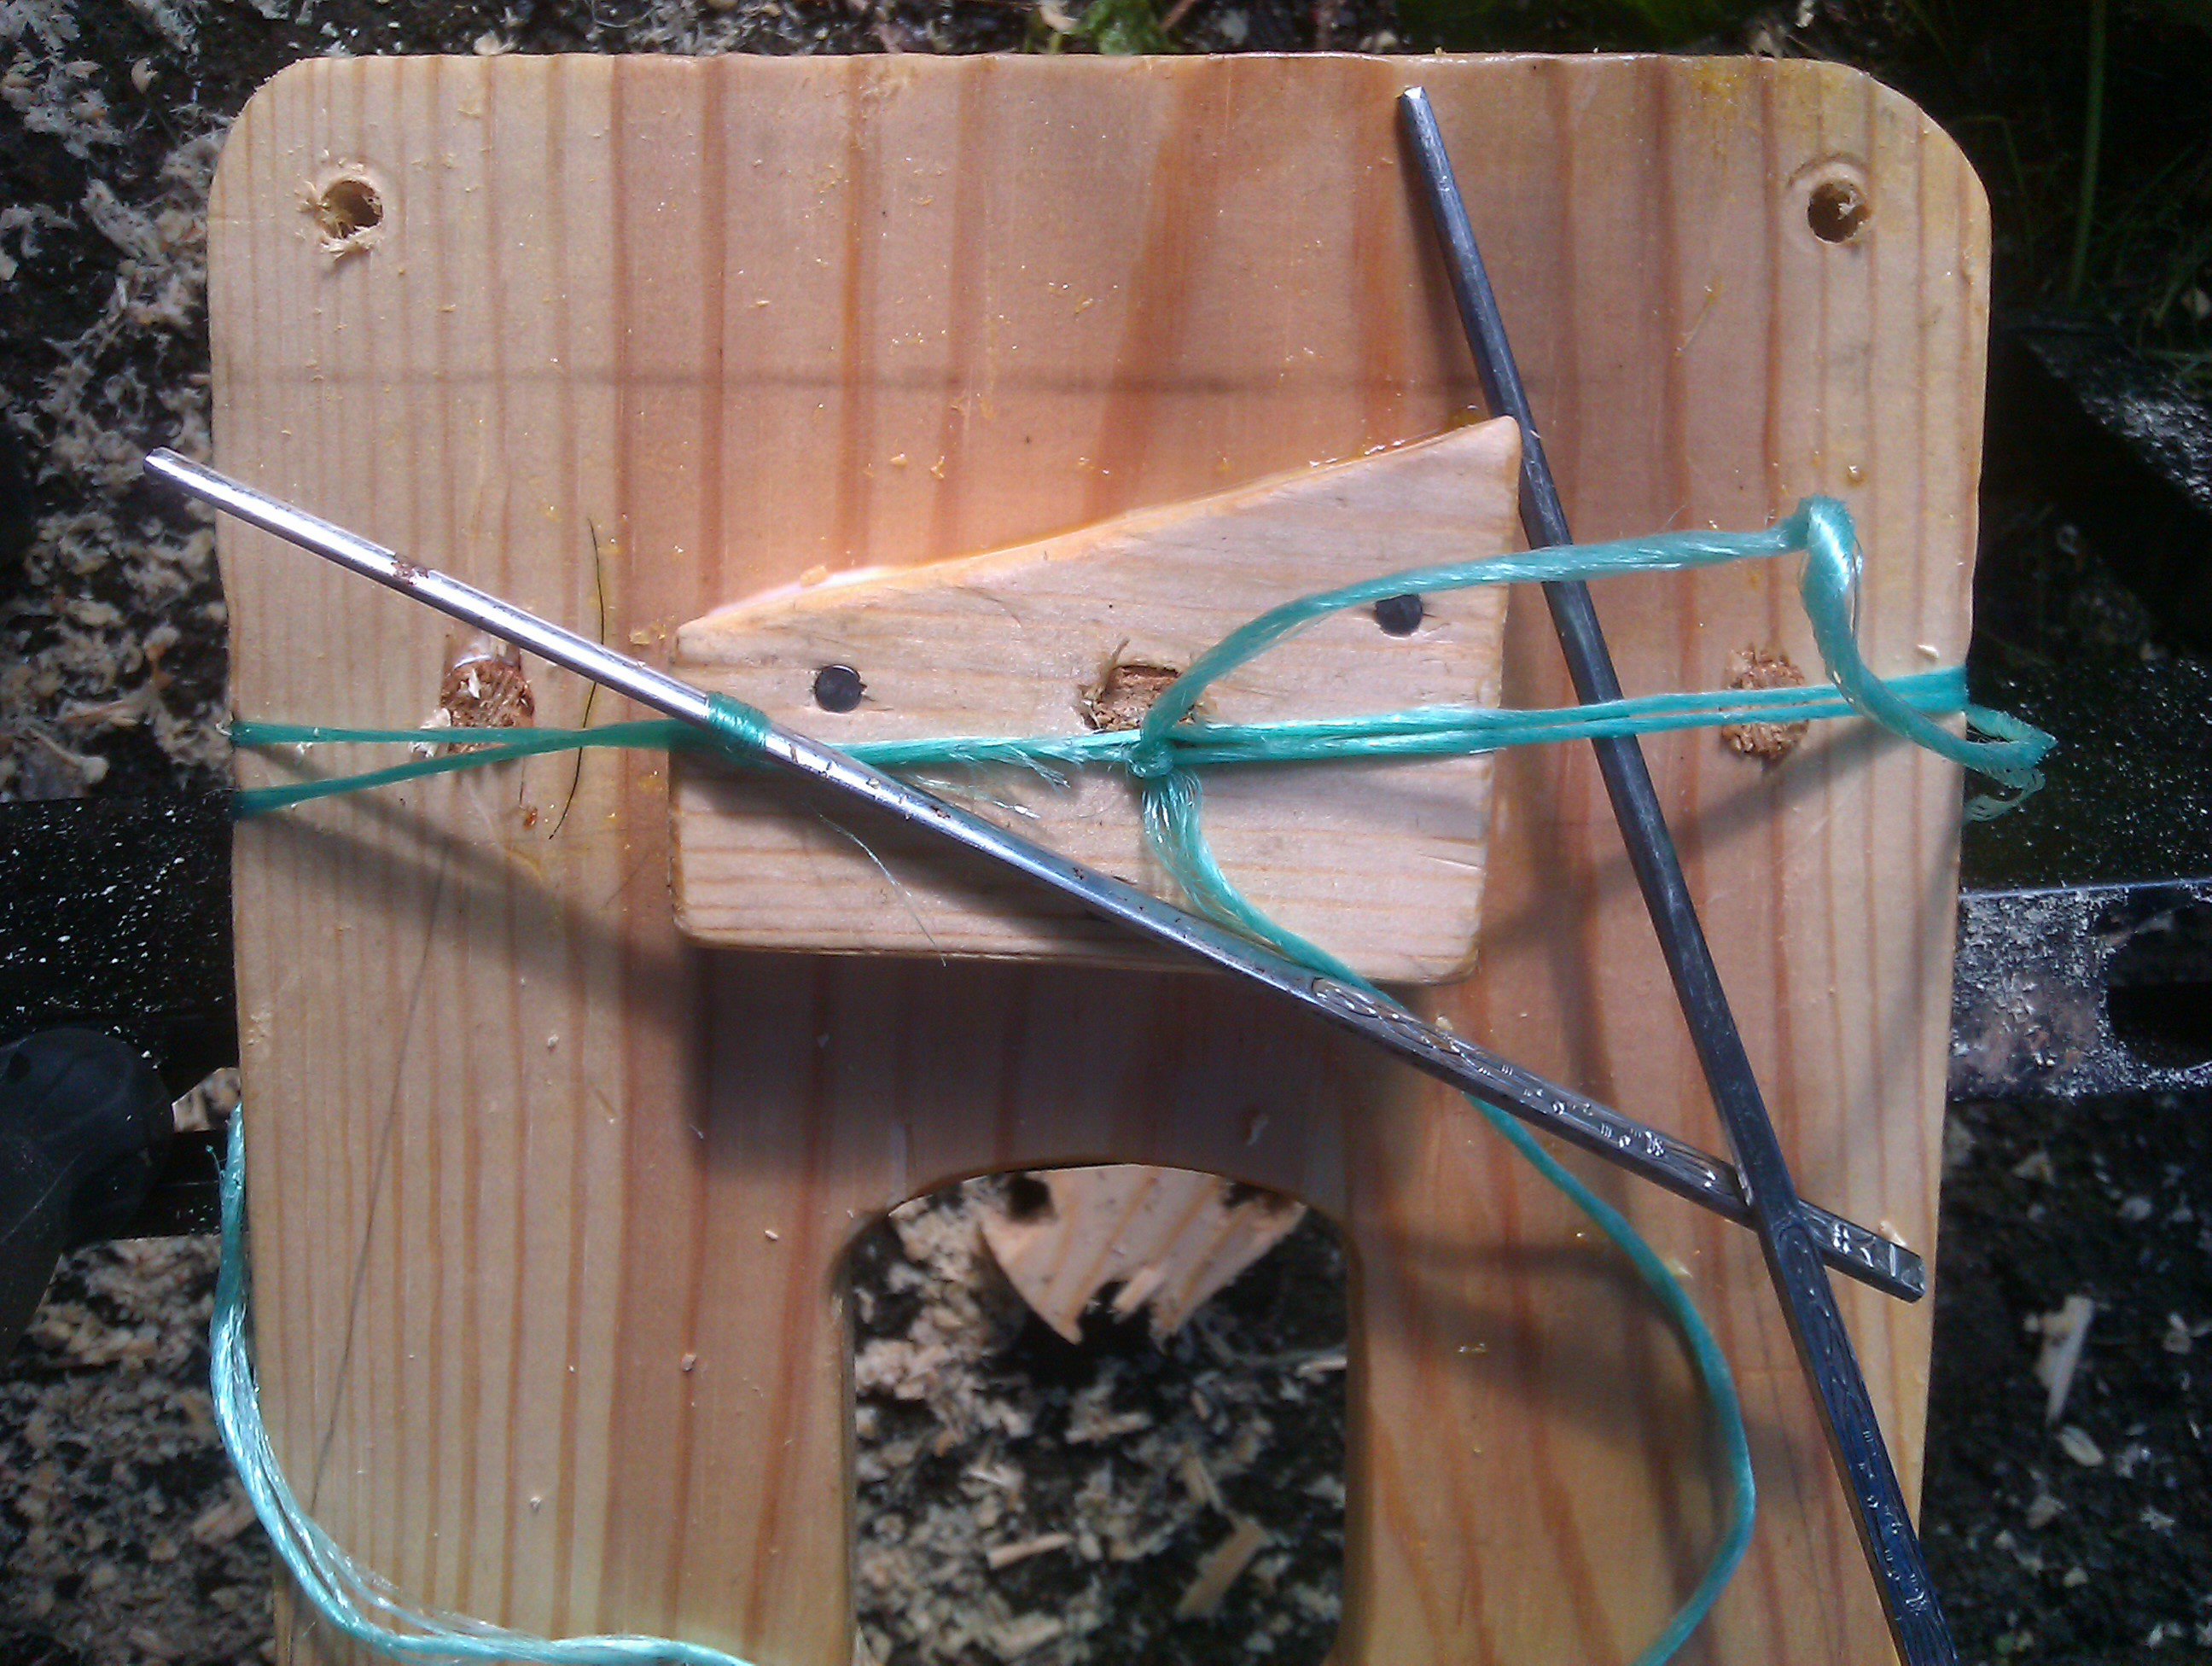
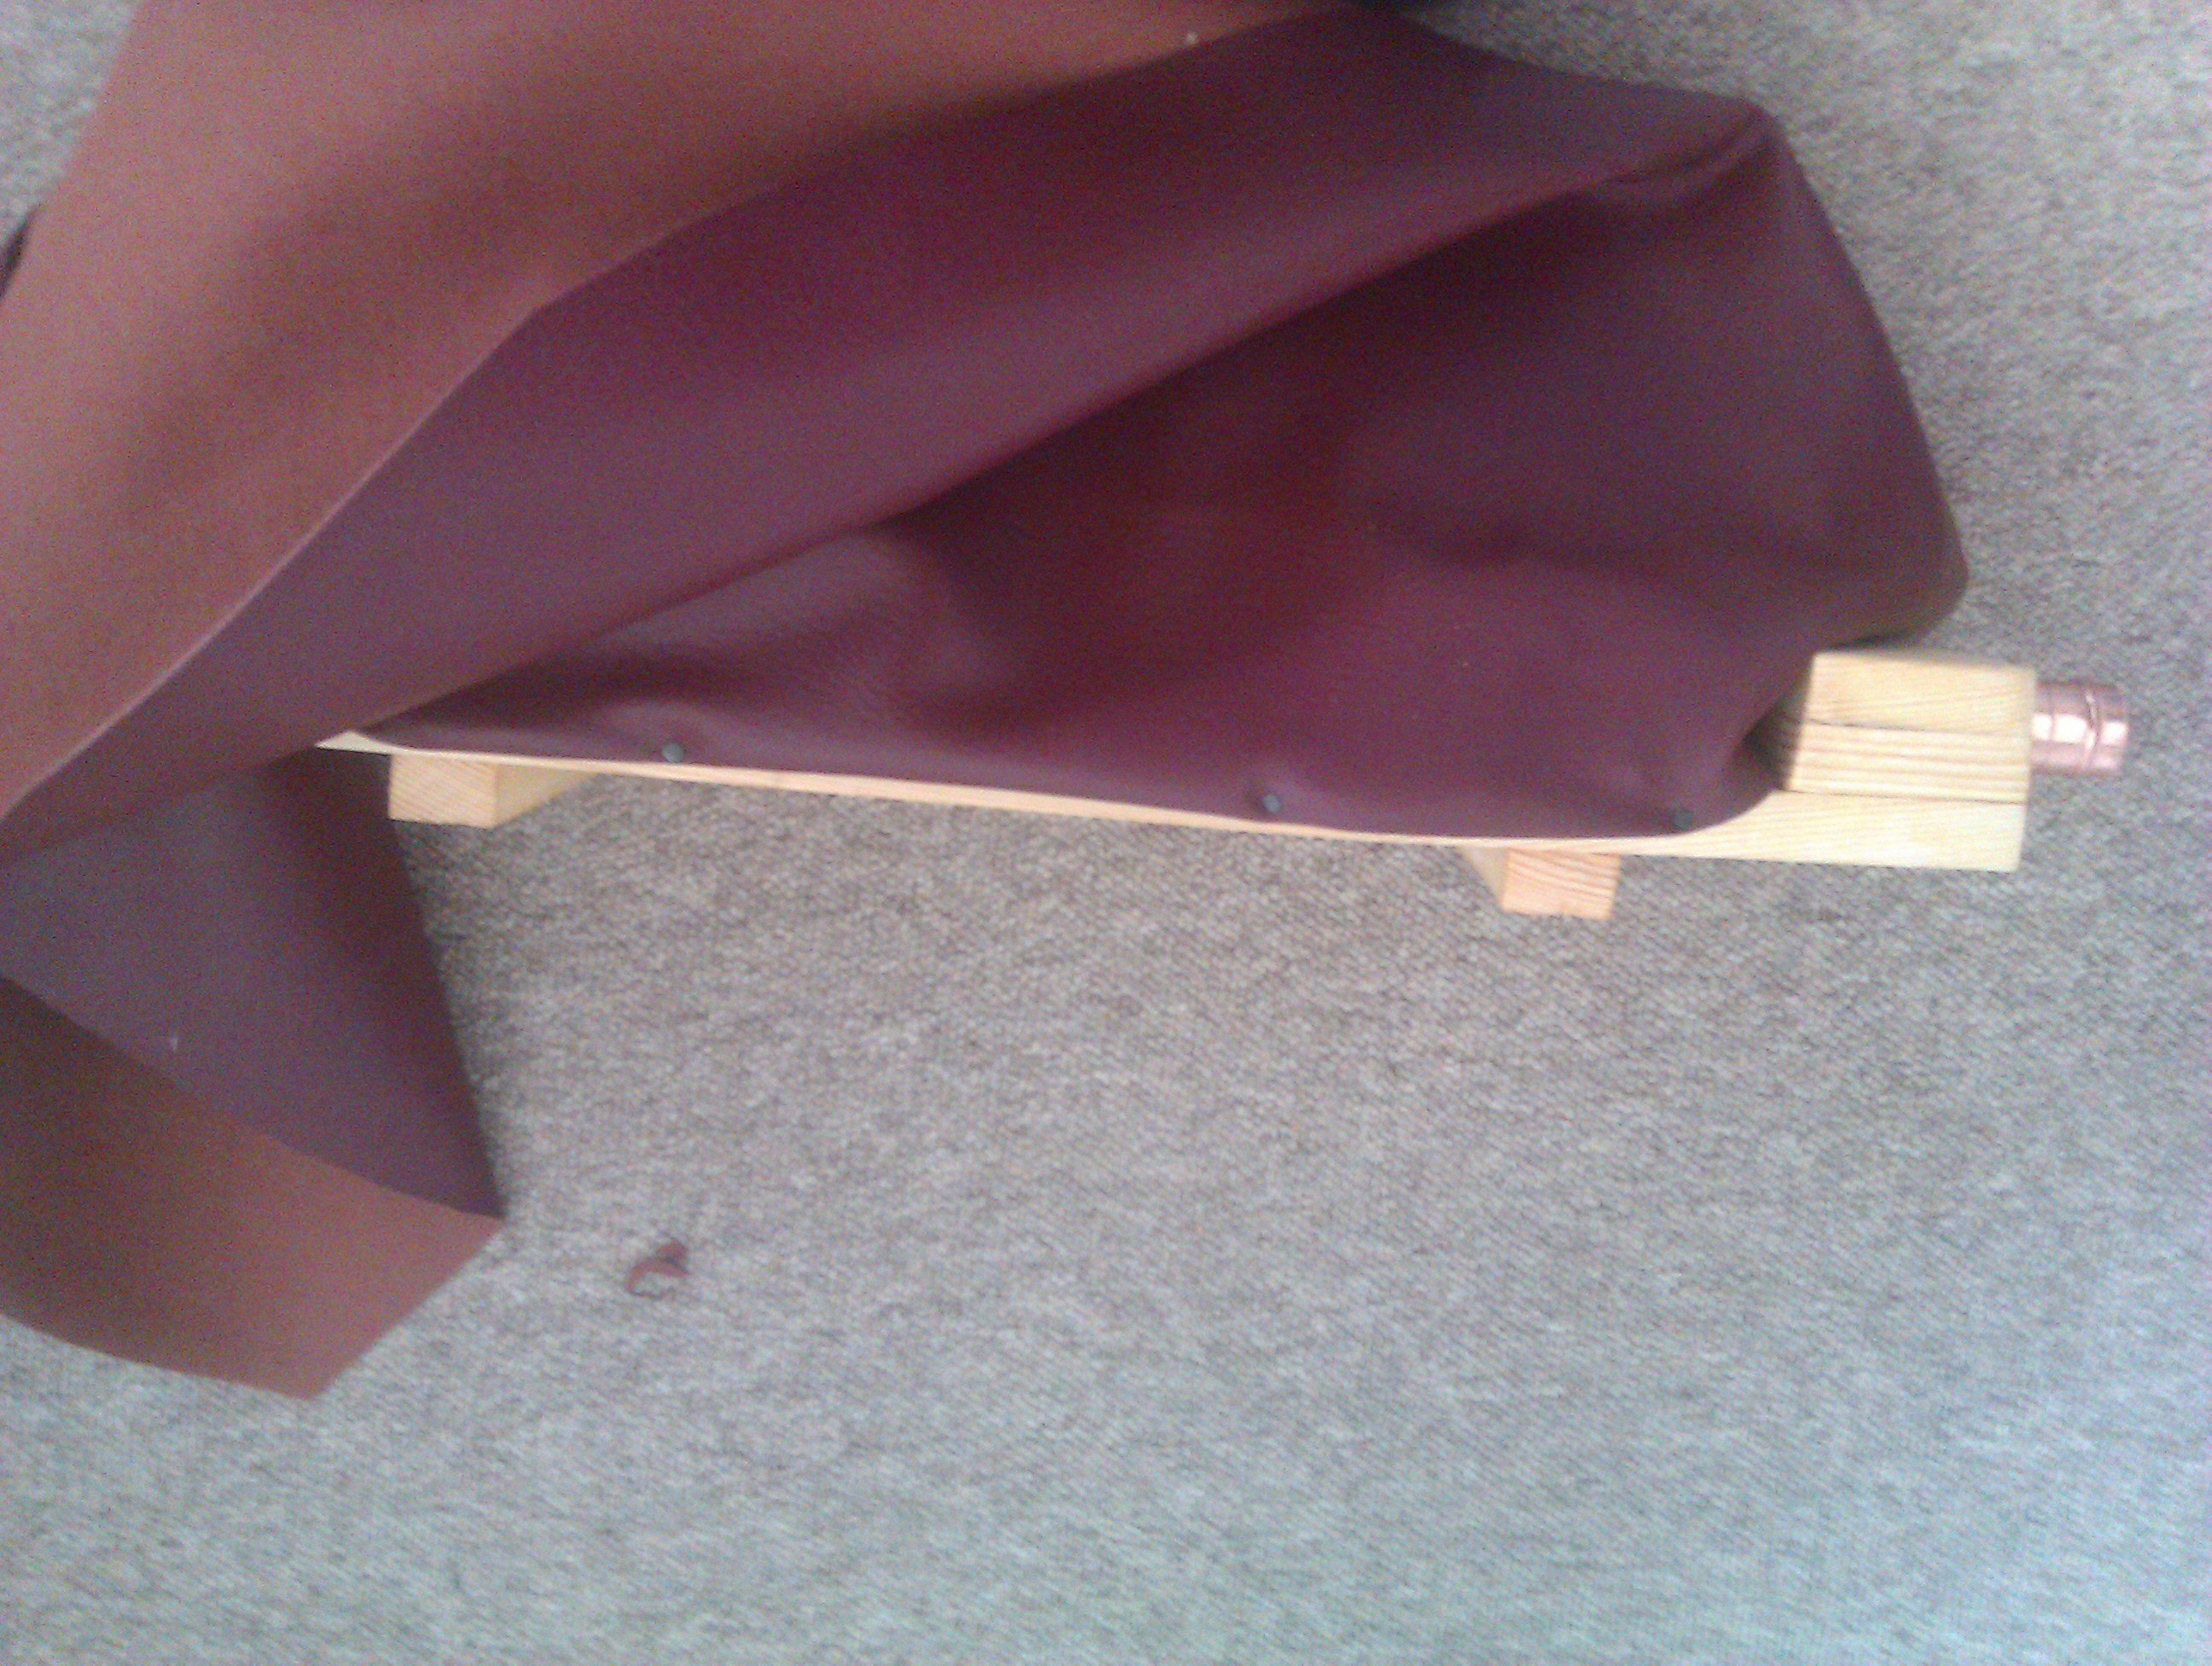
Once everything is sanded and fitted, the final assembly can begin. The first thing is to glue and clamp the nose pieces together. I didn’t have enough clamps for the job, and also some of the pieces were awkward sizes, so I wrapped and tied cord around them and then twisted it with some steel chopsticks (A good sized nail would do the trick, too). Get the joins as tight as possible and then let them dry completely. Once they are good and solid, mark the centre and drill through the end using the spay bit. Fit the copper coupling in. It should be a tight fit. (Make diagram) Now from the inside widen the hole so that it is cone-shaped going back to the end of the coupling.
Do it yourself clamp. This is the bottom board of the bellows. Note the holes drilled in the corners. These are for tent stakes to keep the bellows from being lifted too high by enthusiastic helpers.
Meanwhile pieces of leather were cut for the valve. There is about a ½ – ¾ inch overlap on the end and sides and a bit more at the end where it is tacked in place. I doubled that part over to make a stronger hinge and used the shorter tacks to secure it.
I wanted to use wooden pegs as much as possible for the construction, but I realised that using some wood screws would make life easier. So the next step was to drill every piece that would need pegs and then to glue all the internal support pieces and secure them with wood screws. The internal supports were also cleverly lined up so the screws would help secure the risers. However, these were also drilled and pegged to the bottom of the bellows. Once again, everything was glued and clamped. Once it was dry I gave it a good coating of linseed oil. I used linseed because I had plenty on hand, but there are other good oils designed for woodworking.
Leathering the bellows
Now it’s time to go back to the drawing board. This time the design will be affected by how high you want to lift the bellows and your budget. Ideally this part should be made of soft leather, such as goat or pigskin. I’d love to have had the money for that, but had to opt for vinyl. Despite having used the cheaper material, it has held up amazingly well, and I do have the option of replacing it with leather on later. But whatever material you choose, a pattern must be made first. Bin liners / plastic trash bags are ideal for this.
On the left is the top of the bellows with the top hinge sitting on it. The middle is the bottom of the bellows with supports and valve in place. On the right is the bottom bellows with a pattern for the leather made from a translucent lemon-scented plastic trash bag. Lemon-scented is entirely optional, it was the only type at the shop when I needed to buy some.
Sit beside the bellows and lift the top up as comfortably as you want. Ideally you should be able to open the bellows to about 45° or a bit more. Think about your shoulders when you make this measurement. Measure the length from the handle to the bottom of the bellows and then add a few extra inches for rolling the edge under. Take into consideration that you don’t want the bellows to be so short that you lift them off the ground every time you pump them. Remember you’ll be pumping up and down for hours!
Now measure from the centre back around to the front. You’ll also need to have enough that both ends of the leather will overlap on the block where the tuyere comes in. The next dimension you need is the height of the front end. The leather should be a few inches higher than the block. Now a paper pattern can be made making sure that the sides and ends are symmetrical. Make sure to add an extra inch along the top and bottom to allow for folding the leather under when it is tacked in place. Get the pattern symmetrical by folding it in half lengthwise and adjusting it, and then fold it in half sideways and adjust that. Keep tweaking it until it’s exactly what you need. Use this to make a pattern from the plastic bags. This can be taped to the wood, and you’ll have an approximation of how the bellows will work. Try it out and make any adjustments before cutting into the leather.
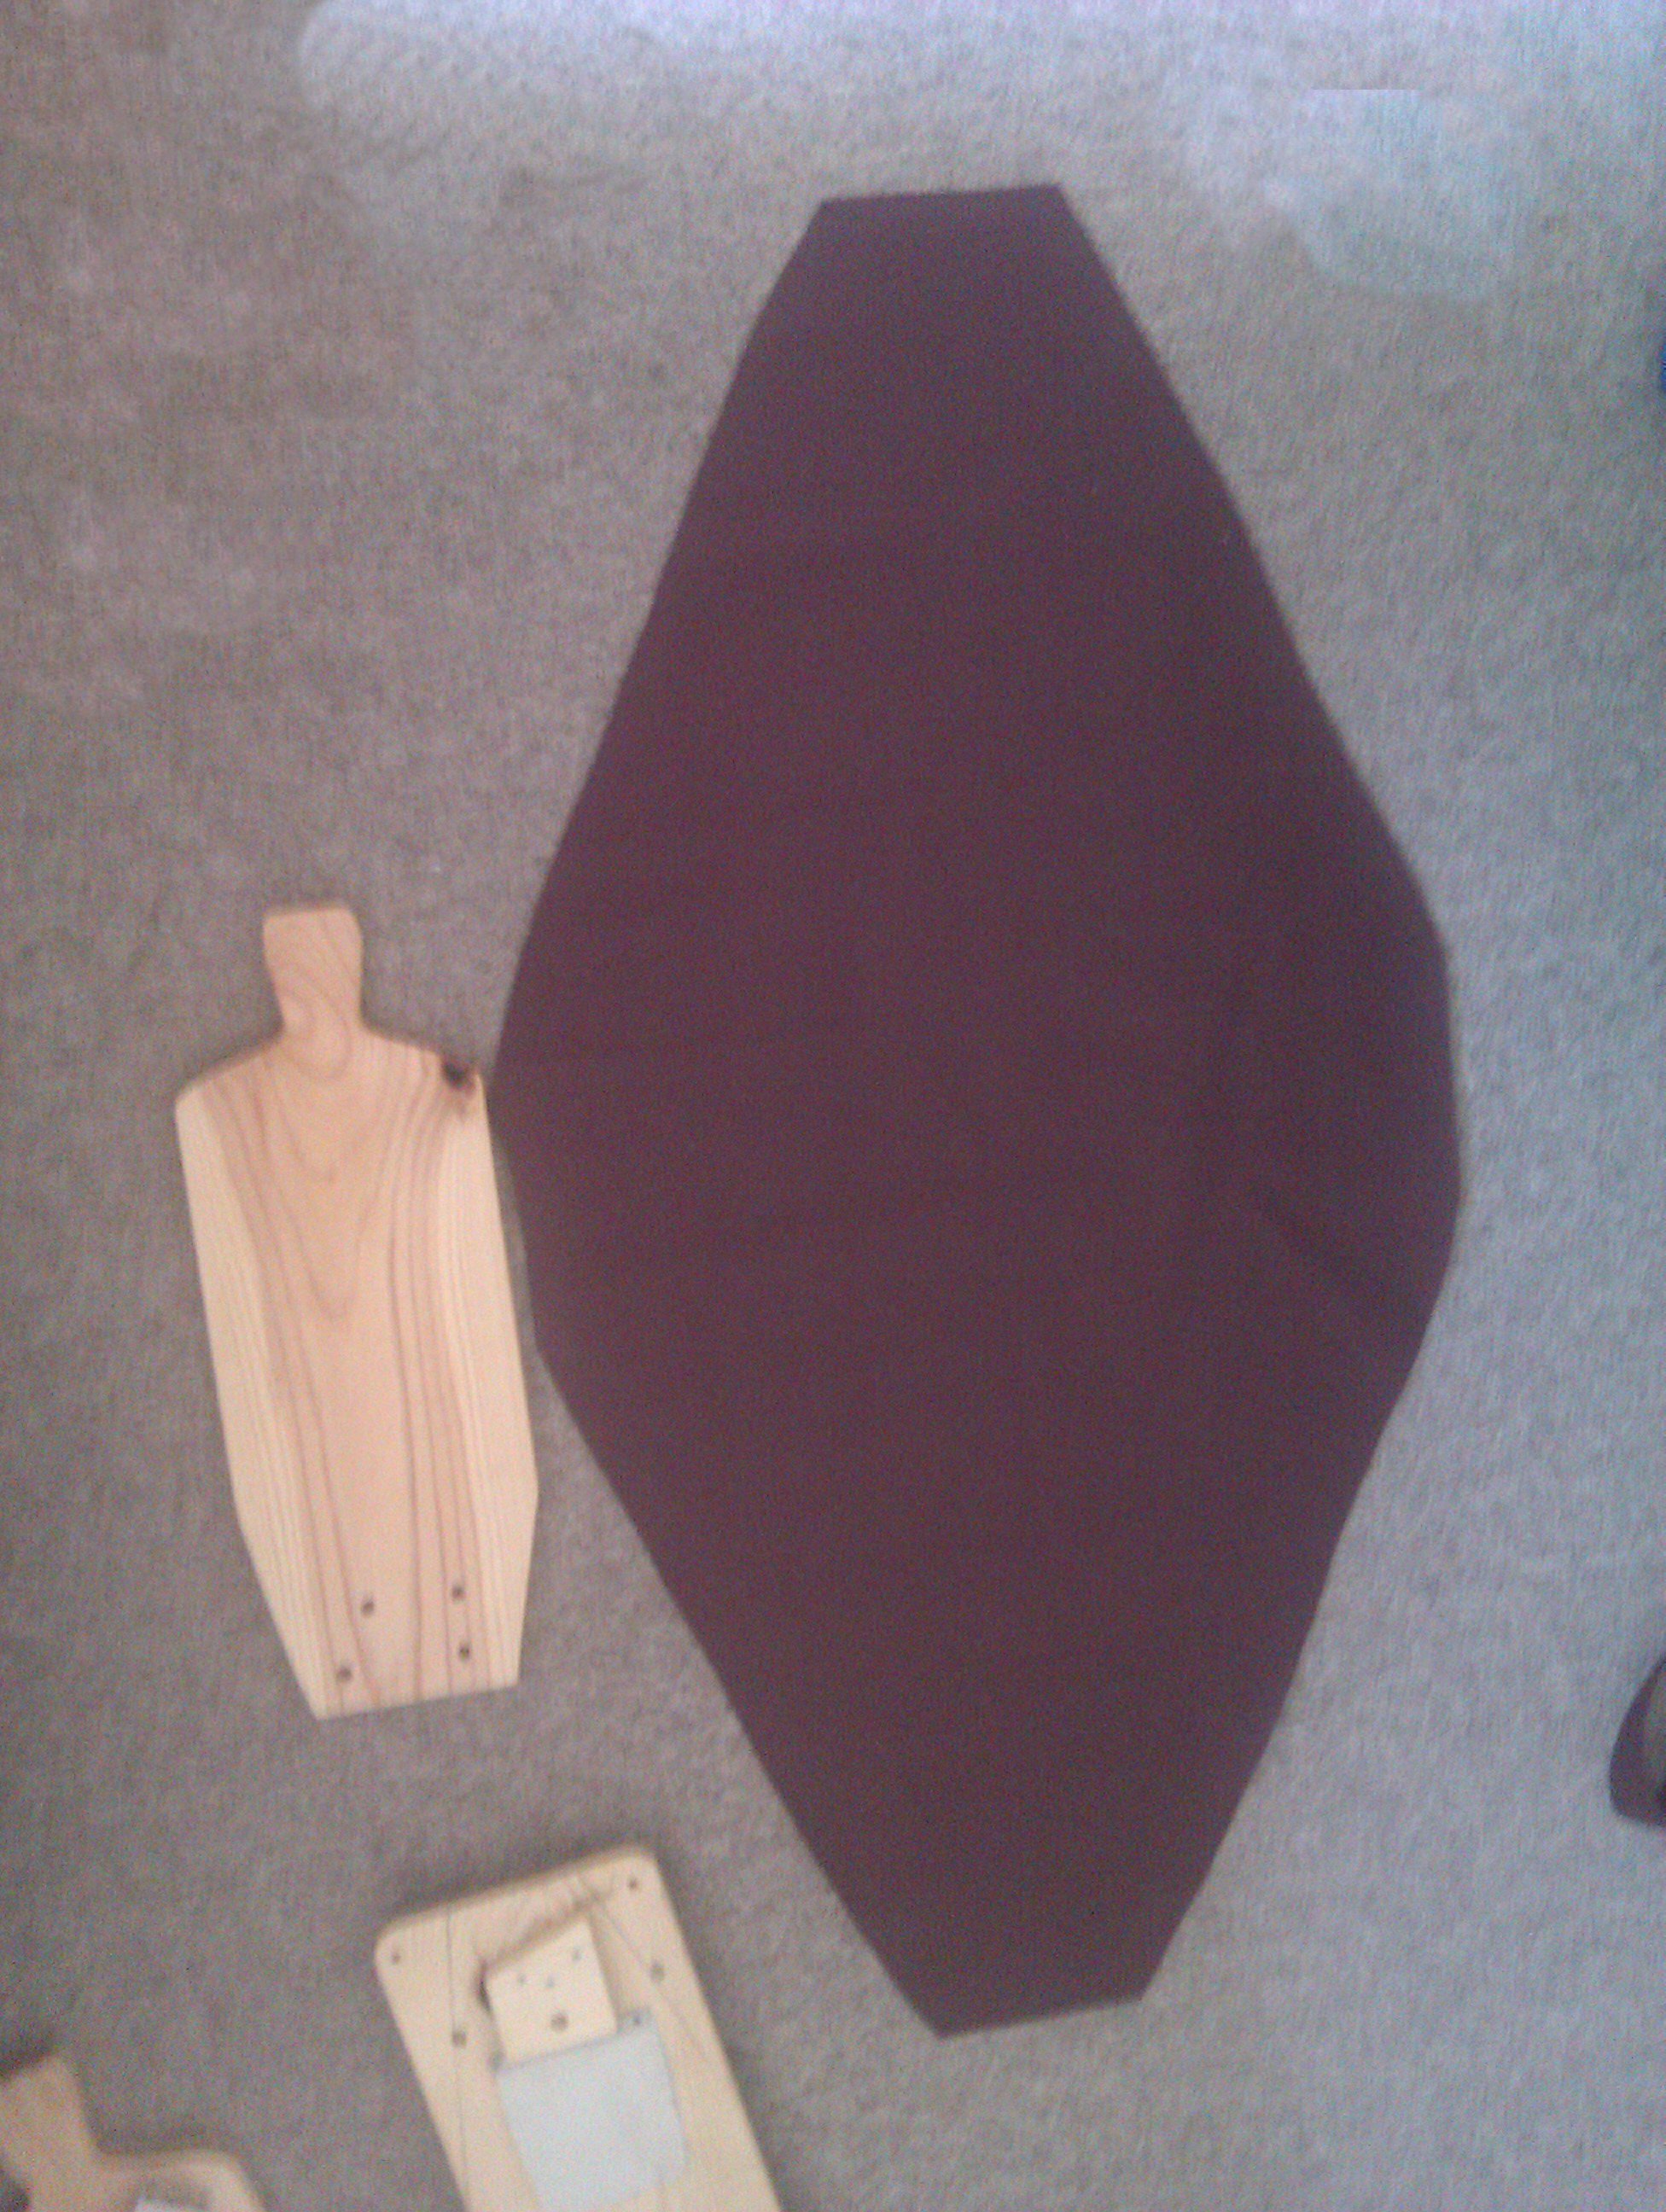
The bellows leather cut out.
Once it’s cut out, working from the centre back of the bottom, fold the leather so the cut edge is inside and secure it with tacks. I used the shorter tacks most of the way, but for some areas that get more stress, like along the corners, I used the longer tacks. Once you come to the front, pull the leather gently so that the edge is along the bottom, and tack it in place.
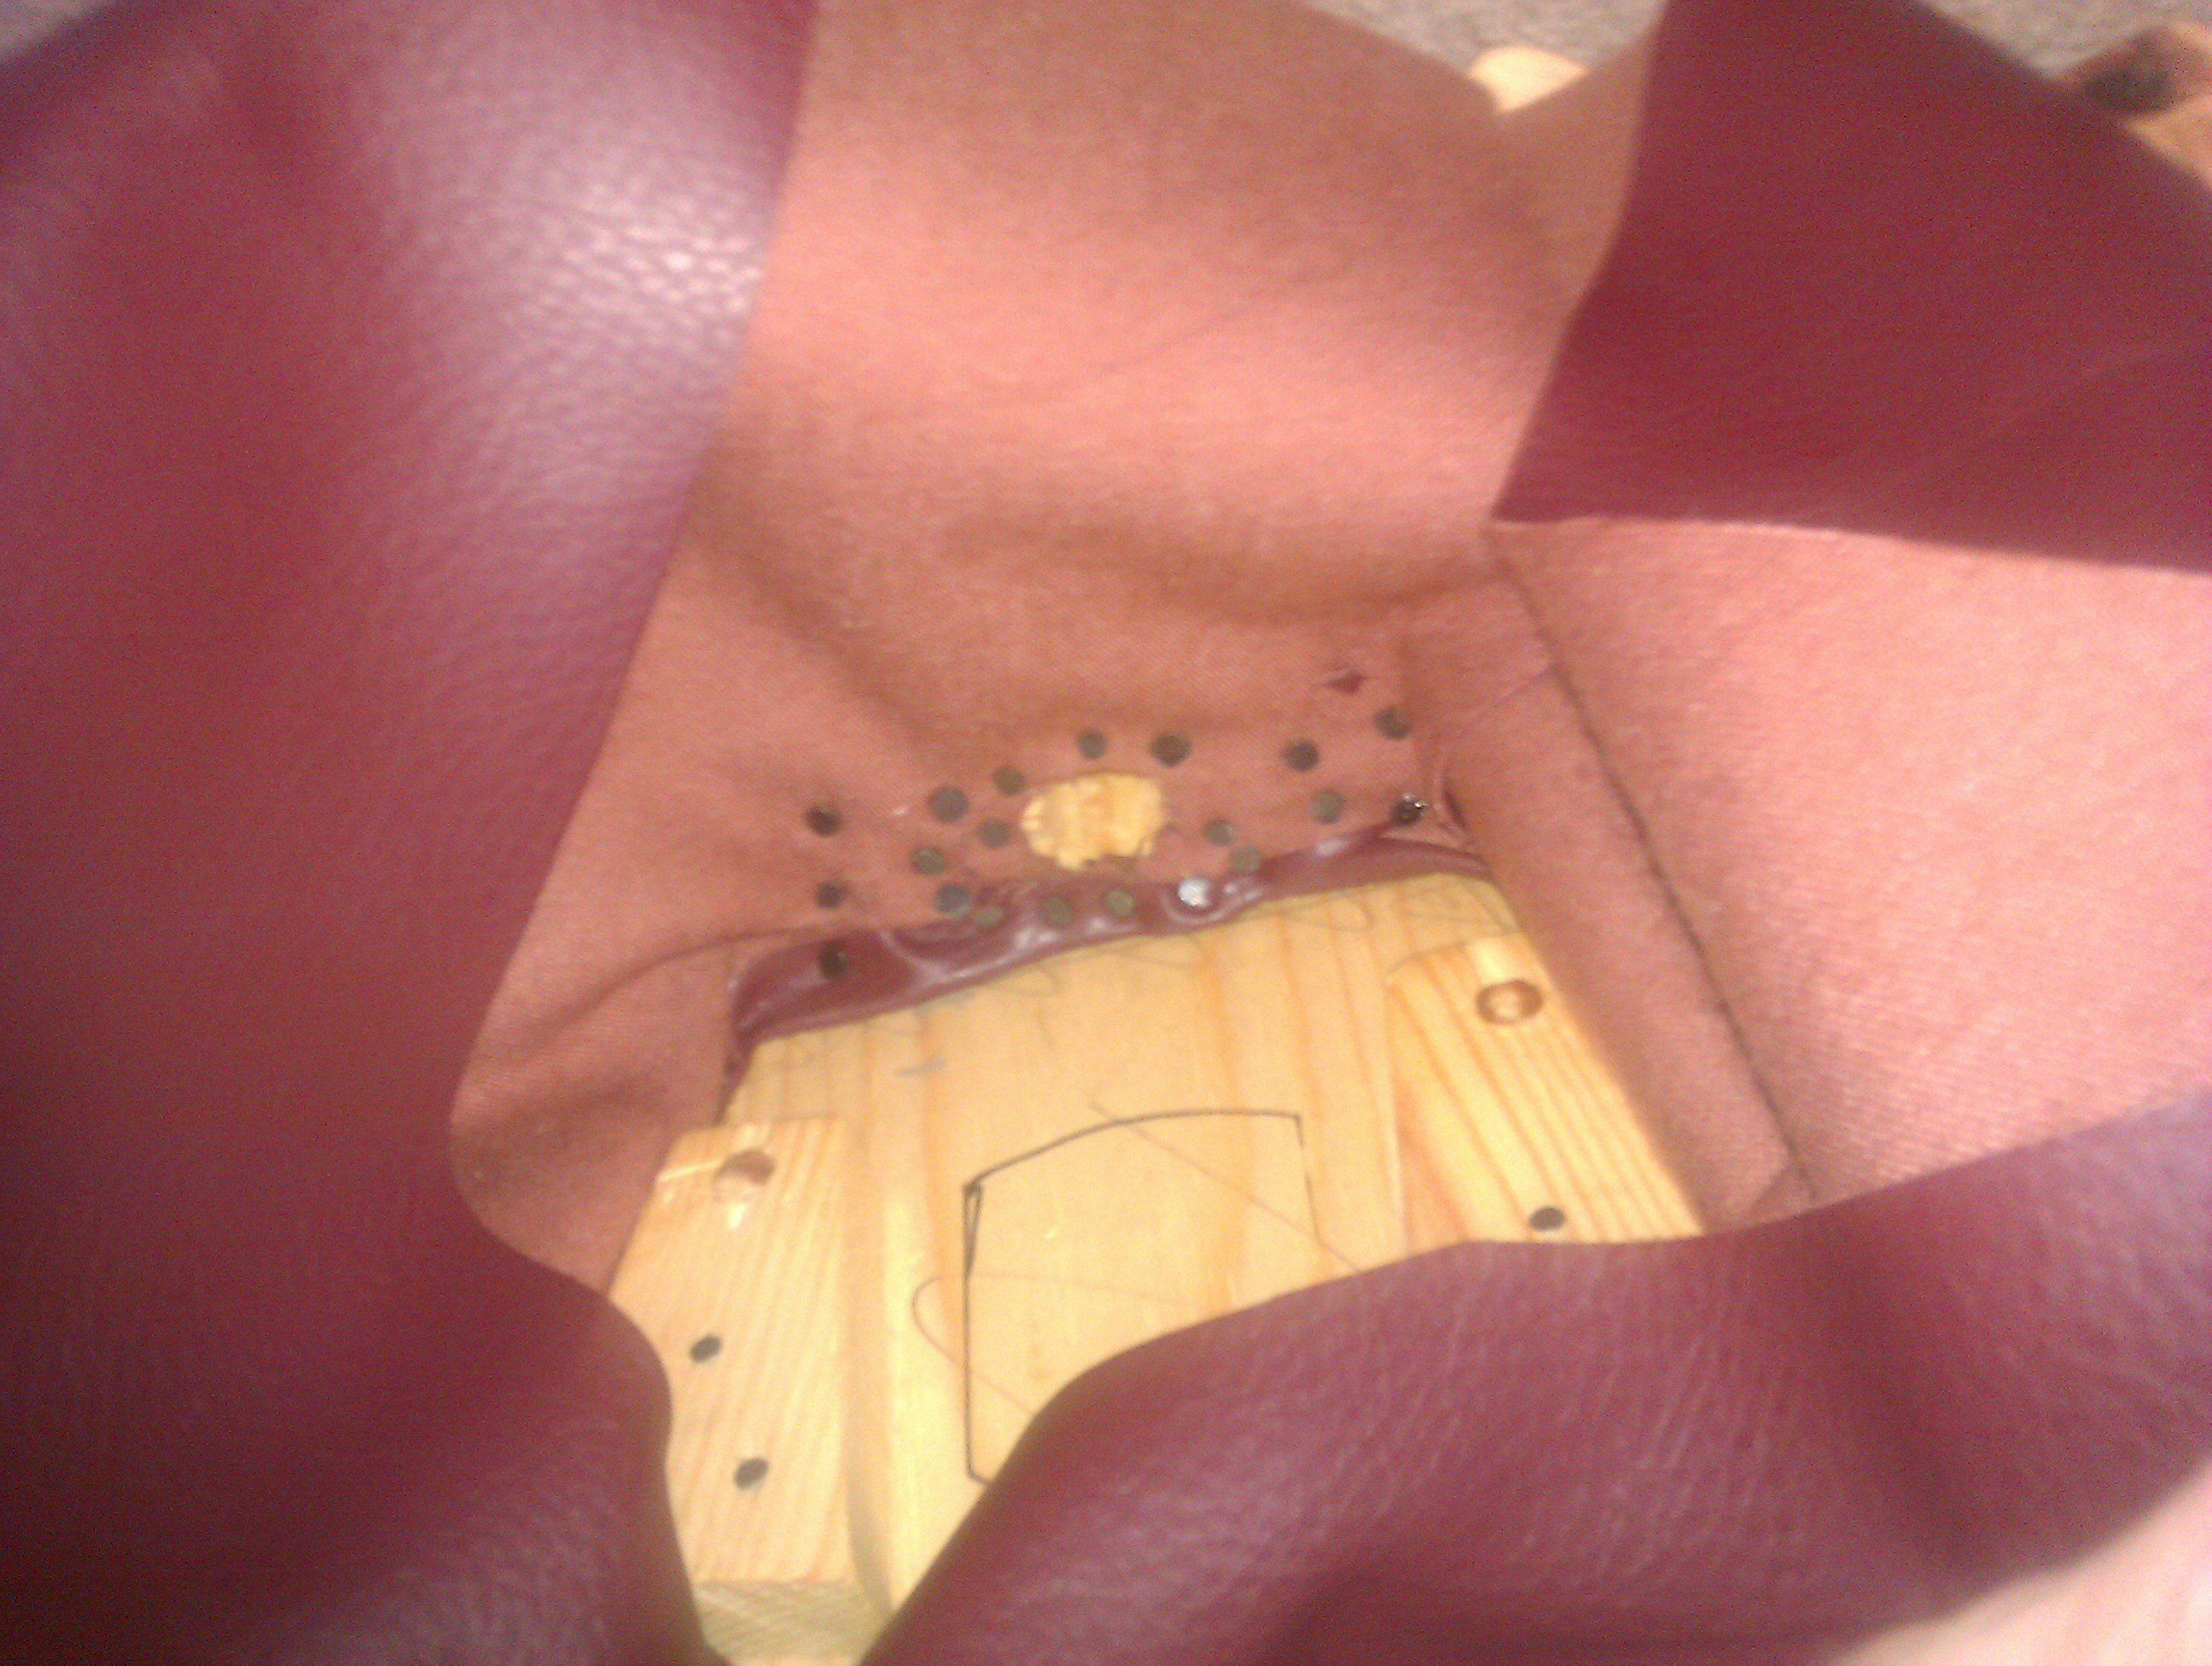
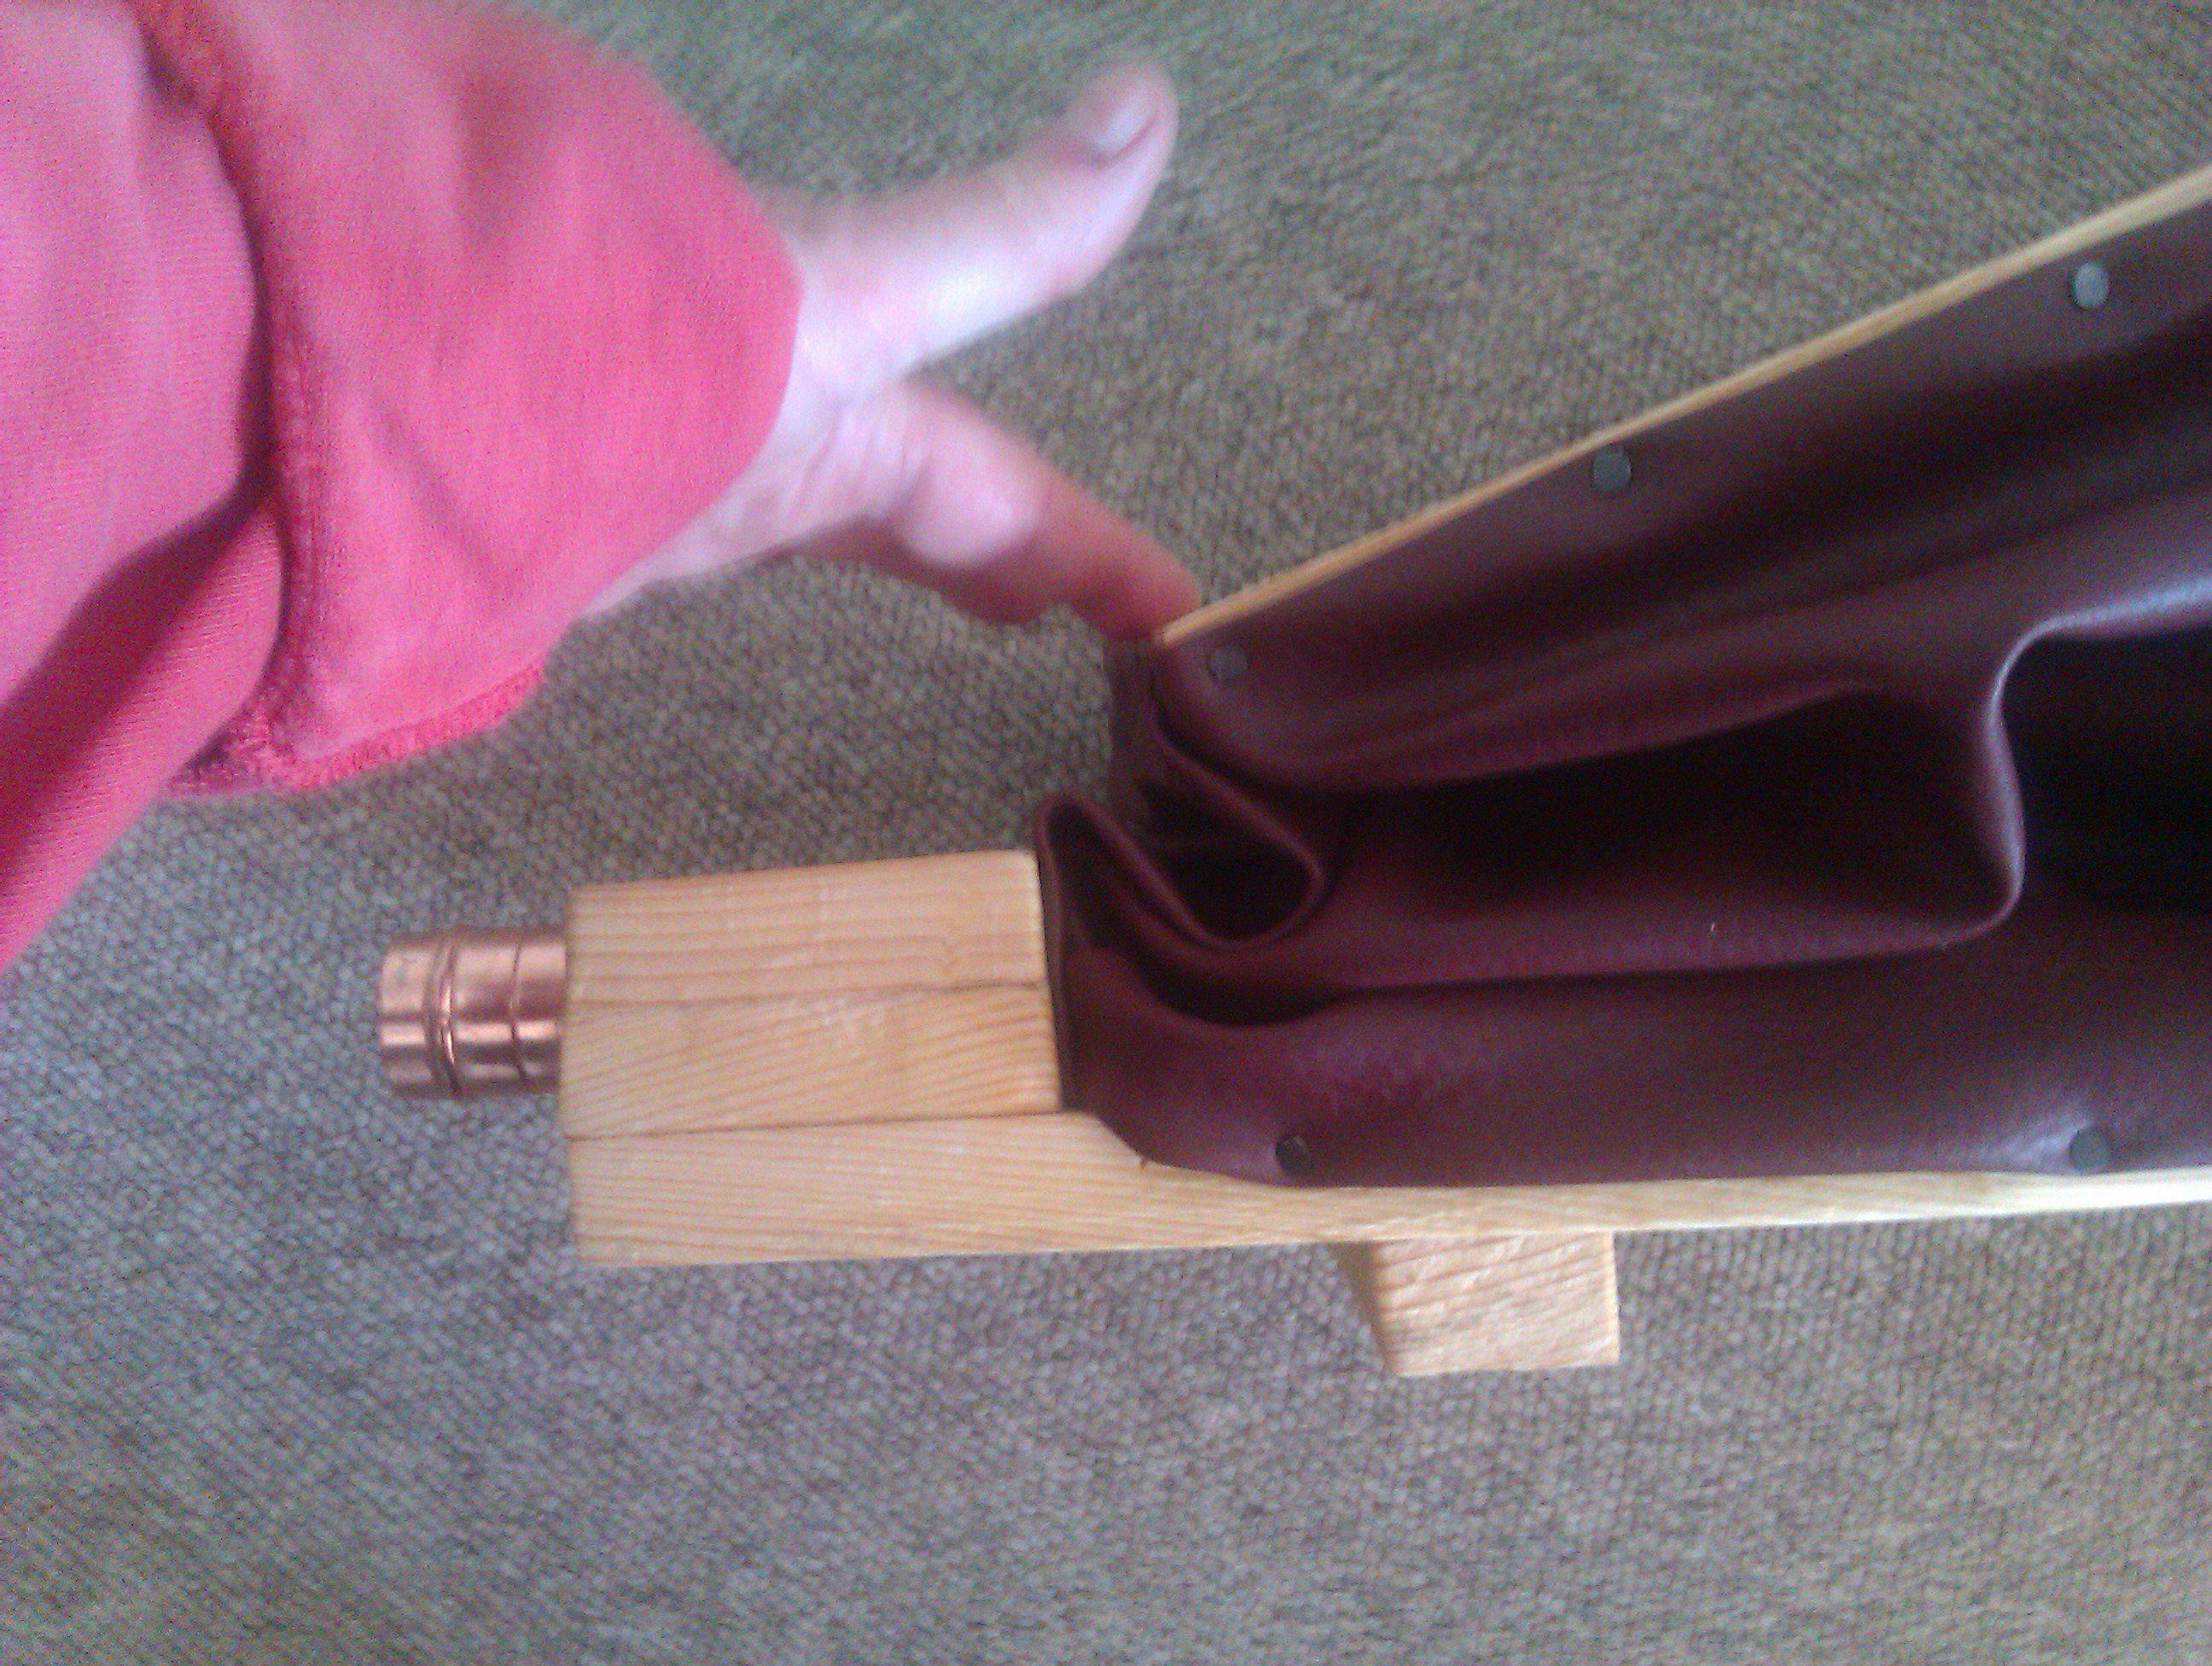
Attaching the leather as seen from the inside. The hole in the leather does actually line up with the hole in the wood. It just doesn’t look that way in the photo.Attaching the leather seen from the outside. Note that I just put a few tacks around the edge at first. After it’s fit properly, more tacks will be put in to make it airtight.
Put some tacks around the tuyere hole and cut the leather so there’s an opening. Do the same for the other side, overlapping the leather and cutting another hole. Put tacks in around the tuyere and the edge of the nose.
I had thought that I would need to glue the leather along the edges of the bellows, but I was pleased to find that the tacks did a good enough job and that there was no leakage.
Now for the top. Starting at the centre back again tack the leather along the edge, folding it like before. Overlap it along the front edge. There will be excess leather and you’ll have to push down a bit to get it to meet. At this point there will be a gap where the leather overlaps. Use some contact cement to seal the pieces together and let dry overnight. You’re almost there!
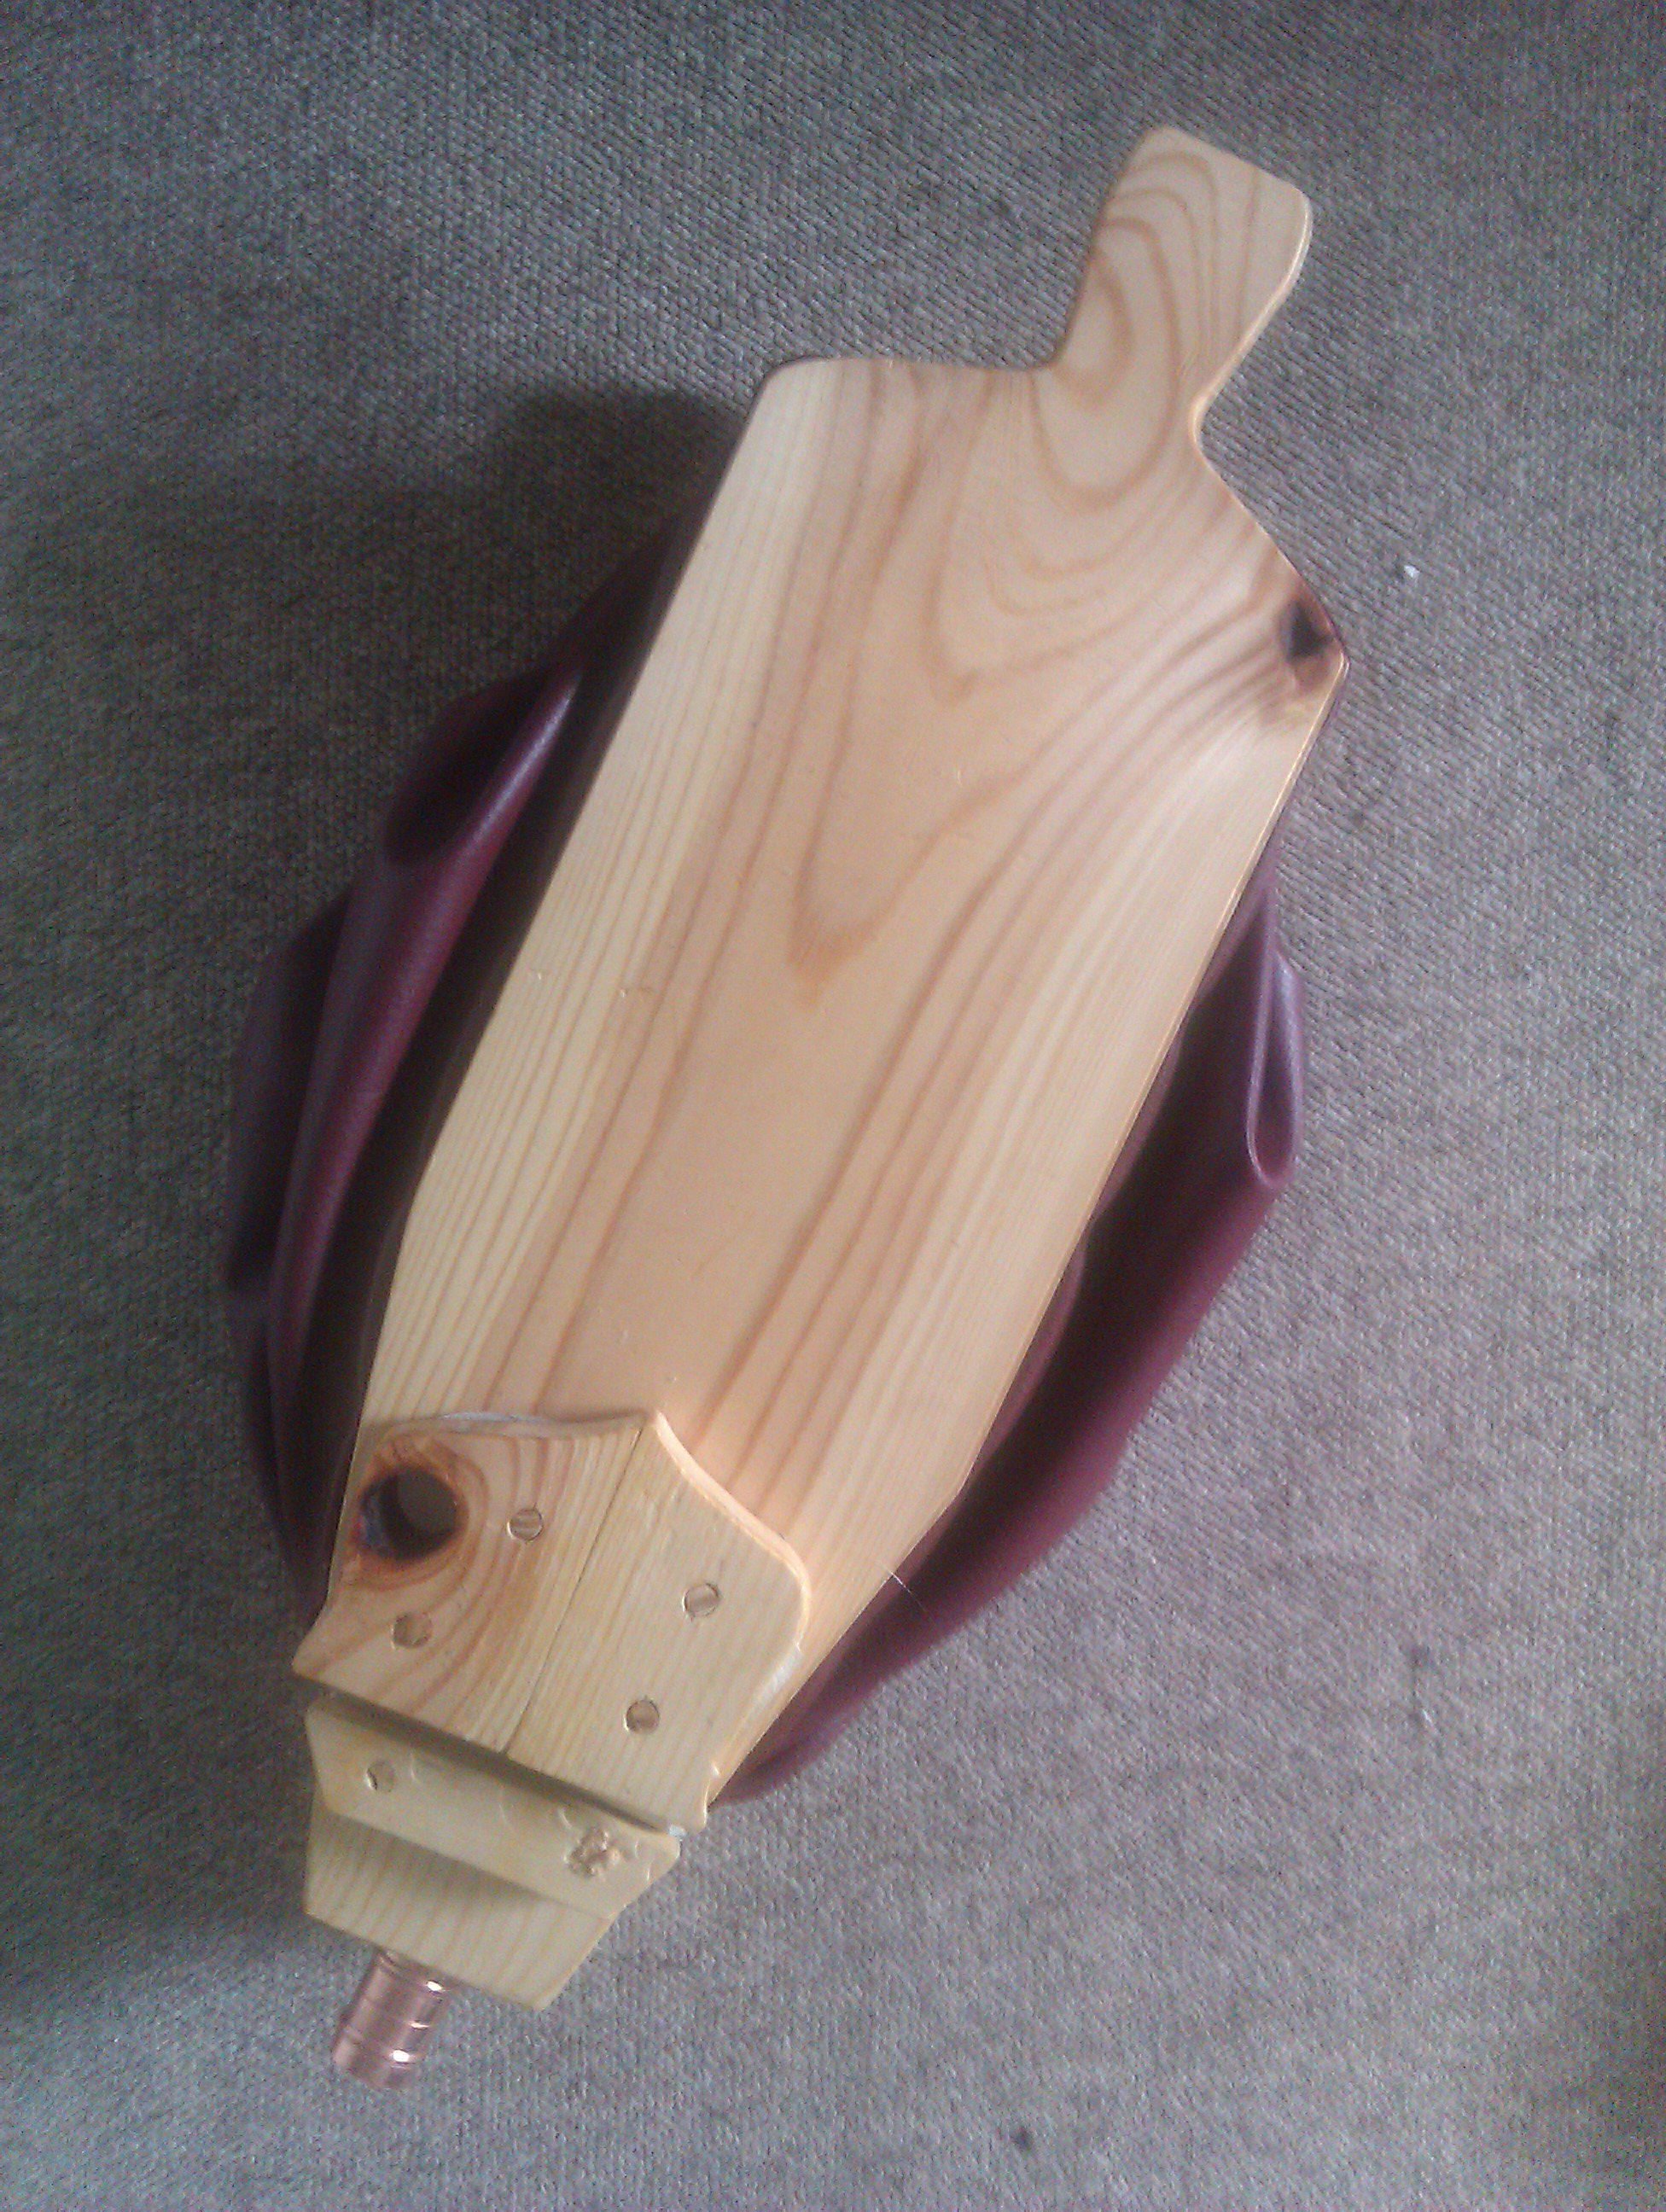
At this point you can test the bellows and feel how much air they put out. They work, but they’re a bit wobbly, so the final step is to make the hinge. You should have two drilled pieces of wood (if you didn’t drill them for pegs, wood screws will work well). One will fit closely over the top piece of the bellows and the other will go on top of the nose of the bellows. Push the top of the bellows down (it will take a little effort to cram the leather into place) and fit the top of the bellows so that it meets the edge of the nose.
It feels like it won’t fit, but with a bit of pushing it all comes together.
Cut a piece of thick leather (the same type as used for the valve works fine) that will fit under both pieces of the upper hinge. If you’re using pegs, cut holes in the leather for them to go through. Glue the leather to the nose piece and to the wooden piece to go above the leather and secure them with pegs or screws, then do the same for the other half of the hinge. It should be a tight fit. The leather in the hinge will stretch over time, but after several months of use, I haven’t seen much change.
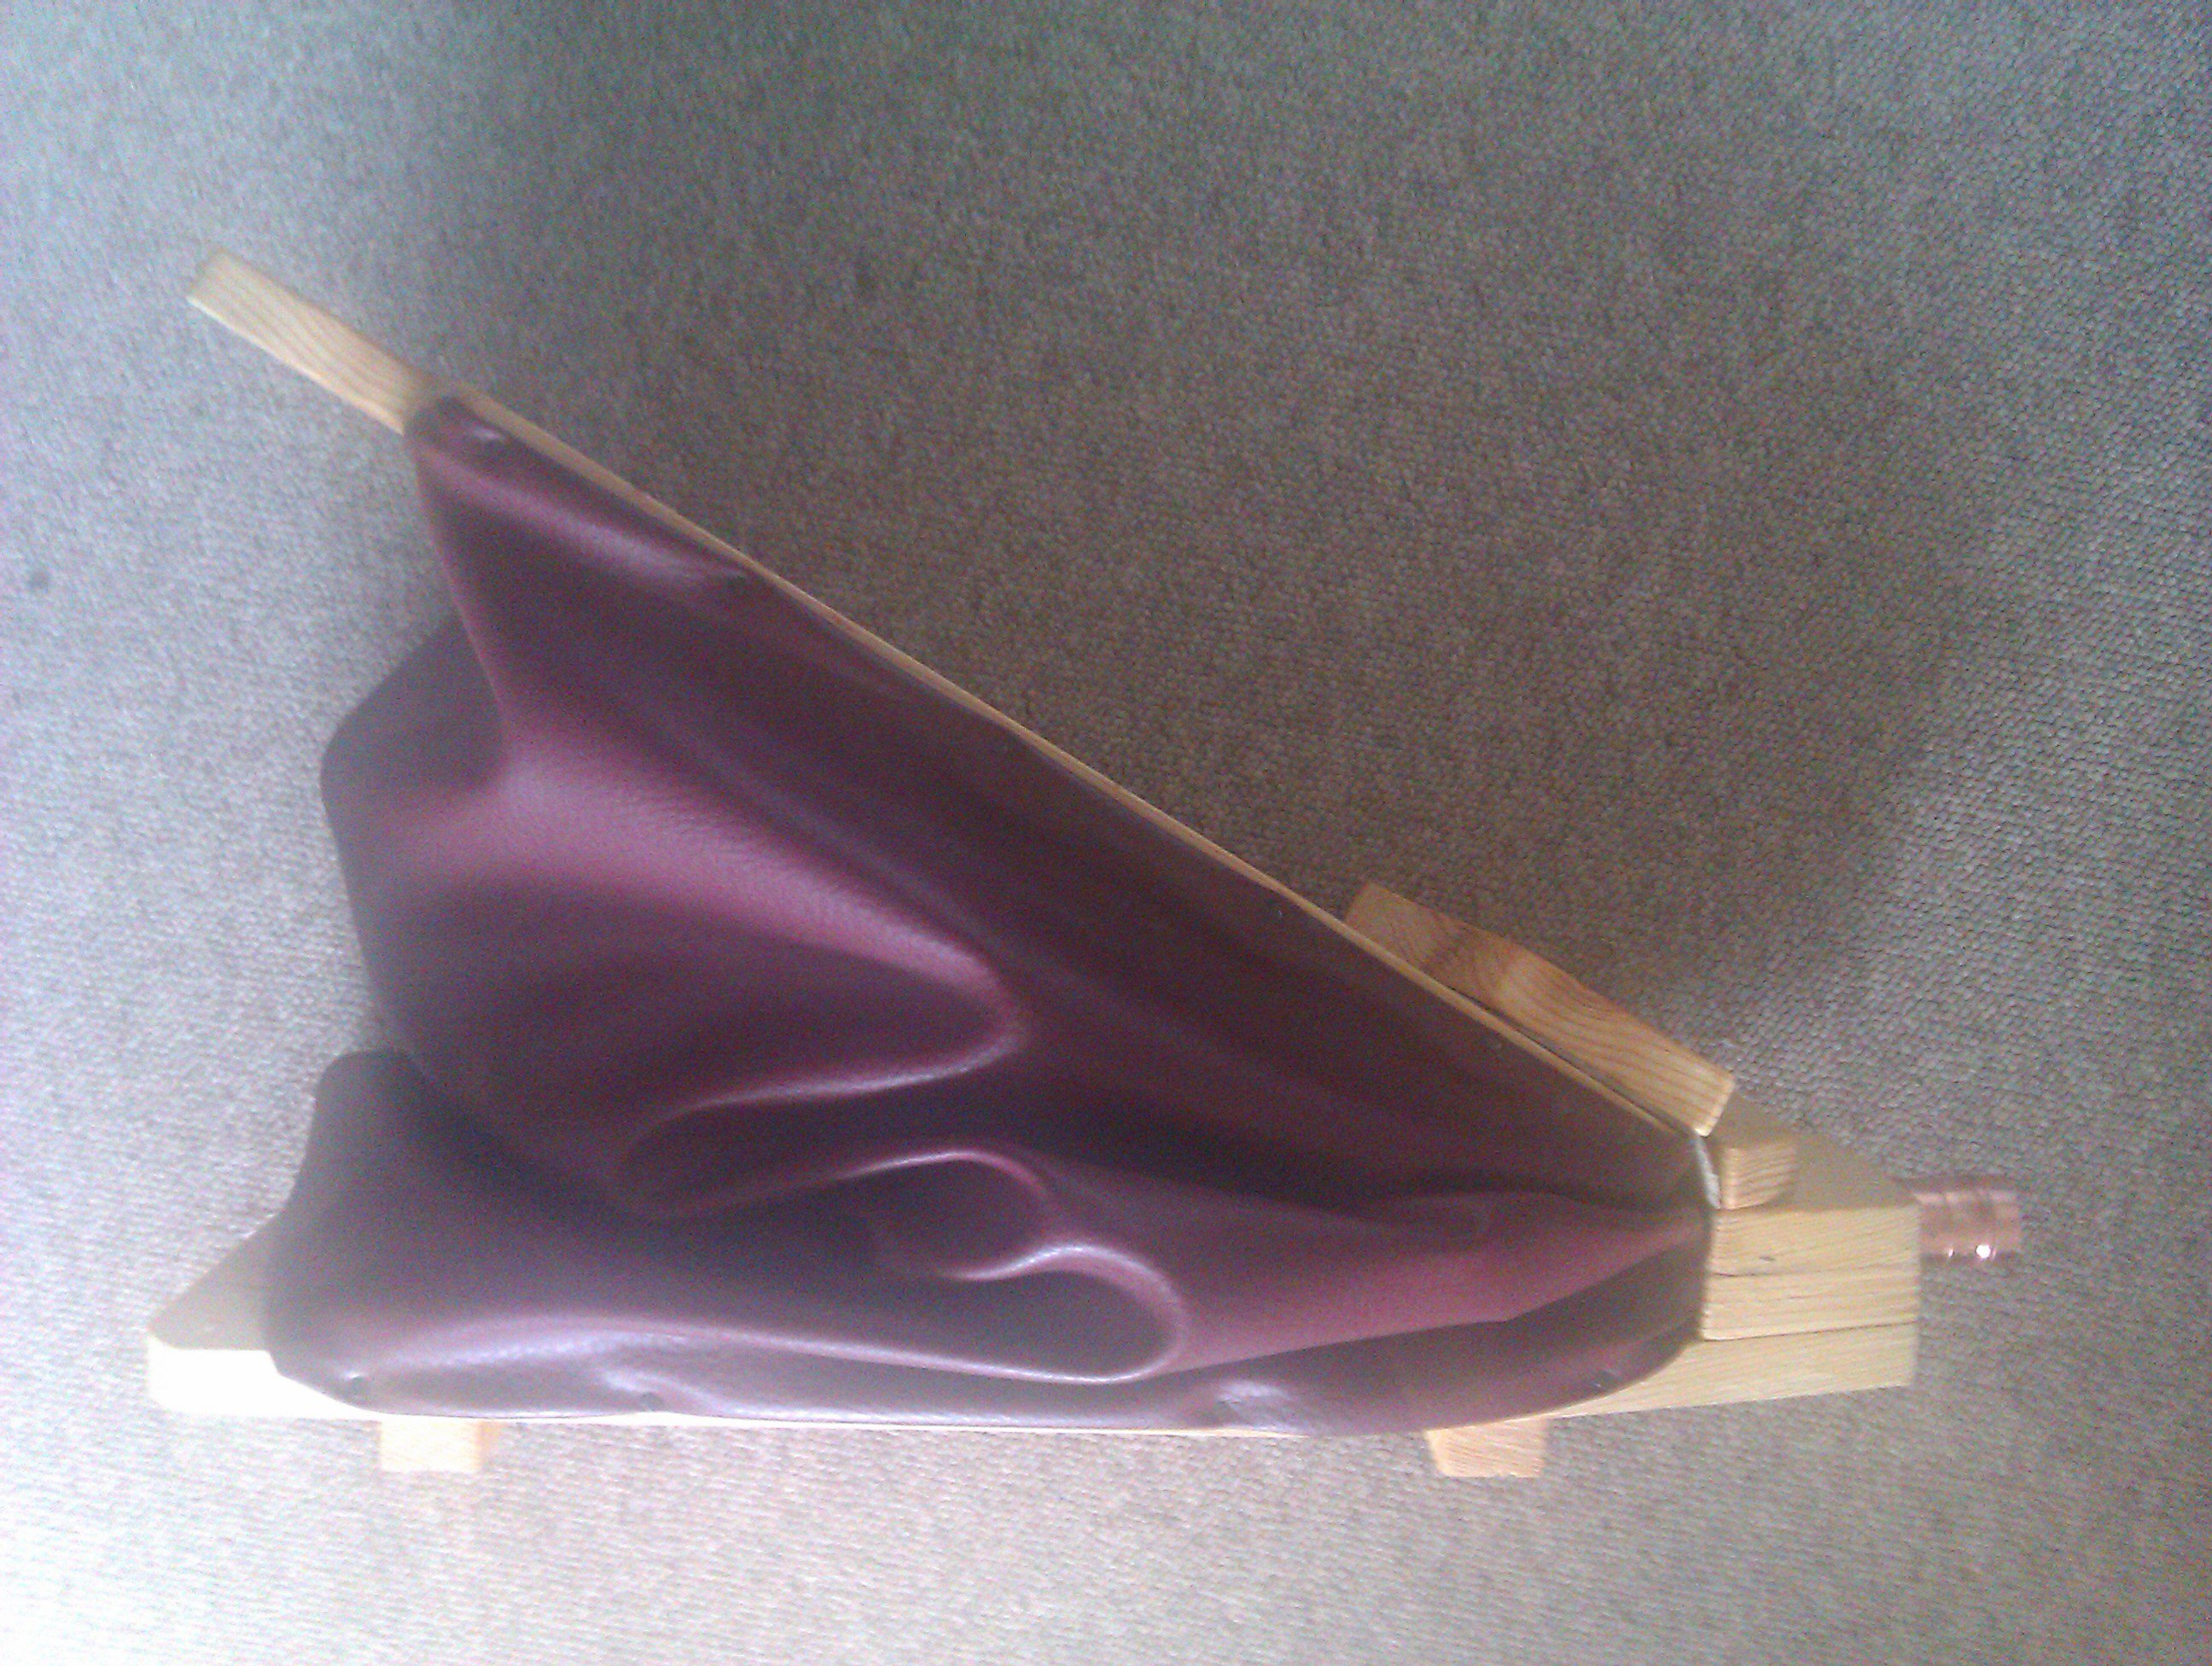
Bellows with hinge in place. Like I said earlier, you could save some time and effort by using a door hinge, but I do like the look of this.
That’s it. You’re done. You’ve made a set of bellows suitable for bronze casting, forge work, or even iron bloom smelting. You can make them as big or as small as you want. Adjust them to fit your needs. Experiment and enjoy.
The finished bellows, ready for use!
If you want to use one at a time, you can add a longer pipe (I’ve found old pipes from vacuum cleaners work well). However, if you want to link two of them together you’ll need a more elaborate tuyere. There will be more on tuyeres in another article.
My first foray into experimental archaeology came when I was working at the Science Museum of Minnesota, where I was cataloguing the metals collections there. It’s not well-known, but during the Late Archaic Period in the Lake Superior region of North America (Minnesota, Northern Ontario, and Upper Michigan) Native Americans worked with the copper that was easily found there. The culture was aceramic, meaning that they did not make pottery, and so did not have the means to cast or alloy the copper they found. However, they could hammer it, anneal it, and create ornaments such as earrings, finely detailed cut work, along with spears, knives, and arrowheads. It was while I was examining the spears that I started to wonder how they were made. The spears were triangular in cross section and I noticed that they were perfectly smooth on two sides, but on the third side the metal was folded with an almost flowing appearance. This was accentuated by fine corrosion on the surface. Knowing these weren’t cast, the first question I had was how they could have been hammered into a raised shape. The clues were in the surfaces and I reasoned that rather than being poured into a mould, they were hammered in, and the rougher surface was where the metal was packed in and hammered from the top. I carved a block of walnut to create a triangular spearhead and then lit a charcoal fire to anneal the copper. I had a friend standing by with bellows, but they weren’t needed. The charcoal fire aided by a light breeze was hot enough to anneal the copper. The metal was easily hammered into the mould using a hand-held hammerstone. The metal pushed into the mould smoothly along the sides and the top surface was rough from my pushing the edges of the metal from the top edges of the mould and folding them back onto the surface of the spear.
I was not only fascinated by the process of making a spear, but also how I had deduced it from examining the original spears in the museum and puzzling out the details. The whole thing was eventually written up and published in The Minnesota Archaeologist. After the first foray into experimental archaeology, I was hooked. From that time forward, I closely examined tools and metal objects, trying to figure out how they were made, what processes were used, and what tools were needed, how those tools were made, and receding back infinitum.
This is the crux of experimental archaeology that sets it apart from re-enactment or generally doing craftwork: experimental archaeology starts with a question. Experiments can be done in a lab in order to control as many variables as possible. Experiments can also be done in the field, but unlike re-enactment, not every tool and object needs to be a replica of an original. This is especially true when doing experiments in prehistoric crafts, where few of the original tools still exist. When doing experiments, I can use steel tongs and graphite crucibles, as long as they will not affect the parameters of the question. Likewise in some experiments, for instance trying to learn the melting times for different alloys in a charcoal fire, rather than using bellows I will use an electric pump to make sure that each sample was created under the same conditions. Each experiment must be thought out ahead of time and choices made for each step. The important thing is not to be distracted by the possibilities, but to always focus on the question and to create the conditions that will give a meaningful answer, even if it is inconclusive and leads to other experiments. It’s also important to measure, weigh, time, and quantify as much as possible. For example when experimenting with smelting, the ore should be weighed before and after processing. How long it took for the ore to smelt should be timed. The amount of charcoal used should be recorded. The size of bellows and furnace should be noted. Finally the slag, dross, and refined metal should be weighed and recorded in order to find out how much metal was produced from the ore. The slag could be examined to see if there is any metal left, and note if it could be re-smelted. It can be tedious work at times, and a pain to remember to weigh, record, and photograph everything, but the results will be worth the effort, because the information hasn’t been lost. The data from the experiment you did will lead to more experiments, but will also yield useful information for others.