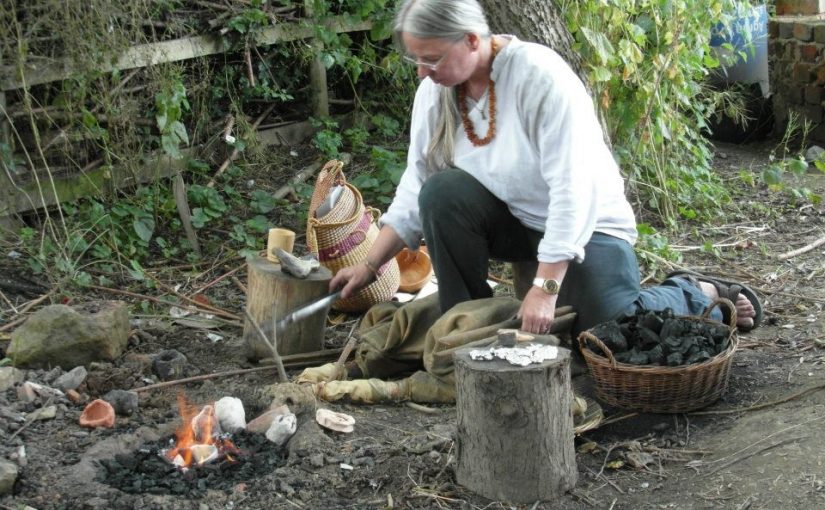
Bag bellows might be the oldest form of bellows used. We don’t know for certain because they are made entirely of organic materials, and so none survive in the archaeological record. Because they have the advantage of being portable, lightweight, and easy to make, this type of bellows are still in use for iron forging in parts of Africa and South Asia. When you make a pair, you can be as “authentic” as you want, using only wood and leather, or you can use more readily scrounged materials like vacuum cleaner hoses and pleather. There is a remarkable video of Kenyan metalsmiths using bellows made of cement bags here.
In addition to this tutorial, check out the Bellows Forum page where there are variations of bellows designs and some interesting variations.
Traditionally bag bellows are made of pliable leather and the usual description is that a single bellow is made from one goatskin. The bellows I describe here are made with upholstery fabric. At the time I made them, leather was too much for my budget. After they were sewn I gave them a good coating of linseed oil that made them both waterproof and airtight. I find it ironic that in the Bronze Age leather would have been readily available, but hand-woven fabric would have been exorbitant. So, these are my ostentatious display of wealth bellows.
How big the bellows you make will depend on what’s comfortable for you. I’ve used very large bellows and ones so small you’d think that they’d never produce enough air to get the job done, but they did remarkably well. What is important is that the size works for you. You’ll be sitting on the ground, or close to the ground (I like a log or a short tree stump with a bit of padding). Sit down on the floor and raise your arm with your elbows bent so that they are lifted a little over waist high. Try not to move with your shoulders. You’ll be pumping your arms up and down for hours, so it’s good to find a height that works for you so that you don’t wear your arms out. Measure that height or get a good idea of how high that is. Then you’ll want to add a few more inches because you want to have the bellows rest on the ground. If you lift them too high, the sides will collapse and you won’t be able to trap the air in them. You also want to add another few inches to wrap around the handles.
Besides the leather (or whatever material you choose) the other supplies you’ll need are heavy waxed thread or sinew, leather or sail needles (depending on the type of material you’re sewing). The handles are made of two straight branches about 3-4 cm (1-1 ½ inches) in diameter, or four boards 3 by .5 cm (1 by ¼ inch) the length will depend on how wide the top of your bellows are. If you use branches, they’ll have to be split lengthwise so that they have a semi-circular cross section. My bellows are about 16 inches wide.
Using your own measurements, adapt the pattern below, adding about 3 cm/1 inch for the seams around the edges, and enough at the top to wrap around the handles. You’ll also need some scrap to make loops for your fingers. The loops are more important than you realise. Getting them right will mean the difference between being able to work for hours, and giving up because you keep getting blisters or losing your grip.
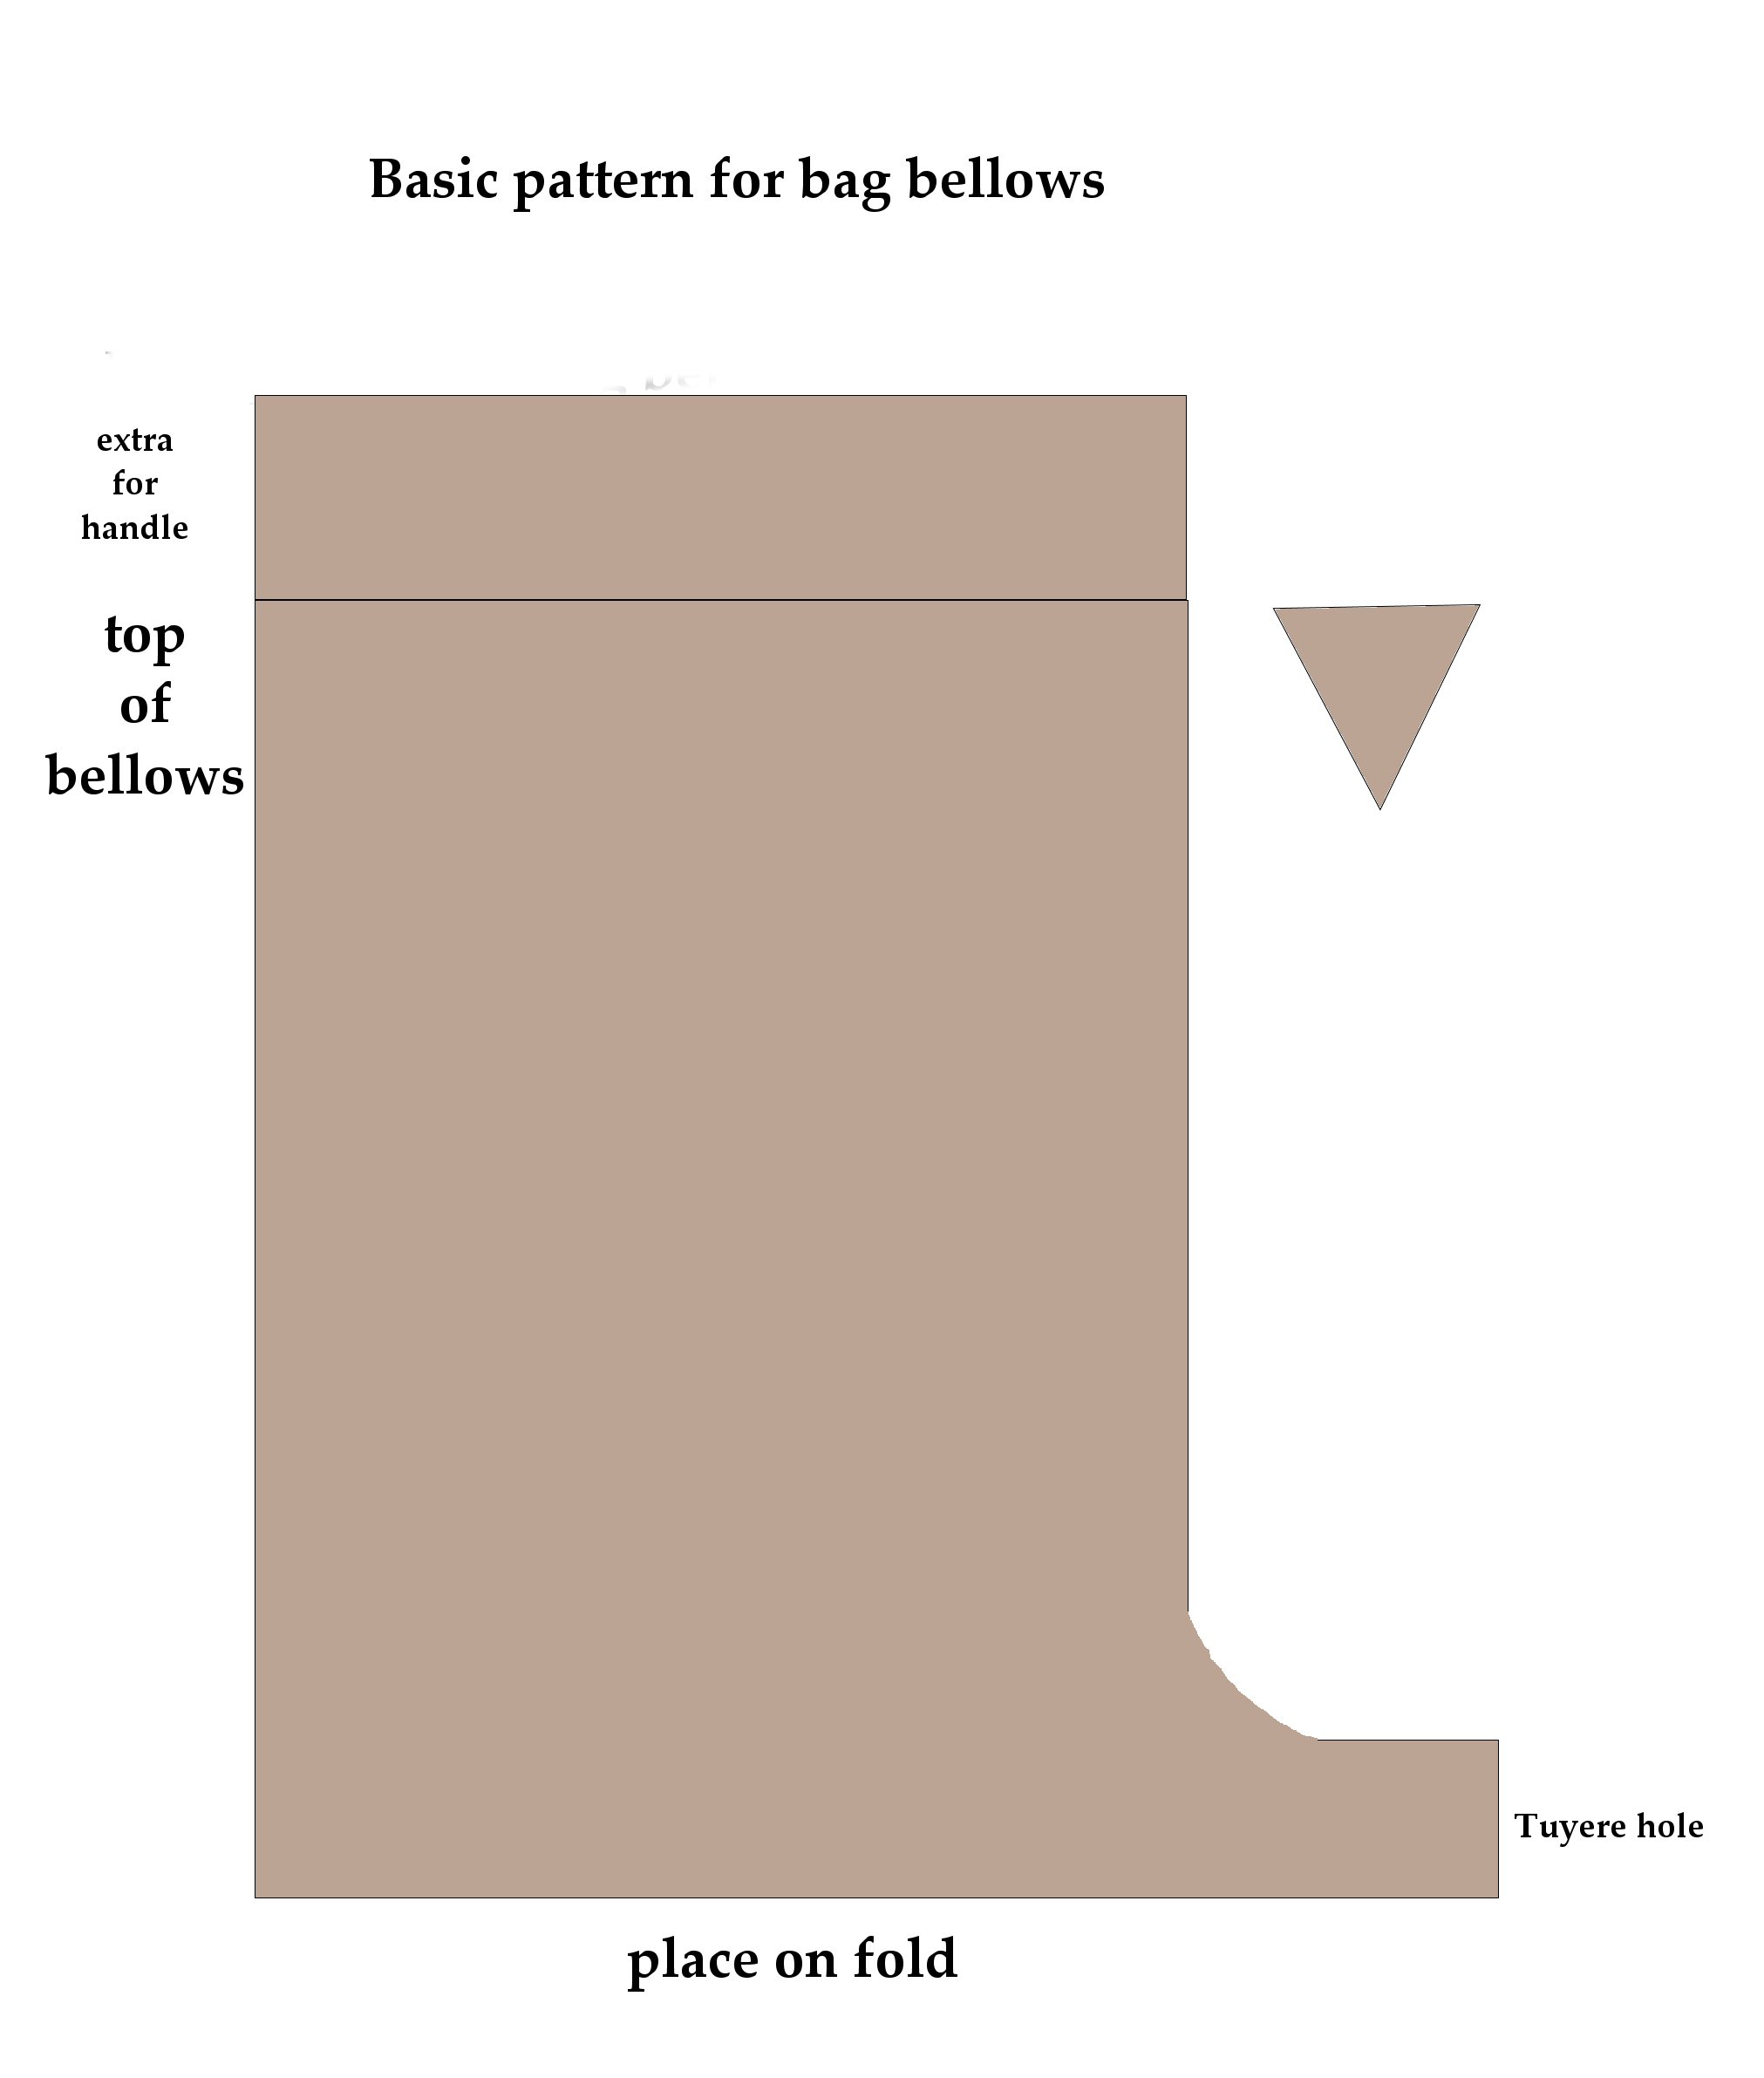
Another useful detail is to sew a small triangle in the front of the bellows, just below the handles. Holger Lonze taught me this trick. It makes it much easier to open the bellows wider and get more air in.
The other detail is the part at the bottom that sticks out. This is where the tuyere will fit. The size you make that will depend on the tuyere you make, and also how much air you want to push through to the fire. If it’s too narrow, you’ll be expending a lot of energy pushing air through a small space. Too large and you’ll be pumping furiously to get the volume of air through the tuyere. Mine is about 10 cm (4 inches) and tapers a little so I can fit different tuyeres to it in case I ever want to change it.
The other supply you’ll need is rawhide. Leather strips can work, but they aren’t as durable or tight as rawhide. The best source for rawhide I’ve found is the pet shop. Buy a rawhide chew bone for a dog and soak it in a bucket of water overnight. The rawhide will soften and you can untie the ends and unroll a nice sheet of rawhide. I cut it in a spiral so I have good, long pieces. While it’s wet, you can wrap it and tie it easily. Once it’s dry it shrinks to a hard, tight fit.

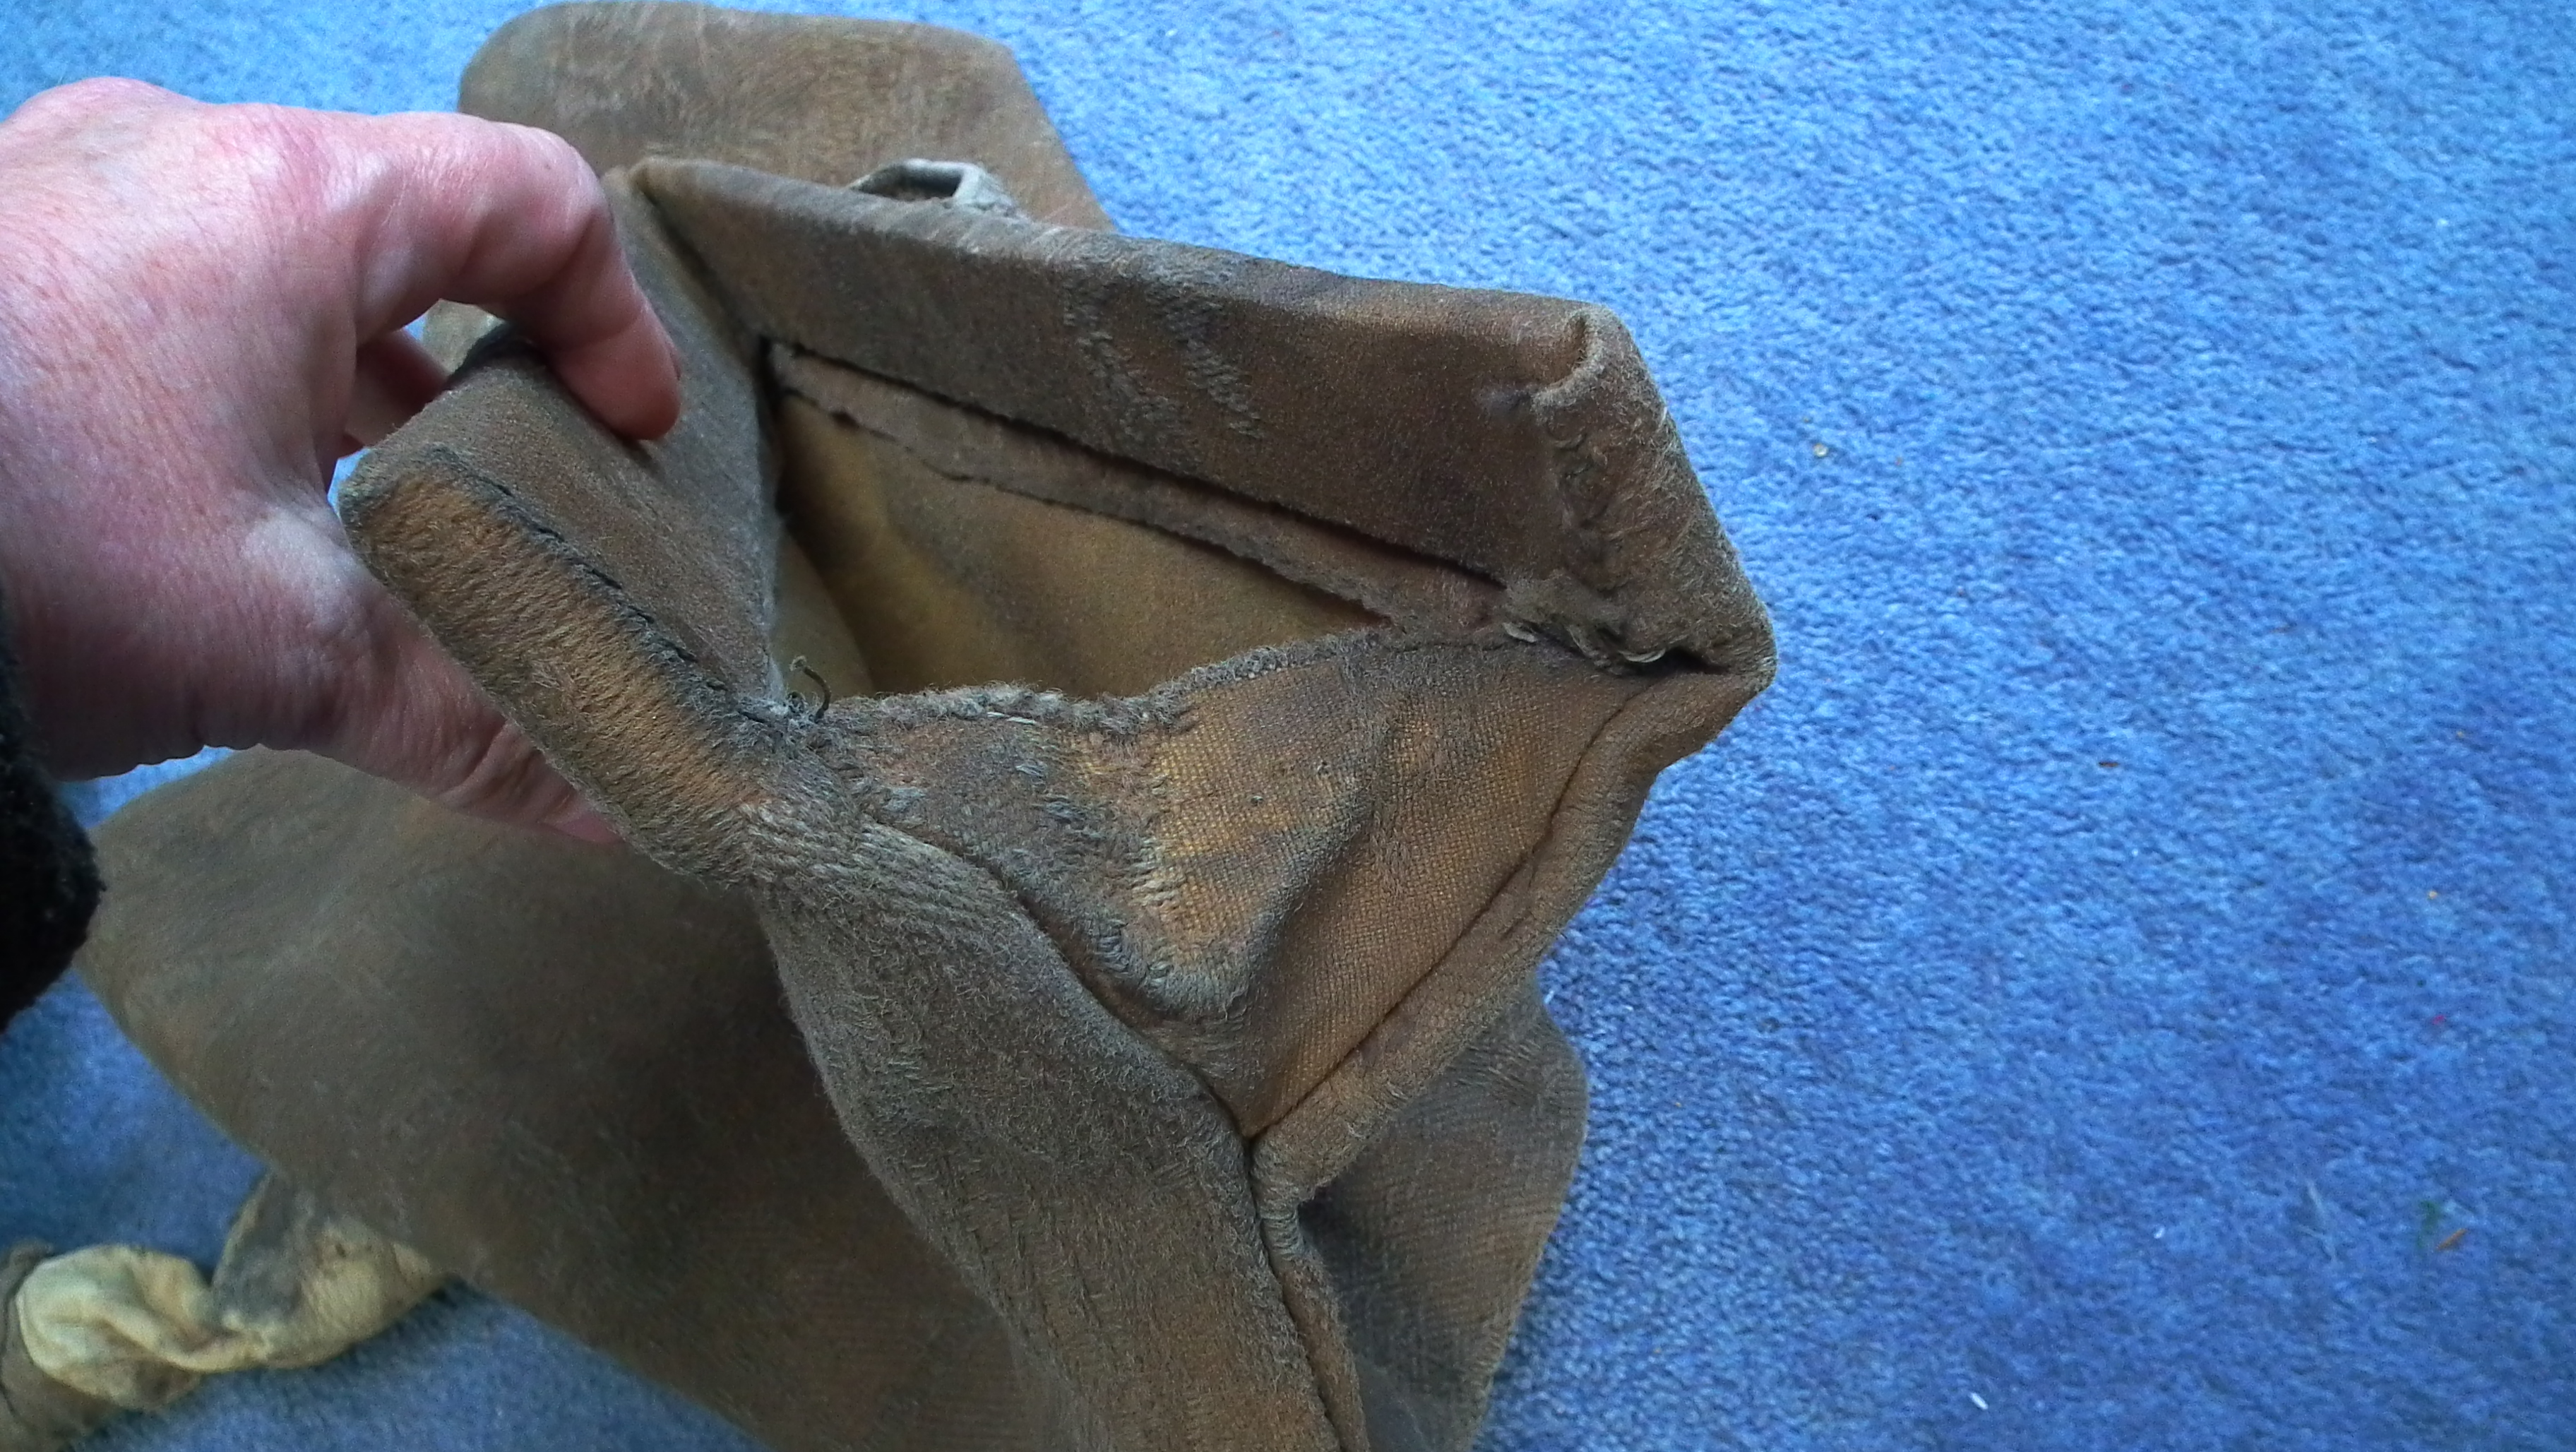
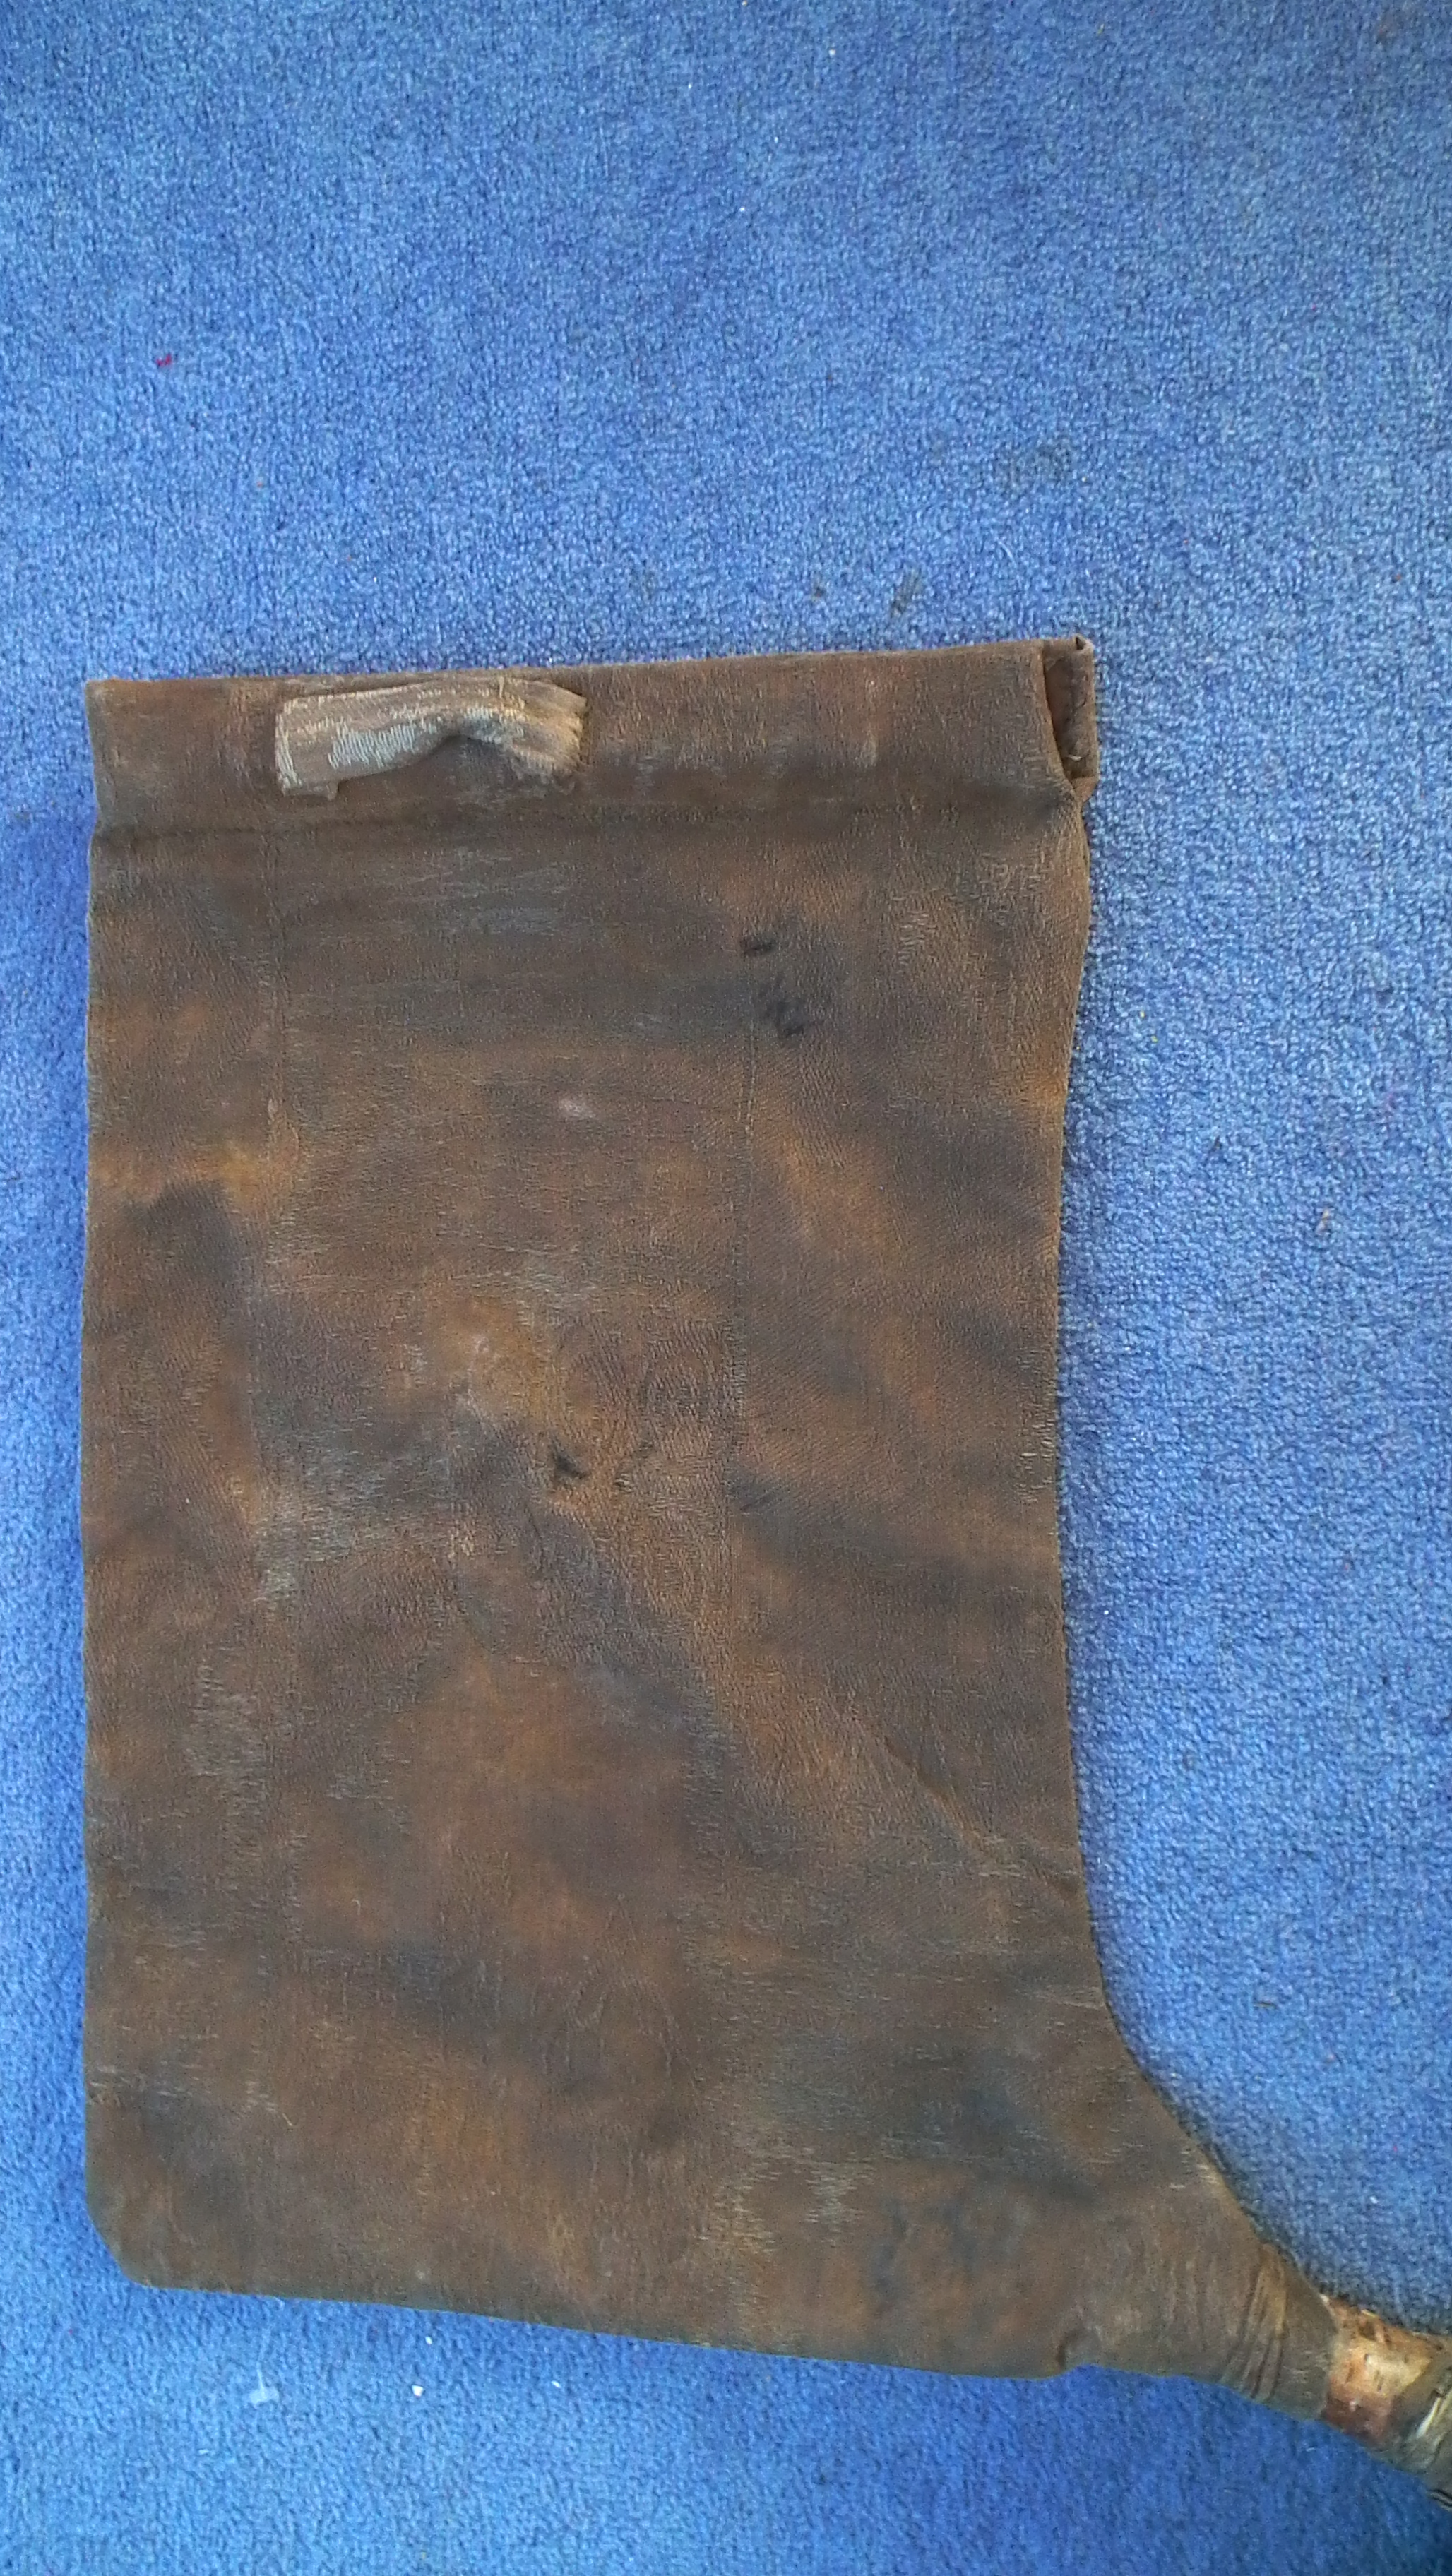
Cut out the leather or material and then stitch it with the outsides together so that when you turn it inside out, the raw edges will be on the inside. Don’t sew it all the way to the top. You want that extra selvedge to wrap around the handles. Make sure you fit the triangle in the front below the bottom edge of where the handles will be.
The next step was the hardest for me. It’s a bit of a pain. You need to wrap the upper selvedge of the bellows around the sticks and sew them tightly into place. If you’re using half-round branches, make sure the flat sides are on the inside so they meet and make a tight fit. Sew these in tight along the bottom of the sticks. It’s annoying if they wobble around.
Turn the bellows right side out and admire your work.
If you used branches, you might not need loops for your fingers. Try pumping them a bit and see if you can open and close them easily without them slipping out of your hands. The action is to open them while the top of the bellows is close to the ground, Lift them, close them when they are as high as you want to lift them, close the bellows and then push down. If you lose your grip, you might want to put loops on them. They are simple, just strips of the same material that your bellows are made from. Sew them so your hand will be about 1/3 to 1/4 of the way from the back. When the bellows open, the little triangle in front will allow the bellows to open in a “V” shape and allow you to trap more air. Having the loops toward the back means that you don’t have to open your hands as wide. Since I work with kids a lot, this was a consideration when I designed them. Also, I have small hands.

The loops should accommodate four fingers on one side and your thumb on the other. The handles will stretch over time, so I periodically have to stitch them again to tighten them up.
There now, try them out. If you feel any air leaks in the seams you can seal them with linseed oil. If you made your bellows from fabric, the easiest way to coat them is to hang them on a clothes line outside and slather the oil on with a paintbrush. It takes a long time to dry and smells pretty strong. It’s definitely something to be done outdoors. Keep in mind that it might take a day or two for the linseed oil to dry.
Now in order to work, you’ll need at least a short tuyere. If you’re not fussed, some steel tubing from a vacuum cleaner works fine. If you want a more Bronze Age look, you can make them from wood. I took a short branch and drilled a hole in it using a 2 cm flat bit (1 ½” spade bit in the US). The branches are about 1 cm or ½” wider than the bit. If you don’t have a bit or don’t want to use power tools, take a branch of the right thickness (about 4 cm or 3”) and split it in half. Carve out the centre and fit them back together using glue and rawhide.
Fit one end of your tuyere into the opening at the bottom of your bellows (you didn’t sew that shut, right?). Now take the wet, sloppy rawhide and wrap it tightly around the part of the bellows covering the tuyere. If your tuyere is made of split branches, keep wrapping so that it holds the halves of the branch together. Depending on the weather and humidity, it might take several hours for the rawhide to dry.
Once everything is dry, try them out. They’ll be a bit stiff at first and will need to be broken in. It takes a bit of practice to get the Open-Lift-Close-Push rhythm going, especially if you alternate hands. Once you get into it, it gets easier. Think of a cat kneading its paws.
Another tip is to get some thin willow twigs, about the size used for making baskets. Make them into hoops that will fit inside the bottom of your bellows. It will help keep them open, especially if you have a tendency to lift them too high.
Next you’ll be wanting a “Y” shaped tuyere to connect the bellows together.