The 3rd Vounous Symposium went wonderfully well. We experimented with creating faience, including making it from locally resourced materials, resulting in what was named Vounous Blue. This year we had three furnaces, my little pit furnace from last year, one that is self drafting and one short shaft furnace. The self drafting one was used for the faience and small projects. It didn’t get quite hot enough for some things we needed, but the design was a work in progress. The shaft furnace was supposed to be for smelting ore. We had a couple of nice samples, but when we went to collect more, we found that the site was under water. Local members of Vounous will go back when the water is down and will collect more. Meanwhile we used what we had to make the pigment for the faience and smelt in a crucible. Since we had so little, we saved it for the evening of the closing ceremonies. People were impressed with the bright blue flames.
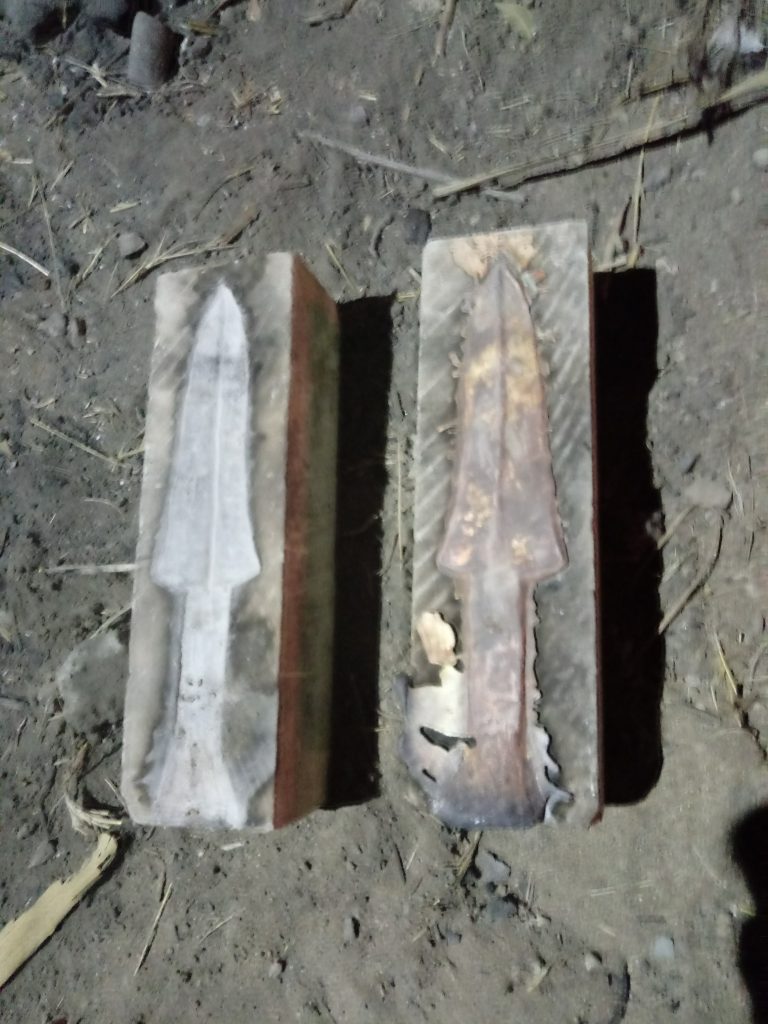
Chris, of Maunfactum Historicum carved limestone moulds for us to cast in, making replicas of knives and daggers that were excavated in the vicinity. He also carved an impressive Egyptian kopesh. We didn’t get that cast, but will try for next year. We wondered about the limestone because we’d always been told that it wouldn’t work. However the moulds we’d seen were local limestone, and we found that this worked very well. Apparently not all limestone is created equal.
The above photo is a replica of a dagger we saw at the Museum of Archaeology and Nature, Gurzelyurt ( Morphou) in its limestone mould. We’ve also cast daggers that are replicas of one that was found here at Vounous.
I wrote a short article for EXARC about last year’s Vounous Symposium. You can read it here.
While this technically isn’t experimental archaeology, this is a good way to facilitate archaeological experiments in metallurgy. I regularly cast bronze and smelt metals using a small clay-lined pit furnace. However, there are occasions when I am asked to demonstrate Bronze Age metalwork, but am not allowed to dig a hole in the ground. Museums and schools do get fussy about grassy areas and holes that could be a tripping hazard.
I found the link below and I thought it would be a good solution to my portable casting problem. The tutorial was for a making a small iron working forge, but I decided to make one that would be a scaled up version that would enable me to do the same sort of casting that I do with a clay furnace. http://www.instructables.com/id/Make-a-Small-Blacksmith-s-Forge/?ALLSTEPS
When I say that I do Bronze Age casting, I have to be honest about it. So far, in Britain no intact Bronze Age furnaces have been excavated or properly identified. The furnaces I used are based on the work of others and best guesses as to how the technology was done[1]. I have used short shaft furnaces, similar to, but much smaller than bloomery iron smelting furnaces. I have also used clay bowl furnaces with the air supply coming across the top or from below. The most efficient type I’ve used is a two chamber furnace with the air introduced into a lower chamber with the charcoal and crucible supported above it. It fires up quickly and evenly, plus it has the advantage that the crucible has a stable support, so I don’t have to worry about spilling the metal because the charcoal is moved around.
Step one was to find a sturdy steel bucket and drill a hole in the side near the bottom for the tuyere, the tube through which air is blown into the furnace. The air is needed to increase the heat.
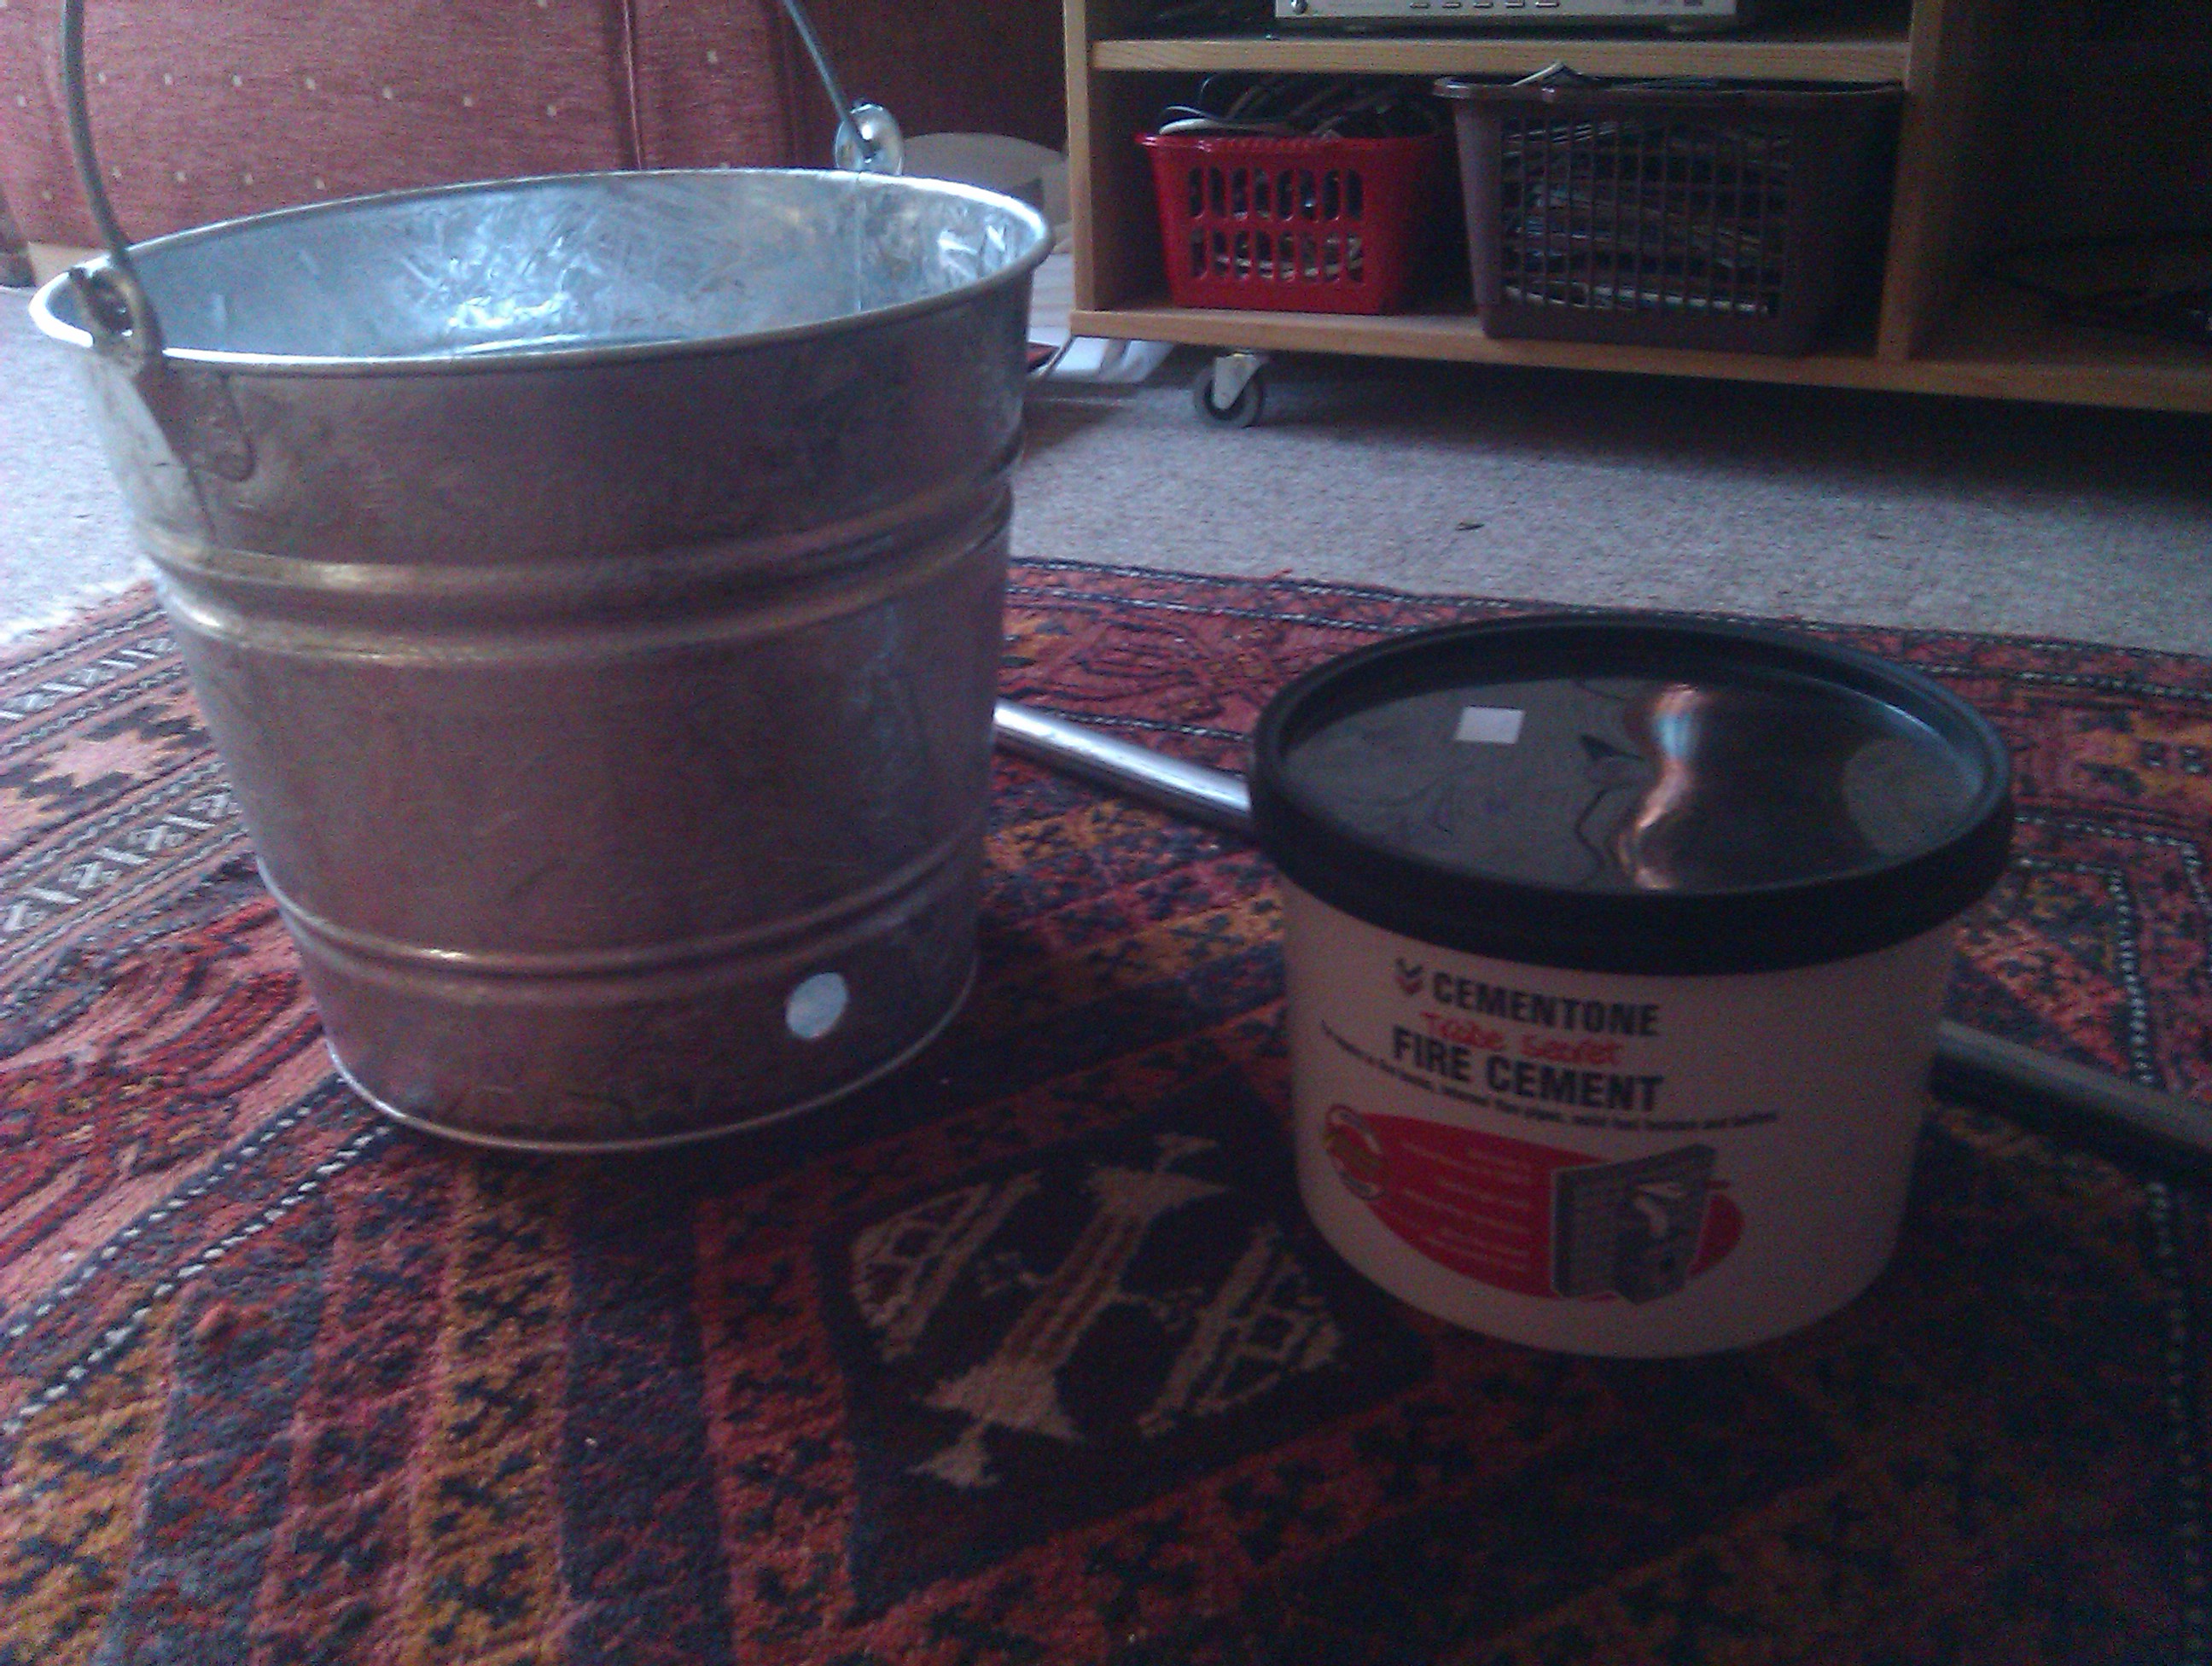
A bucket, a steel tube, and furnace cement. Let’s get going!
I had a length of steel tube and a flat drill bit (spade drill bit in the US) of the same diameter. The hole was drilled about an inch and a half above the bottom of the bucket to allow for at least one inch of space for the furnace lining.
The view from above. It all fits nicely.
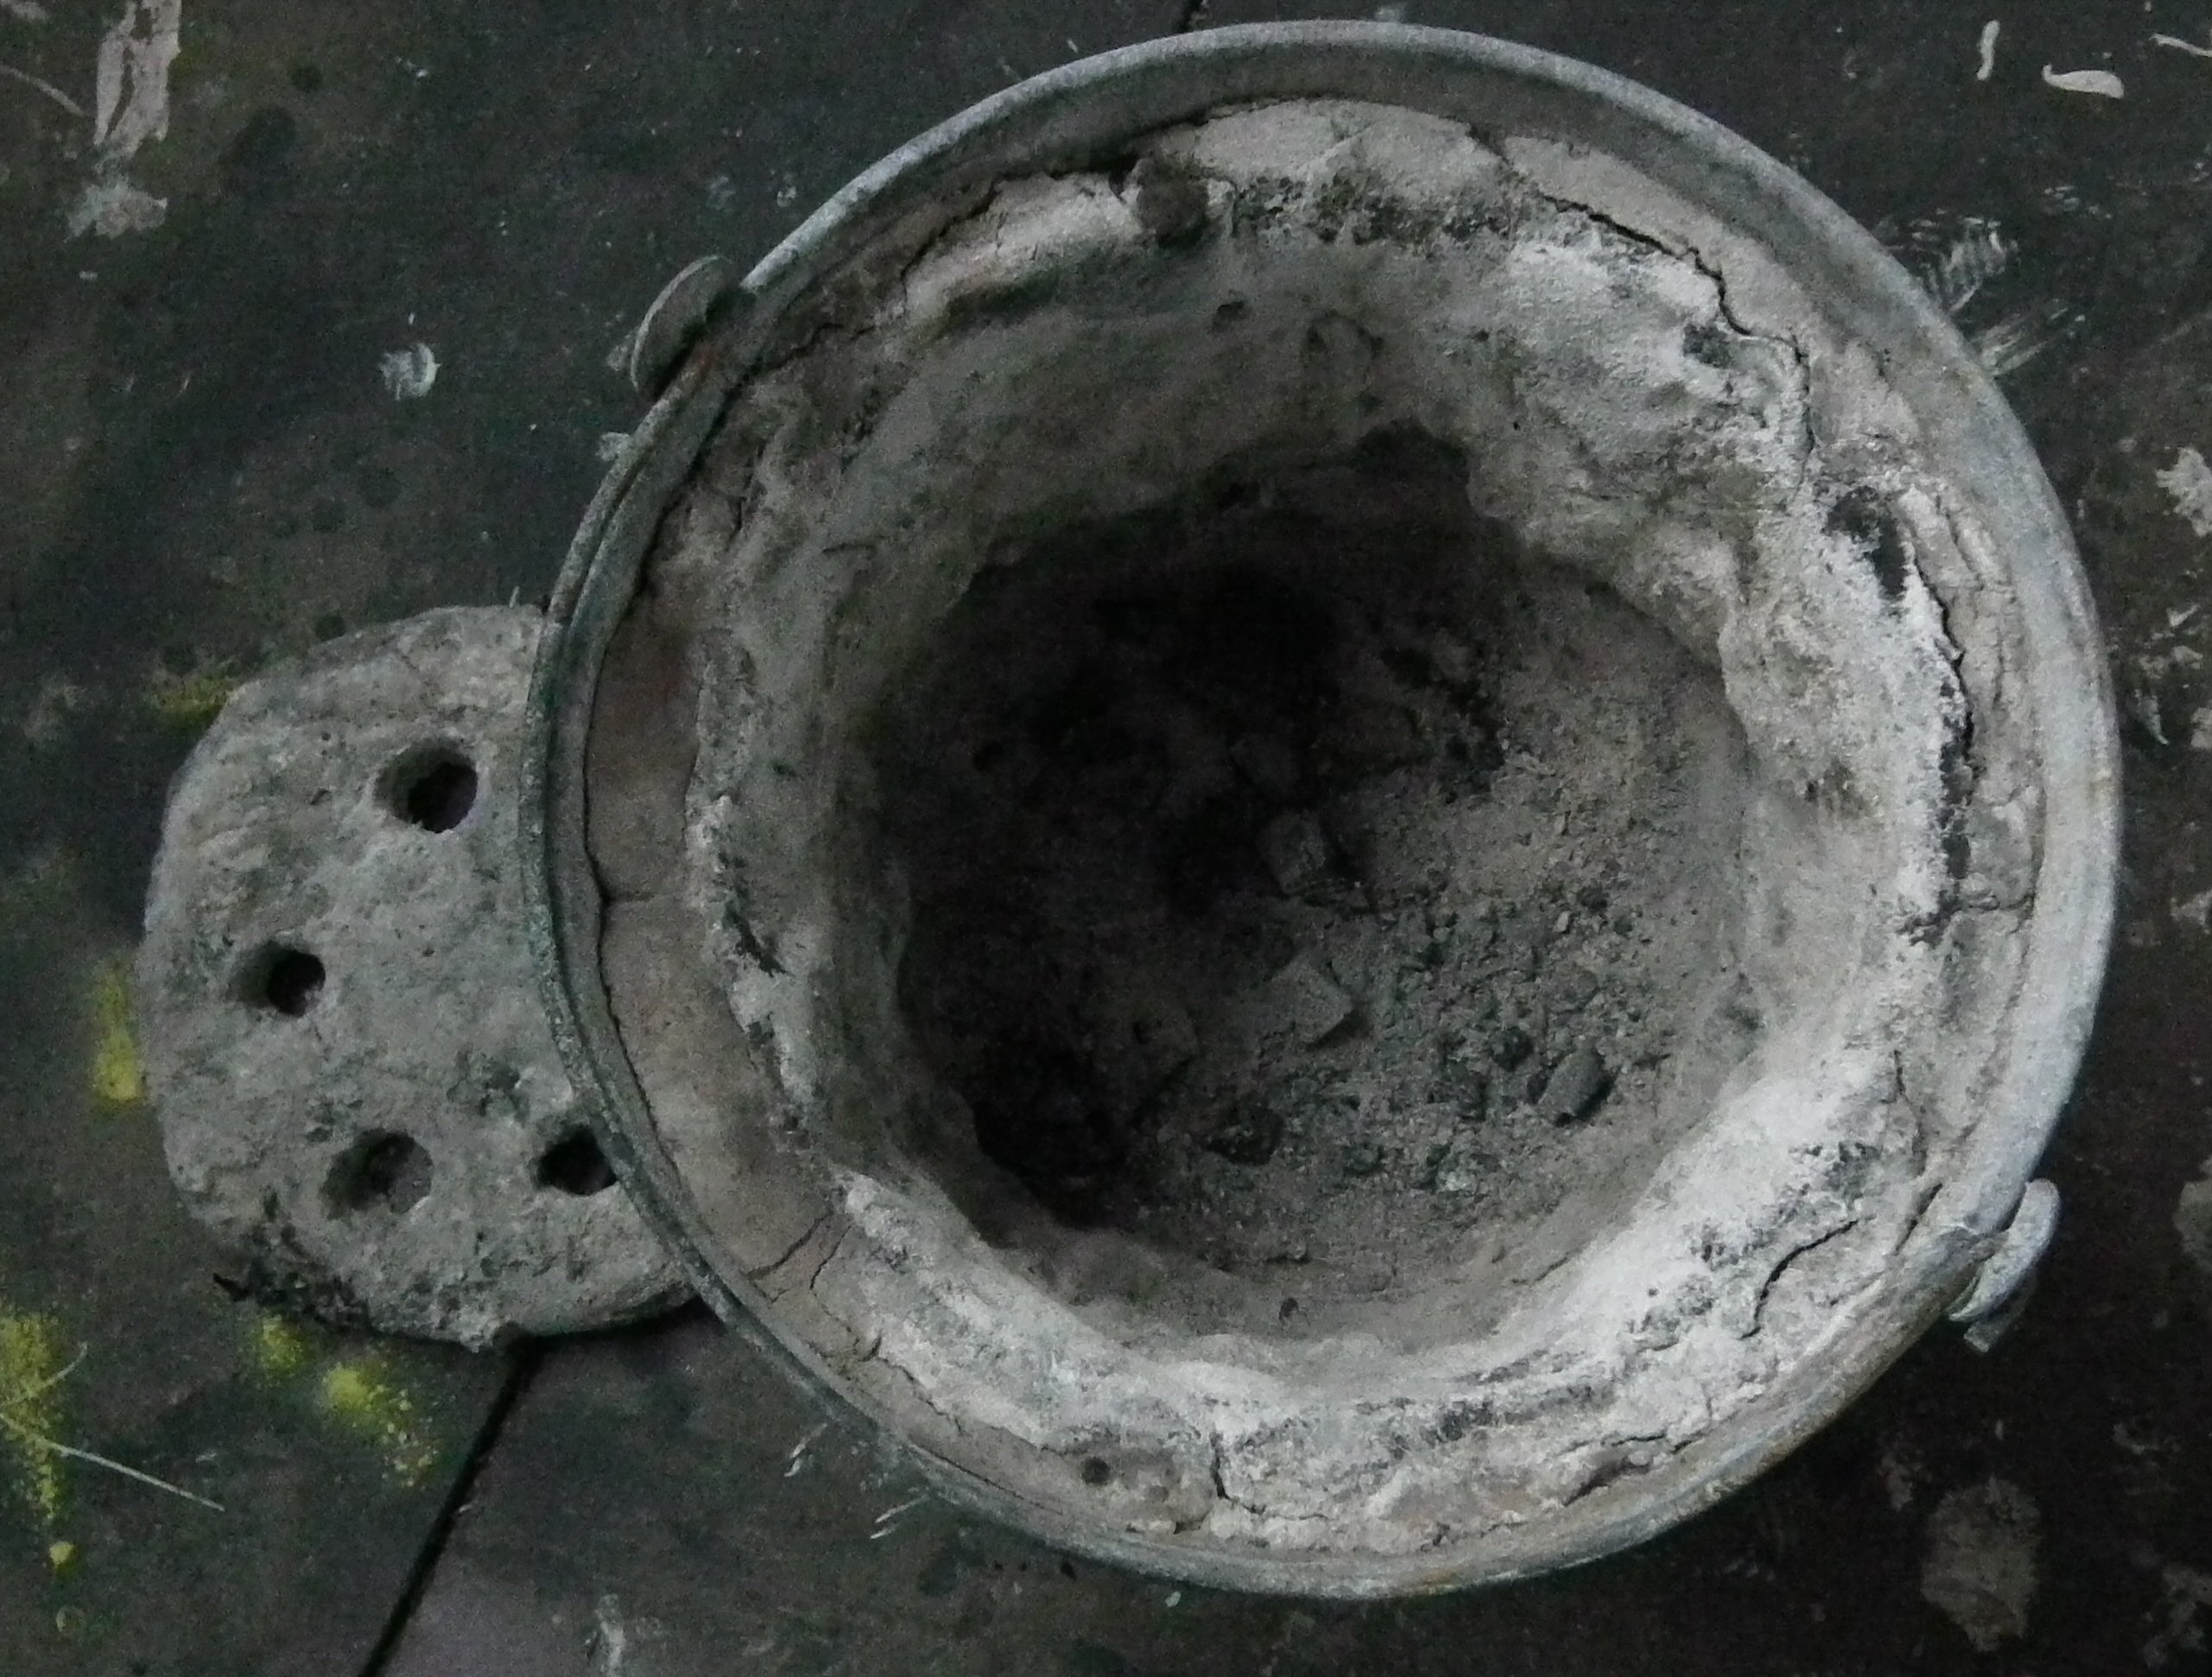
The original website used furnace clay, but didn’t say much about it. I bought a tub of Cementone Fire Cement for £8 at B&Q. As you can see it did about half the job, with the clay packed about an inch thick. The directions said to use a trowel, however the cement has a texture like gritty plasticene, but not quite as rigid. Getting it smoothed in the bottom of the bucket was awkward with the trowel (I’m more used to removing material with a trowel than adding it) so I put on some plastic gloves and pushed it into place.
That’s how far one 5 kg bucket of furnace cement will go. Time to go out and get another…
Now the instructions didn’t say anything about getting it on your hands, it just had warnings about getting it into your eyes. However, knowing that many materials like this can be caustic I decided to err on the side of caution and wore nitril gloves. The container had a handy link to the MSDS (Material Safety Data Sheet) so I could check out all the possible material hazards. The MSDS is a great online resource that will let you know exactly what’s in a product and every possible statistic for it. Check it out here http://www.bostik.co.uk/diy/product/cementone/Fire-Cement/109. Note that it is caustic and there are precautions against getting it on your skin. It also tells you what to do in case of contact with skin or eyes.
I used to work with someone who was severely health and safety challenged. I survived, but in the process learned the effects of being too intimately acquainted with carbon monoxide. It should go without saying, but I’ll say it anyway. Do this outside with plenty of ventilation and don’t hover over the thing while it’s being heated. It’s not a barbeque (at least not yet, there’s plenty of time for that later).
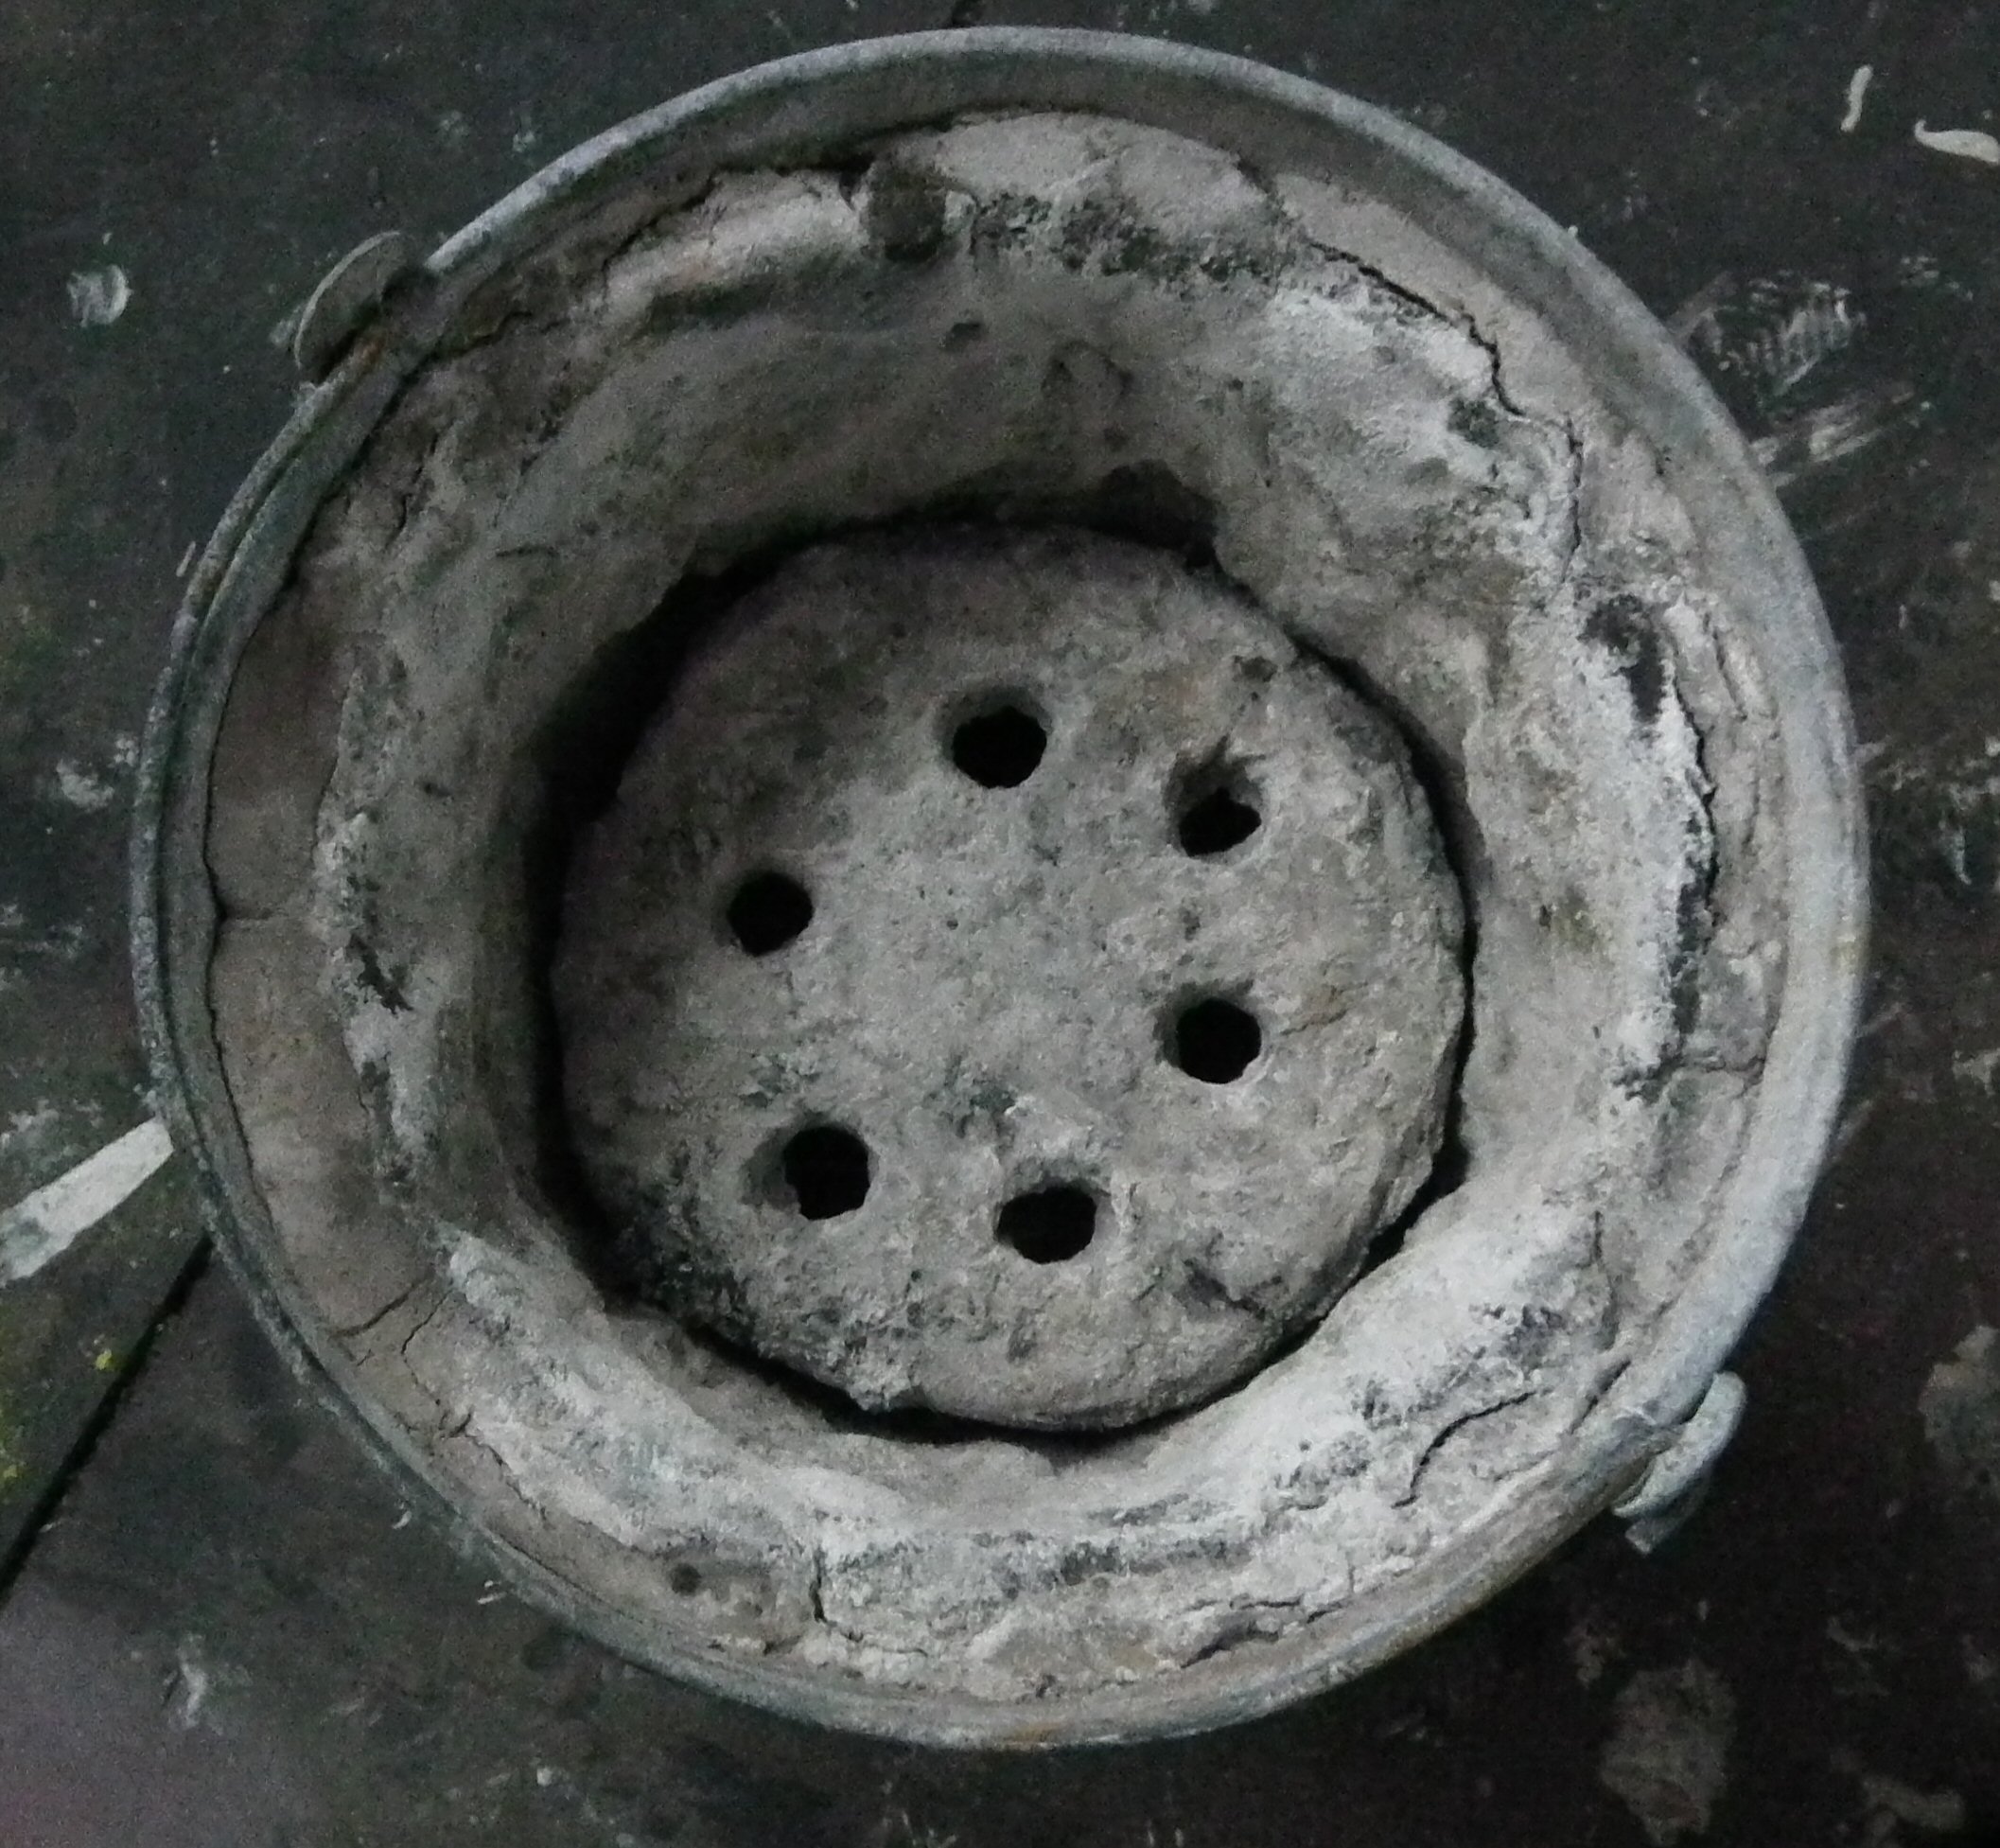
I took out the tube that I was using for the tuyere and built a small wood fire in the furnace and faced it so the tuyere hole faced the breeze. The fire lit quickly and I kept it topped up with scrap wood and a little charcoal and let the whole thing burn down. Once it was cooled, the material was hard as a rock. The next step was to make the tea pot stand. It’s simply a flat plate that fits the diameter of the interior of the furnace with holes about an inch from the edge. The tea pot stand allows the air to circulate freely below and then up through the holes to increase the heat of the charcoal. Once that was fired the furnace was ready to use.
Finished furnace after a few firings.
I’ve used the furnace now several times and it holds up well doing high temperature work. My initial fear was that the seams in the bucket wouldn’t hold, but it remains intact after melting bronze and copper. I’ve used it both with bellows and electric pumps.
Furnace with tea pot stand (AKA perforated clay slab in place.
After I made this, there was some discussion about experimental archaeology and authenticity on the EXARC Facebook Group (a group well worth checking out if you have an interest in any aspect of experimental archaeology). I made the point that this isn’t designed to replicate a Bronze Age furnace, but it replicates the conditions of how we believe Bronze Age furnaces performed. Many early experiments were done using modern gas or electric furnaces, however those have oxygen enriched atmospheres. Charcoal fires have reduced atmospheres, meaning that the air immediately around the crucible is free of oxygen. This is good news because less dross and slag is produced since the environment won’t allow the surface of the molten metal to oxidise.
As for electric pumps, sometimes it’s valuable to have a controlled air-flow. Having an electric air pump means that I can control how much air goes into the furnace and replicate conditions from one pour to the next. This way I will be able to have multiple experiments conducted under conditions as close as possible to each other. It would be difficult to replicate the controlled airflow of an electric pump with bellows since there might be times when I get tired or there is some distraction and the air flow is slightly less than for the previous pour. Control in these situations is important for experiments where I would I want to compare the melting times of different alloys and need to control as many variables as possible.
Another advantage is that this furnace always starts out at the same temperature. While a bowl furnace dug into the ground is well insulated, there are often problems getting it dried out or warmed up after a night of rain. While it’s good to have the experience of getting a cold, damp furnace going, it’s also nice to have one where I don’t use up a couple kilos of charcoal getting it dry and heated.
By the way, it’s not only good for metal casting, but with a small grate, it does a good job as a barbeque.
[1] I should note that while there haven’t been any of these types of furnaces excavated in Britain, twice now when I have been demonstrating using a small bowl furnace, field archaeologists have told me that they excavated something that looks identical to what I was working with, but didn’t know what it was and wrote it up as a cooking hearth.
My first foray into experimental archaeology came when I was working at the Science Museum of Minnesota, where I was cataloguing the metals collections there. It’s not well-known, but during the Late Archaic Period in the Lake Superior region of North America (Minnesota, Northern Ontario, and Upper Michigan) Native Americans worked with the copper that was easily found there. The culture was aceramic, meaning that they did not make pottery, and so did not have the means to cast or alloy the copper they found. However, they could hammer it, anneal it, and create ornaments such as earrings, finely detailed cut work, along with spears, knives, and arrowheads. It was while I was examining the spears that I started to wonder how they were made. The spears were triangular in cross section and I noticed that they were perfectly smooth on two sides, but on the third side the metal was folded with an almost flowing appearance. This was accentuated by fine corrosion on the surface. Knowing these weren’t cast, the first question I had was how they could have been hammered into a raised shape. The clues were in the surfaces and I reasoned that rather than being poured into a mould, they were hammered in, and the rougher surface was where the metal was packed in and hammered from the top. I carved a block of walnut to create a triangular spearhead and then lit a charcoal fire to anneal the copper. I had a friend standing by with bellows, but they weren’t needed. The charcoal fire aided by a light breeze was hot enough to anneal the copper. The metal was easily hammered into the mould using a hand-held hammerstone. The metal pushed into the mould smoothly along the sides and the top surface was rough from my pushing the edges of the metal from the top edges of the mould and folding them back onto the surface of the spear.
I was not only fascinated by the process of making a spear, but also how I had deduced it from examining the original spears in the museum and puzzling out the details. The whole thing was eventually written up and published in The Minnesota Archaeologist. After the first foray into experimental archaeology, I was hooked. From that time forward, I closely examined tools and metal objects, trying to figure out how they were made, what processes were used, and what tools were needed, how those tools were made, and receding back infinitum.
This is the crux of experimental archaeology that sets it apart from re-enactment or generally doing craftwork: experimental archaeology starts with a question. Experiments can be done in a lab in order to control as many variables as possible. Experiments can also be done in the field, but unlike re-enactment, not every tool and object needs to be a replica of an original. This is especially true when doing experiments in prehistoric crafts, where few of the original tools still exist. When doing experiments, I can use steel tongs and graphite crucibles, as long as they will not affect the parameters of the question. Likewise in some experiments, for instance trying to learn the melting times for different alloys in a charcoal fire, rather than using bellows I will use an electric pump to make sure that each sample was created under the same conditions. Each experiment must be thought out ahead of time and choices made for each step. The important thing is not to be distracted by the possibilities, but to always focus on the question and to create the conditions that will give a meaningful answer, even if it is inconclusive and leads to other experiments. It’s also important to measure, weigh, time, and quantify as much as possible. For example when experimenting with smelting, the ore should be weighed before and after processing. How long it took for the ore to smelt should be timed. The amount of charcoal used should be recorded. The size of bellows and furnace should be noted. Finally the slag, dross, and refined metal should be weighed and recorded in order to find out how much metal was produced from the ore. The slag could be examined to see if there is any metal left, and note if it could be re-smelted. It can be tedious work at times, and a pain to remember to weigh, record, and photograph everything, but the results will be worth the effort, because the information hasn’t been lost. The data from the experiment you did will lead to more experiments, but will also yield useful information for others.