I have a Patreon page where I post stories about my travels and experiences casting bronze around the world. Last year I was in Moscow for the Times and Epochs festival, casting bronze with local reenactors. I learned a lot, both about different ways to cast bronze, and also about Moscow and Russia. The story is being told in installments. The first two can be found here:
If you’re interested in reading more, there are both public posts and ones that are available to my Patreon subscribers. There are also other benefits for supporters, including copies of powerpoints and articles, or even postcards sent from wherever I travel. Check and out my Patreon page here and consider a small contribution to support my ongoing work in experimental archaeology.
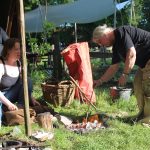
Last year the Bronze Casting Festival was a wonderful experience. People from all over Europe came and exchanged information about bronze casting and metalworking techniques.
Here are a few photos of the First Bronze Casting Festival in 2017.
My talk on air flow and furnace design
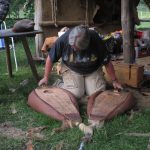
Casting with Heide Nodegaard
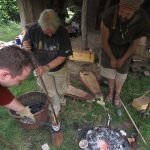
Casting with Mark Vyvyan-Penny
Pumping Viking bellows. It’s a bit more work than Roman ones, or even bag bellows.
Pouring into stone moulds.
Stirring the bronze to make bronzing powder.
My furnace and bellows
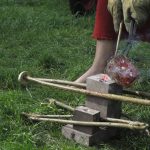
A small Roman furnace designed for jewellery casting.
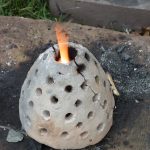
Bronze Age Bunsen burner
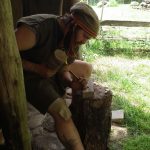
Chris Stein carving stone moulds.
I’ll be returning there again this May and furthering my experiments in metal finishing. In addition to casting, I’m interested in using metal oxides as colorants for enamels and how they are affected by the reduced environment of a charcoal furnace. In the past I did a lot of metal enamelling in an electric furnace. This will be a chance to explore how the process of enamelling could have been developed. I might even have a chance to make some glass while I’m at it!
I was visiting my sister in the autumn of 2016. She has a bit of landjust outside Albuquerque, New Mexico, so I asked her if I could build a furnace and do some casting there. I’ve built plenty of pit furnaces, so this time I wanted to build one that was above ground and a bit more visible. It would also mean that no one would trip and fall if they forgot where I put the thing.
The first task was to get the basic materials: Clay, Sand, and Horse Manure.
I thought that the clay would be the biggest hurdle. However my sister’s neighbour happened to be a sculptor who works in both iron and ceramics. She went to her regular clay supplier and got a couple feed sacks full of dried clay for free. Potters who work at wheels, or work with students end up with a lot of clay that is scraped off of workbenches and wheels that is hard to re-use. It often has a mixed consistency, it’s lumpy or part dried. If they want to use the clay again, it has to be reconditioned. So, they take their sacks of scrap back to the place where they buy the clay and pay to have it put through the mill. Since it’s not really usable, some potters are willing to just give it away. So thanks to Liz Fritzsche, who does amazing and beautiful work in porcelain, I was able to get started.
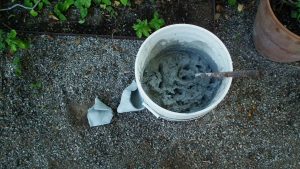
Mixing dried clay. Once it’s wetted, I’ll add sand and manure
I threw some of the dried clay into a five gallon bucket and poured in enough water to cover the clay and let it sit. It was squishy and workable in a few hours. Next up was locating horse manure. A friend of a friend has horses, and they were grateful to have someone who would haul away a couple of barn buckets full of manure. The final bit was the sand. My sister did have some beach sand that she’d bought for the garden, but I was more fascinated by the soil there. Her land is in the old Rio Grande River Valley, and the soil is a mixture of silty sand and a little clay that had been pounded to a powder. The soil was almost the consistency of dust. It mixed in perfectly and later I found the mixture was highly resistant to cracking.
The ingredients were mixed with some water, stomped, and the proportions were adjusted until it was perfect. New Mexico is a lot drier than England, so I ended up adding more water than usual as I worked. It was also nice knowing that it was unlikely for any rain to fall while I was working.
The silt/clay/dung mixture made a durable clay, and after I flew back to Minneapolis, I was please that the crucibles and moulds I packed in my check-in luggage survived airport handling.
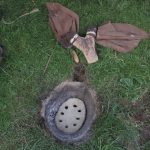
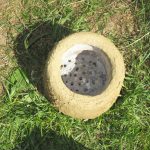
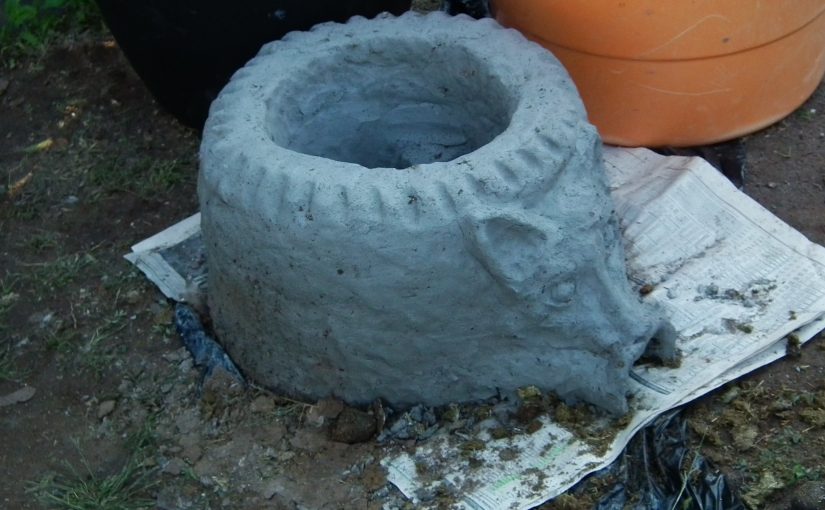
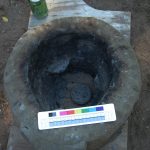
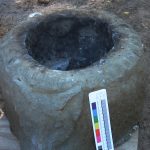
Note the small tabs inside that will support the teapot stand
The furnace walls are about 8 cm wide (about the width of my palm) and the inside diameter is about 25 cm in diameter. I let it dry for a couple days and then moved it over to an unused area behind a greenhouse where I would have more room to work. I set a small fire with cottonwood branches, fed it for a couple hours, and then let it die out overnight.
The thickness and upper dimensions of the furnace
The height of the furnace
Mavis the dog immortalised in a furnace!Mavis in a calm moment. Her nickname is the Dog-nado.
We all like to put some decoration on our furnaces. My students have done everything from dragons to turtles to cats. I had been thinking about doing some decorations imitating the local petroglyphs, but as I was working it just seemed natural to do a portrait of Mavis, my sister’s exuberant German Shepherd.
Finally I adjusted the mix to have a bit more of the silty sand and horse dung to make the teapot stand and crucibles. For more information about teapot stands and how they work in furnaces, check out my article on the Umha Aois website here.
Later I added more water to make the slip for dipping waxes in for the first stages of mould making. The silt made a wonderfully fine mould that picked up all the details. Honestly, this mix was as good as jeweller’s investment for picking up detail.
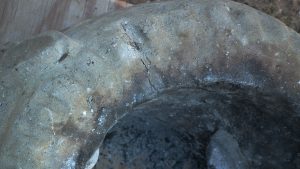
I had some cracking on the upper part of the furnace, and noted that the part that cracked was where I used the commercial sand. The silty New Mexico soil held up much better. If it weren’t so heavy (and probably not allowed) I would have hauled bags of the soil on the plane home to use for more projects.
Detail of cracking on furnace. It was fixed by rubbing in some of the clay mix.
Both Mavises performed very well (Mavis the Dog is into barrel racing and advanced obedience classes). I’ll be interested to see how it holds up over the winter. Winters in New Mexico tend to be mild, so I’m hoping that the Mavis furnace will be available for friends in Albuquerque to use for some time to come.
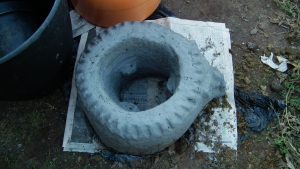
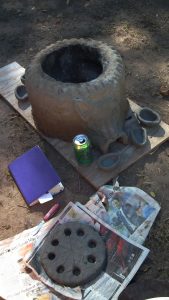
The Mavis furnace, teapot stand, and some crucibles
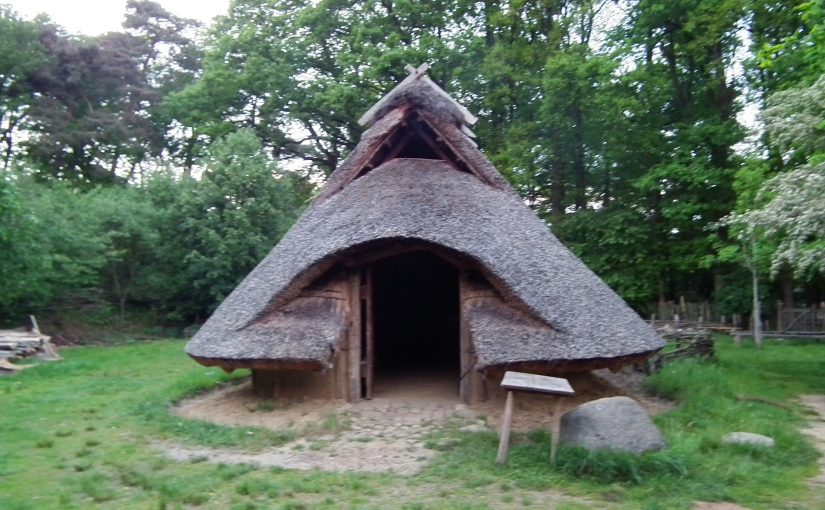
In October 2015 I had the great adventure of doing some bronze casting with Il Tre de Spade (The Three of Swords) at the Archaeological Park and Open-Air Museum of the Terramare in Montale. The museum is located just south of Modena and recreates Bronze Age houses surrounded by a palisade and a marsh, appearing as it would have in the central and later phases of the Bronze Age there (1600-1250 BC). The museum hosts demonstrations and activities, along with a recreation of the original excavation.
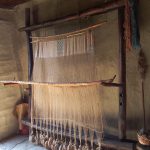
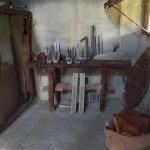
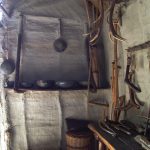
The houses are nicely furnished, with well laid out areas for cooking, sleeping, food storage, and workshops. One house has a workbench for wood and antler working, and another area set aside for weaving and textile crafts. The other has a metalworking workbench with stone anvils, moulds, bellows, and all the needed kit stored neatly on shelves and a work bench. Unlike the recreated roundhouses that are often seen in the UK, you can get a good idea about how the ancient people lived here and where they put their all the things they used in every day life.
The ubiquitous Bronze Age warp weighted loom. This one has some rather nice textile in the works.
The cooking hearth and oven. The little device on the side is a wonderful little warming oven with charcoal in the bottom and the food on top. I like to think of it as a Bronze Age microwave.
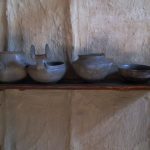
Pots on a shelf
Space for metalworking tools and supplies
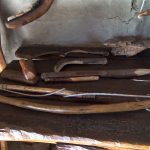
Some of the wood and antler working tools
The woodworking shop
I had been invited to join the casting demonstrations by Claude Cavazzuti, who is also a member of EXARC. He is one of Il Tre di Spade (along with Pelle and Scacco) , who were some of the first metalworkers at the museum after it opened several years ago. They do regular demonstrations (sometimes with hundreds of visitors per day) and also run workshops that introduce people to Bronze Age casting and metalworking with a focus on the Middle and Recent Bronze Age (1700-1150 BC) of Northern Italy.
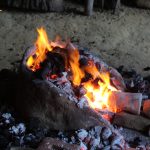
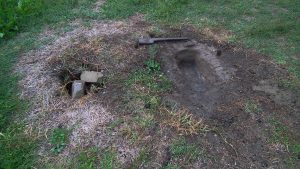
The furnaces there are small clay-lined trenches about 25 cm deep and 50 cm long, something that would be nearly invisible archaeologically and easily interpreted as a cooking hearth (and really, there’s no reason why they couldn’t be both). The furnaces heat up quickly and work efficiently. The charcoal is concentrated around the crucible with more warming beside it so that the fuel is hot before it gets raked around to cover the crucible.
The furnace. Not much to see here, and even less after a few thousand years!
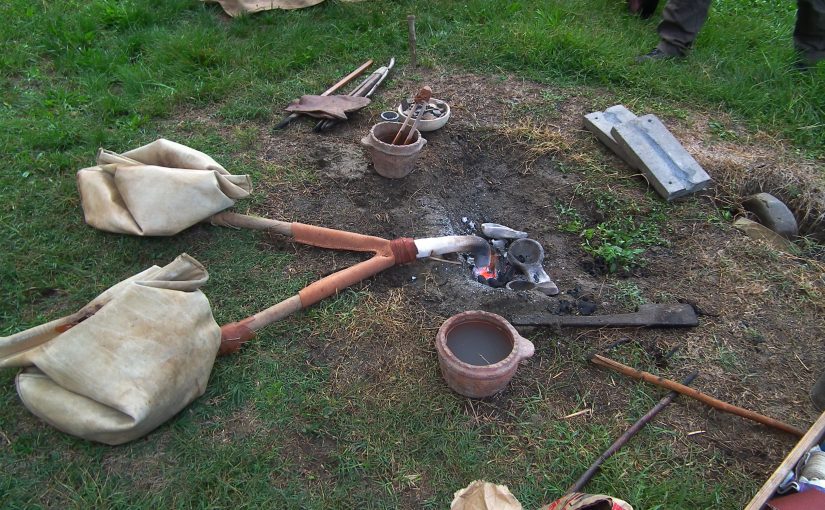
My first new introduction was the bag bellows. They were larger than I have used in the past, and made of much heavier leather. They put out an enormous volume of air, and their size also allows the person pumping the bellows to sit on a low stool.
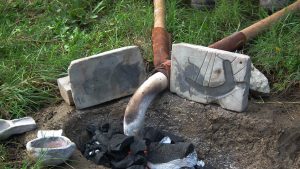
The real challenge for me was the valve and the way the bellows open at the top. The bag bellows I’d used before have straight sticks in the handles that either open parallel to each other, or are hinged at the back to open like a “V”. These bellows have two sticks on both sides, so that they open into a diamond shape making another hinge where your hands hold the bellows. It took a little bit to get used to them and to figure out where best to position my fingers. I never did get it quite tight enough and could feel a bit of air blasting on the back of my arms, but they still delivered a powerful amount of air. The tuyere was a large clay tube that curved downwards at a 90° angle, and was positioned so that it was directly above the crucible. This meant that the charcoal had to be moved frequently to keep the crucible covered. Without the layer of charcoal above, the air coming from the bellows would cool the metal in the crucible.
One nice innovation is that they put a large stone in the bottom of each bag. That prevents people who are new to bellowing from lifting them too high and causing the bags to collapse.
Casting in Stone and Sand
The crucibles are a flattened dish-shape, with some that were larger and a bit more of a bowl shape to hold more metal. They have a grooved tab on one side that is used as a handle, and have a small lip for pouring. The shallow design and lip cause the metal to pour more quickly and flow out in an arc, rather than almost straight down like the triangular bag-shaped crucibles used in Britain. It took a couple tries to get used to the trajectory of the metal in order to get all the metal in the pouring cups.
The shallow crucibles also mean that the pouring has to be done more quickly than with the deeper crucibles that I was used to.Because they are wide open, the metal cools quickly, so there is little time for dragging out charcoal and skimming. As soon as the metal was molten, we gave it a quick stir with a stick, pulled the crucible out with the wet tongs, and poured the bronze into the mould while holding the stick across the top to keep the charcoal back.
The tuyere with the moulds set next to it to warm up. The small bowls are the crucibles. Note that they are used without lids.
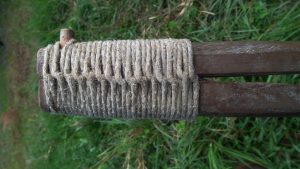
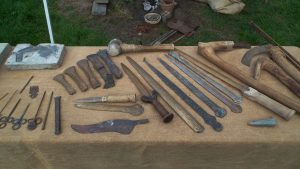
The tongs they use are beautifully crafted from wood and cord. They are kept in a bucket of water to keep them from burning when holding the heated crucible. The entire organisation of tools and materials is efficient and elegant, and there is nothing that could not have been made from materials available during the Early Bronze Age.
Beautifully constructed wooden tongs
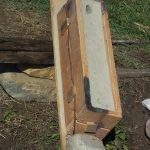
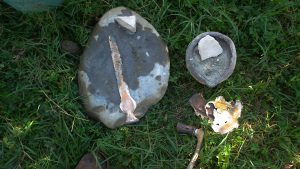
For this session we used the stone moulds that were on display in the house. The moulds were made of a very fine-grained local stone, the same that had been used by the Terramare circa 3500 years ago. The moulds were warmed next to the furnace and then strapped together with leather strips. We took turns bellowing and pouring.
We cast sickles, knives, and daggers using the stone moulds. Later we moved on to using sand moulds. I borrowed one of the antler spindle whorls from the woodcarving house to see if I could try casting that as an experiment. It worked sort-of. It will take a bit of work to get finished up, but I think with a couple more tries we could have got it spot-on.
I was wearing my bronze torc bracelet that day and one of the new people wanted to try casting that. We used it as a model for a sand mould and after a couple tries, we got a cast that made a perfect duplicate.
Some of the replica tools and ornaments cast at the Terramare Museum
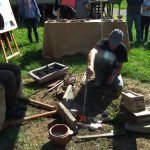
Casting a bronze sword
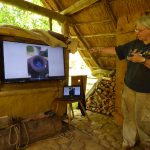
The museum was also performing public demonstrations that day. The main event was casting a sword using a sand mould. The sand they use is local, and perfect for casting. Commercial casting sand consists of fine sand mixed with dry bentonite clay. The sand from the Po River delta is exactly that, sand that has been reduced to almost a powder by erosion, combined with clay and silt that has been washed into the river (I encountered the same natural mixture in Albuquerque in the dry bed of the Rio Grande River Valley). The Po River sand leaves a much finer texture on the finished objects than the coarser commercial sand that I have used in the US and the UK. Looking at the quality of the sand, I was able to understand how different sands might affect the regional quality of casting, and might even have had value as a commodity.
The mould for the sword was made using the standard cope and drag method, with the pouring cup on the flat side of the sword, rather than pouring from the top. A large vent was also placed at the tip of the sword. Before casting, the mould was propped up at an angle. As the crowd gathered and settled onto benches under a marquee, Claude explained Bronze Age metalworking techniques, and then the sword was cast. The angle and the pour are calculated so that the metal cools just before it exits the vent hole at the bottom. Everyone was impressed and even more so when the perfectly cast sword was taken from the mould.
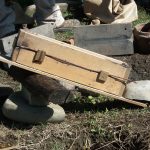
The sand mould is set up. The hole at the top is the pouring cup. There’s a smaller hole at the bottom, at the tip of the sword that acts as a vent.
Another view of how the mould was propped up to allow the metal to flow.
Getting ready to pour the bronze
Often after the casting is done for demonstrations the bronzes are taken home and finished using drills and angle grinders, but not here. We had a relaxing time using wet sand on the hard, fine-grained anvil stones to grind off the flashing and excess metal. Some smaller stones that had a coarser texture could be held in the hand and used for working the inside curves and corners. I’d brought my small socketed hammer along and we used that to break off some of the excess metal. Between light hammering and patient grinding, the daggers were smoothed rather more quickly than I would have expected.
A nice flat anvil stone for grinding the flashing off of the dagger blade. There’s evidence from the originals from this area that the holes for rivets were punched rather than drilled, or cast in place. Other stones are used for coarser grinding. Note my hammer at the bottom. It came in handy for breaking off some of the flashing. A bit of time travel here since this is a replica of a Late Bronze Age hammer!
While we were casting, more tour and school groups came through to watch more casting demonstrations. School kids also had the opportunity to make their own copper bracelets. There was a square of tables set up with small stone anvils and hammerstones. Punches and chisels were available so they could decorate the strips of copper to make bracelets in patterns that would not have looked out of place in a Terramare village.
It was a great day, and one that was full of new experiences. It was particularly interesting to see how much variation there is in doing the same tasks and getting successful results. The different types of furnaces, moulds, bellows, and crucibles make for differences in how tasks are performed. Other small acts show variation between different metalworking groups. Tasks such as turning the crucible over to remove dross and leftover metal after casting was done into the furnace here, where in Ireland we have always done that on the ground next to the furnace. These are small things that could be seen archaeologically if excavation is done carefully, but also shows how customs and metalworking traditions develop with regional differences.
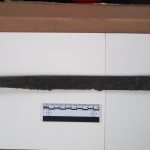
Knife: This is as cast in commercial casting sand. It will take a bit of polishing, but I am looking forward to finishing and using it.
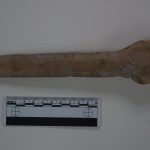
Dagger: This was cast in a stone mould and is partially cleaned (it’s the same one as in the photo above). The pouring cup will be cut off and rivet holes punched into the arched end.
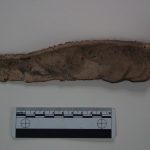
Sword: This was cast in the natural sand. It’s difficult to see, but the texture is much less gritty than the knife but smoother than the dagger that was cast in stone. It just needs to have the sprue and vent removed and a bit of the flashing taken off before punching the holes for the rivets.
Sword seen from the edge. Note the wide shallow pouring cup, and the angled vent at the tip of the sword.
A special thanks to Il Tre di Spade, Claude, Pelle, and Scacco and the staff at the Parco archaologico e Muse all’aperto della Terramare for inviting me to participate in casting. I would also like to acknowledge Markus Binggeli & Markus Binggeli who are masters of bronze casting and replicating ancient metalworking techniques. They are mentors of Il Tre di Spade, and provide both inspiration and technical expertise for experimental archaeologists.
Useful links
If you’d like to learn more about the Early Bronze Age in the Modena area, the work of Il Tre di Spade, and the Terramare Open Air Museum in Montale you can find links below.