I was invited to cast bronze at an event in Germany, but the catch was that I needed to dress in period costume. The skirt and tunic were easy enough, but I knew that the people there would look at my Iron Age shoes and comment on how anachronistic they were. I know, because it’s happened in the past. There are few Bronze Age shoes that have been preserved, and the most famous were the ones worn by Otzi, the Ice Man whose body was recovered in the Alps in 1991. There are a few websites describing how to make them, including one with a video,
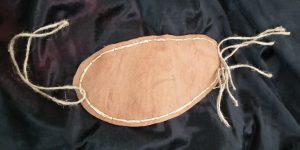
Following the instructions onthis website,I cut out a pair of soles from the same leather I used for the Iron Age shoes, and punched holes around the perimeter. I didn’t have leather lacing, so I stitched them with multiple strands of sinew. Then I got some jute cord. This is made from the inner bark of the lime, or basswood tree (tillia sp). It is essentially the same as the cord used for Otzi’s shoes. I cut several lengths and started plaiting and knotting.
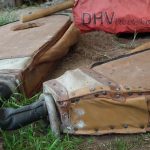
Lacing the Bronze Age shoe sole
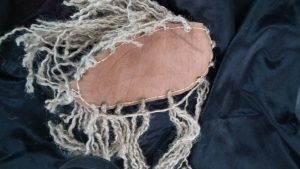
I quickly realised that it wasn’t going well. I couldn’t tie the knots while wearing the shoes, so I made a sort of shoe last out of socks. I just wasn’t enjoying the project and it was looking a mess. I just wasn’t getting the measurements right and the shoe was too large.
Putting the cords on the Otzi style shoe.
I just wasn’t producing what I wanted, so it went on the back burner. When it was about a month out from the event, I nagged myself into getting the shoes done. The problem was that I wasn’t happy with how they were turning out. It would be easier if I was making them for someone else, where I could tie the knots while they wore the shoes. It was then that I convinced myself that I didn’t need to slavishly copy this particular shoe. The materials were proper for period, I just needed to find a way to make them so I was happy while using a technique that would be consistent with the Bronze Age. I decided to make a netted upper rather than one that was plaited and knotted. I started over, this time using a single length of cord. I measured off a length that was 5 times the circumference of the sole (note, this finished about half the shoe. On the second one I measured 9 times the circumference and that worked out perfectly).
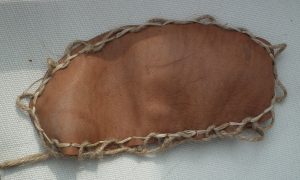
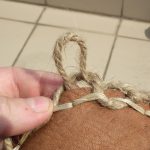
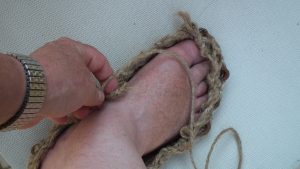
I wove the cord in and out of the sinew, skipping every other stitch and leaving a small loop at the top near the edge of the sole.
Weaving the cord through the sinew to make the upper part of the shoe
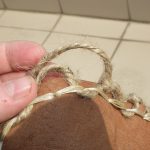
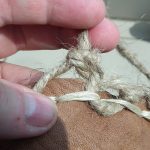
Then continuing around, I brought a loop through the loop next to the sole and then threaded the cord through that to make a knot. It was easily adjustable.
Bringing the cord through the loop
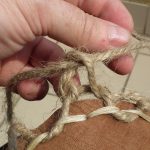
The loop in loop
Pulling the cord through the upper loop
Pulling the cord through the upper loop, another vieww
Pulling the knot tight
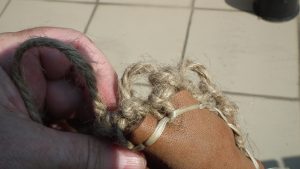
I made the first round fairly tight so that it would pull the sole up around my foot. I did the same for the second round.
Fitting the shoe to my foot. At this point the netting is fairly tight.
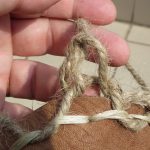
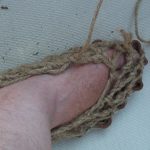
On the third round I made the loops larger because I wanted a netted effect. If I wanted, could continue making the loops smaller that would result in a denser fabric. At this point it was easy to work on the shoe while wearing it.
Making the loops larger to make a more open netting.
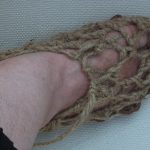
After a couple more rounds I started making the loops even larger. I brought the cord around the front of my ankle, looping the cord between it and the loops closer to my toes.
The netting continues with wider loops
The netting is finished and fits around the front of my ankle.
By this time I was essentially done. It took me about three hours for both shoes, working at a relaxed pace. I had a fair amount of cord left over, so I wound that around the top cord of the shoe to reinforce the opening and to give it a bit more of a finished look.
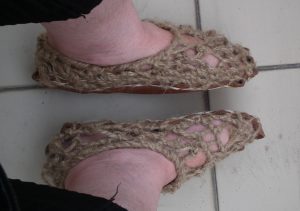
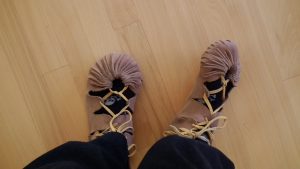
The finished shoes
I made this pair fairly tight because I figure that both the leather and cord will stretch over time. Still, they are easy to slip on and off, and are comfortable for walking. I could make some leather uppers to go over the netting. Otzi’s shoes had that, although there is debate as to whether the leather was on top of, or under the cording. A project for the future is to learn nålebinding to make some socks.
Sometimes you just need a new pair of shoes. I’d been wanting to make some of the replica shoes I’d seen online. there are a few good sites where you can find patterns and step by step tutorials.
Kelticos has a number of different patterns that you can download.
I followed the instructions on this site. It goes step by step and practically no-fail. I however am a bit more cautious and rather start with the leather I made a pattern out of brown paper.
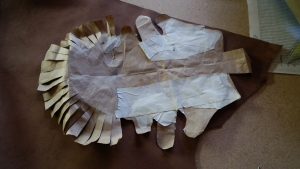
brown paper pattern for a pair of Iron Age shoes.
Once I was confident that I had a good fit with the paper pattern, I bought the leather that I needed. One thing that few sites describe is the type and weight of leather needed. I bought some cow leather that was supple, but not stretchy from Cox Leather in Albuquerque. The place is an amazing resource for hides, rawhide, leather, skins, and really anything leather related. They also ship!
Leather thickness in the US is measured by the ounce, and in mm in Europe. The leather I bought was about 8 oz / 3.2 mm / 1/8 inch thick.
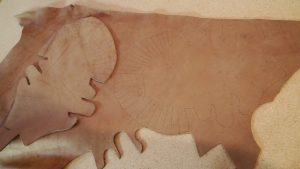
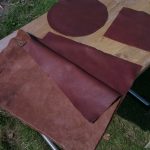
The pattern laid out on the leather. I traced the right foot and then flipped the pattern over to trace the left foot.
Once I traced the pattern on the leather, I cut the shoes out using good sharp scissors and punched the holes for lacing with an awl. It’s important to use an awl or punch rather than cutting the hole with a scissors since a round hole pushed through the leather is less likely to tear than a hole that is cut.
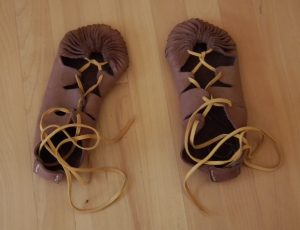
The shoes all laced up.
I stitched up the backs with sinew. I followed the directions and stitched the sides of the heel to the heel tab straight up. It ended up a little loose. When I get the time I’ll restitch them so they come in a little tighter on the top. Another modification will be to put more of a sole on them. Some options are to cut an insole out of rawhide and sew it between the inside of the sole with another, softer leather insole on top. I might line it with some sheep skin, too.
A comfy fit.
First posted on 16th November 2016
Since I first posted this I have worn the shoes often and have come in useful while working at the Bronzezeithof in Germany. They are holding up well after a year, although I don’t wear them every day.
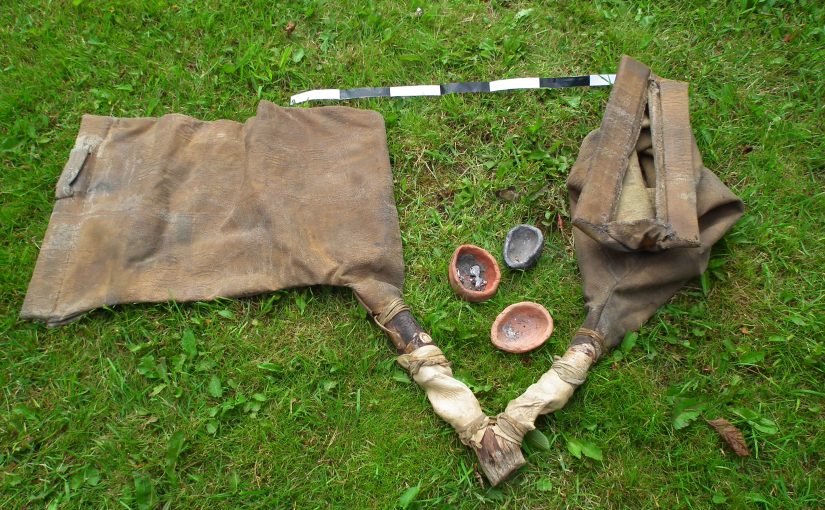
Bag bellows might be the oldest form of bellows used. We don’t know for certain because they are made entirely of organic materials, and so none survive in the archaeological record. Because they have the advantage of being portable, lightweight, and easy to make, this type of bellows are still in use for iron forging in parts of Africa and South Asia. When you make a pair, you can be as “authentic” as you want, using only wood and leather, or you can use more readily scrounged materials like vacuum cleaner hoses and pleather. There is a remarkable video of Kenyan metalsmiths using bellows made of cement bags here.
In addition to this tutorial, check out the Bellows Forum page where there are variations of bellows designs and some interesting variations.
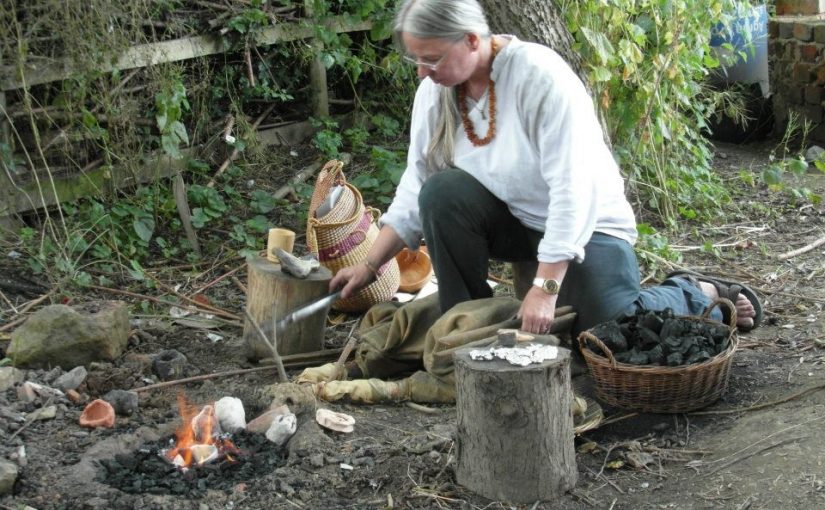
Traditionally bag bellows are made of pliable leather and the usual description is that a single bellow is made from one goatskin. The bellows I describe here are made with upholstery fabric. At the time I made them, leather was too much for my budget. After they were sewn I gave them a good coating of linseed oil that made them both waterproof and airtight. I find it ironic that in the Bronze Age leather would have been readily available, but hand-woven fabric would have been exorbitant. So, these are my ostentatious display of wealth bellows.
How big the bellows you make will depend on what’s comfortable for you. I’ve used very large bellows and ones so small you’d think that they’d never produce enough air to get the job done, but they did remarkably well. What is important is that the size works for you. You’ll be sitting on the ground, or close to the ground (I like a log or a short tree stump with a bit of padding). Sit down on the floor and raise your arm with your elbows bent so that they are lifted a little over waist high. Try not to move with your shoulders. You’ll be pumping your arms up and down for hours, so it’s good to find a height that works for you so that you don’t wear your arms out. Measure that height or get a good idea of how high that is. Then you’ll want to add a few more inches because you want to have the bellows rest on the ground. If you lift them too high, the sides will collapse and you won’t be able to trap the air in them. You also want to add another few inches to wrap around the handles.
Besides the leather (or whatever material you choose) the other supplies you’ll need are heavy waxed thread or sinew, leather or sail needles (depending on the type of material you’re sewing). The handles are made of two straight branches about 3-4 cm (1-1 ½ inches) in diameter, or four boards 3 by .5 cm (1 by ¼ inch) the length will depend on how wide the top of your bellows are. If you use branches, they’ll have to be split lengthwise so that they have a semi-circular cross section. My bellows are about 16 inches wide.
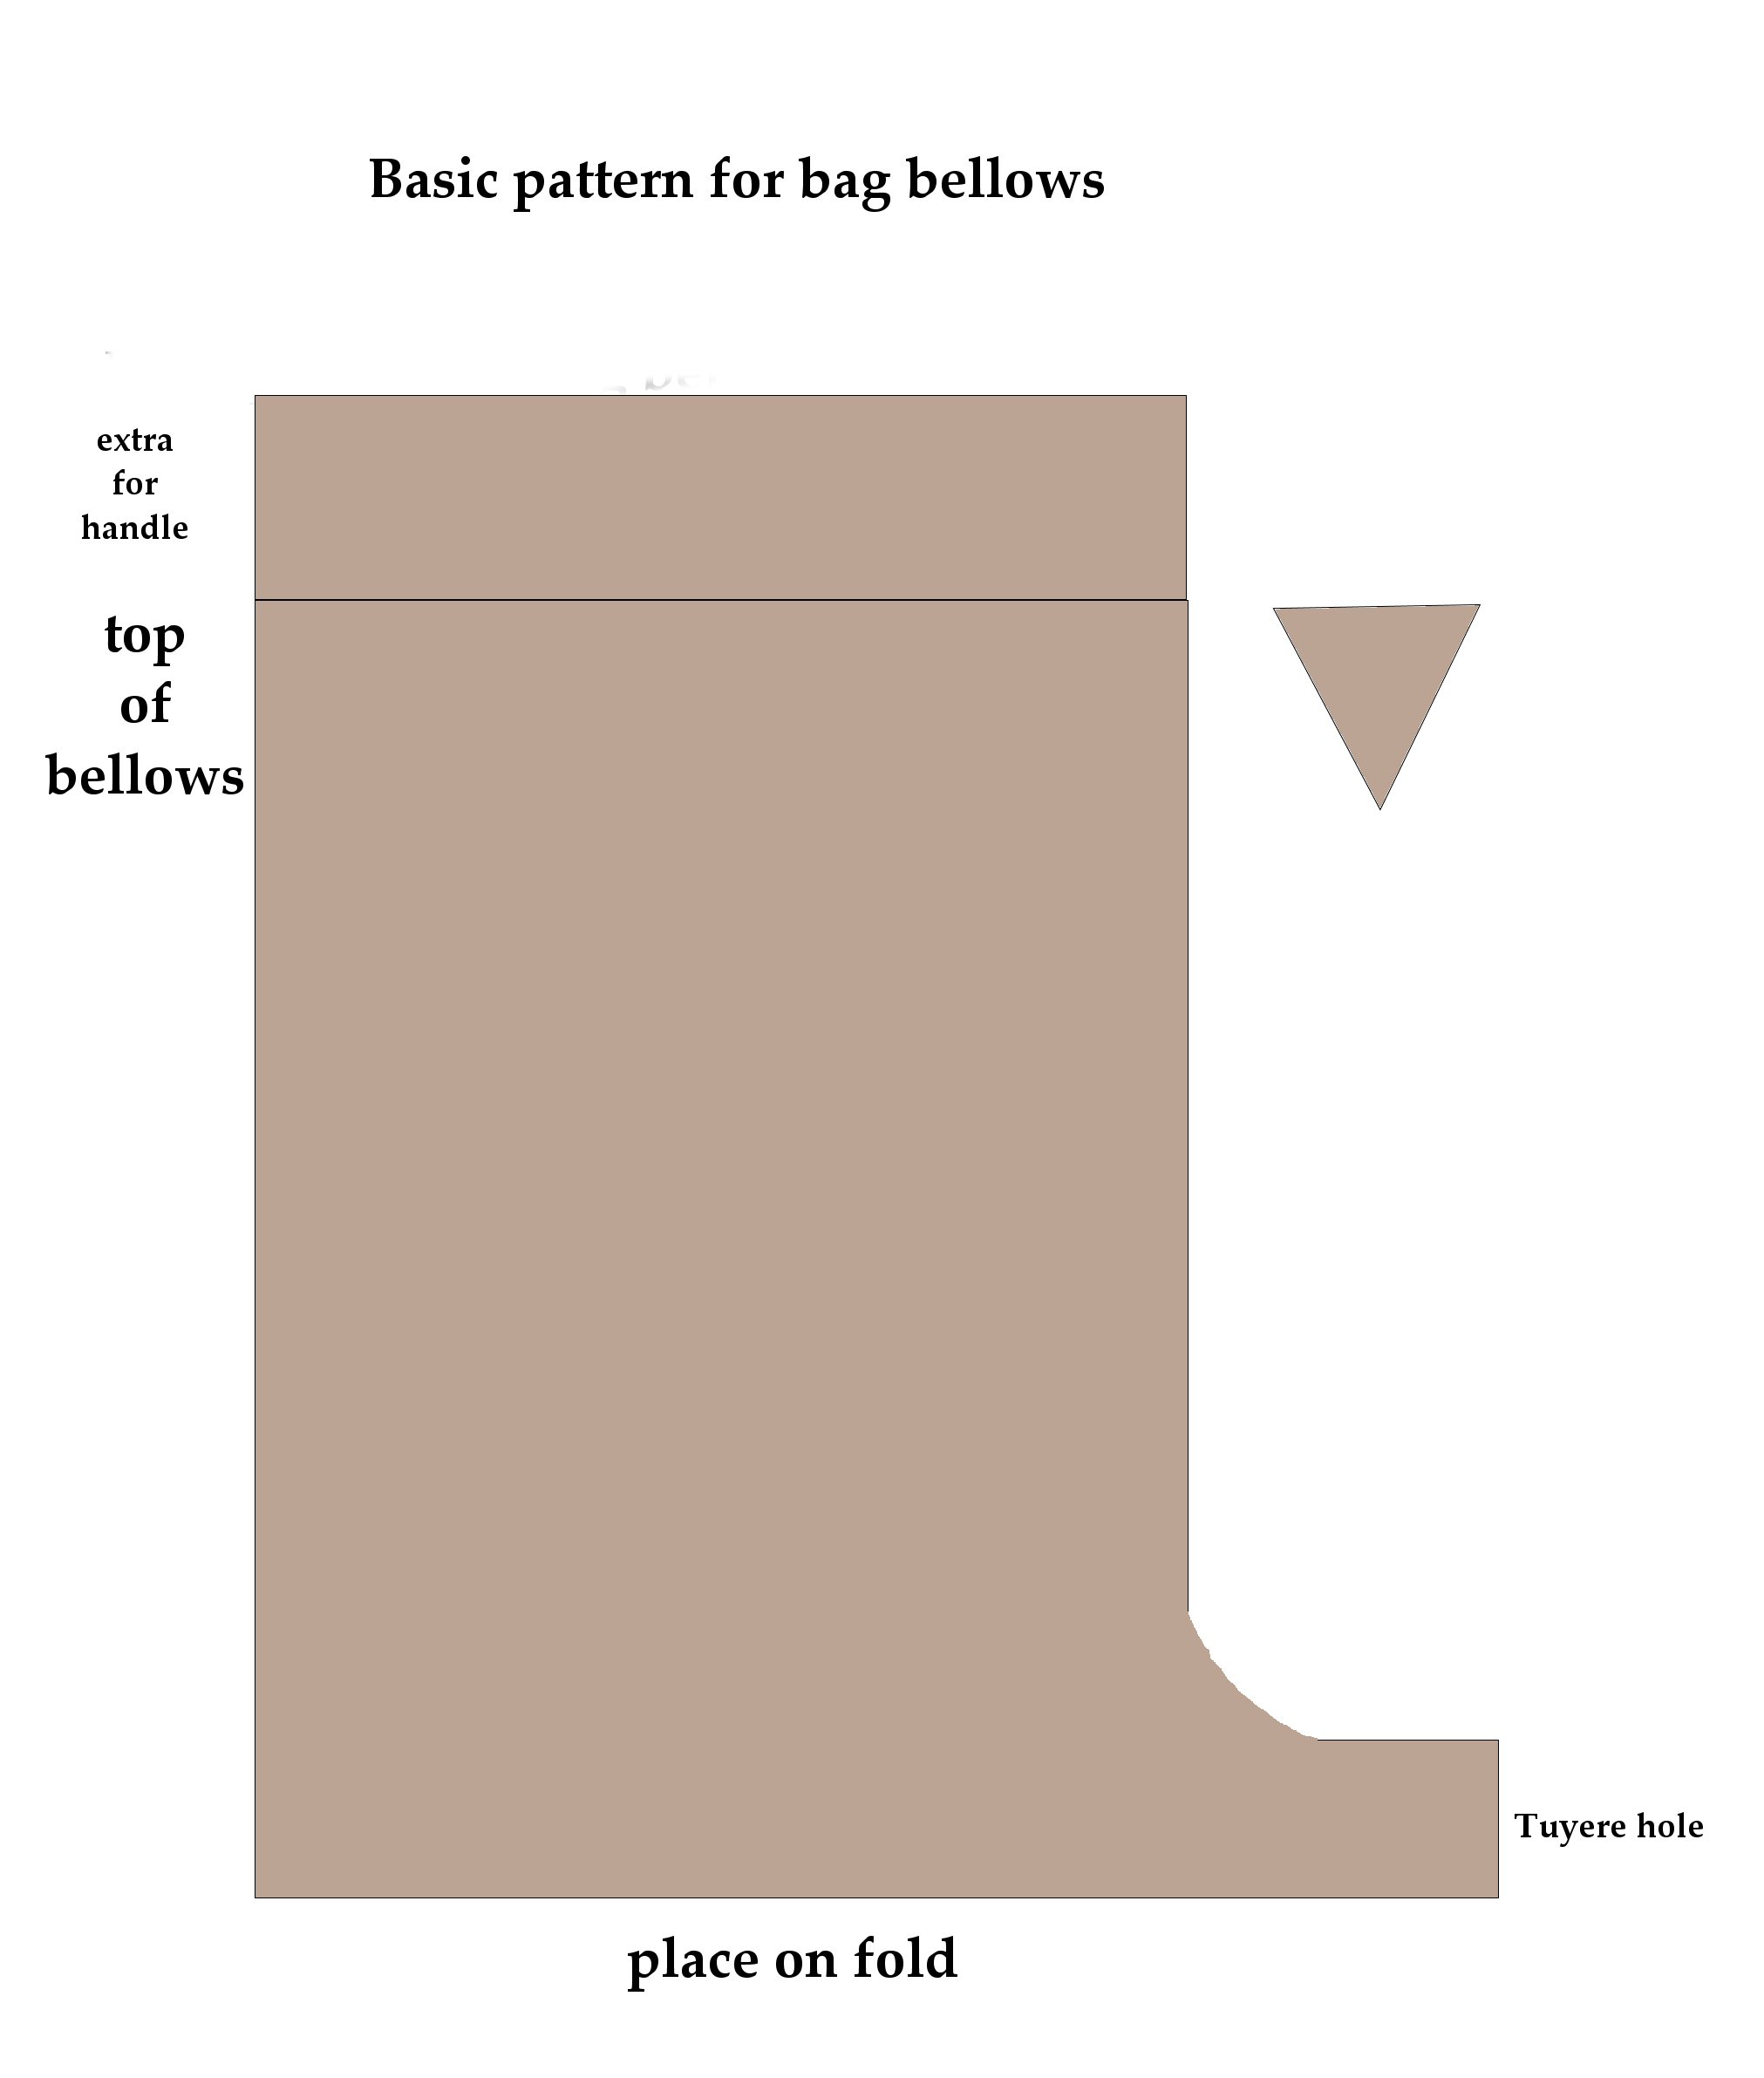
Using your own measurements, adapt the pattern below, adding about 3 cm/1 inch for the seams around the edges, and enough at the top to wrap around the handles. You’ll also need some scrap to make loops for your fingers. The loops are more important than you realise. Getting them right will mean the difference between being able to work for hours, and giving up because you keep getting blisters or losing your grip.
The basic pattern for cutting out a pair of bag bellows.
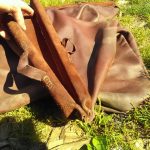
Another useful detail is to sew a small triangle in the front of the bellows, just below the handles. Holger Lonze taught me this trick. It makes it much easier to open the bellows wider and get more air in.
The small triangle set into the front of the bellows. Note that I put in a couple stitches so that when the bellows close, the triangle folds inwards.
The other detail is the part at the bottom that sticks out. This is where the tuyere will fit. The size you make that will depend on the tuyere you make, and also how much air you want to push through to the fire. If it’s too narrow, you’ll be expending a lot of energy pushing air through a small space. Too large and you’ll be pumping furiously to get the volume of air through the tuyere. Mine is about 10 cm (4 inches) and tapers a little so I can fit different tuyeres to it in case I ever want to change it.
The other supply you’ll need is rawhide. Leather strips can work, but they aren’t as durable or tight as rawhide. The best source for rawhide I’ve found is the pet shop. Buy a rawhide chew bone for a dog and soak it in a bucket of water overnight. The rawhide will soften and you can untie the ends and unroll a nice sheet of rawhide. I cut it in a spiral so I have good, long pieces. While it’s wet, you can wrap it and tie it easily. Once it’s dry it shrinks to a hard, tight fit.
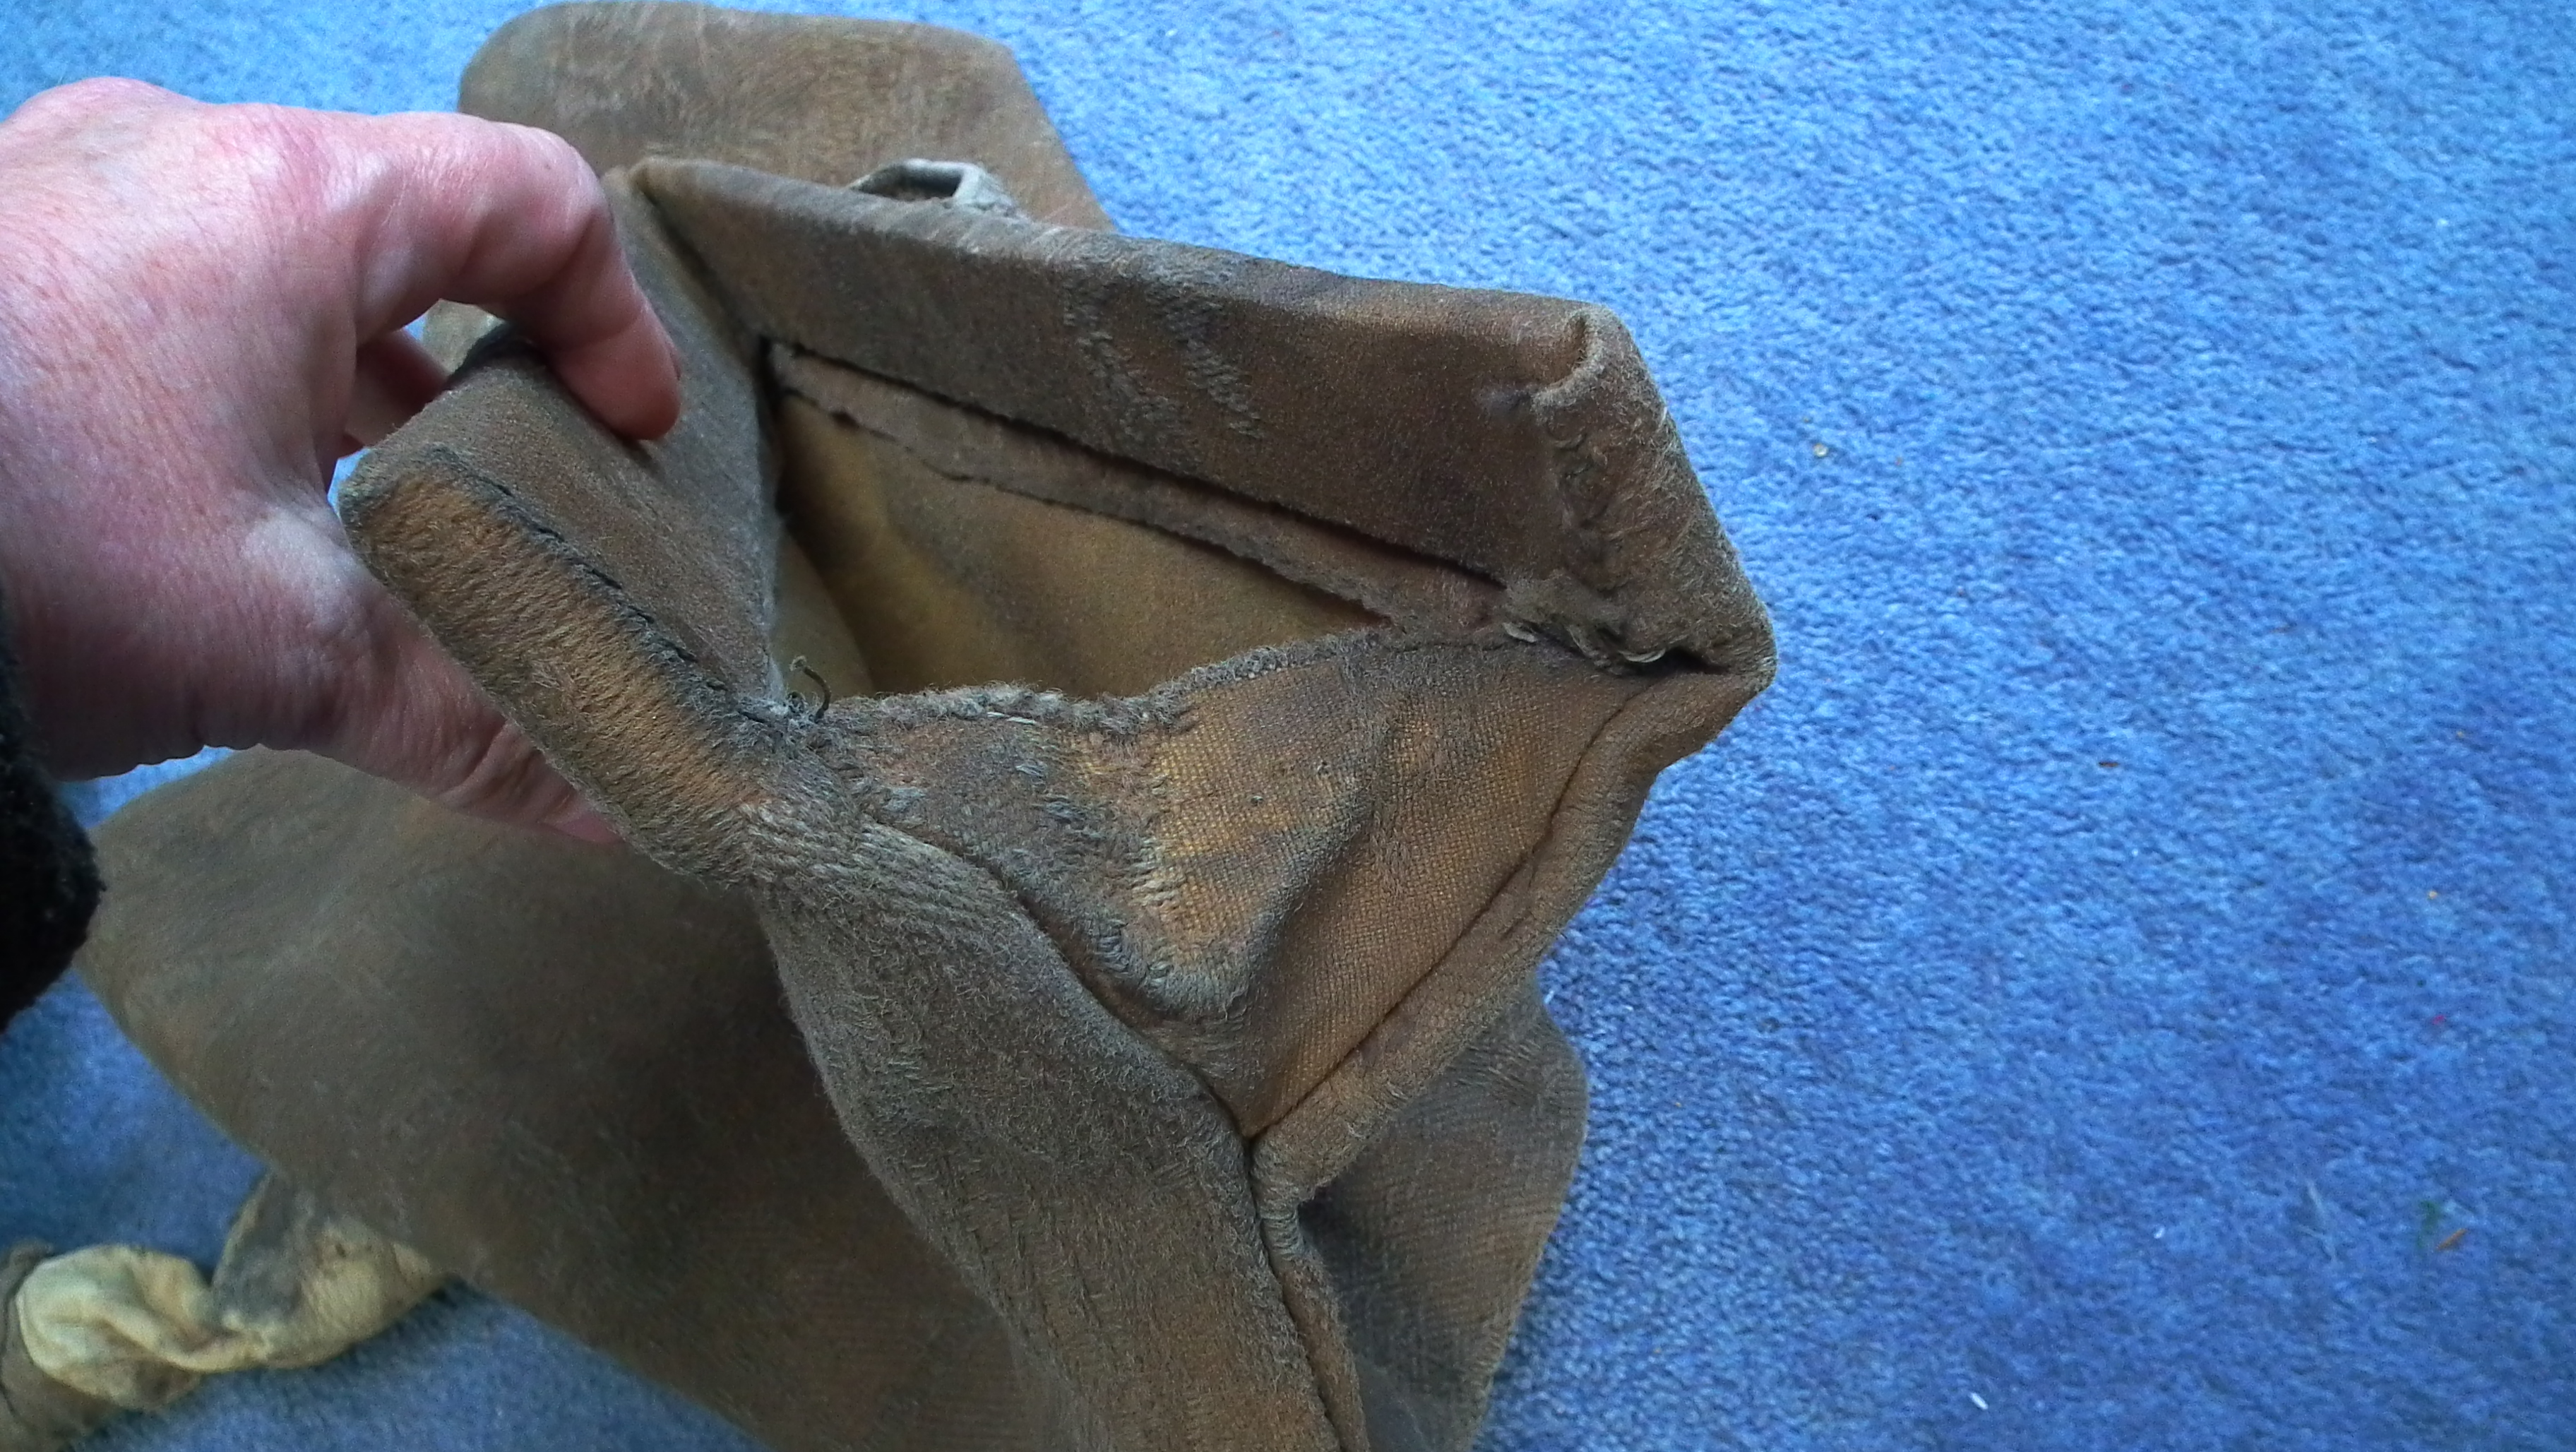
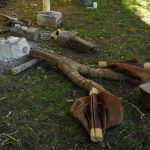
A close-up of where I tied the opening of the bellows to the tuyere
Cut out the leather or material and then stitch it with the outsides together so that when you turn it inside out, the raw edges will be on the inside. Don’t sew it all the way to the top. You want that extra selvedge to wrap around the handles. Make sure you fit the triangle in the front below the bottom edge of where the handles will be.
The next step was the hardest for me. It’s a bit of a pain. You need to wrap the upper selvedge of the bellows around the sticks and sew them tightly into place. If you’re using half-round branches, make sure the flat sides are on the inside so they meet and make a tight fit. Sew these in tight along the bottom of the sticks. It’s annoying if they wobble around.
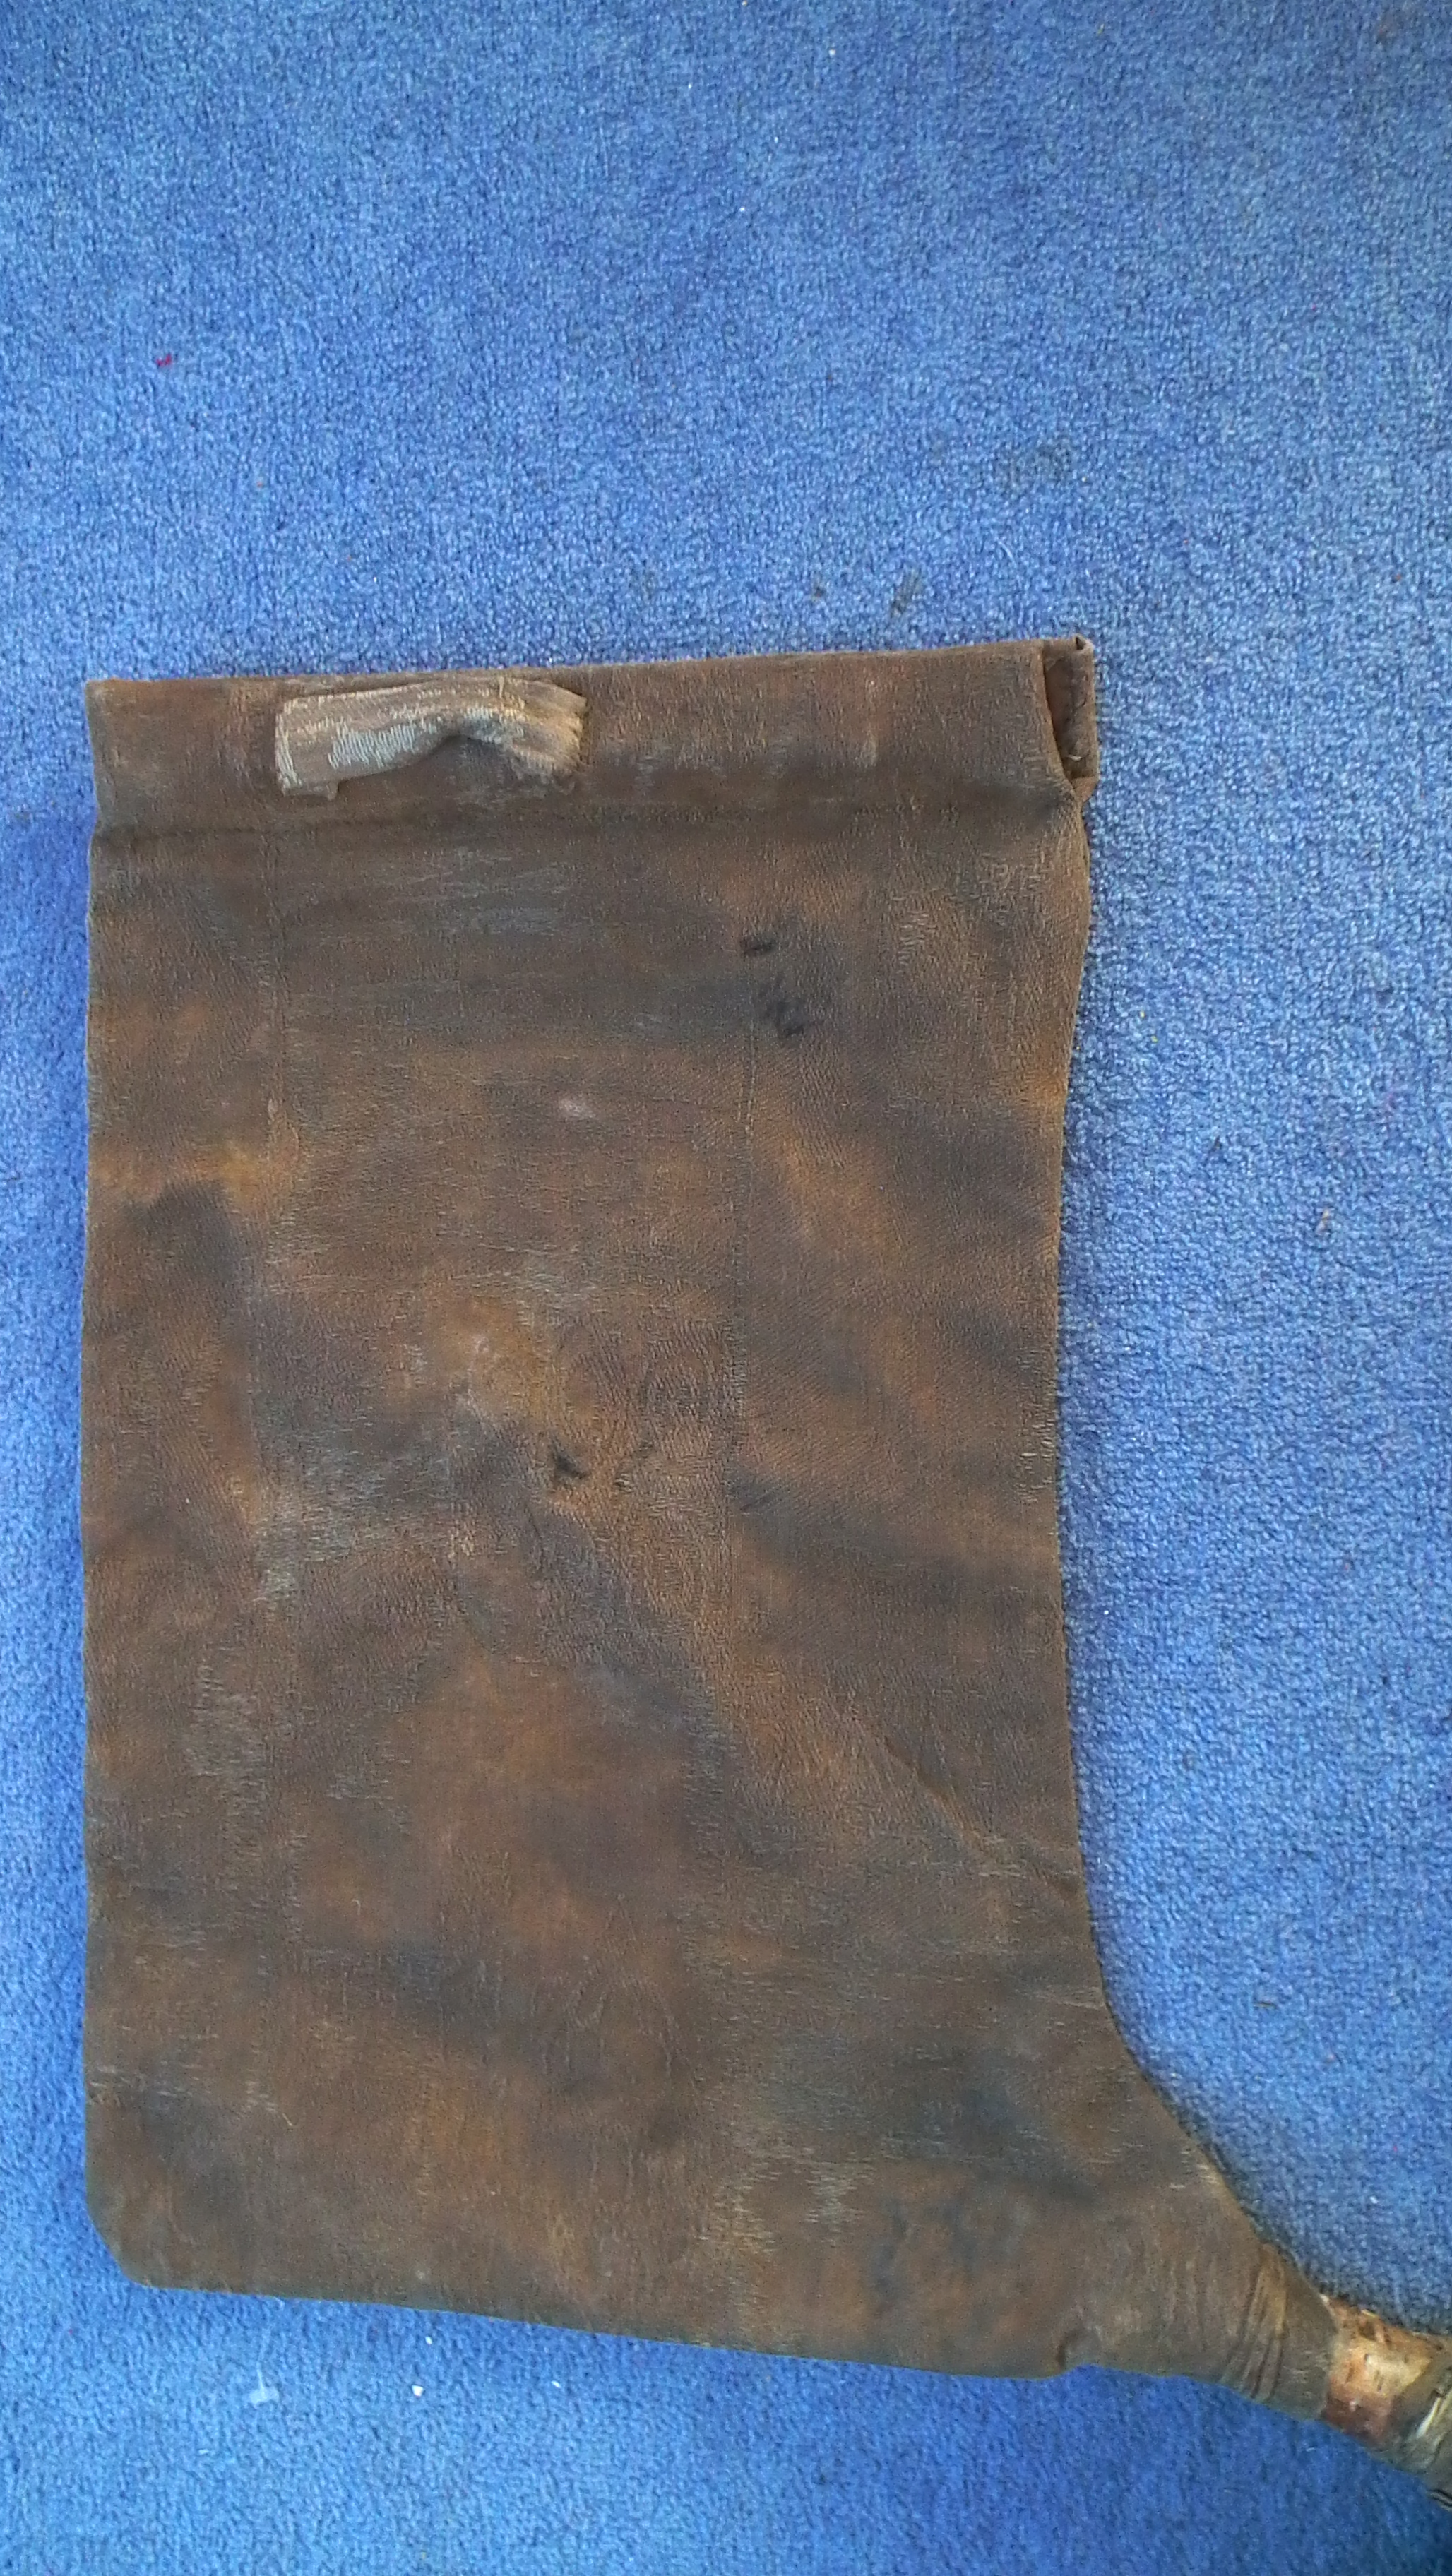
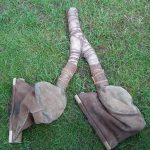
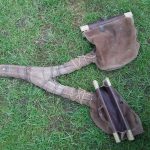
The finished bag bellows. Note that the handle is towards the rear of the bellows.
Turn the bellows right side out and admire your work.
If you used branches, you might not need loops for your fingers. Try pumping them a bit and see if you can open and close them easily without them slipping out of your hands. The action is to open them while the top of the bellows is close to the ground, Lift them, close them when they are as high as you want to lift them, close the bellows and then push down. If you lose your grip, you might want to put loops on them. They are simple, just strips of the same material that your bellows are made from. Sew them so your hand will be about 1/3 to 1/4 of the way from the back. When the bellows open, the little triangle in front will allow the bellows to open in a “V” shape and allow you to trap more air. Having the loops toward the back means that you don’t have to open your hands as wide. Since I work with kids a lot, this was a consideration when I designed them. Also, I have small hands.
This shows the handle at the top of the bellows and how to hold the bellows open while using them
The loops should accommodate four fingers on one side and your thumb on the other. The handles will stretch over time, so I periodically have to stitch them again to tighten them up.
There now, try them out. If you feel any air leaks in the seams you can seal them with linseed oil. If you made your bellows from fabric, the easiest way to coat them is to hang them on a clothes line outside and slather the oil on with a paintbrush. It takes a long time to dry and smells pretty strong. It’s definitely something to be done outdoors. Keep in mind that it might take a day or two for the linseed oil to dry.
Now in order to work, you’ll need at least a short tuyere. If you’re not fussed, some steel tubing from a vacuum cleaner works fine. If you want a more Bronze Age look, you can make them from wood. I took a short branch and drilled a hole in it using a 2 cm flat bit (1 ½” spade bit in the US). The branches are about 1 cm or ½” wider than the bit. If you don’t have a bit or don’t want to use power tools, take a branch of the right thickness (about 4 cm or 3”) and split it in half. Carve out the centre and fit them back together using glue and rawhide.
Fit one end of your tuyere into the opening at the bottom of your bellows (you didn’t sew that shut, right?). Now take the wet, sloppy rawhide and wrap it tightly around the part of the bellows covering the tuyere. If your tuyere is made of split branches, keep wrapping so that it holds the halves of the branch together. Depending on the weather and humidity, it might take several hours for the rawhide to dry.
Once everything is dry, try them out. They’ll be a bit stiff at first and will need to be broken in. It takes a bit of practice to get the Open-Lift-Close-Push rhythm going, especially if you alternate hands. Once you get into it, it gets easier. Think of a cat kneading its paws.
Another tip is to get some thin willow twigs, about the size used for making baskets. Make them into hoops that will fit inside the bottom of your bellows. It will help keep them open, especially if you have a tendency to lift them too high.
Next you’ll be wanting a “Y” shaped tuyere to connect the bellows together.
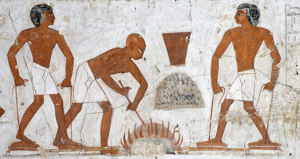
Bellows are a bit of a mystery. We know they had to have existed in the Bronze Age, but the only physical evidence we have consists of fragments of tuyeres. An Egyptian painting from the Tomb of Rekhmire, from 1450 BC shows a man using pot bellows that are operated by hands and feet. There are also Chinese documents depicting the use of box bellows. But bellows, after blowpipes, are likely to be one of the earliest forms of delivering air to the furnace. Unfortunately they are also constructed of ephemeral materials.
Scene from the Tomb of Rekhmire. The man on the right is operating a set of pot bellows. The valve is opened when he lifts both his foot and pulls on the cord attached to the top of the bellows. The air is pushed out of the bellows when he steps down. These require a lot of coordination.
Until a set of bellows is uncovered preserved in a bog somewhere a lot is left to the imagination. How big or small could they be? How can the valves be altered to be more efficient? How heavy should the leather be? Should sturdiness trump suppleness? How are all the parts held together and made airtight? Bellows are one of the most essential pieces of equipment that we have for casting bronze and yet very little information is available about their origins, and we rely on information for their use and construction from the community of experimental archaeologists and reenactment groups.
Over the years I’ve seen many different shapes and sizes of bellows and always thought that a forum where bellows design and use could be discussed would be invaluable for people to share ideas and experiences.
I would like to invite others to share photos of the bellows they’ve made on this site. This could be a welcome forum for discussing the pros and cons of different designs, what worked, what didn’t. Of course any news of archaeological bellows or tuyeres discovered would add to the fun.
Note the round bottom. a good way to keep the bellows from deflating if they are pulled up too high.
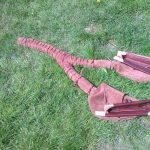
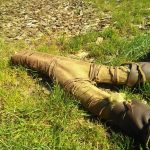
The new bellows, ready to use
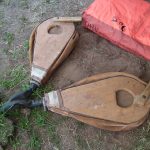
Close-up of the new bellows showing how the valve and handles were assembled
An earlier set of bellows by Morgan van Es. These had smaller bags and took more work to deliver enough air to the furnace.
Note the depression along the top of the tuyere. The tuyere is made from wood in which a deep groove was cut. Then the tuyere was covered in leather. Much less labour intensive and it delivers the air very well.
A close-up of the tuyere that Morgan made for the bellows
Pump Bellows
Matthias’ bellows: I saw these at the 2018 Bronze Casting Festival at the Bronzezeitehof in Germany. The handles can be adjusted at an angle, and they have other nice features.
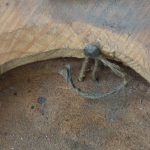
Note that a small nail and a bit of string can give you more control and make it easier to close the bellows when the valve is on top.
These bellows have the leathering on the outside. This decreases the possibility of air leaks, but also limits the height that the bellows can be drawn. That said, they did deliver a lot of air with little effort.
I would welcome others to send in photos of their bellows, and not just bag bellows, any bellows that could be considered to fit in with what we know or can surmise from archaeology would be interesting for this forum.