Tag: ancient craft
Vounous 2024
The annual Vounous Symposium is a 17 day long event where artists and archaeologists from around the world gather to collaborate and recreate the objects from Bronze Age Cyprus. During the symposium they will explore ancient techniques for making ceramics, metalworking, and other crafts.
This year I’ll be doing a video diary of the event.
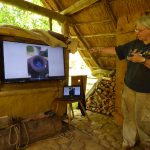
Day 1: A walk-around of the site
Crafting in the World: Materiality in the Making

Crafting in the World is a new work that combines the world of archaeology, craft, and anthropology. It explores crafts in ancient and modern contexts and discuses the relevancy of understanding crafts to other disciplines.
I had the privilege of writing one of the chapters for this book. In it I discuss how metal objects can be read in a way that the actions of the smith can be visualised.
"This volume expands understandings of crafting practices, which in the past was the major relational interaction between the social agency of materials, technology, and people, in co-creating an emergent ever-changing world. The chapters discuss different ways that crafting in the present is useful in understanding crafting experiences and methods in the past, including experiments to reproduce ancient excavated objects, historical accounts of crafting methods and experiences, craft revivals, and teaching historical crafts at museums and schools.


Crafting in the World is unique in the diversity of its theoretical and multidisciplinary approaches to researching crafting, not just as a set of techniques for producing functional objects, but as social practices and technical choices embodying cultural ideas, knowledge, and multiple interwoven social networks. Crafting expresses and constitutes mental schemas, identities, ideologies, and cultures. The multiple meanings and significances of crafting are explored from a great variety of disciplinary perspectives, including anthropology, archaeology, sociology, education, psychology, women’s studies, and ethnic studies.

This book provides a deep temporal range and a global geographical scope, with case studies ranging from Europe, Africa, and Asia to the Americas and a global internet website for selling home crafted items."
The link to the publisher is here. It is an academic publisher, and so it is rather expensive. However some university libraries already have copies, so I would recommend seeing if your local library can get a copy, or borrow it on Inter-Library Loan. If all else fails, contact me through the website or Academia.edu for a PDF.

Bronze Age Shoes
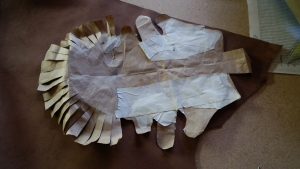
I was invited to cast bronze at an event in Germany, but the catch was that I needed to dress in period costume. The skirt and tunic were easy enough, but I knew that the people there would look at my Iron Age shoes and comment on how anachronistic they were. I know, because it’s happened in the past. There are few Bronze Age shoes that have been preserved, and the most famous were the ones worn by Otzi, the Ice Man whose body was recovered in the Alps in 1991. There are a few websites describing how to make them, including one with a video,
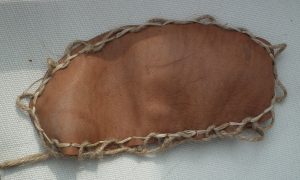
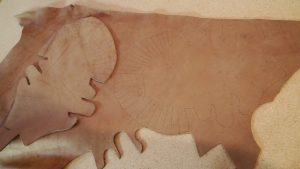
Following the instructions on this website, I cut out a pair of soles from the same leather I used for the Iron Age shoes, and punched holes around the perimeter. I didn’t have leather lacing, so I stitched them with multiple strands of sinew. Then I got some jute cord. This is made from the inner bark of the lime, or basswood tree (tillia sp). It is essentially the same as the cord used for Otzi’s shoes. I cut several lengths and started plaiting and knotting.
I quickly realised that it wasn’t going well. I couldn’t tie the knots while wearing the shoes, so I made a sort of shoe last out of socks. I just wasn’t enjoying the project and it was looking a mess. I just wasn’t getting the measurements right and the shoe was too large.
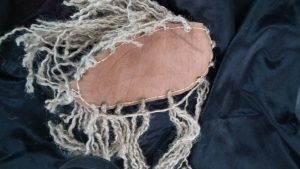
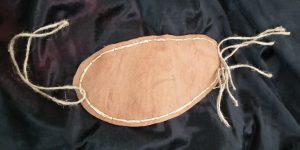
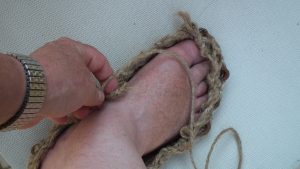
I just wasn’t producing what I wanted, so it went on the back burner. When it was about a month out from the event, I nagged myself into getting the shoes done. The problem was that I wasn’t happy with how they were turning out. It would be easier if I was making them for someone else, where I could tie the knots while they wore the shoes. It was then that I convinced myself that I didn’t need to slavishly copy this particular shoe. The materials were proper for period, I just needed to find a way to make them so I was happy while using a technique that would be consistent with the Bronze Age. I decided to make a netted upper rather than one that was plaited and knotted. I started over, this time using a single length of cord. I measured off a length that was 5 times the circumference of the sole (note, this finished about half the shoe. On the second one I measured 9 times the circumference and that worked out perfectly).
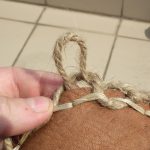
I wove the cord in and out of the sinew, skipping every other stitch and leaving a small loop at the top near the edge of the sole.
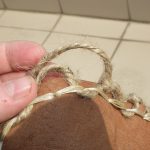
Then continuing around, I brought a loop through the loop next to the sole and then threaded the cord through that to make a knot. It was easily adjustable.
I made the first round fairly tight so that it would pull the sole up around my foot. I did the same for the second round.
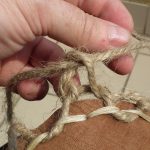
On the third round I made the loops larger because I wanted a netted effect. If I wanted, could continue making the loops smaller that would result in a denser fabric. At this point it was easy to work on the shoe while wearing it.
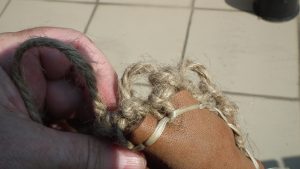
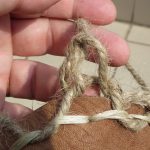
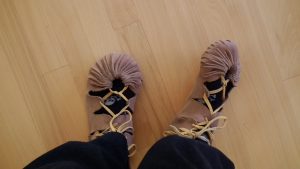
After a couple more rounds I started making the loops even larger. I brought the cord around the front of my ankle, looping the cord between it and the loops closer to my toes.
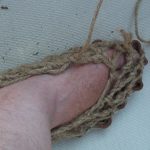
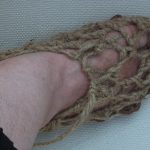
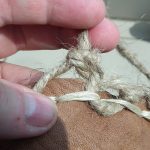
By this time I was essentially done. It took me about three hours for both shoes, working at a relaxed pace. I had a fair amount of cord left over, so I wound that around the top cord of the shoe to reinforce the opening and to give it a bit more of a finished look.

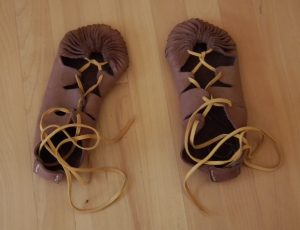
The finished shoes
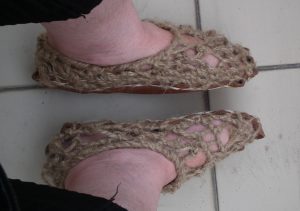
I made this pair fairly tight because I figure that both the leather and cord will stretch over time. Still, they are easy to slip on and off, and are comfortable for walking. I could make some leather uppers to go over the netting. Otzi’s shoes had that, although there is debate as to whether the leather was on top of, or under the cording. A project for the future is to learn nålebinding to make some socks.
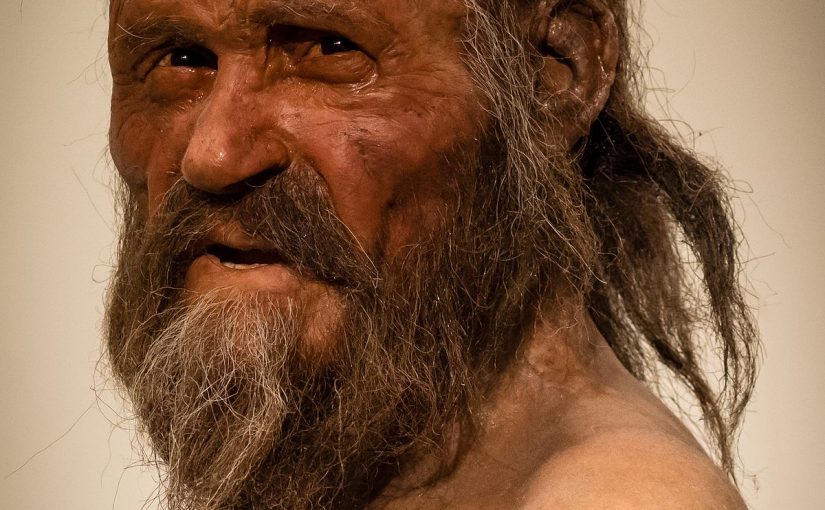
New analyses of Ötzi, the Iceman’s tools
Ever since he was recovered, I have had a fascination with Ötzi. His death and preservation gave us a unique opportunity to look into the face of someone who lived in the Bronze Age. We are able to examine his clothes and tools and use them to not only reconstruct the last days of his life, but also the lives of others in the Bronze Age.
A new article was published by The New York Times based on newly published research. The article titled, “The Final Hours of the Iceman’s Tools: What the implements found with the body of Ötzi revealed about the Copper Age” by Nicholas St. Fleur gives a fair assessment of the recent research. You can find the NYT article here.
Even better, Mr St. Fluer provides a direct link to the original publication published online through PLOS One, an open access platform, meaning that everyone read the article. “The Iceman’s lithic toolkit: Raw material, technology, typology and use” by Ursula Wierer, Simona Arrighi, Stefano Bertola,Günther Kaufmann, Benno Baumgarten, Annaluisa Pedrotti, Patrizia Pernter, Jacques Pelegrin is available here.
The NYT article gives details about how Ötzi appeared to be in a hurry in his last days. We knew already that his bow was not finished, but the PLOS One article goes into details about the state of his stone tools, the arrowheads, knife, and knapping supplies. The wear analyses showed how recently the tools had been retouched. The fine attention to detail in the examinations indicated how the fine scratches on the stone tools made by the lime bark holder would tell how recently the retouching had been done. Some tools also had evidence of of a particular type of gloss that occurs after the tool was used for cutting live plants.
The examination tells us brief stories about the history of the tools. The scraper was made from what was originally a knife and one arrowhead might have been made from stone reused from a sickle. We also know Ötzi was fairly well skilled as a flint knapper, since the evidence from his retouching tool (antler) and the recent retouching of some of the arrowheads would have most likely been done by him.
The end of the article by Ursula Wierer et al is exciting reading. Through the detailed examination of the condition of Ötzi’s tools, their origins, and how they were manufactured, they have reconstructed an almost moment by moment story of his last days.
featured image from Wikimedia Commons
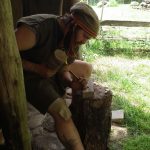
Return to the Bronzezeitehof
Last year the Bronze Casting Festival was a wonderful experience. People from all over Europe came and exchanged information about bronze casting and metalworking techniques.
Here are a few photos of the First Bronze Casting Festival in 2017.

I’ll be returning there again this May and furthering my experiments in metal finishing. In addition to casting, I’m interested in using metal oxides as colorants for enamels and how they are affected by the reduced environment of a charcoal furnace. In the past I did a lot of metal enamelling in an electric furnace. This will be a chance to explore how the process of enamelling could have been developed. I might even have a chance to make some glass while I’m at it!
Forging Ahead!
January 2023
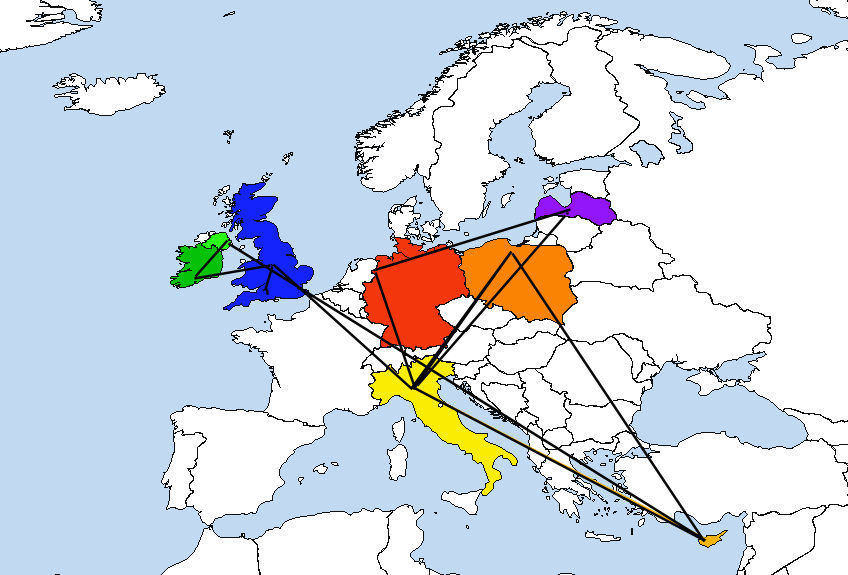
It looks like a crazy year of travel!
The year got off to a rocky start with me getting Covid while on a trip to Los Angeles. I’ve recovered and have a couple of months before I start the year’s journeys, and I am excited. It looks as if I’ll be busier than last year!
At the end of March I fly to Italy, where I’ll have a week in Modena to pick up my summer clothes and then fly to Northern Cyprus. I will spend the whole month of April there. The plan is to relax and see the country in the spring, but there’s a chance that I’ll be able to do some metalwork and give some lectures.
In May I head to Poland for the EXARC/EAC conference on experimental archaeology. Then it’s back to Italy to spend time with the family there, but at the end of the month I’ll head north to Germany for the Bronze Casting Festival, immediately followed by a trip to Latvia, where I’ve been asked to speak at a conference there.
Later in June, I’ll be in England for a couple of months where I hope to make some museum visits, help out with some workshops, and catch up with friends. In August I plan to go to Ireland and then head up to Belfast for the EAA Conference, where I’m co-chairing a session on experimental archaeology. From there, I head back to Northern Cyprus for the Vounous Symposium. I’ll spend a little more time in Italy before heading back to the US in the autumn.
Some of these workshops and travel expenses are covered by grants, but a lot of it is out of pocket for me. One of my sources of income is my Patreon Campaign. If you would like to support my work in experimental archaeology, please consider making a small monthly donation at https://www.patreon.com/archaeology Even a couple of dollars/euros/pounds a month really does help. Think of it as buying me a glass of wine after I’ve finished a day at a conference! Supporters do get benefits including postcards sent from all the places that I visit, early access to my podcast, In Small Things Considered, and special access to articles and publications that are exclusive to Patreon patrons. Special thanks go to those who support me on Patreon. You definitely are part of the excitement and fun of doing experimental archaeology!
2022 The Year in Archaeology and Conferences
2022 was an exciting year, full of archaeology, travel and travel mishaps, and exploring a world that had been closed off for two years.
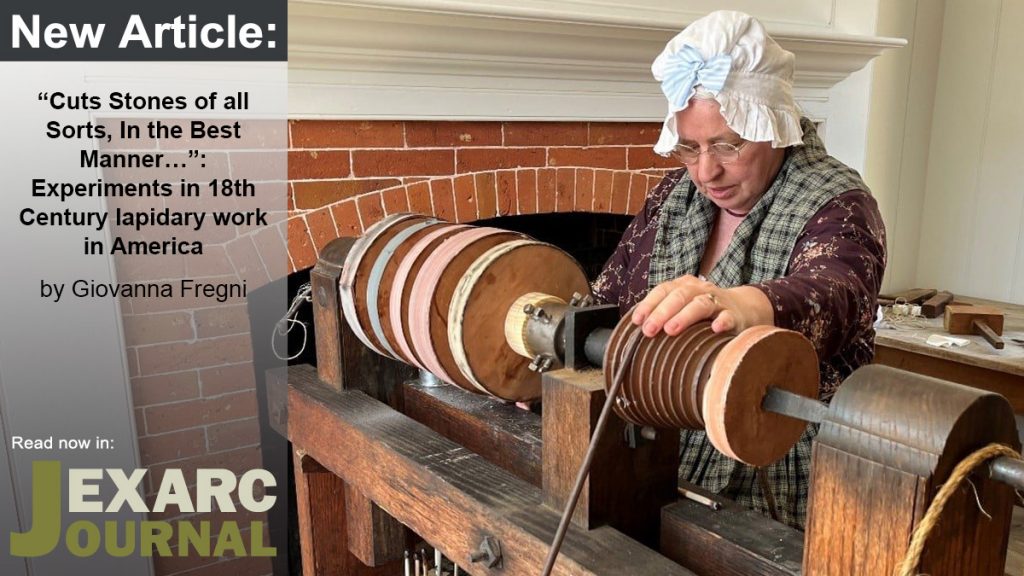
In February, I finally got to work on the fellowship that was awarded to me through Historic Williamsburg and EXARC. I lived for a month in a cottage on the edge of the historic city and helped convert a jeweller’s lathe into a lapidary machine. For the final week, I was on display cutting gems in period costume, which was actually pretty comfortable. I wrote about the experience in an article for the EXARC Journal.
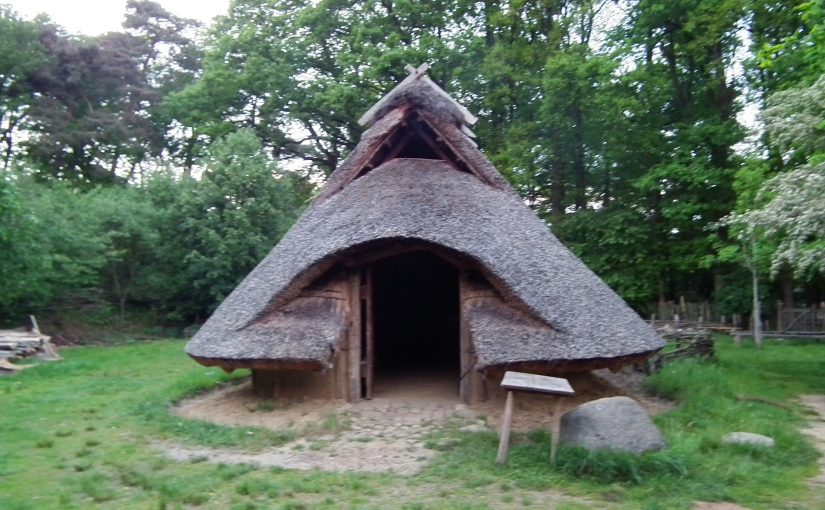
The year really got into gear in the spring when I landed in England and went to the Second Accidental and Experimental Archaeometallurgy Conference at the Ancient Technology Centre in Cranbourne. After two years of pandemic isolation in the US it was wonderful to be able to work with colleagues again. Before getting down to work, Fergus Milton took me over to Butser Ancient Farm to check out the new buildings. The site now has houses that range from the Mesolithic to Early Medieval and even includes a posh Roman house. Fergus is building his own dedicated metals workshop. I hope that I will get a chance to go down there and visit it when it is completed next summer.
The Archaeometallurgy conference was a great time. We constructed furnaces, laughed and joked, and shared information and stories about our respective fields of research. There were talks and presentations, a hog roast, and storytelling. Bronze was poured, iron smelted, and brass created. On Sunday the public came by to see the pyrotechnic action. They weren’t disappointed. I ended up spending more time talking to the public and explaining the event than actually working metal. That was a theme that continued through the summer.
In the end our furnaces were all destroyed and returned to the earth. By the time we left, there was little evidence that so much activity had been going on. To read more about it, here’s a link to my report in the EXARC Journal
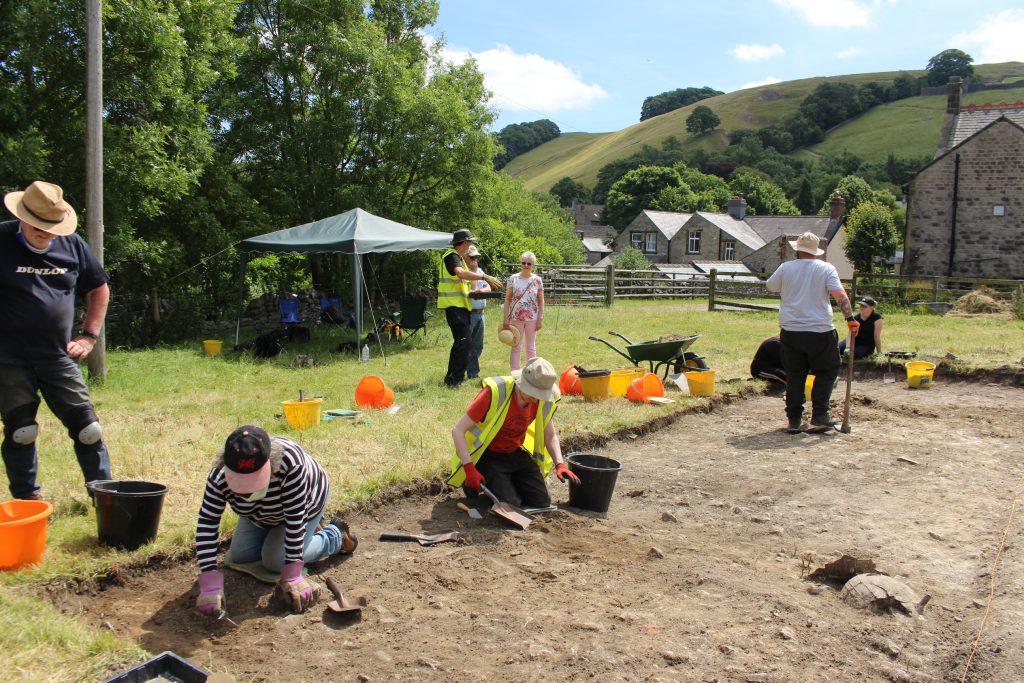
I had a wild ride back up north with Ellie Blakelock and Vanessa Castagnino, laughing and talking the whole way. It was great to be in Sheffield again and going out into the Peak District with Gill and Ken. We checked for witches’ marks in the Tideswell Church, visited Bishop’s House, and I wandered around my old neighbourhood in Crookes.
I even got a little bit of excavating in at Castleton.
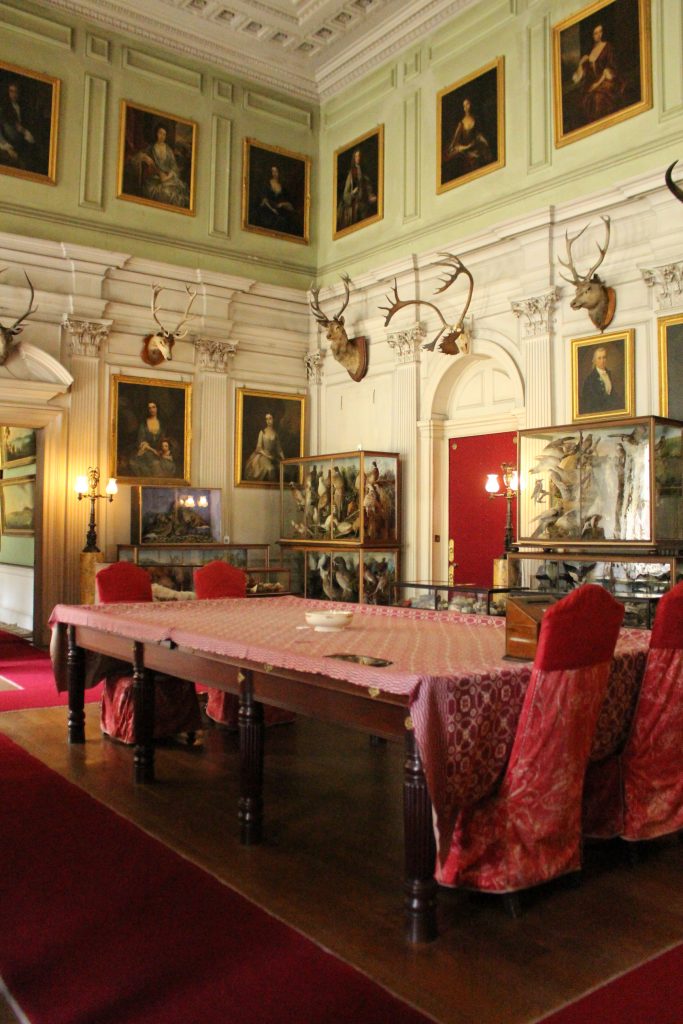
We also made a trip down to Derbyshire to visit Calke Abbey. It has one of the few remaining 19th Century faceting machines. After my experience at Williamsburg, I was interested in seeing one of these in the flesh. Calke Abbey is an experience in itself. It’s an old manor house that was donated to the National Trust, who have kept everything in situ. Everything is in a jumble, and only the library seems to have been sorted out. The director moved the machine out where I could photograph every inch of it, while Gill wrote down measurements. We did get to see more of the place, although we never got to the upstairs. As it was, there was more taxidermy than many natural history museums, and the family seemed to have a particular interest in lapidary and rock collecting. The curator in my sorely wanted to sort things out and label them, but the place is just as the last residents left it with doll houses, tiger rugs, and even a palanquin chair. It’s truly a place of sensory overload. I just wished that we could have sat ourselves down in one of the comfy library chairs and pulled out a book. A cup of tea would also have been a lovely addition.
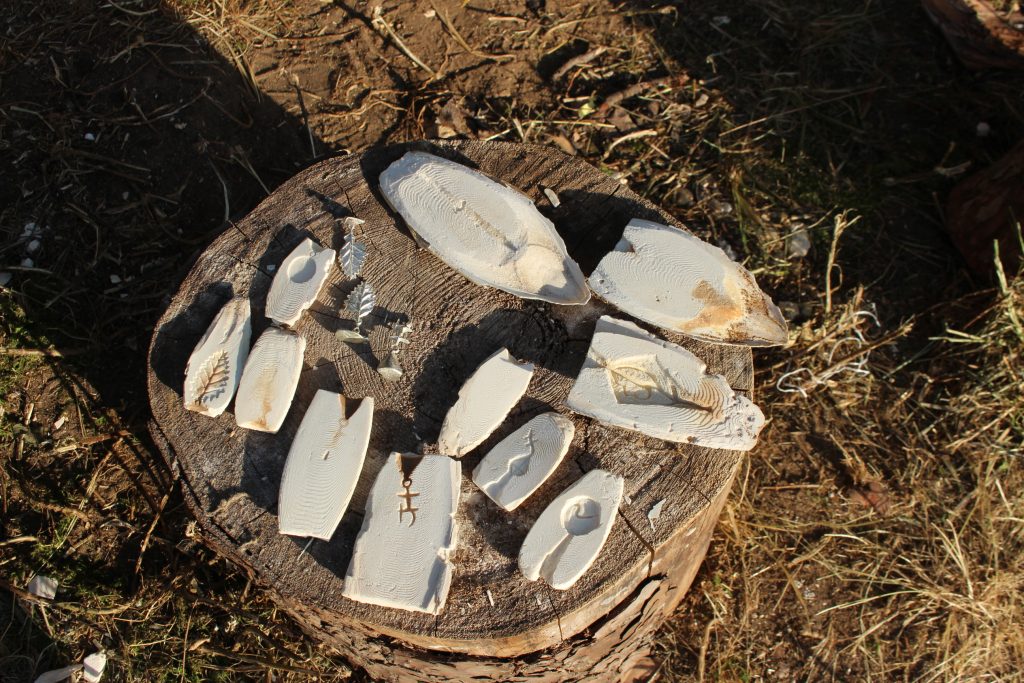
In July I headed south and helped out with the Sedgeford Archaeological metals course, run by Ellie Blakelock. The Sedgeford Historical and Archaeological Research Project (SHARP https://www.sharp.org.uk/ ) is a long term excavation and field school. In addition to excavating an entire medieval village, they run basic and specialist archaeology courses. Despite the unprecedented heat, we had a great time building a furnace, carving moulds, and casting. The final day was an open day so the public got to see the students in action. The students had a great time and cast a lot of jewellery and small objects while learning the basics of primitive casting techniques.
The summer heat took Britain by surprise. I got a ride to the Kings Lynn Train Station. I had tickets to go from there to London and then catch the Eurostar the next morning and get back to Italy. The heat was so extreme that the tracks buckled, meaning that no trains could get in or out of Kings Lynn. After waiting a few hours I was lucky to hitch a ride with a young woman whose dad gave us a ride to Ely, where we could get the next train to London. I got a decent night’s sleep at the hotel I booked and then was up at the crack of dawn to catch the first Eurostar back to the continent.
I had a great time relaxing in Modena. I spent a lot of time at the local library taking advantage of the wifi and air conditioning. I visited friends in Siena where we visited as many museums as we could pack into a weekend. I also had some great evenings knitting with friends and making squares for the Viva Vittoria Project. In February 2023 we plan to cover the Piazza Grande with an enormous blanket, all to raise awareness about violence against women.
There was a bit too much adventure at the beginning of August when I tried to get to the Bronze Casting Festival in Uelsen in northern Germany. The plan was to take the train up near Karlsruhe, meet Kevin Frank and then we’d drive the rest of the way. Except… a couple days before we were due to leave, Kevin came down with covid. I had to figure out how to get up there by train, starting from Karlsruhe. It was the high point for holiday travel in Europe, and Germany was offering 9 euro tickets to promote public transit. The trains were packed, and always running late. I missed so many connections and kept having to cobble together a new route and schedule at every station, straining my limited German language skills. It took almost exactly 24 hours, but I got there finally. I was exhausted and then found out that other participants had cancelled out due to Covid or other issues. That left me and Matthias Fischer to get things up and running, teach, and then demonstrate to the public on Sunday. The event was only a weekend, rather than a full week, so there was little time to get my brain together. But it was good to be back, and I enjoyed the event and seeing everyone after so long.
Then I faced the trip back down south. Knowing that it would still be insane, I arranged to spend the night at Kira and Tony’s place in Köln. What should have been an early evening arrival turned into me rolling in around 11 pm. Instead of sleeping, like any sane person would, we stayed up talking and drinking wine all night. I did get a little nap in before heading back to the station. I got there on time, only to find that the first train of the morning train was delayed. The trip back had about as many delays and rescheduling as the trip up. I was so glad to be back to Italy where, despite so many complaints, the trains do tend to run on time, or at least better than they do in Germany.
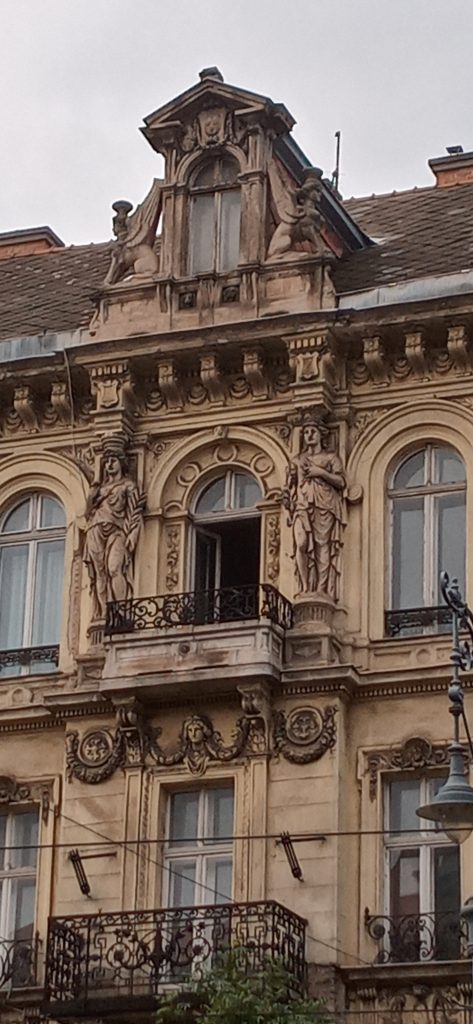
At the beginning of September I flew to Budapest to speak at the EAA (European Association of Archaeologists) conference. My paper was on examining the industrial waste from primitive non-ferrous metalworking, both in ancient and modern experimental contexts. I’m hoping to continue this project and have started to look for resources and ways to support the project. Meanwhile Budapest was beautiful. I only saw a small portion of the city, and spent most of one day at the museum. I definitely have to go back again.
Then it was back to Modena briefly. I had enough time to wash my clothes and repack my bags. Then I was off to North Cyprus for the Vounous Symposium.
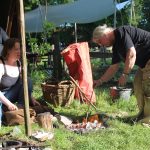
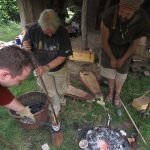
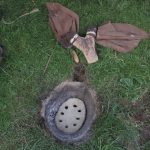
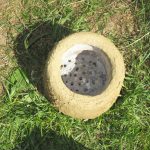
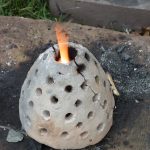
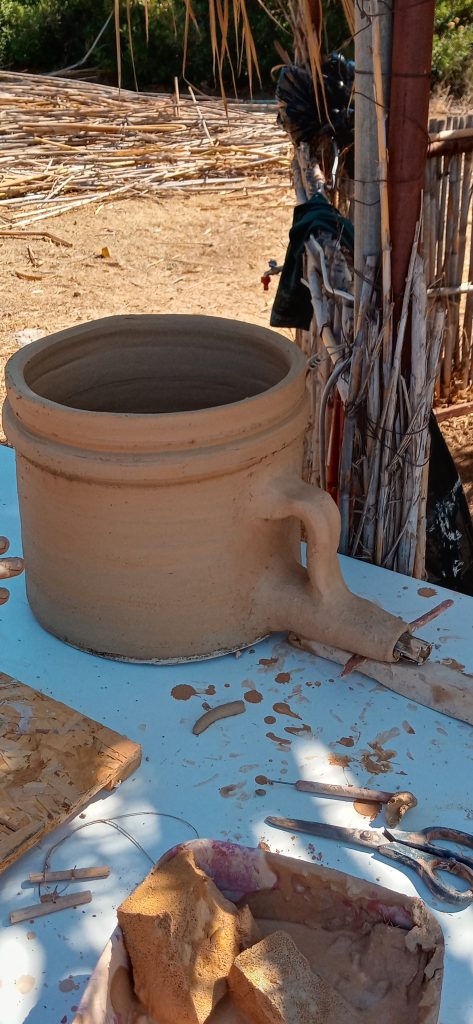
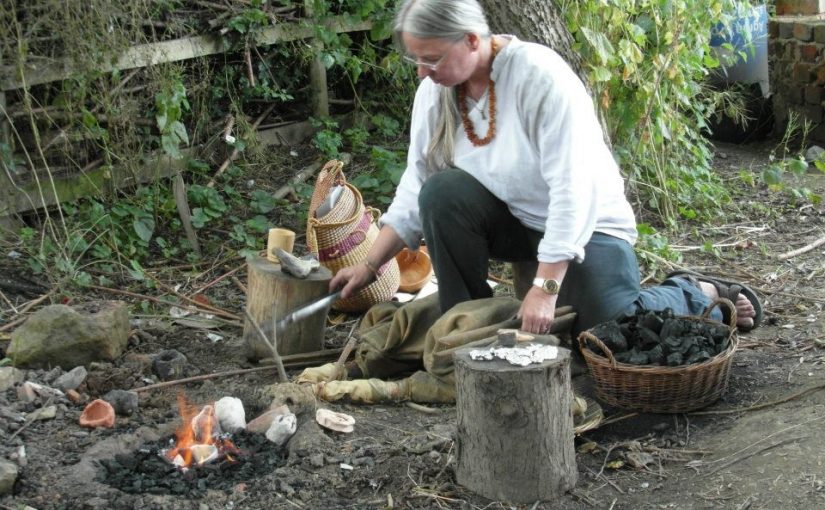
My goal for this year was to replicate a set of pot bellows that were excavated at Enkomi, a Bronze Age site near Famagusta. Kevin was still out with covid and Chris couldn’t afford to come, so I was on my own again. Except that Vounous is a huge supportive community. I met Ergün Arda, a ceramic artist from Turkey who took time away from his work to make the bodies for the bellows. A ride was organized so I could go to the leather supplier to get the hides I needed for the tops of the bellows. Then we had a tense night hoping that the bellows wouldn’t crack during the firing. They turned out perfectly and everyone was fascinated by them. In the following days anyone who wanted to had the chance to use them. Again, I didn’t get much in the way of casting or smelting done, but together we made an important piece of equipment that is closely related to the heritage of the site. During the symposium I finally started the Turkish language course that I’d been trying to get on for over a year. I dearly hope that I will be able to speak Turkish reasonably well by the time I return.
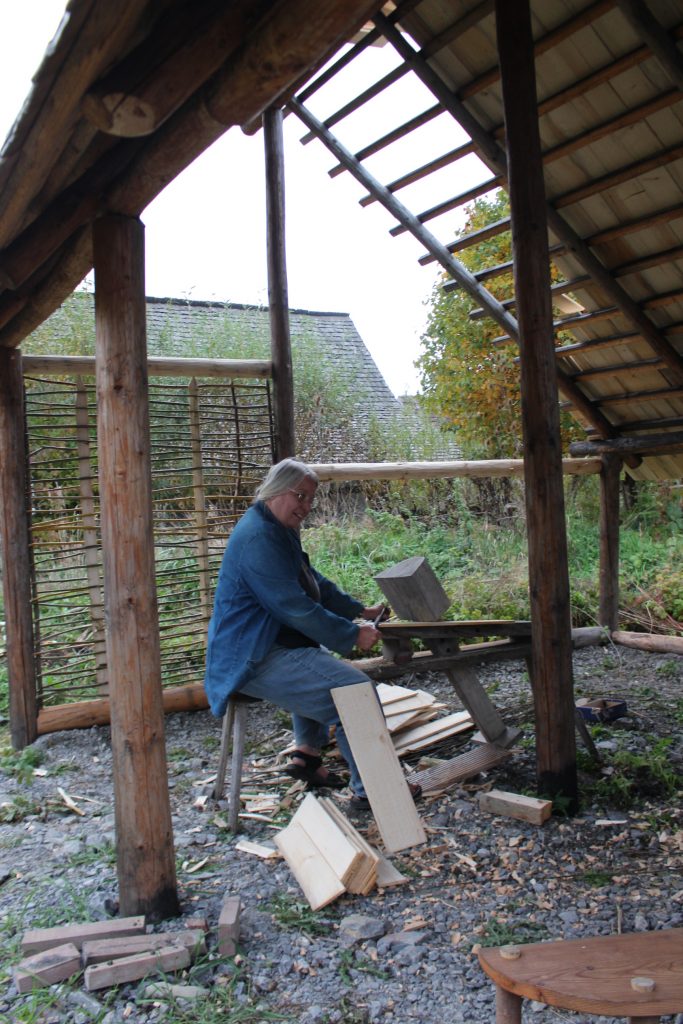
I always hate to leave Vounous, but at least I was heading back to Modena. It’s a good place to relax and recharge. I got to spend some time with my cousin Paolo and enjoy the cooler weather. Then in early October I headed back north to Germany to Adventon, a medieval/Viking era open air archaeological park http://mittelalterpark.de/. Kevin has been building a metals workshop there, and originally he planned for an event to celebrate the completion of the workshop. Instead, a small group of us finished putting on the roof and getting most of the walls done. Even if we didn’t get any metalworking done, it was still a great time. The weather was good for the most part, and we had a great time drinking Turkish coffee, talking, and eating meals together.
At the end of Adventon, I had to return to the US. My allotted three months in the EU were up. Unfortunately, my late afternoon flight was changed to an early morning one, meaning I had to beg a ride from Kevin, and we had to get up at 4 am to get me to the airport on time. That was not appreciated by either of us.
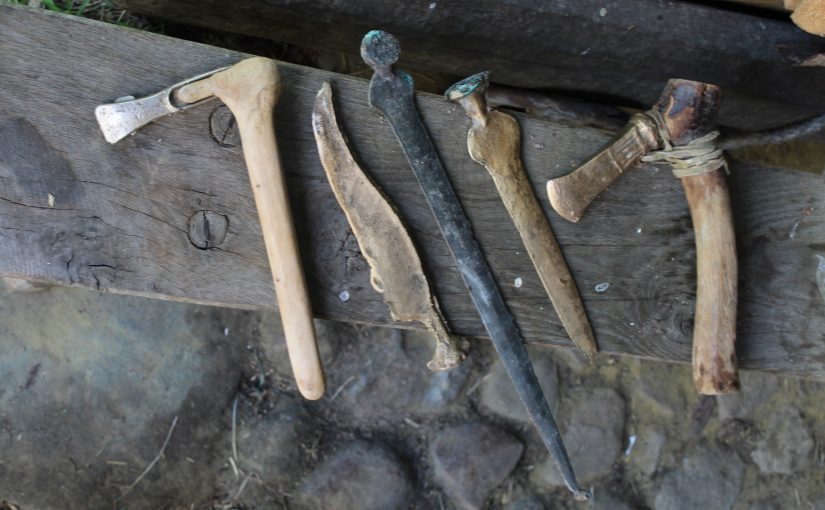
Back in the US, I have been finishing up a lot of projects that have languished. Knives have handles now, and I finished a sickle that was a commissioned piece. I’m at the lathe as much as possible, and I’ve also joined a foundry where I can get casting done over the winter. I have some very cool projects in mind and a lot to do in the three months until I leave for Europe again at the end of March.
Next year is already filling up. I submitted an abstract for the EAC conference in Poland in April, and the EAA in Belfast in August. There’s the Bronze casting Festival and Adventon, and of course Vounous. Speaking of which, I’ve only been in Northern Cyprus in September and very much want to see it in the spring when it is green. I’m making plans to be there in April and maybe got some metalworking done while I’m there.
2022 was an exhausting year of missed connections and difficult travel, but it was all so worth it. After the two years of pandemic lockdown, seeing so many friends and people I love, being able to work again and teach, pour metal, all of that was the greatest gift I could have asked for. Here’s to 2023 and all the adventure, but maybe with better travel connections.
September 2022
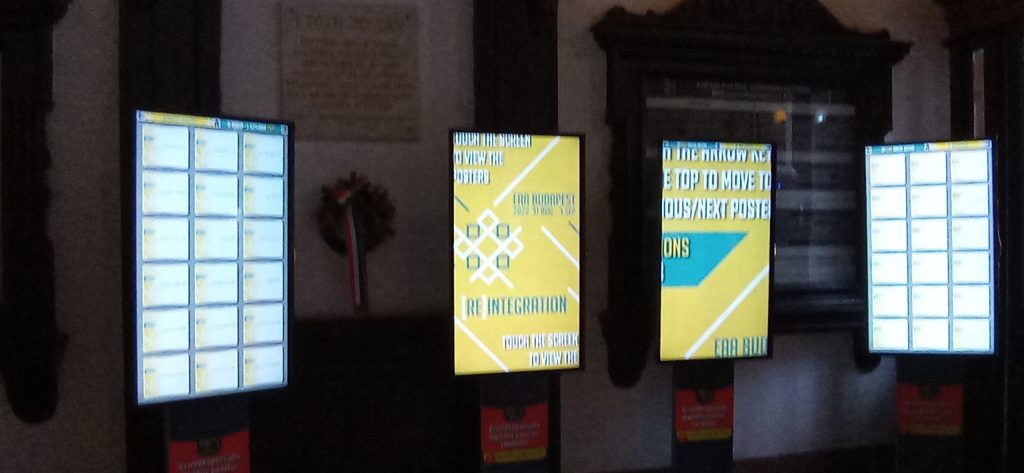
I’m back from the conference of the European Association of Archaeologists in Budapest. There were a lot of great sessions, and as always it’s impossible to see more than a fraction of what’s going on. This year the conference was a hybrid of in-person presentations and virtual. Every session had participants who joined in online. The sessions I attended went seamlessly, although it must have been tough for people on the west coast of the US who were giving their talks at 5 am Pacific Time. The poster sessions were also virtual. There were no printed posters. Instead touchscreens allowed viewers to select a session and see the posters. All of these innovations allowed for people to participate who would normally be unable to attend the conference. However, there were some people who I wish would have been able to make it, if only to have in person conversations. Still, the conference was inspiring and I came away with fresh ideas and seriously thinking about new projects.
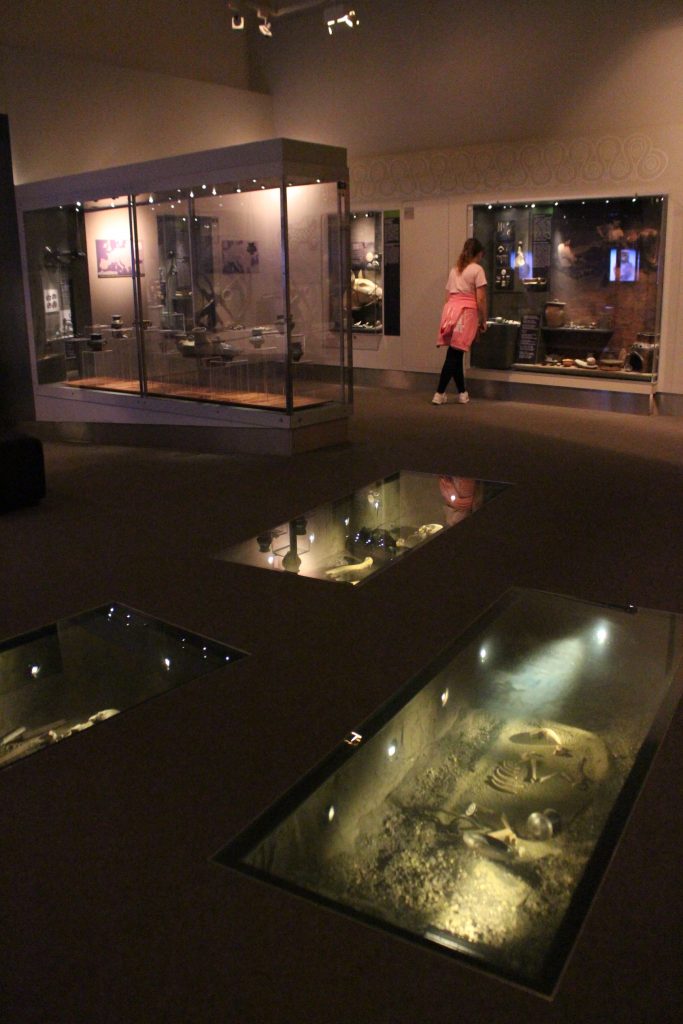
Budapest is beautiful and the National Museum there is world class. The displays and layout are outstanding. Many of them allow the visitor to walk around the object, or at least to be able to see them from more than just one angle. The objects themselves are truly worthy of the treatment they get. I spent an entire afternoon there and would willingly go again and spend more time.
But there’s no rest this week. I arrived back on Saturday and tomorrow, the 6th I fly out to North Cyprus for the Vounous Symposium. There will be two weeks of smelting copper and melting bronze, and maybe we’ll get back into making some faience.
July 2022
The year continues, although the excessive heat has been a bit much, especially when working with hot metal!
The Accidental and Experimental Archaeometallurgy 2.1 Conference was a blast. It was great connecting with everyone again and getting some work done. Thanks to Vanessa Castignino who went all out to make the event a success. There was the usual friendly rivalry between the ferrous and non-ferrous people, with furnaces of all shapes and sizes. There will be a short review of the conference in the EXARC Newsletter, coming out soon.
After a relaxing time in Sheffield, where I actually got to do a few minutes of excavating, I headed down to Norfolk for Sedgeford’s Archaometallurgy day course. We had some great students and built a permanent bowl furnace, so we don’t have to start from scratch every year. We did try to smelt copper, but ironically the weather was too hot to continue bellowing, so we just couldn’t get the furnace hot enough without roasting the people pumping the bellows.
Right now I’m in Modena, Italy where the extreme temperatures continue. However, I am looking forward to a cool time in Uelsen, Germany where I’ll be at the Bronze Casting Festival. I plan to continue my experiments with self-draughting furnaces, and use my 3D printed pins as forms for some sand casting.
Later in August I’ll be presenting at the EAA Conference in Budapest, and then I just got word that the Vounous Symposium will be back for another year! I am so looking forward to seeing everyone in North Cyprus again. Last time we started making faience for the fun of it. Who knows what we’ll try this time, in addition to all the usual smelting and casting…
************************************************************************
2022 is finally picking up where 2020 left off. I’m back in England and this weekend I’ll be at the Historical Metallurgy Society’s Accidental and Experimental Archaeometallurgy 2.1 Conference. Next month I’ll be at Sedgeford for SHARP’s Metallurgy day course. Then in August, I’ll head up to Uelsen, Germany for the Bronze Casting Festival at the Bronzezeithof. At the end of August I’ll be speaking at the EAA Conference in Budapest. Plans are still afoot for heading down to North Cyprus in September, although I haven’t had official word about another Vounous Symposium. Fingers crossed, though. It’s an exciting event and one where we have two weeks to work rather than just a weekend.
It feels great to be on the road again, although hauling a suitcase full of bronze tools can get a bit tiring at times. Still, I wouldn’t trade this life for anything!

Welcome to 2022 and Some Resolutions
Last year, in 2021 everything was cancelled… again. The world was put on hold for another year. We all got tired of waiting for the next shoe to drop, not realizing that it was a centipede that was dropping them. It was as if the promise we hoped for in 2020 was snatched away. Some people reacted with anger, but for me it was withdrawal. I checked out for a while. When I look back on all the stuff I did last year, it looks like I was insanely busy, but to me it felt as if I had been treading water, waiting for life to come back to some form of normal and leave the US behind. Still, hope springs eternal. My fellowship at Colonial Williamsburg that’s been delayed three times is rescheduled to happen next April and with luck I’ll be back in Europe this summer.
I did get a furnace built last year. It’s self-draughting, so I didn’t even need a set of bellows. That was convenient and a real labour saver, but it brought home how much bronze casting is a communal event for me. I missed the camaraderie, the laughing, storytelling, and the intensity of working as a close-knit team. I never bought into the idea of the lone, itinerant Bronze Age metalsmith, unbound from the structure of society. As a metalsmith, I am pretty itinerant, but I am rarely alone, and there is always some sort of social structure. In the modern world it is much easier to do this sort of work alone, but that is essentially an illusion. I head over to the hardware store and buy bags of charcoal and order bags of clay to be delivered here, but in the Broze Age there would have been a lot more interaction to get the necessary supplies. If the people who dug the clay and burned the charcoal weren’t a part of my village or settlement, I would have had to negotiate how to get the supplies to where I was working. Likewise for the metal or ore. The Bronze Age was a world without a lot of easy transportation. Something we take for granted now.
These days it’s unfashionable to do New Year’s resolutions. People point out that there really isn’t anything special about the transition from December 31st to January 1st, it’s just an arbitrary date. It is an arbitrary date, but it’s also a long-standing tradition and there is a certain amount of power in traditions. 2021 was certainly a depressing year. Then New Year’s came and went. Compared to New Year’s Eve in Italy and England, there’s not much going on here even in a non-Covid year. It was a low point for me, and it came to the point where the only way was back up again. So, I did make resolutions. Small ones that will get bigger as I get back into the swing of things. It felt right. I feel as if I am getting back into the game and even if I don’t have a lot of energy, I’m acting as if I do. In the coming weeks I plan to put up a page of bronze casting moulds, similar to the page I made for textile tools. I’ll also write a full report on my self-draughting furnace, that amazingly seems to be holding up in the sub-zero weather here, and I’ll polish up and publish some old articles of mine. So, I’m back and hoping to make up for lost time.
The Mavis Furnace or how to build a furnace for almost no cost!
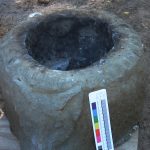
I was visiting my sister in the autumn of 2016. She has a bit of land just outside Albuquerque, New Mexico, so I asked her if I could build a furnace and do some casting there. I’ve built plenty of pit furnaces, so this time I wanted to build one that was above ground and a bit more visible. It would also mean that no one would trip and fall if they forgot where I put the thing.
The first task was to get the basic materials: Clay, Sand, and Horse Manure.
I thought that the clay would be the biggest hurdle. However my sister’s neighbour happened to be a sculptor who works in both iron and ceramics. She went to her regular clay supplier and got a couple feed sacks full of dried clay for free. Potters who work at wheels, or work with students end up with a lot of clay that is scraped off of workbenches and wheels that is hard to re-use. It often has a mixed consistency, it’s lumpy or part dried. If they want to use the clay again, it has to be reconditioned. So, they take their sacks of scrap back to the place where they buy the clay and pay to have it put through the mill. Since it’s not really usable, some potters are willing to just give it away. So thanks to Liz Fritzsche, who does amazing and beautiful work in porcelain, I was able to get started.
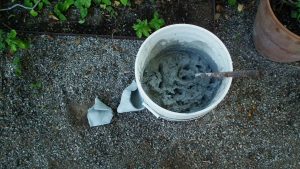
I threw some of the dried clay into a five gallon bucket and poured in enough water to cover the clay and let it sit. It was squishy and workable in a few hours. Next up was locating horse manure. A friend of a friend has horses, and they were grateful to have someone who would haul away a couple of barn buckets full of manure. The final bit was the sand. My sister did have some beach sand that she’d bought for the garden, but I was more fascinated by the soil there. Her land is in the old Rio Grande River Valley, and the soil is a mixture of silty sand and a little clay that had been pounded to a powder. The soil was almost the consistency of dust. It mixed in perfectly and later I found the mixture was highly resistant to cracking.
The ingredients were mixed with some water, stomped, and the proportions were adjusted until it was perfect. New Mexico is a lot drier than England, so I ended up adding more water than usual as I worked. It was also nice knowing that it was unlikely for any rain to fall while I was working.
The silt/clay/dung mixture made a durable clay, and after I flew back to Minneapolis, I was please that the crucibles and moulds I packed in my check-in luggage survived airport handling.
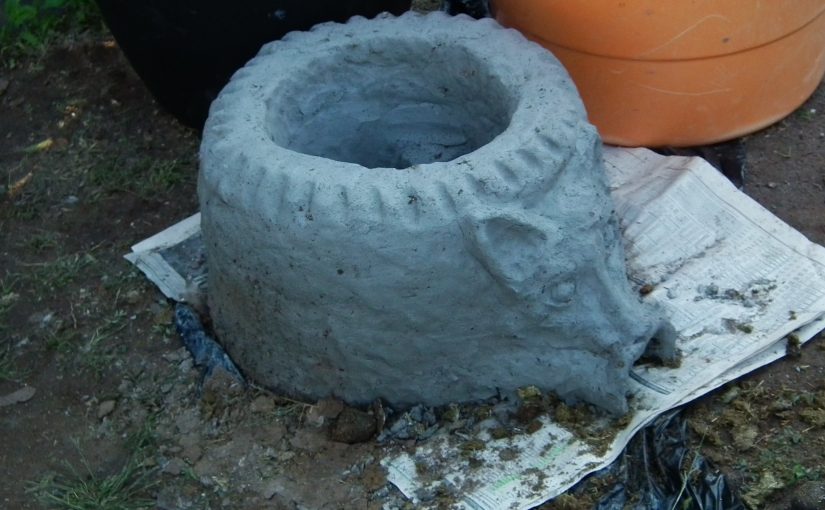
The furnace walls are about 8 cm wide (about the width of my palm) and the inside diameter is about 25 cm in diameter. I let it dry for a couple days and then moved it over to an unused area behind a greenhouse where I would have more room to work. I set a small fire with cottonwood branches, fed it for a couple hours, and then let it die out overnight.
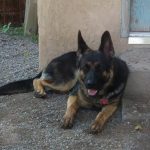
We all like to put some decoration on our furnaces. My students have done everything from dragons to turtles to cats. I had been thinking about doing some decorations imitating the local petroglyphs, but as I was working it just seemed natural to do a portrait of Mavis, my sister’s exuberant German Shepherd.
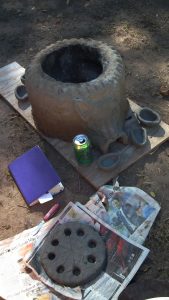
Finally I adjusted the mix to have a bit more of the silty sand and horse dung to make the teapot stand and crucibles. For more information about teapot stands and how they work in furnaces, check out my article on the Umha Aois website here.
Later I added more water to make the slip for dipping waxes in for the first stages of mould making. The silt made a wonderfully fine mould that picked up all the details. Honestly, this mix was as good as jeweller’s investment for picking up detail.
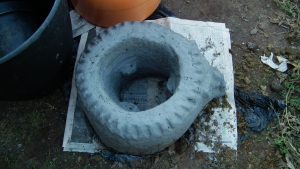
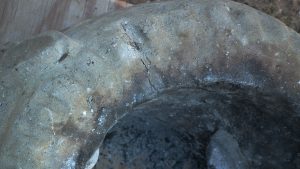
I had some cracking on the upper part of the furnace, and noted that the part that cracked was where I used the commercial sand. The silty New Mexico soil held up much better. If it weren’t so heavy (and probably not allowed) I would have hauled bags of the soil on the plane home to use for more projects.
Both Mavises performed very well (Mavis the Dog is into barrel racing and advanced obedience classes). I’ll be interested to see how it holds up over the winter. Winters in New Mexico tend to be mild, so I’m hoping that the Mavis furnace will be available for friends in Albuquerque to use for some time to come.
Iron Age Shoes
Sometimes you just need a new pair of shoes. I’d been wanting to make some of the replica shoes I’d seen online. there are a few good sites where you can find patterns and step by step tutorials.
Kelticos has a number of different patterns that you can download.
I followed the instructions on this site. It goes step by step and practically no-fail. I however am a bit more cautious and rather start with the leather I made a pattern out of brown paper.
Once I was confident that I had a good fit with the paper pattern, I bought the leather that I needed. One thing that few sites describe is the type and weight of leather needed. I bought some cow leather that was supple, but not stretchy from Cox Leather in Albuquerque. The place is an amazing resource for hides, rawhide, leather, skins, and really anything leather related. They also ship!
Leather thickness in the US is measured by the ounce, and in mm in Europe. The leather I bought was about 8 oz / 3.2 mm / 1/8 inch thick.
Once I traced the pattern on the leather, I cut the shoes out using good sharp scissors and punched the holes for lacing with an awl. It’s important to use an awl or punch rather than cutting the hole with a scissors since a round hole pushed through the leather is less likely to tear than a hole that is cut.
I stitched up the backs with sinew. I followed the directions and stitched the sides of the heel to the heel tab straight up. It ended up a little loose. When I get the time I’ll restitch them so they come in a little tighter on the top. Another modification will be to put more of a sole on them. Some options are to cut an insole out of rawhide and sew it between the inside of the sole with another, softer leather insole on top. I might line it with some sheep skin, too.
First posted on 16th November 2016
Since I first posted this I have worn the shoes often and have come in useful while working at the Bronzezeithof in Germany. They are holding up well after a year, although I don’t wear them every day.
Making bag bellows
Bag bellows might be the oldest form of bellows used. We don’t know for certain because they are made entirely of organic materials, and so none survive in the archaeological record. Because they have the advantage of being portable, lightweight, and easy to make, this type of bellows are still in use for iron forging in parts of Africa and South Asia. When you make a pair, you can be as “authentic” as you want, using only wood and leather, or you can use more readily scrounged materials like vacuum cleaner hoses and pleather. There is a remarkable video of Kenyan metalsmiths using bellows made of cement bags here.
In addition to this tutorial, check out the Bellows Forum page where there are variations of bellows designs and some interesting variations.
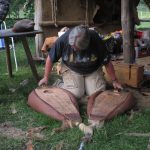
Traditionally bag bellows are made of pliable leather and the usual description is that a single bellow is made from one goatskin. The bellows I describe here are made with upholstery fabric. At the time I made them, leather was too much for my budget. After they were sewn I gave them a good coating of linseed oil that made them both waterproof and airtight. I find it ironic that in the Bronze Age leather would have been readily available, but hand-woven fabric would have been exorbitant. So, these are my ostentatious display of wealth bellows.
How big the bellows you make will depend on what’s comfortable for you. I’ve used very large bellows and ones so small you’d think that they’d never produce enough air to get the job done, but they did remarkably well. What is important is that the size works for you. You’ll be sitting on the ground, or close to the ground (I like a log or a short tree stump with a bit of padding). Sit down on the floor and raise your arm with your elbows bent so that they are lifted a little over waist high. Try not to move with your shoulders. You’ll be pumping your arms up and down for hours, so it’s good to find a height that works for you so that you don’t wear your arms out. Measure that height or get a good idea of how high that is. Then you’ll want to add a few more inches because you want to have the bellows rest on the ground. If you lift them too high, the sides will collapse and you won’t be able to trap the air in them. You also want to add another few inches to wrap around the handles.
Besides the leather (or whatever material you choose) the other supplies you’ll need are heavy waxed thread or sinew, leather or sail needles (depending on the type of material you’re sewing). The handles are made of two straight branches about 3-4 cm (1-1 ½ inches) in diameter, or four boards 3 by .5 cm (1 by ¼ inch) the length will depend on how wide the top of your bellows are. If you use branches, they’ll have to be split lengthwise so that they have a semi-circular cross section. My bellows are about 16 inches wide.
Using your own measurements, adapt the pattern below, adding about 3 cm/1 inch for the seams around the edges, and enough at the top to wrap around the handles. You’ll also need some scrap to make loops for your fingers. The loops are more important than you realise. Getting them right will mean the difference between being able to work for hours, and giving up because you keep getting blisters or losing your grip.
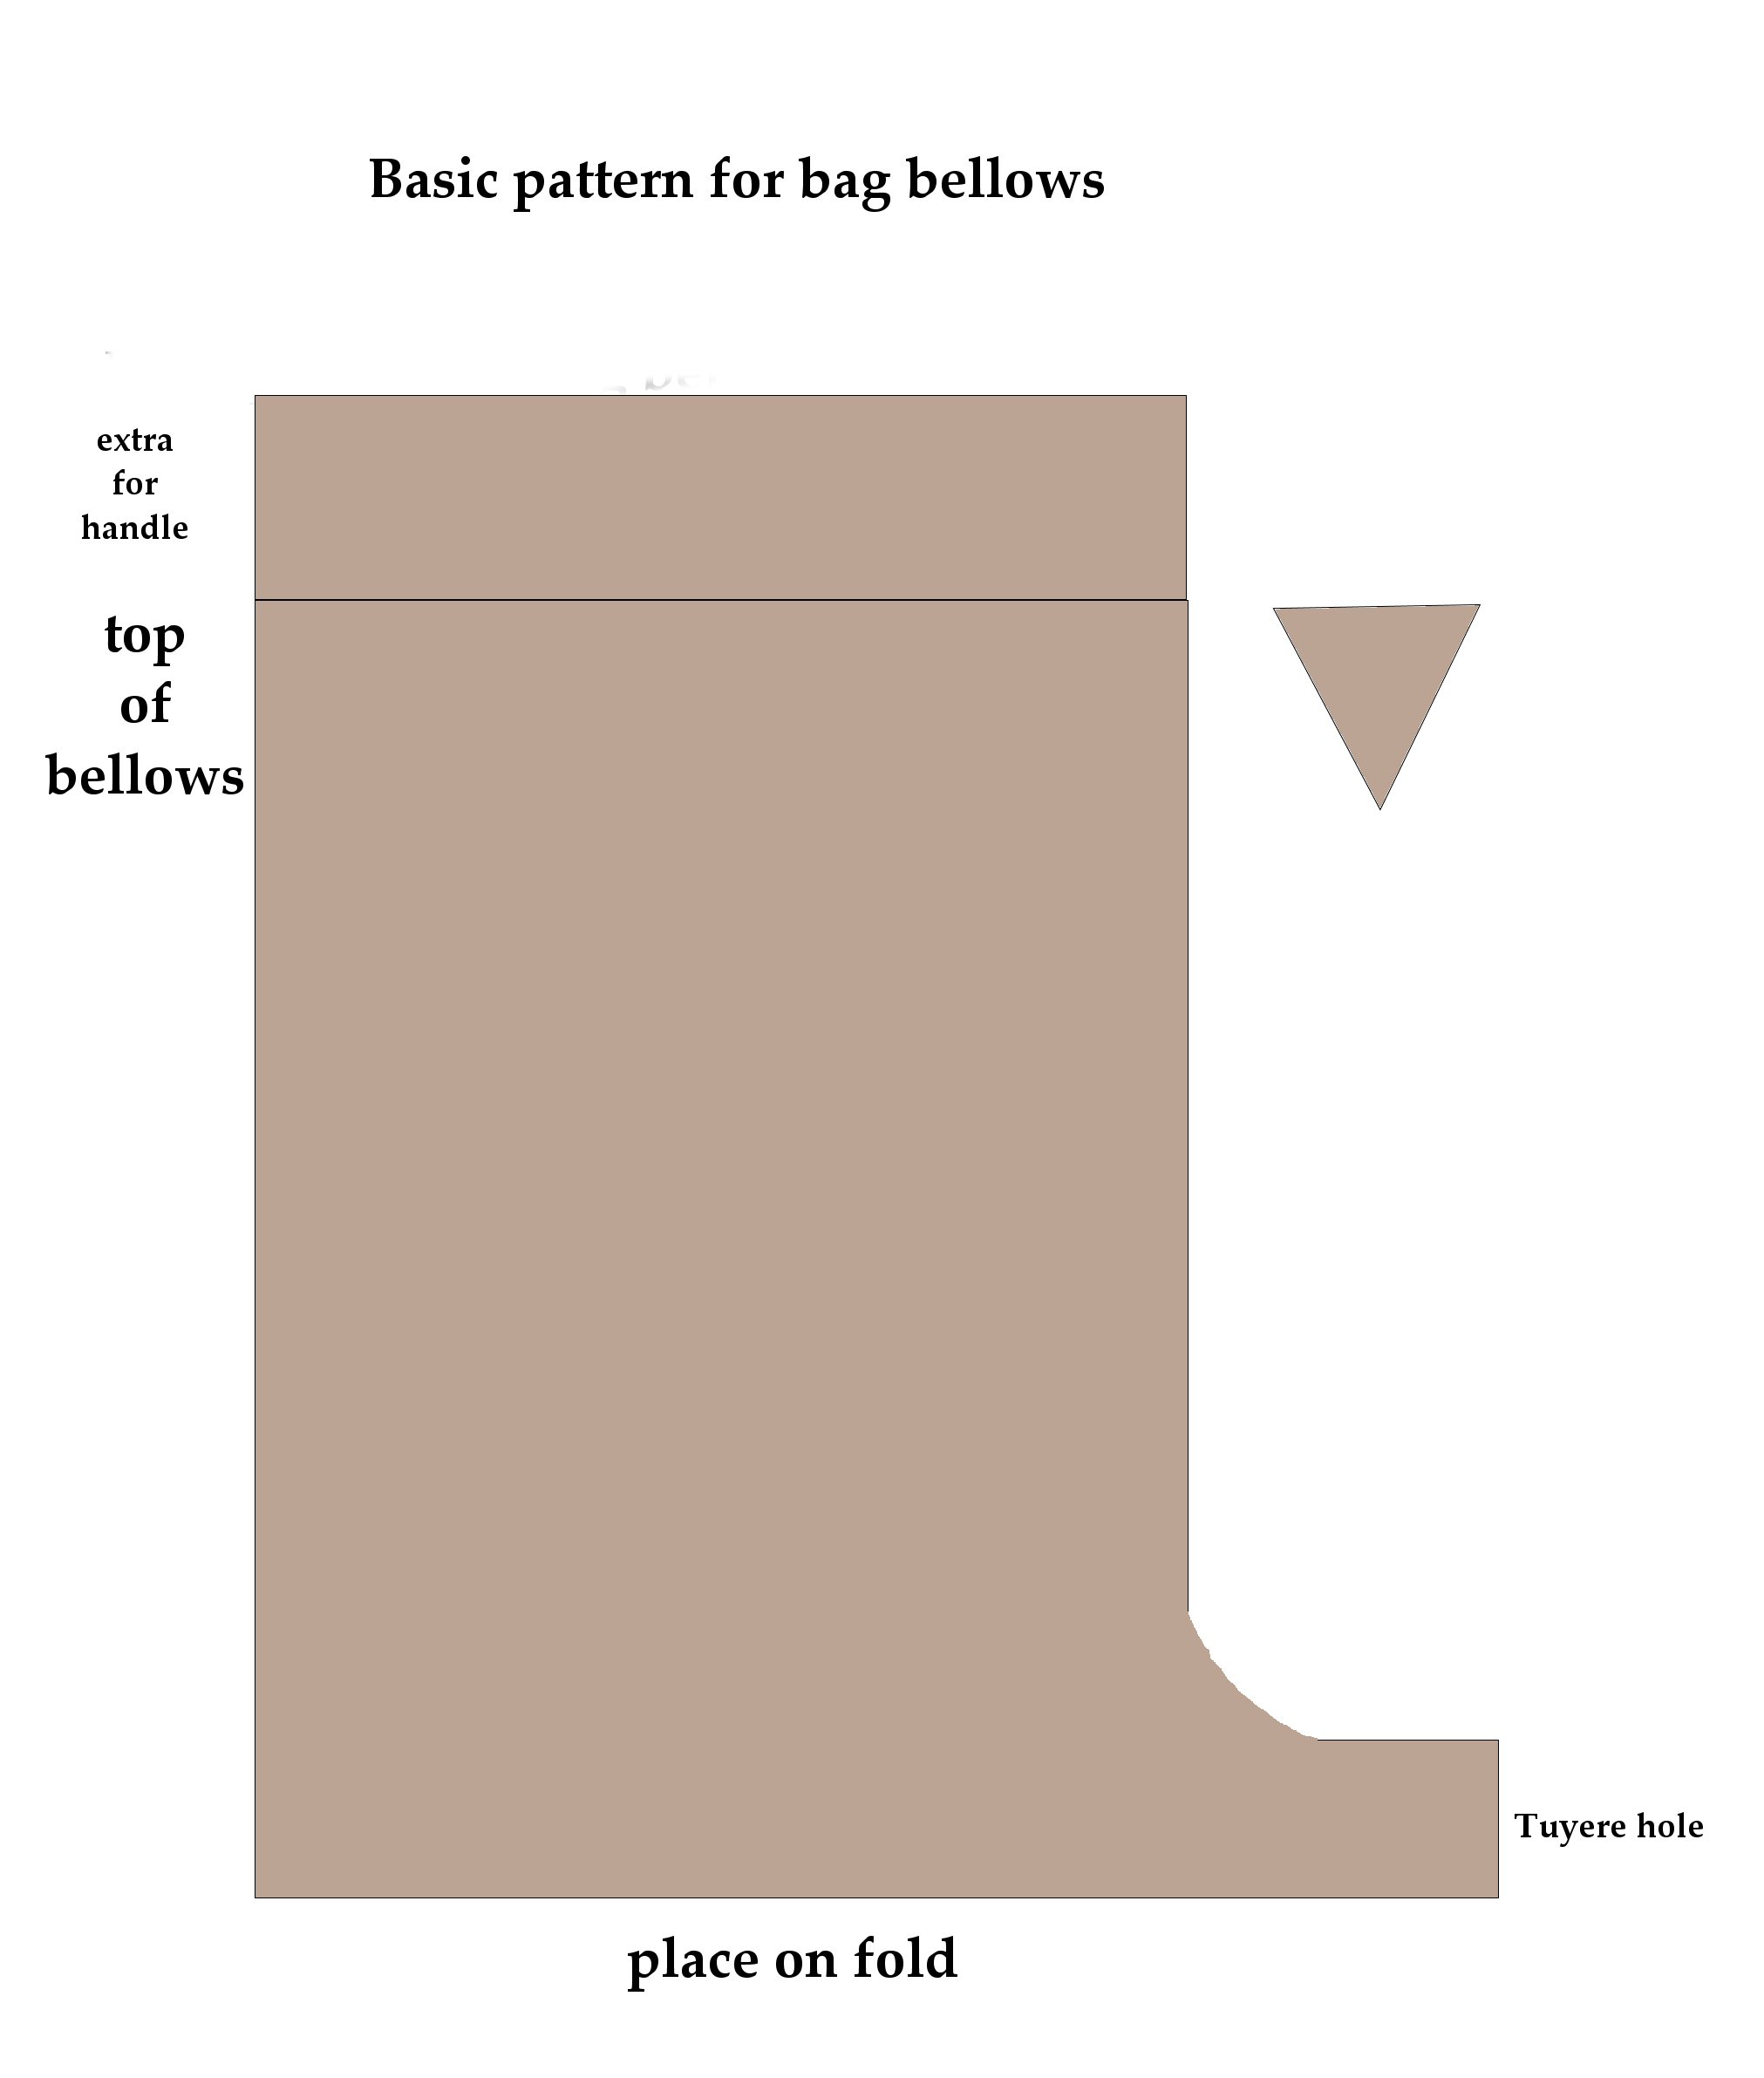
Another useful detail is to sew a small triangle in the front of the bellows, just below the handles. Holger Lonze taught me this trick. It makes it much easier to open the bellows wider and get more air in.
The other detail is the part at the bottom that sticks out. This is where the tuyere will fit. The size you make that will depend on the tuyere you make, and also how much air you want to push through to the fire. If it’s too narrow, you’ll be expending a lot of energy pushing air through a small space. Too large and you’ll be pumping furiously to get the volume of air through the tuyere. Mine is about 10 cm (4 inches) and tapers a little so I can fit different tuyeres to it in case I ever want to change it.
The other supply you’ll need is rawhide. Leather strips can work, but they aren’t as durable or tight as rawhide. The best source for rawhide I’ve found is the pet shop. Buy a rawhide chew bone for a dog and soak it in a bucket of water overnight. The rawhide will soften and you can untie the ends and unroll a nice sheet of rawhide. I cut it in a spiral so I have good, long pieces. While it’s wet, you can wrap it and tie it easily. Once it’s dry it shrinks to a hard, tight fit.

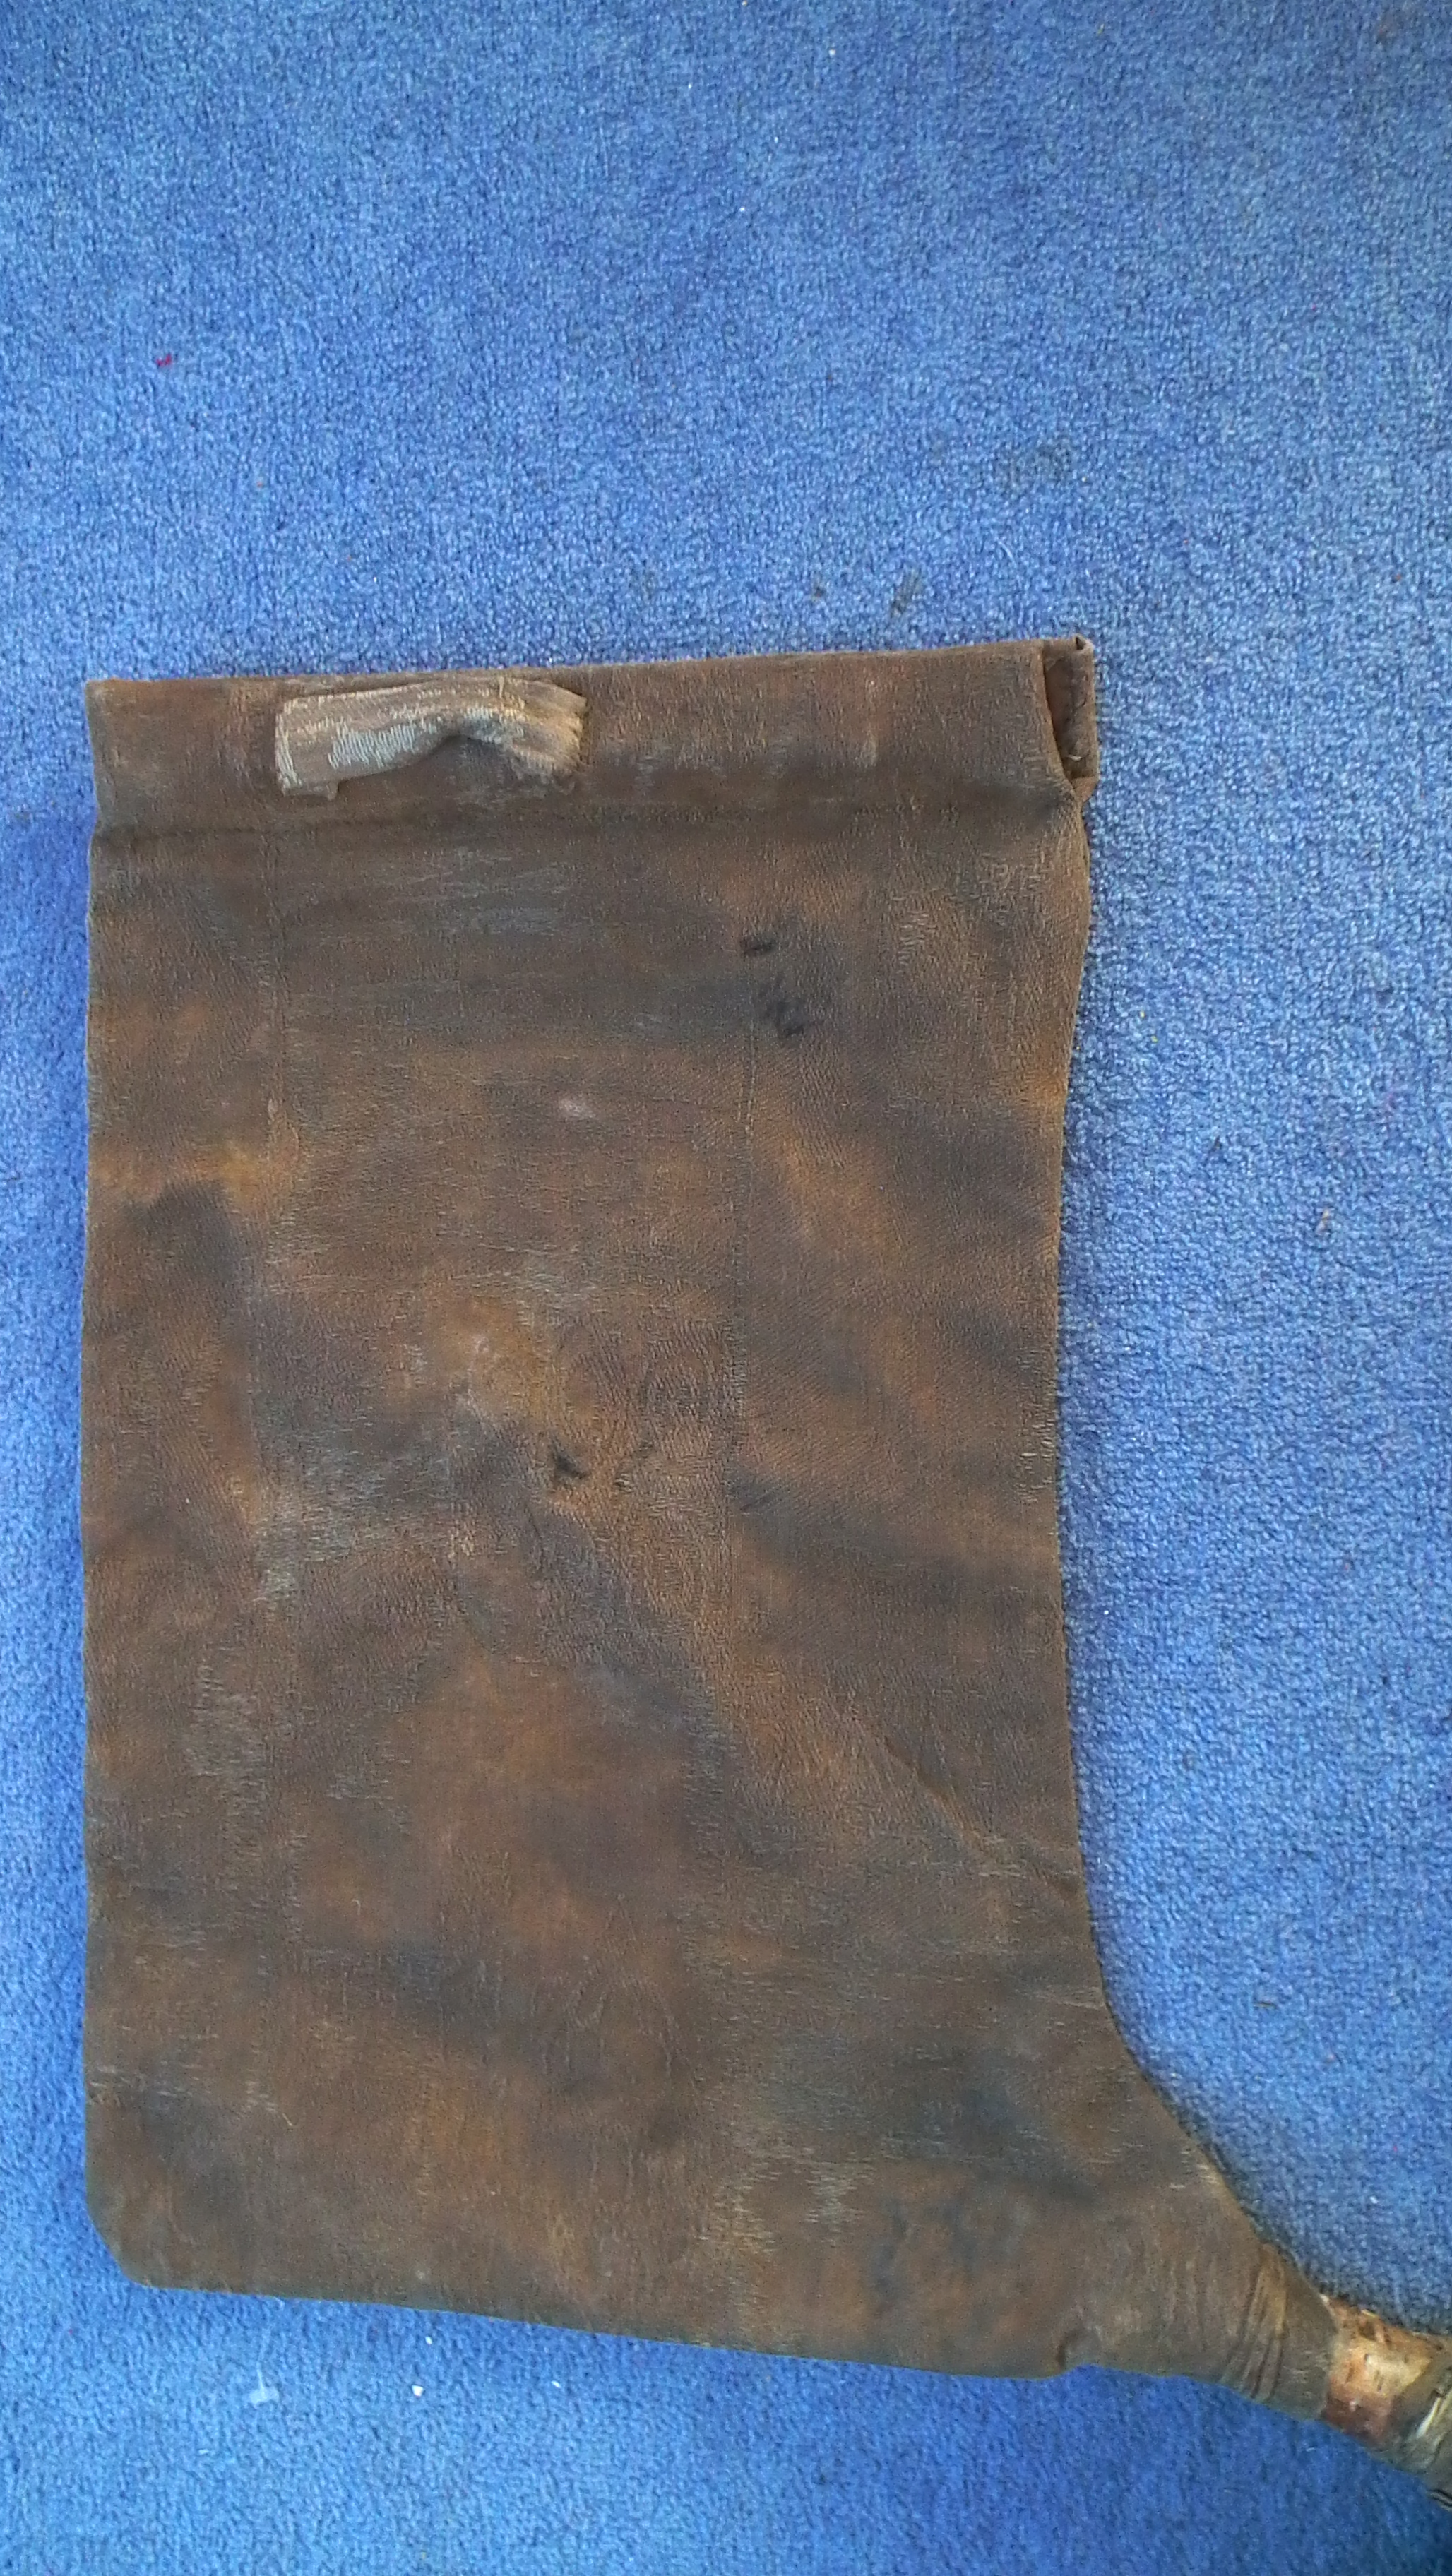
Cut out the leather or material and then stitch it with the outsides together so that when you turn it inside out, the raw edges will be on the inside. Don’t sew it all the way to the top. You want that extra selvedge to wrap around the handles. Make sure you fit the triangle in the front below the bottom edge of where the handles will be.
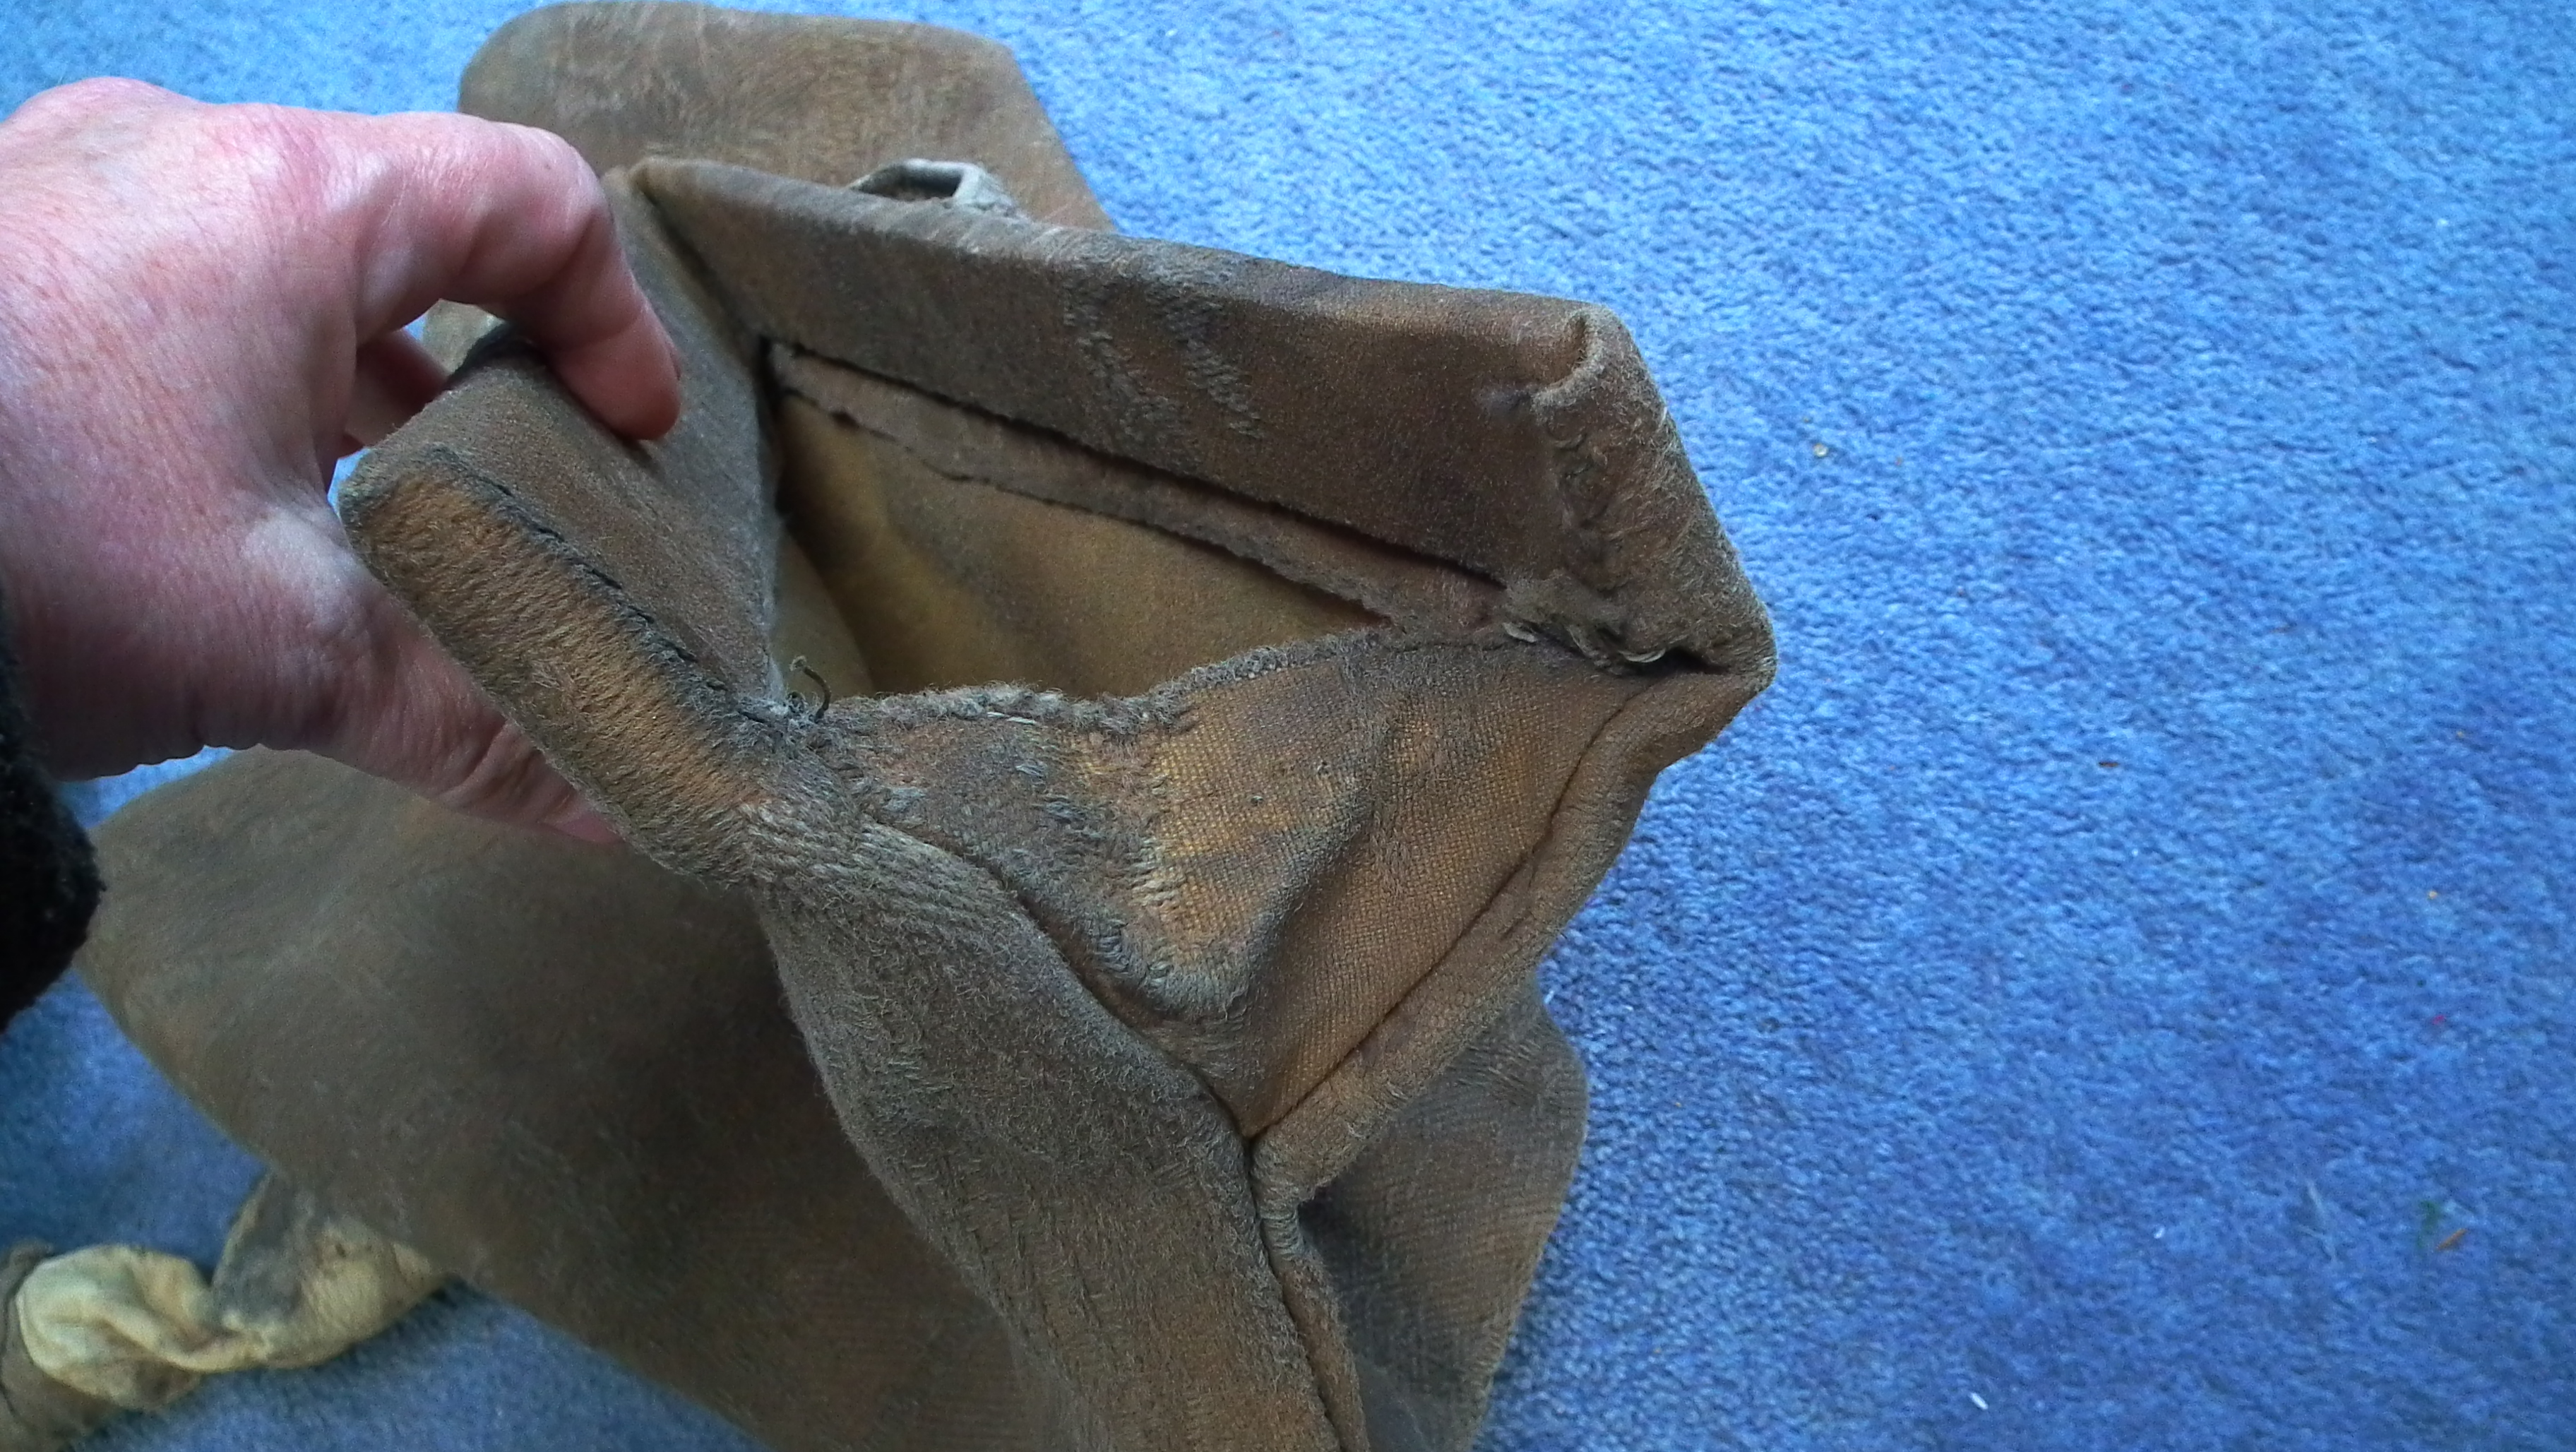
The next step was the hardest for me. It’s a bit of a pain. You need to wrap the upper selvedge of the bellows around the sticks and sew them tightly into place. If you’re using half-round branches, make sure the flat sides are on the inside so they meet and make a tight fit. Sew these in tight along the bottom of the sticks. It’s annoying if they wobble around.
Turn the bellows right side out and admire your work.
If you used branches, you might not need loops for your fingers. Try pumping them a bit and see if you can open and close them easily without them slipping out of your hands. The action is to open them while the top of the bellows is close to the ground, Lift them, close them when they are as high as you want to lift them, close the bellows and then push down. If you lose your grip, you might want to put loops on them. They are simple, just strips of the same material that your bellows are made from. Sew them so your hand will be about 1/3 to 1/4 of the way from the back. When the bellows open, the little triangle in front will allow the bellows to open in a “V” shape and allow you to trap more air. Having the loops toward the back means that you don’t have to open your hands as wide. Since I work with kids a lot, this was a consideration when I designed them. Also, I have small hands.

The loops should accommodate four fingers on one side and your thumb on the other. The handles will stretch over time, so I periodically have to stitch them again to tighten them up.
There now, try them out. If you feel any air leaks in the seams you can seal them with linseed oil. If you made your bellows from fabric, the easiest way to coat them is to hang them on a clothes line outside and slather the oil on with a paintbrush. It takes a long time to dry and smells pretty strong. It’s definitely something to be done outdoors. Keep in mind that it might take a day or two for the linseed oil to dry.
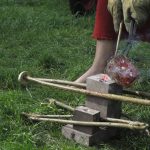
Now in order to work, you’ll need at least a short tuyere. If you’re not fussed, some steel tubing from a vacuum cleaner works fine. If you want a more Bronze Age look, you can make them from wood. I took a short branch and drilled a hole in it using a 2 cm flat bit (1 ½” spade bit in the US). The branches are about 1 cm or ½” wider than the bit. If you don’t have a bit or don’t want to use power tools, take a branch of the right thickness (about 4 cm or 3”) and split it in half. Carve out the centre and fit them back together using glue and rawhide.
Fit one end of your tuyere into the opening at the bottom of your bellows (you didn’t sew that shut, right?). Now take the wet, sloppy rawhide and wrap it tightly around the part of the bellows covering the tuyere. If your tuyere is made of split branches, keep wrapping so that it holds the halves of the branch together. Depending on the weather and humidity, it might take several hours for the rawhide to dry.
Once everything is dry, try them out. They’ll be a bit stiff at first and will need to be broken in. It takes a bit of practice to get the Open-Lift-Close-Push rhythm going, especially if you alternate hands. Once you get into it, it gets easier. Think of a cat kneading its paws.
Another tip is to get some thin willow twigs, about the size used for making baskets. Make them into hoops that will fit inside the bottom of your bellows. It will help keep them open, especially if you have a tendency to lift them too high.
Next you’ll be wanting a “Y” shaped tuyere to connect the bellows together.