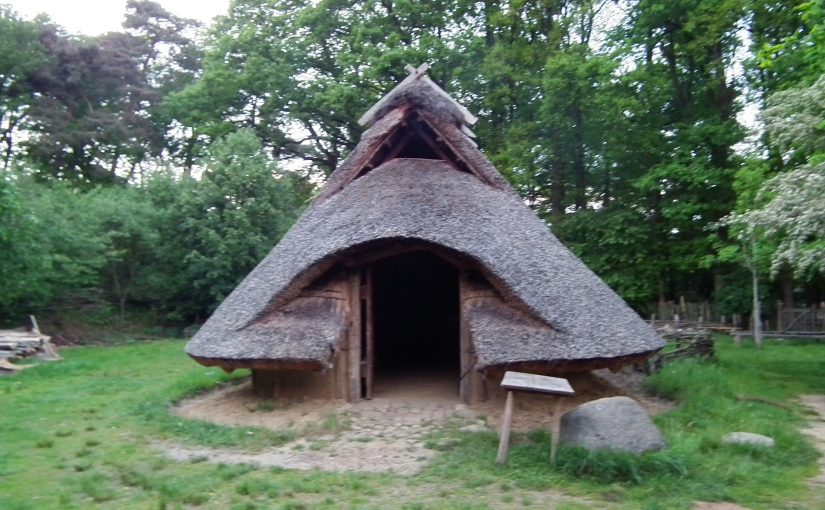
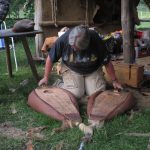
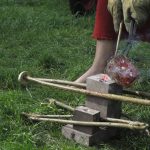
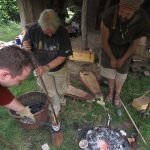
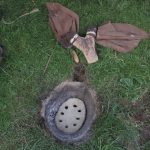
Last year the Bronze Casting Festival was a wonderful experience. People from all over Europe came and exchanged information about bronze casting and metalworking techniques.
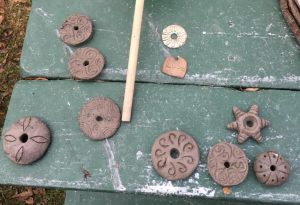
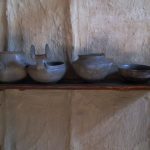
Here are a few photos of the First Bronze Casting Festival in 2017.
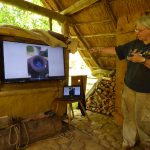
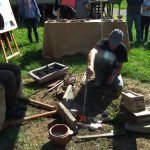
My talk on air flow and furnace design
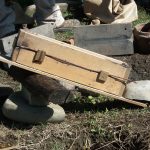
Casting with Heide Nodegaard
Casting with Mark Vyvyan-Penny
Pumping Viking bellows. It’s a bit more work than Roman ones, or even bag bellows.
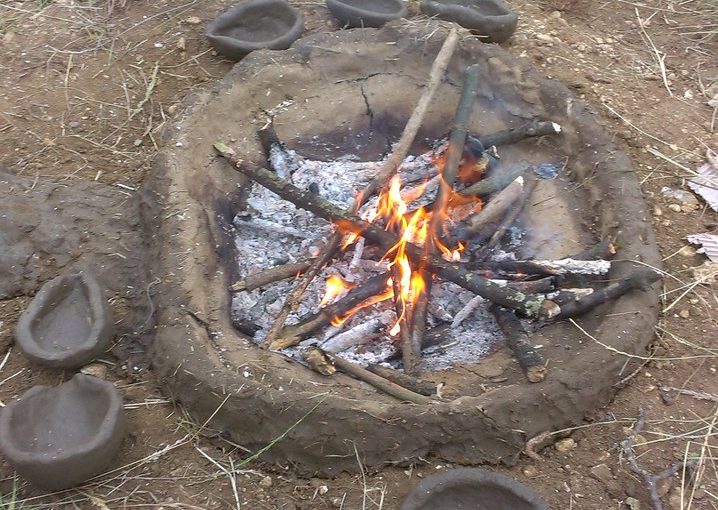
Pouring into stone moulds.
Stirring the bronze to make bronzing powder.
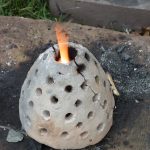
My furnace and bellows
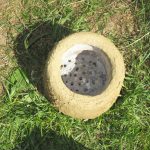
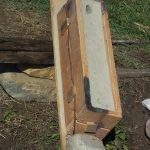
A small Roman furnace designed for jewellery casting.
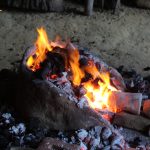
Bronze Age Bunsen burner
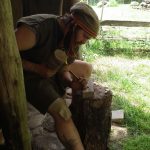
Chris Stein carving stone moulds.
I’ll be returning there again this May and furthering my experiments in metal finishing. In addition to casting, I’m interested in using metal oxides as colorants for enamels and how they are affected by the reduced environment of a charcoal furnace. In the past I did a lot of metal enamelling in an electric furnace. This will be a chance to explore how the process of enamelling could have been developed. I might even have a chance to make some glass while I’m at it!
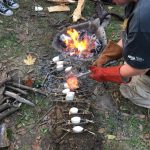
On November 1-3, 2017 I was in Macomb, Illinois leading a bronze casting workshop at Western Illinois University. This was the first event of its kind for the University and few people there knew what to expect. While the archaeology program provides for a certain amount of flintknapping and some pottery done by students, there was no available program for the introduction of the method and theory behind experimental archaeology.
Professor Andrea Alveshere, a colleague of mine from the University of Minnesota and I discussed the possibility of my coming to give a short seminar and workshop. There wasn’t much in the way of funds for the project, so I agreed to come as long as my expenses and materials were covered. It was a program that both she and I very much wanted to introduce to the university.
I had a long train ride from St Paul to central Illinois, but enjoyed seeing the landscape. I arrived fairly late that evening and was taken to cabins on rural property now owned by the university. The land and cabins had been bequeathed to the university and they are a great resource. In addition to dorm-like cabins with bunk beds, bathrooms, and limited kitchen facilities, there is a dining hall with a complete kitchen. We made sure that there were supplies for coffee and breakfast and checked out the site where we would build the furnace.
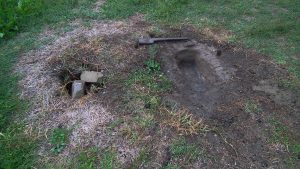
The grounds around the cabin are level and grassy, and there was already a large firepit with picnic benches arranged around it. I met the site manager, and we chose a spot beyond the firepit where we could construct a small pit furnace. She was excited about the project and had no problems with holes being dug. She also liked the idea of the furnace being buried when we were done with it so that it could be excavated later.
We hit the ground running on Thursday. Andrea picked me up and we went to the university where I met students and staff in the art metals department. They were excited about participating in the project and were glad to provide us with supplies. The idea of primitive casting was fascinating to them and they looked forward to the event. I borrowed some tongs and other equipment from them, with more to be delivered the next day. While we spoke, one of the professors who teaches pottery came in. We needed clay, and I had to explain that we wanted his worst stuff, the stuff that’s scraped off tables that’s usually discarded or sent for recycling. He didn’t quite understand why we wanted the useless clay, but he said that we could have as much as we wanted.
After lunch we made a run into town for more supplies. We found bags of sand and proper lumpwood/natural charcoal at the local farm store for a reasonable price. The plan was to cast into cuttlefish bone since two days was not enough time to make moulds for lost wax casting. Andrea had ordered cuttlefish bone from a wholesaler, but unfortunately when the shipment of arrived it contained packages of aquarium gravel. So we were also scouring local pet stores for cuttlefish. Andrea contacted the company she ordered from and arranged an overnight delivery, but there were no promises that it would arrive in Macomb in time. The nearest FedEx office was in Peoria and it would have to go by post from there to Macomb.
We agreed to meet up at the site at 2:30 to build the furnace. When we arrived, a few students were already on site. I explained to them about clay mixing and the reasons we mix sand and dung with the clay. In the process they got a basic lesson about ceramic petrography, and early clay recipes.
Note the supports for the teapot stand inside. It was a well made and durable furnace.
By the time we were done they had a working knowledge of clay bodies and the physical experience of working with it as well. A hole was dug and then it was lined with clay. I explained about tuyeres and used a branch to construct a clay-lined hole that ran from the top edge to the base of the furnace. When I build a furnace I usually ask the students to decorate it in some way. Usually something is put above the hole where the tuyere comes in. While working, the students decided that the furnace should have a turtle head above the tuyere. A nice choice, since the glowing charcoal would make for an interesting turtle shell! While they worked on that, I made the platform (also known as teapot stands or perforated clay slabs) to place in the furnace. By 6:30 pm we had everything done. That was right on time since I needed to change clothes for my talks at 7 pm at the university.
Once I was cleaned up Andrea took me to the lecture hall. It was a great facility with a large wall-sized screen and auditorium seating. It was almost half full, which was good considering that it was a weekday evening and the subject was unfamiliar to most people. Despite that we drew attendance from the anthropology and art departments, in addition to members of the local archaeology society and members of the public who were not associated with the university.
I gave three short talks in succession with questions and answers after each one. These were all presentations that I’d previously given at conferences, all of which were about 15 minutes long. I started off with the one I gave in Oslo about the significance of mistakes and how they are preserved in metalwork. The second was about Minimum Tools Required, a portion of my PhD thesis that organised the chaîne opératoire of metalworking. The final talk was about excavating metal, based on the BAJR guide that I’d written. The questions were enthusiastic and despite there being little in the way of prehistoric metal in the region, there was interest in the subject. I did answer a couple questions about Lake Superior copper use among Native Americans. There is some debate as to how some of the copper objects arrived in central Illinois from northern Minnesota. Were finished objects traded by Native Americans, was the raw material transported and traded, or was the copper a chance find of raw material that had been redeposited in southern Illinois by glacial action? I hadn’t seen the objects, but typology might provide a part of the answer. At the end I spoke a little about what we would be doing the next day.
Afterwards Andrea and I returned to the furnace. Although it was still damp, I wanted to get it dry before casting the next day. We laid a little fire and sat talking late into the night. The presentation had been a great success and it looks as if it generated a lot of interest.
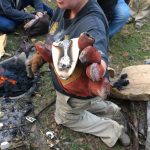
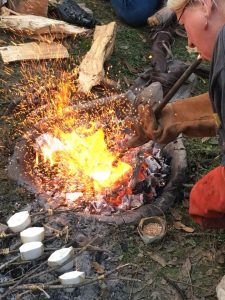
Friday I was scheduled to give a talk on experimental archaeology at noon. This was basically an introductory lecture about why and how experimental archaeology is done, along with the basic ground rules for doing experimental work. Word had gotten out and the room was filled to capacity. After the talk we headed back to the site and got to work. Because we hurried the process along last night there were a couple cracks in the furnace, but because it was set into the ground the cracks had little effect. The furnace was still warm from the previous night and I used a trusty pig scapula to scrape out the ash and leftover charcoal and then fit the platform in place. The fire was lit and after I had worked the bag bellows for a bit, the students took over. Every group I work with seems to have a different approach as to how to operate the bellows. I know that the way I do it, alternating pumps with one per hand, is difficult to coordinate for many people trying it the first time. Some people never quite get it and just pump both the bellows at the same time (affectionately known as the Cambridge Method). Here, the students teamed up and had one person per side, operating the bellows with both hands. They were surprisingly well-coordinated. The students were energetic and worked long sessions without tiring. At times I had to ask someone to give up their place to let another student try. I wanted to make sure that everyone who wanted to (including non-students who had come to see what was going on) had a chance at the bellows. The furnace took a bit longer to get the first crucible of metal melted than it normally does because of the frequent changes of personnel pumping the bellows, but we did get there. About an hour after we started Andrea got the call that the cuttlebone had arrived. Students were already carving moulds from what we had on hand. Now things were in full swing. I was grateful to the jewellery professor who took on showing the students how to prepare and carve the cuttlebone while I supervised the melts.
I hadn’t noticed that I was still wearing my coral earrings from the lecture!
Opening the mould of another successful cast
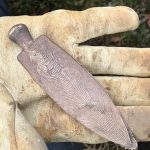
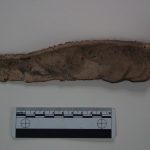
A freshly cast bronze knife
There were a few failures due to improper mould preparation. It gave me the opportunity to explain how easy it was to lose droplets of metal while casting and pointed out the debris that was getting trampled around the furnace, tell-tale clues that an archaeologist needs to look out for in a site that could be mistaken for a cooking pit. Every experience that day was a teaching moment. Both instructional and non-discursive. Repeatedly students told me that they had never known that there was such a thing as experimental archaeology, and that they were thinking about archaeology in a new way. A couple students who had not yet declared were suddenly thinking about the possibilities of having a major in anthropology.
The students wanted to keep going despite a large pot-luck dinner that had been prepared, so we all went to eat in shifts. When I took a break, people assured me that I wasn’t too soot covered, although I felt as if I had charcoal smoke in every pore. The head of the Anthropology Department came up and complemented me on my lecture. He was impressed by how I presented the information and noted the enthusiasm of the students. The potluck was also attended by members of the local archaeology society who aren’t formally a part of the university, but attend functions and often work with students on projects. We had a great time talking about local archaeology and experimental work.
After dinner we worked a little more, but it was long past the time that we could see well in the dark. We packed up as much as we could find and put it all in the cabin.
Blowing off the bits of charcoal before pouring. Always exciting!
I had the choice of leaving on Saturday or Sunday. I opted for Sunday because the train left at 7 am and I knew that Friday would be a late night. I told the students that if they were interested, we could continue casting on Saturday. I had no lectures or other plans, so we agreed on a 10 am start.
The next morning we had another good-sized group of students. The previous day there had been close to a couple dozen people in the afternoon and rarely fewer than a dozen visiting throughout the day and evening. Saturday was more relaxed, but still well-attended. Students made moulds and instructed new participants who hadn’t been there the day before. The more experienced ones were already taking on tasks like they were old hands at it.
Andrea was amused that this was supposed to be my day off, but instead it was another full day of casting. Some experimentation was done with hammering (using my bronze hammer and anvil) and other finishing work. One student was keen on textile archaeology, so she cast some beautiful spindle whorls. I also made some clay ones with her, using some of the scraps left over from building the furnace. Once dry, she’ll take them to the art department to see if she can get them fired there. I heard that they also do raku pit firing.
Clay, pewter, and bronze spindle whorls. experimental Bronze Age metallurgy meets textile archaeology!
Towards evening I needed to call it quits. I had an early start in the morning and needed to get things cleaned up and packed. The students reluctantly poured the last moulds and we got everything in order. The next day they would cover the turtle furnace with dirt and let it deteriorate. Left to itself, it should be covered in grass in a year. In a year or two it will be just as useful as a teaching tool for excavation.
The entire event was successful and exceeded our expectations. We had brought an entire new perspective on archaeology to the department, and the department heads were impressed. In my talk I had emphasised the value of programs like this not only for hands-on student learning, but also as a unique opportunity for public interaction with the department. Too often universities are segregated from the surrounding community leading to the local residents wondering what goes on there. Experimental archaeology programs, especially those performed out of doors, provide an opportunity for interaction and public participation, and even drawing on experience of people from outside the university. Andrea and I discussed the possibility of doing a longer workshop or even the possibility of an accredited short course. Now that the department has been given an idea of what can be accomplished, they might be more amenable to funding it.
These are ambitious ideas in a time when universities are hurting for money. I was glad to be a part of this mainly because I wanted to help Andrea introduce experimental archaeology to her students and colleagues. There was no budget for such an unknown project, but because we were keen on this, Andrea scraped what funds she could get at short notice and we put it together on a shoestring. I would love to pursue this and give students the full range of what an experimental archaeology course could offer, but that is for the university board to decide.
In the meantime, I would like to thank all the people who support my project on Patreon. They provided the opportunity for this seed to get planted and for students to have a unique experience that will benefit them in their careers as archaeologists. The contributions made through Patreon and PayPal go towards giving more people the opportunity to explore the world of material culture in a way they never realised before. If you’re interested in finding out more about my Patreon project or making a sustaining contribution please click on the link below.
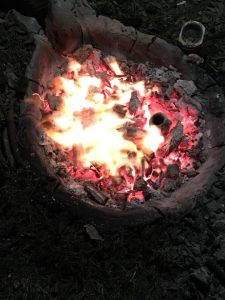
The furnace at night
Did you find this information useful? Please consider supporting this site with a small donation through PayPal
In October 2015 I had the great adventure of doing some bronze casting with Il Tre de Spade (The Three of Swords) at the Archaeological Park and Open-Air Museum of the Terramare in Montale. The museum is located just south of Modena and recreates Bronze Age houses surrounded by a palisade and a marsh, appearing as it would have in the central and later phases of the Bronze Age there (1600-1250 BC). The museum hosts demonstrations and activities, along with a recreation of the original excavation.
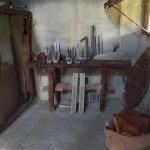
The houses are nicely furnished, with well laid out areas for cooking, sleeping, food storage, and workshops. One house has a workbench for wood and antler working, and another area set aside for weaving and textile crafts. The other has a metalworking workbench with stone anvils, moulds, bellows, and all the needed kit stored neatly on shelves and a work bench. Unlike the recreated roundhouses that are often seen in the UK, you can get a good idea about how the ancient people lived here and where they put their all the things they used in every day life.
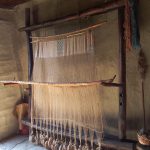
The ubiquitous Bronze Age warp weighted loom. This one has some rather nice textile in the works.
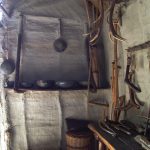
The cooking hearth and oven. The little device on the side is a wonderful little warming oven with charcoal in the bottom and the food on top. I like to think of it as a Bronze Age microwave.
Pots on a shelf
Space for metalworking tools and supplies
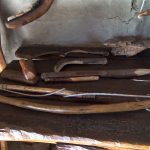
Some of the wood and antler working tools
The woodworking shop
I had been invited to join the casting demonstrations by Claude Cavazzuti, who is also a member of EXARC. He is one of Il Tre di Spade (along with Pelle and Scacco) , who were some of the first metalworkers at the museum after it opened several years ago. They do regular demonstrations (sometimes with hundreds of visitors per day) and also run workshops that introduce people to Bronze Age casting and metalworking with a focus on the Middle and Recent Bronze Age (1700-1150 BC) of Northern Italy.
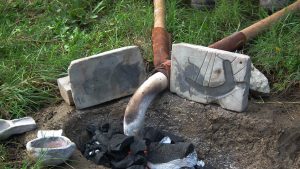
The furnaces there are small clay-lined trenches about 25 cm deep and 50 cm long, something that would be nearly invisible archaeologically and easily interpreted as a cooking hearth (and really, there’s no reason why they couldn’t be both). The furnaces heat up quickly and work efficiently. The charcoal is concentrated around the crucible with more warming beside it so that the fuel is hot before it gets raked around to cover the crucible.
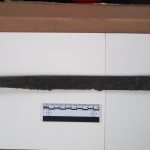
The furnace. Not much to see here, and even less after a few thousand years!
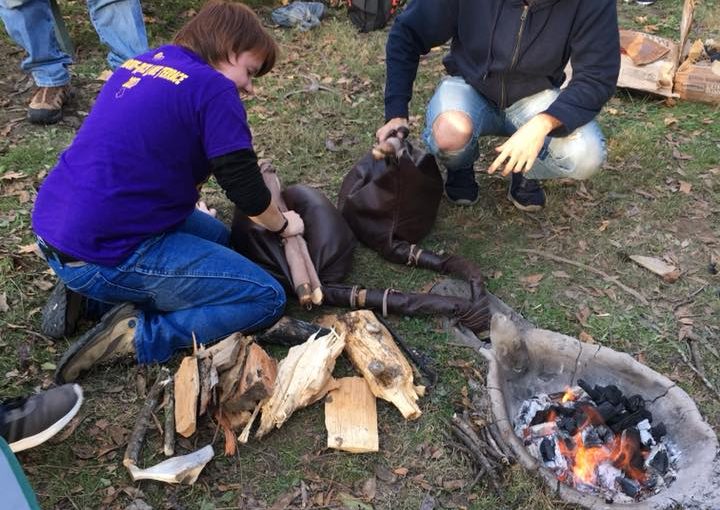
My first new introduction was the bag bellows. They were larger than I have used in the past, and made of much heavier leather. They put out an enormous volume of air, and their size also allows the person pumping the bellows to sit on a low stool.
The real challenge for me was the valve and the way the bellows open at the top. The bag bellows I’d used before have straight sticks in the handles that either open parallel to each other, or are hinged at the back to open like a “V”. These bellows have two sticks on both sides, so that they open into a diamond shape making another hinge where your hands hold the bellows. It took a little bit to get used to them and to figure out where best to position my fingers. I never did get it quite tight enough and could feel a bit of air blasting on the back of my arms, but they still delivered a powerful amount of air. The tuyere was a large clay tube that curved downwards at a 90° angle, and was positioned so that it was directly above the crucible. This meant that the charcoal had to be moved frequently to keep the crucible covered. Without the layer of charcoal above, the air coming from the bellows would cool the metal in the crucible.
One nice innovation is that they put a large stone in the bottom of each bag. That prevents people who are new to bellowing from lifting them too high and causing the bags to collapse.
Casting in Stone and Sand
The crucibles are a flattened dish-shape, with some that were larger and a bit more of a bowl shape to hold more metal. They have a grooved tab on one side that is used as a handle, and have a small lip for pouring. The shallow design and lip cause the metal to pour more quickly and flow out in an arc, rather than almost straight down like the triangular bag-shaped crucibles used in Britain. It took a couple tries to get used to the trajectory of the metal in order to get all the metal in the pouring cups.
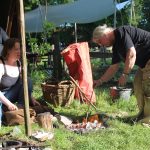
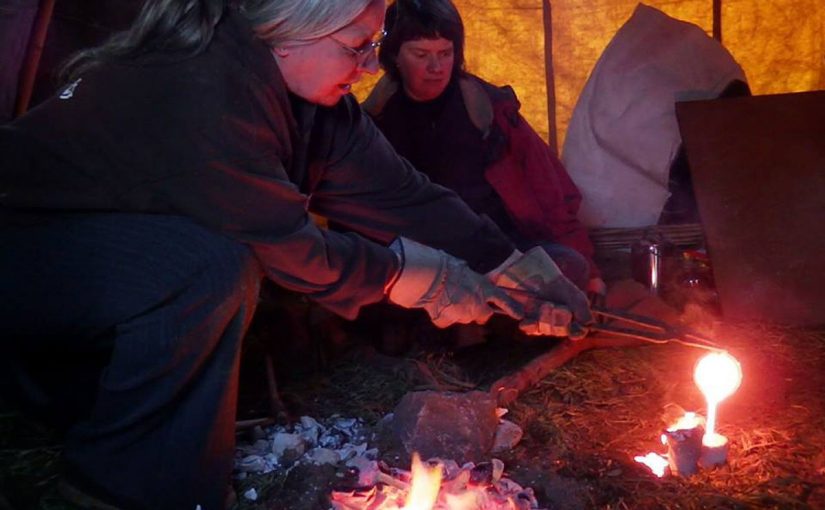
The shallow crucibles also mean that the pouring has to be done more quickly than with the deeper crucibles that I was used to.Because they are wide open, the metal cools quickly, so there is little time for dragging out charcoal and skimming. As soon as the metal was molten, we gave it a quick stir with a stick, pulled the crucible out with the wet tongs, and poured the bronze into the mould while holding the stick across the top to keep the charcoal back.
The tuyere with the moulds set next to it to warm up. The small bowls are the crucibles. Note that they are used without lids.
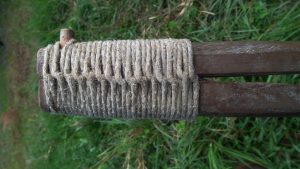
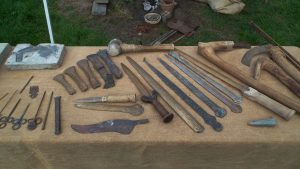
The tongs they use are beautifully crafted from wood and cord. They are kept in a bucket of water to keep them from burning when holding the heated crucible. The entire organisation of tools and materials is efficient and elegant, and there is nothing that could not have been made from materials available during the Early Bronze Age.
Beautifully constructed wooden tongs
For this session we used the stone moulds that were on display in the house. The moulds were made of a very fine-grained local stone, the same that had been used by the Terramare circa 3500 years ago. The moulds were warmed next to the furnace and then strapped together with leather strips. We took turns bellowing and pouring.
We cast sickles, knives, and daggers using the stone moulds. Later we moved on to using sand moulds. I borrowed one of the antler spindle whorls from the woodcarving house to see if I could try casting that as an experiment. It worked sort-of. It will take a bit of work to get finished up, but I think with a couple more tries we could have got it spot-on.
I was wearing my bronze torc bracelet that day and one of the new people wanted to try casting that. We used it as a model for a sand mould and after a couple tries, we got a cast that made a perfect duplicate.
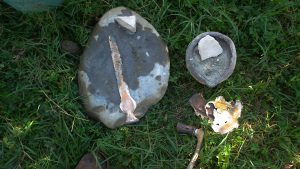
Some of the replica tools and ornaments cast at the Terramare Museum
Casting a bronze sword
The museum was also performing public demonstrations that day. The main event was casting a sword using a sand mould. The sand they use is local, and perfect for casting. Commercial casting sand consists of fine sand mixed with dry bentonite clay. The sand from the Po River delta is exactly that, sand that has been reduced to almost a powder by erosion, combined with clay and silt that has been washed into the river (I encountered the same natural mixture in Albuquerque in the dry bed of the Rio Grande River Valley). The Po River sand leaves a much finer texture on the finished objects than the coarser commercial sand that I have used in the US and the UK. Looking at the quality of the sand, I was able to understand how different sands might affect the regional quality of casting, and might even have had value as a commodity.
The mould for the sword was made using the standard cope and drag method, with the pouring cup on the flat side of the sword, rather than pouring from the top. A large vent was also placed at the tip of the sword. Before casting, the mould was propped up at an angle. As the crowd gathered and settled onto benches under a marquee, Claude explained Bronze Age metalworking techniques, and then the sword was cast. The angle and the pour are calculated so that the metal cools just before it exits the vent hole at the bottom. Everyone was impressed and even more so when the perfectly cast sword was taken from the mould.
The sand mould is set up. The hole at the top is the pouring cup. There’s a smaller hole at the bottom, at the tip of the sword that acts as a vent.
Another view of how the mould was propped up to allow the metal to flow.
Getting ready to pour the bronze
Often after the casting is done for demonstrations the bronzes are taken home and finished using drills and angle grinders, but not here. We had a relaxing time using wet sand on the hard, fine-grained anvil stones to grind off the flashing and excess metal. Some smaller stones that had a coarser texture could be held in the hand and used for working the inside curves and corners. I’d brought my small socketed hammer along and we used that to break off some of the excess metal. Between light hammering and patient grinding, the daggers were smoothed rather more quickly than I would have expected.
A nice flat anvil stone for grinding the flashing off of the dagger blade. There’s evidence from the originals from this area that the holes for rivets were punched rather than drilled, or cast in place. Other stones are used for coarser grinding. Note my hammer at the bottom. It came in handy for breaking off some of the flashing. A bit of time travel here since this is a replica of a Late Bronze Age hammer!
While we were casting, more tour and school groups came through to watch more casting demonstrations. School kids also had the opportunity to make their own copper bracelets. There was a square of tables set up with small stone anvils and hammerstones. Punches and chisels were available so they could decorate the strips of copper to make bracelets in patterns that would not have looked out of place in a Terramare village.
It was a great day, and one that was full of new experiences. It was particularly interesting to see how much variation there is in doing the same tasks and getting successful results. The different types of furnaces, moulds, bellows, and crucibles make for differences in how tasks are performed. Other small acts show variation between different metalworking groups. Tasks such as turning the crucible over to remove dross and leftover metal after casting was done into the furnace here, where in Ireland we have always done that on the ground next to the furnace. These are small things that could be seen archaeologically if excavation is done carefully, but also shows how customs and metalworking traditions develop with regional differences.
Knife: This is as cast in commercial casting sand. It will take a bit of polishing, but I am looking forward to finishing and using it.
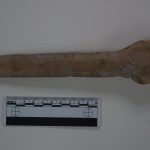
Dagger: This was cast in a stone mould and is partially cleaned (it’s the same one as in the photo above). The pouring cup will be cut off and rivet holes punched into the arched end.
Sword: This was cast in the natural sand. It’s difficult to see, but the texture is much less gritty than the knife but smoother than the dagger that was cast in stone. It just needs to have the sprue and vent removed and a bit of the flashing taken off before punching the holes for the rivets.
Sword seen from the edge. Note the wide shallow pouring cup, and the angled vent at the tip of the sword.
A special thanks to Il Tre di Spade, Claude, Pelle, and Scacco and the staff at the Parco archaologico e Muse all’aperto della Terramare for inviting me to participate in casting. I would also like to acknowledge Markus Binggeli & Markus Binggeli who are masters of bronze casting and replicating ancient metalworking techniques. They are mentors of Il Tre di Spade, and provide both inspiration and technical expertise for experimental archaeologists.
Useful links
If you’d like to learn more about the Early Bronze Age in the Modena area, the work of Il Tre di Spade, and the Terramare Open Air Museum in Montale you can find links below.
In the summer of 2014 I had the pleasure to assist Dr Eleanor Blakelock in running week-long seminars in archaeometallurgy and experimental archaeology at the Sedgeford Historical and Archaeological Project (SHARP) in Norfolk. The current excavations are focused on two areas of an Anglo Saxon village, however their “primary objective is the investigation of the entire range of human settlement and land use in the Norfolk parish of Sedgeford”. The excavations have been going on since 1996, and the organisation provides comprehensive teaching in a wide area of archaeological subjects. You can read all about the project here.
The previous year SHARP began a new course in archaeometallurgy. Ellie wanted to expand the course, so I lent a hand with some of the hands-on and experimental work. We built furnaces, made moulds, crucibles, mixed alloys, and cast bronze. We even got some local ore to smelt iron. It was an intensive week and the hottest one I have ever experienced in England.
During the event, Ellie took some videos of us in action. The first one shows us building a pit furnace for casting bronze and a pit for heating the moulds. The video then follows us through the casting process.
One interesting phenomenon of the week was how we became separated from the rest of the SHARP community. We were given our own space that wouldn’t interfere with the the trenches or the campground, and was not archaeologically sensitive. The first two days when we were building furnaces we kept to the same schedule as everyone else. However, once the casting began we couldn’t stop for meals or keep to the schedule that everyone else had. One of our group would go down to the mess tent and bring back food for the rest of us. We were effectively isolated, although the others always knew where we were from the rising smoke. Later when we started showing up with freshly cast bronze jewellery there was a bit of envy and wonder. In the space of a couple days we had gone from being part of the community to the people who were “over there” with special knowledge, and who didn’t conform to the regular schedule or tasks that everyone else did. We kept odd hours, were continually covered in soot, but had become somewhat wizard-like in our knowledge of metalworking (not to mention regularly getting out of kitchen chores!).
On the final evening, everyone joined us for the iron smelt. The week had been intensely hot so we started stoking the bloomery furnace in the late afternoon, after the heat of the day. As the sun set and most folks had finished their supper, they came by to see the furnace in full swing with fire shooting from the top. Of course everyone wanted to take a turn at the bellows. It was a magical evening. Stories were told, and mysteries presented. The people who worked on the furnace and participated in the smelt had a new appreciation for the process of making iron. The archaeologists also had a more rounded knowledge of what a smelting site could have looked like, including the resources needed for smelting iron, and the physical space that people would have inhabited while at work. It was past 1 AM when we finally called it quits for the night and let the furnace cool.
In a way the course was an initiatory experience for the archaeologists who participated in the event. It was hard work, but they learned the secret knowledge of the smiths and have stories and their bronze castings to prove it. They also gained a well-rounded introduction to archaeometallurgy that included both theory and practice.
I have been back to help run the course and plan to be there again this summer. The course will run again this July. If you’re interested in learning more about the course or being part of the excavation please sign up on the SHARP website.
I missed the first day of the conference. Instead I was at my PhD graduation ceremony. It was a wild trip. I graduated with the full regalia of cap and gown, had a quick couple glasses of wine at the archaeology department’s reception, and then we hopped on a fast flight to Dublin for the EAC9 conference at University College, Dublin. The conference was a collaborative effort brought together by EXARC, UCD, and the Irish National Heritage Park. It was a large conference with over 200 delegates, 20 papers, and 31 posters.
The Dublin University campus is huge and spread out, so we had a time trying to find the right building. I arrived just in time to deliver my paper and see the rest of the session. There were some interesting papers and posters given that explored the range of pyrotechnology in archaeology from cremation to glassworking and metalwork. In addition to the usual poster session, individual posters were given a ten minute presentation while being projected in the main hall. These included Jiří Hošek, Ryszard Kaźmierczak, Paweł Kucypera & Maciej Tomaszczyk (Nicolaus Copernicus University) with a presentation on steel carburising in a small shaft furnace, and Yuri Godino & Lorenzo Teppati Losè (University of Florence) presented a poster on their experiments on cupellating galena to produce refined silver.
I was also interested in the presentations on glassworking. There were two very different approaches to the subject with Marta Krzyżanowska & Mateusz Frankiewicz from Poland who spoke about producing Early Medieval lampwork type beads in an open hearth based on excavations in Ribe. Jonathan Thornton from Buffalo, New York spoke about replicating trade bead production based on evidence from Africa using glass frit in a clay mould .
The presentations that discussed metal began with my presentation on inverse segregation and its influence on chemical analysis of objects cast in the Bronze Age. Padraig McGoran of Umha Aois presented a poster on his experiments that included problems and solutions in casting into open one piece moulds.
After that I was off to the university’s experimental grounds to help set up furnaces and get ready for casting. The centre boasts a Mesolithic house, along with metalworking furnaces in varying states of decay. There are separate areas set aside for flint knapping, firing pottery, and active metalworking projects. The members of Umha Aois had already started building a variety of furnaces that included ones heated from below, from the side, and another with a tuyere that had a 90 degree bend that blew the air directly onto charcoal covering a flat, pan-shaped crucible. I worked at a portable ceramic furnace that was brought to the site by Fiona Coffey. It was set up inside Billy Mag Floinn’s newly constructed traveller’s tent. Despite it being wind and waterproof, the flaps ventilated it well and we kept warmer than the others who were set up under a tarp outside.
A memorable birthday! Photo by Tríona Sørensen
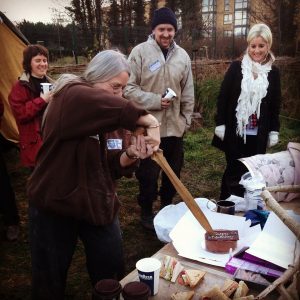
At lunch I was presented with a birthday cake. Surprisingly no one had anything bigger to cut it with than a pocket knife. The only solution was to get one of Billy’s bronze swords and carefully slice it. It was a most memorable birthday.
Bronze objects that had been created by the members of Umha Aois were on display, including swords, horns, tools, spears, and stone moulds. We spent the day casting axes, jewellery, tools, and more. There was a constant flood of visitors and regular announcements were made when one of us was ready to pour. For most of the day it was standing room only. The casting events continued all afternoon and into the evening.
Rather than head straight back to Sheffield the next day, I had arranged to see the Bishopsland Hoard and a hammer from the Garden Hill Hoard at the National Museum. I’d hoped that I could see some moulds, and to have some colleagues also examine the objects. Unfortunately emails were crossed and I just got to see the hoard and hammer. However, that was fascinating in itself, and I spent hours measuring, weighing, drawing, and photographing every detail of the artefacts.
Events like this are exhilarating and exhausting. We all learn more every time we meet, and we come away with new ideas as well as newly cast objects to finish up. This week I’ve been filing and polishing some of the bronze fibulae I cast and I still need to get to work on the replica I cast of the hammer from the Lusmagh Hoard. Meanwhile, there are more waxes and moulds to make to get ready for casting again.
While this technically isn’t experimental archaeology, this is a good way to facilitate archaeological experiments in metallurgy. I regularly cast bronze and smelt metals using a small clay-lined pit furnace. However, there are occasions when I am asked to demonstrate Bronze Age metalwork, but am not allowed to dig a hole in the ground. Museums and schools do get fussy about grassy areas and holes that could be a tripping hazard.
I found the link below and I thought it would be a good solution to my portable casting problem. The tutorial was for a making a small iron working forge, but I decided to make one that would be a scaled up version that would enable me to do the same sort of casting that I do with a clay furnace. http://www.instructables.com/id/Make-a-Small-Blacksmith-s-Forge/?ALLSTEPS
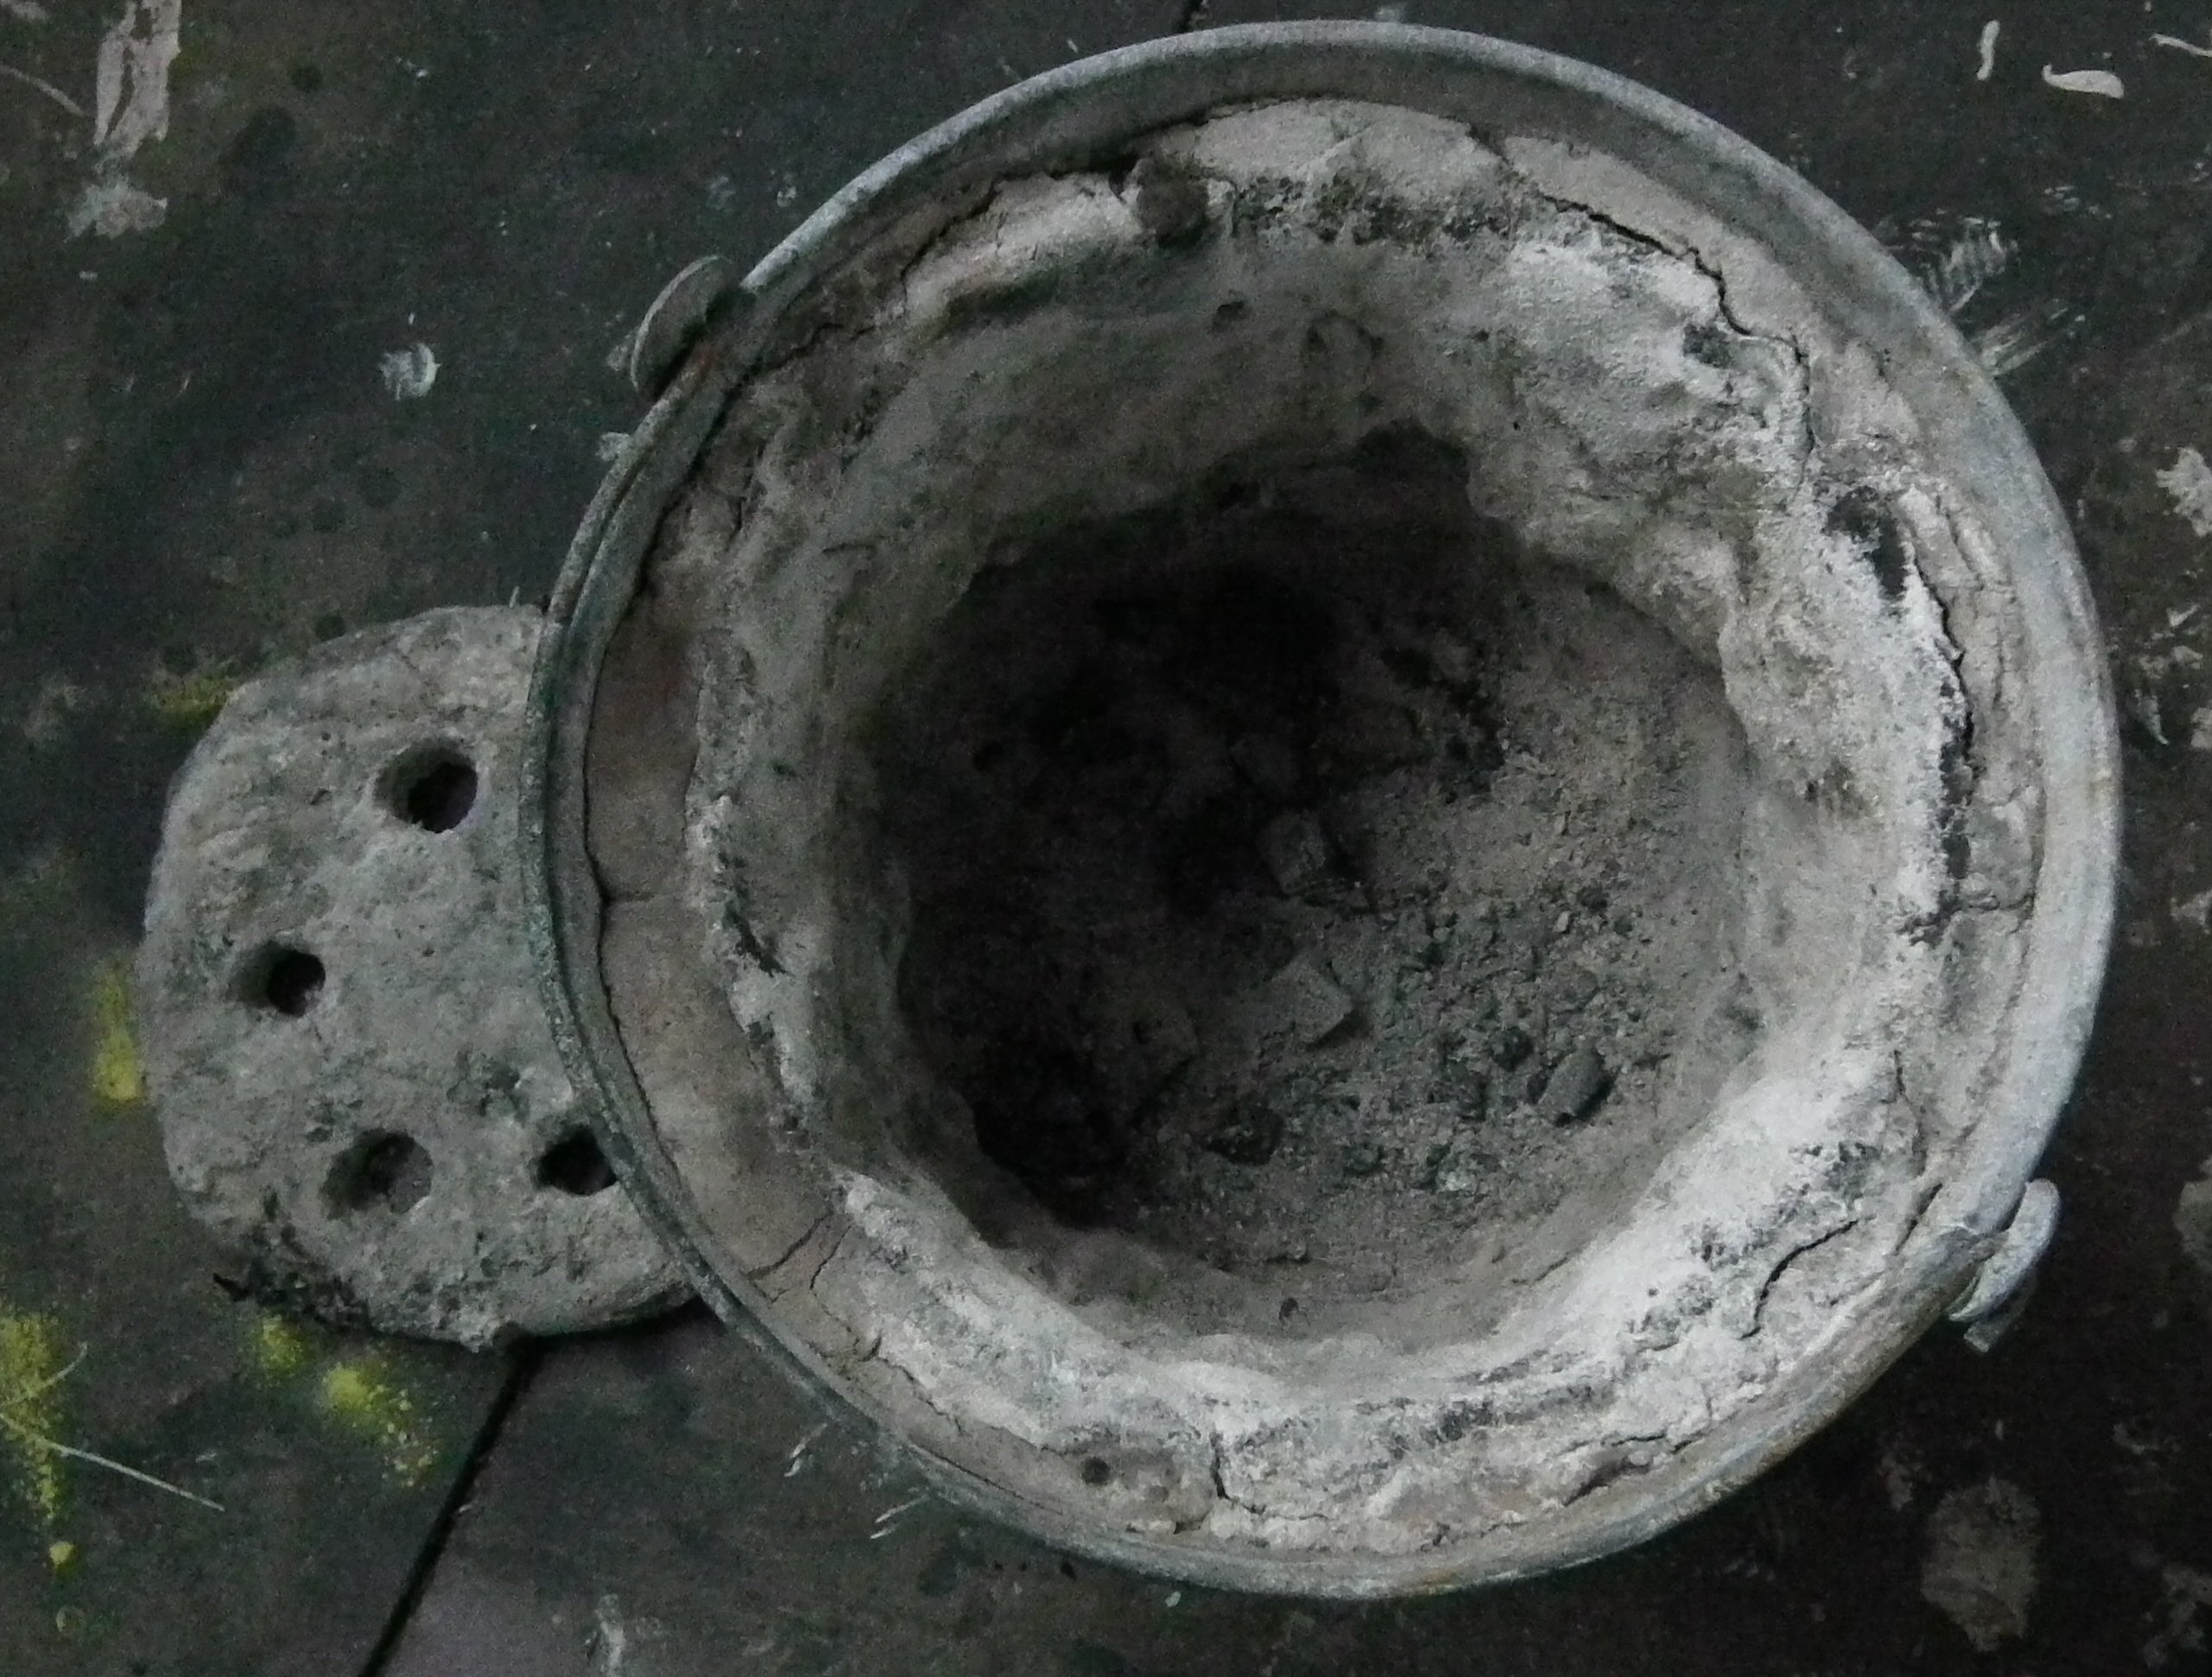
When I say that I do Bronze Age casting, I have to be honest about it. So far, in Britain no intact Bronze Age furnaces have been excavated or properly identified. The furnaces I used are based on the work of others and best guesses as to how the technology was done[1]. I have used short shaft furnaces, similar to, but much smaller than bloomery iron smelting furnaces. I have also used clay bowl furnaces with the air supply coming across the top or from below. The most efficient type I’ve used is a two chamber furnace with the air introduced into a lower chamber with the charcoal and crucible supported above it. It fires up quickly and evenly, plus it has the advantage that the crucible has a stable support, so I don’t have to worry about spilling the metal because the charcoal is moved around.
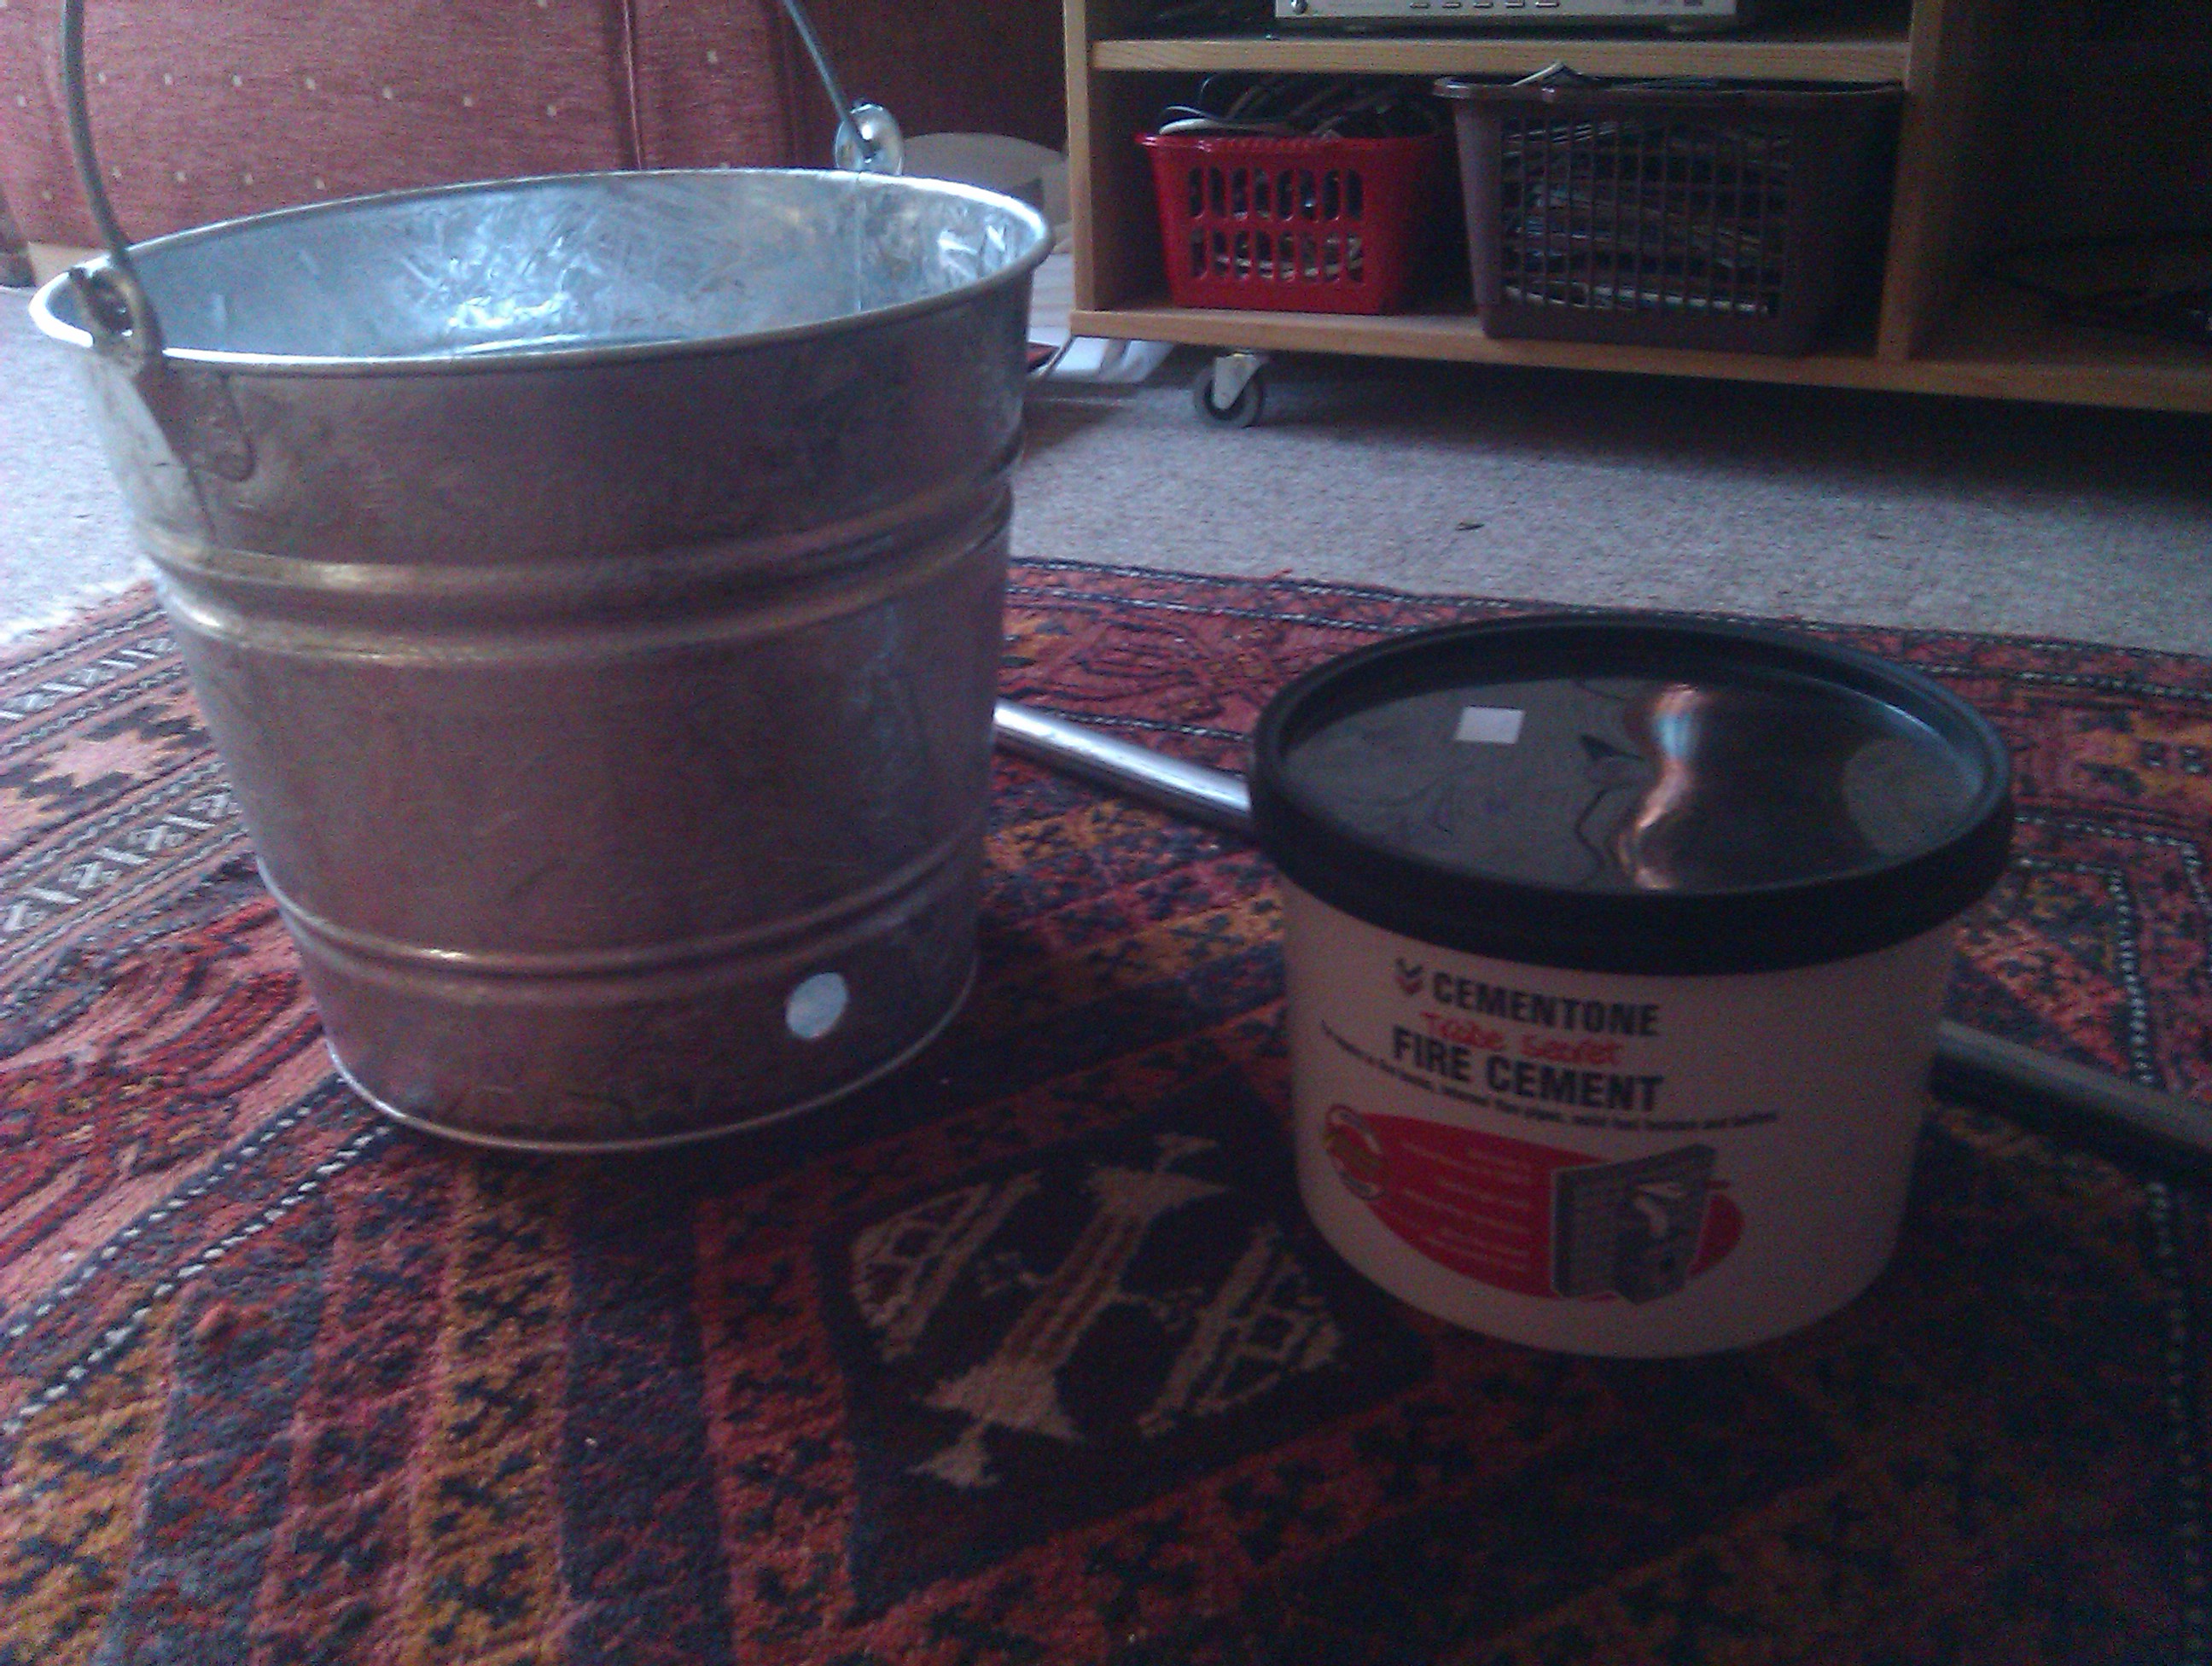
Step one was to find a sturdy steel bucket and drill a hole in the side near the bottom for the tuyere, the tube through which air is blown into the furnace. The air is needed to increase the heat.
A bucket, a steel tube, and furnace cement. Let’s get going!
I had a length of steel tube and a flat drill bit (spade drill bit in the US) of the same diameter. The hole was drilled about an inch and a half above the bottom of the bucket to allow for at least one inch of space for the furnace lining.
The view from above. It all fits nicely.
The original website used furnace clay, but didn’t say much about it. I bought a tub of Cementone Fire Cement for £8 at B&Q. As you can see it did about half the job, with the clay packed about an inch thick. The directions said to use a trowel, however the cement has a texture like gritty plasticene, but not quite as rigid. Getting it smoothed in the bottom of the bucket was awkward with the trowel (I’m more used to removing material with a trowel than adding it) so I put on some plastic gloves and pushed it into place.
That’s how far one 5 kg bucket of furnace cement will go. Time to go out and get another…
Now the instructions didn’t say anything about getting it on your hands, it just had warnings about getting it into your eyes. However, knowing that many materials like this can be caustic I decided to err on the side of caution and wore nitril gloves. The container had a handy link to the MSDS (Material Safety Data Sheet) so I could check out all the possible material hazards. The MSDS is a great online resource that will let you know exactly what’s in a product and every possible statistic for it. Check it out here http://www.bostik.co.uk/diy/product/cementone/Fire-Cement/109. Note that it is caustic and there are precautions against getting it on your skin. It also tells you what to do in case of contact with skin or eyes.
I used to work with someone who was severely health and safety challenged. I survived, but in the process learned the effects of being too intimately acquainted with carbon monoxide. It should go without saying, but I’ll say it anyway. Do this outside with plenty of ventilation and don’t hover over the thing while it’s being heated. It’s not a barbeque (at least not yet, there’s plenty of time for that later).
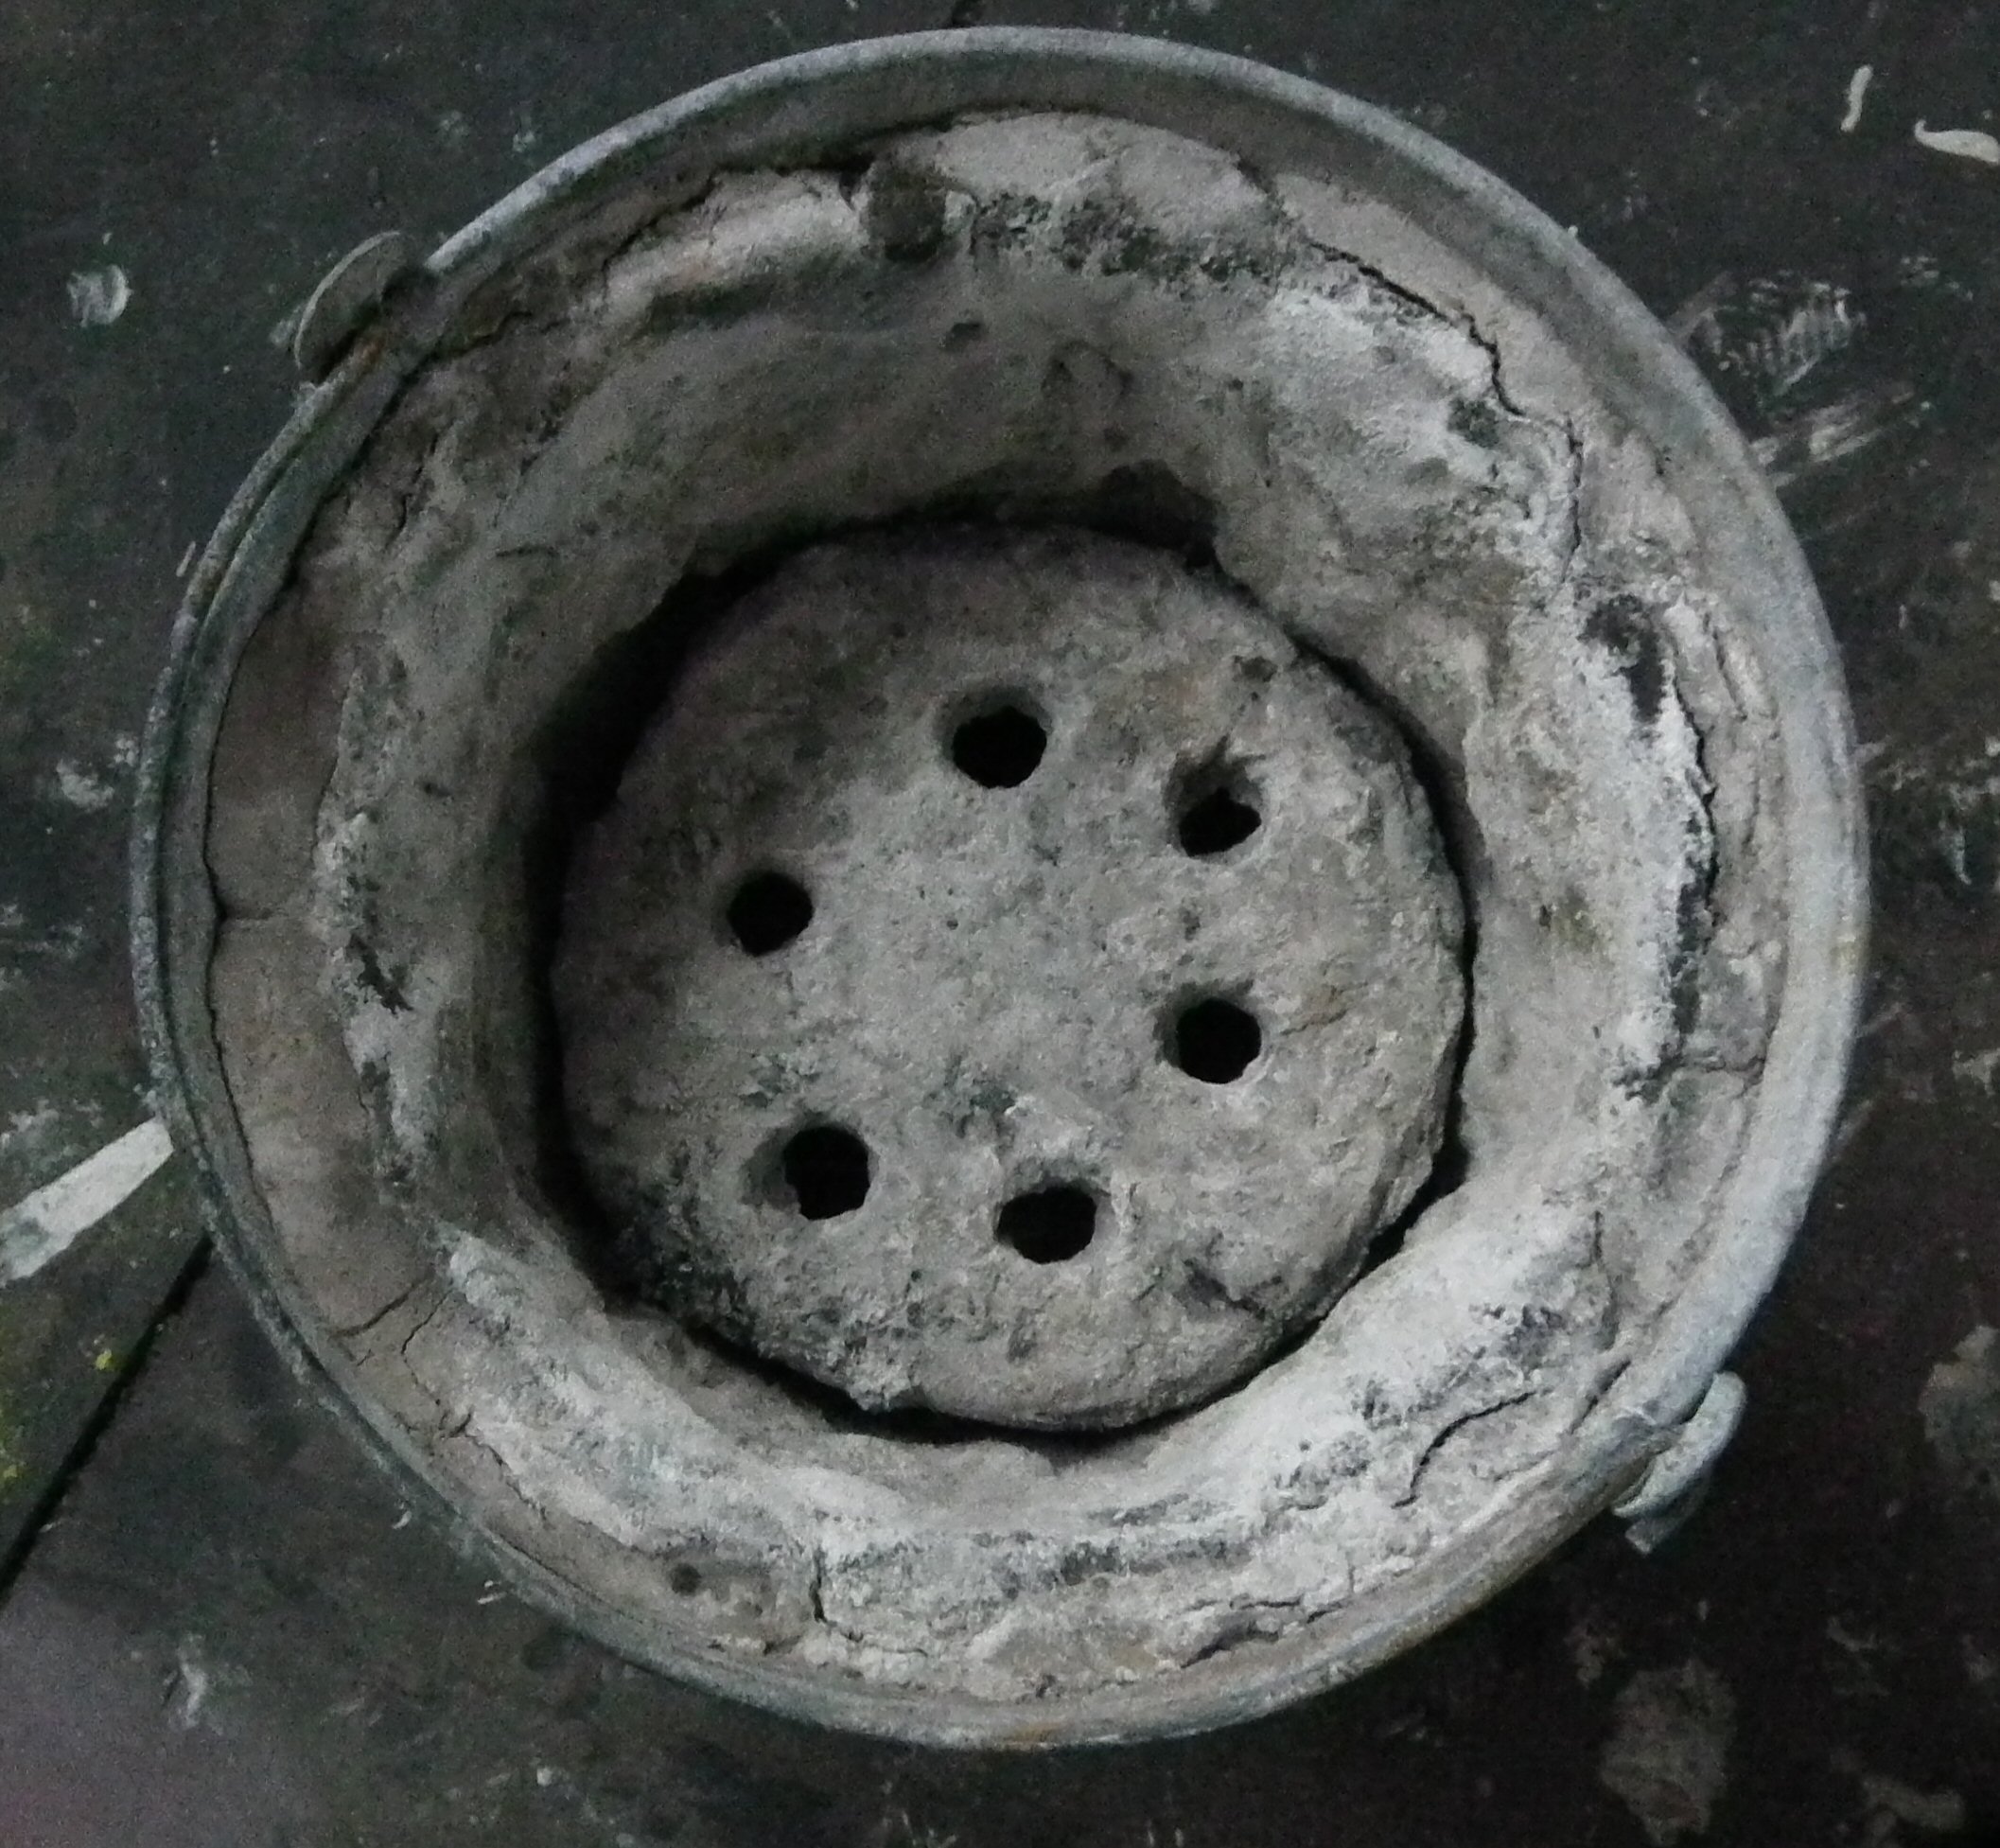
I took out the tube that I was using for the tuyere and built a small wood fire in the furnace and faced it so the tuyere hole faced the breeze. The fire lit quickly and I kept it topped up with scrap wood and a little charcoal and let the whole thing burn down. Once it was cooled, the material was hard as a rock. The next step was to make the tea pot stand. It’s simply a flat plate that fits the diameter of the interior of the furnace with holes about an inch from the edge. The tea pot stand allows the air to circulate freely below and then up through the holes to increase the heat of the charcoal. Once that was fired the furnace was ready to use.
Finished furnace after a few firings.
I’ve used the furnace now several times and it holds up well doing high temperature work. My initial fear was that the seams in the bucket wouldn’t hold, but it remains intact after melting bronze and copper. I’ve used it both with bellows and electric pumps.
Furnace with tea pot stand (AKA perforated clay slab in place.
After I made this, there was some discussion about experimental archaeology and authenticity on the EXARC Facebook Group (a group well worth checking out if you have an interest in any aspect of experimental archaeology). I made the point that this isn’t designed to replicate a Bronze Age furnace, but it replicates the conditions of how we believe Bronze Age furnaces performed. Many early experiments were done using modern gas or electric furnaces, however those have oxygen enriched atmospheres. Charcoal fires have reduced atmospheres, meaning that the air immediately around the crucible is free of oxygen. This is good news because less dross and slag is produced since the environment won’t allow the surface of the molten metal to oxidise.
As for electric pumps, sometimes it’s valuable to have a controlled air-flow. Having an electric air pump means that I can control how much air goes into the furnace and replicate conditions from one pour to the next. This way I will be able to have multiple experiments conducted under conditions as close as possible to each other. It would be difficult to replicate the controlled airflow of an electric pump with bellows since there might be times when I get tired or there is some distraction and the air flow is slightly less than for the previous pour. Control in these situations is important for experiments where I would I want to compare the melting times of different alloys and need to control as many variables as possible.
Another advantage is that this furnace always starts out at the same temperature. While a bowl furnace dug into the ground is well insulated, there are often problems getting it dried out or warmed up after a night of rain. While it’s good to have the experience of getting a cold, damp furnace going, it’s also nice to have one where I don’t use up a couple kilos of charcoal getting it dry and heated.
By the way, it’s not only good for metal casting, but with a small grate, it does a good job as a barbeque.
[1] I should note that while there haven’t been any of these types of furnaces excavated in Britain, twice now when I have been demonstrating using a small bowl furnace, field archaeologists have told me that they excavated something that looks identical to what I was working with, but didn’t know what it was and wrote it up as a cooking hearth.