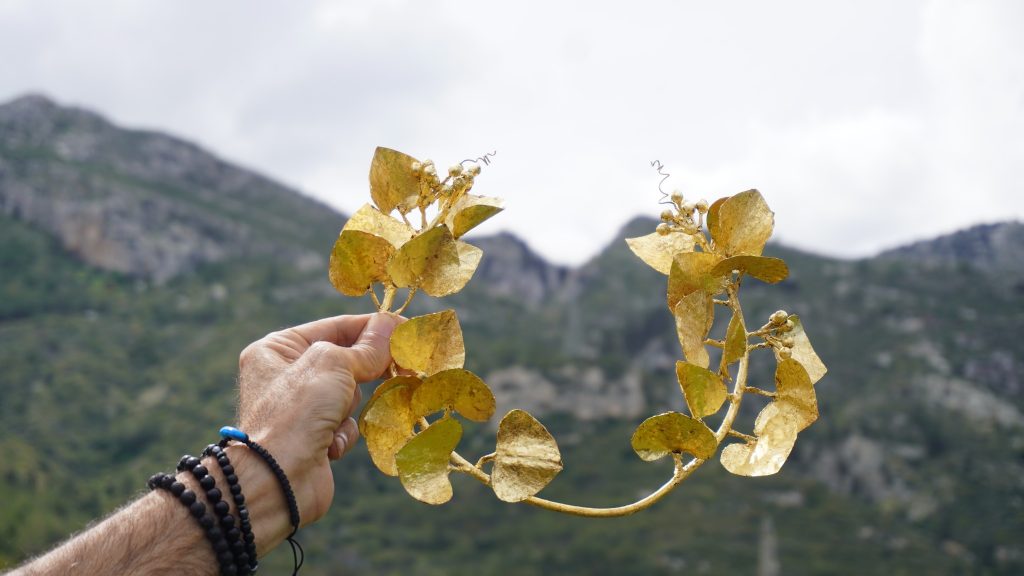
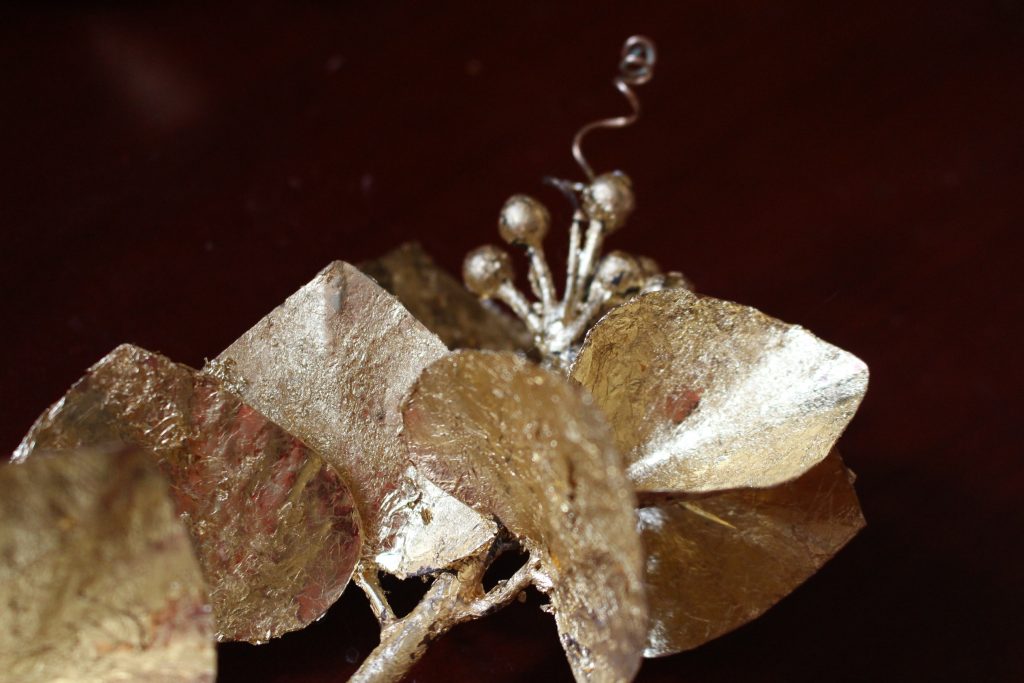
I wanted to recreate one of the gold leaf crowns found in Cyprus. These date back to the Bronze Age there and have been found in burials. The one I chose to replicate is in the Güzelyurt Museum of Archaeological and Natural History, Northern Cyprus. The crown has ivy leaves, berries, and two tendrils.
The original was made of gold, however unable to afford that much gold, I used copper and gold leaf. I also did not create the wire or sheet from scratch. I had planned to make the berries using a dapping block, but a bout of Covid meant that I lost a couple of weeks of time to work on it, so instead I bought 8 mm copper beads.
Making the structure of the crown
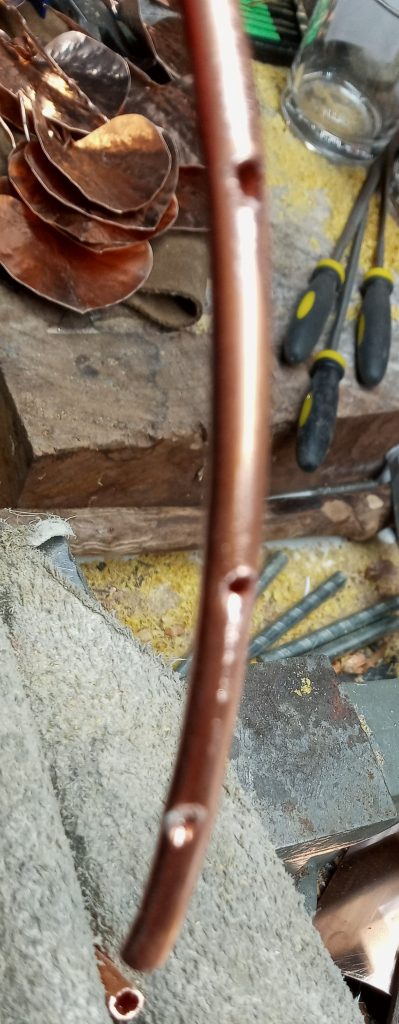
The base of the crown was made from Copper Tube (5/32″ ID × 3/16″ OD(4-5mm)) that is commonly used for refrigerators. The original was made from two pieces that were overlapped and held together by wrapping with wire in two places at the back. Since I intended this to be worn, I wanted the crown to be as sturdy as possible, so used one piece of tubing. The original and the replica are both open at the front.
The first step was to drill holes in the tubing. Twenty-four leaves are concentrated along the sides and front. The leaves are in twelve pairs along each side.
The leaves were cut from 30-gauge (0.31mm) copper sheet. The metal was thin enough to be cut with a strong pair of scissors. Long stems were cut out extending from the leaves. The leaves were chased to imitate veins using a bronze hammer with a chisel shaped face. The stems were twisted and then were inserted into the holes and soldered in place.
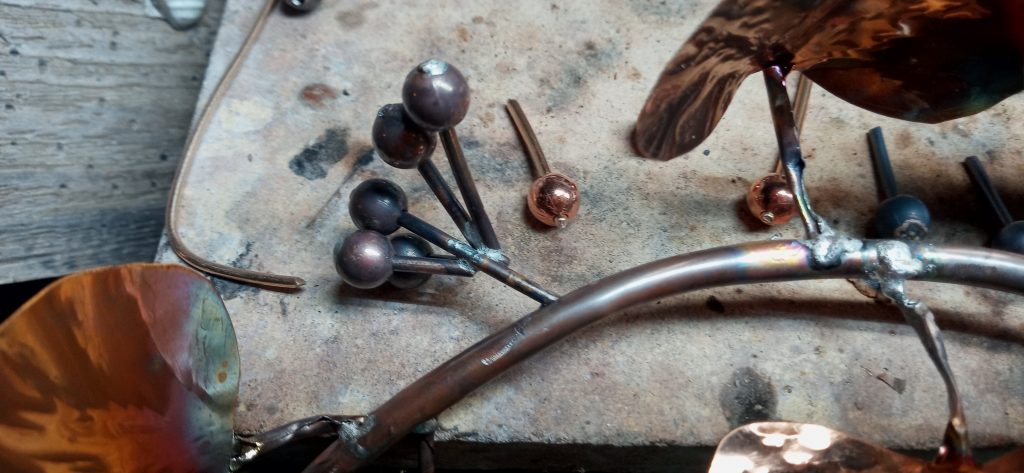
The berries were put on stems by inserting 12-gauge (2.6mm) bronze wire into the bead and soldering at the top. The stems were then soldered in bunches. Tendrils were made of 18-gauge (1.2mm) wire and soldered into two of the clusters that would be placed at the front of the crown. Four clusters of berries were soldered to the front of the crown by inserting into drilled holes and the ends of the tubing. Two more clusters were inserted into holes along the sides, facing outward.
The soldering was at times frustrating. I would get several in place, and then a leaf halfway around the crown would fall off. I ended up soldering one or two leaves and then leaving it for a half an hour to cool down completely before continuing to add leaves.
Applying the gold leaf
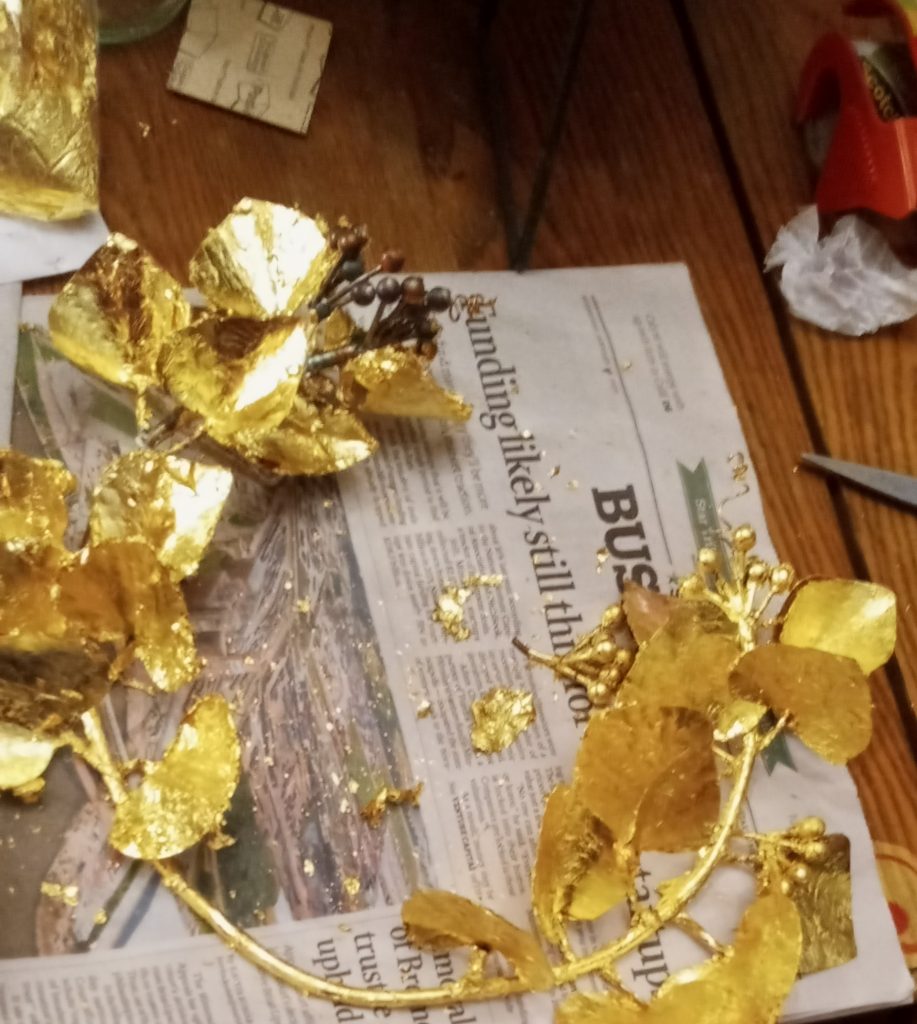
Leaves were coated with thinned PVA glue and gold leaf applied directly using fine sable brushes and tweezers. One was used for applying the glue, while the other was kept dry to to smooth the gold leaf. Multiple layers were applied, with each layer coated with the thinned PVA glue and allowing to dry. Despite the layers, the chased details were still evident.
Transport
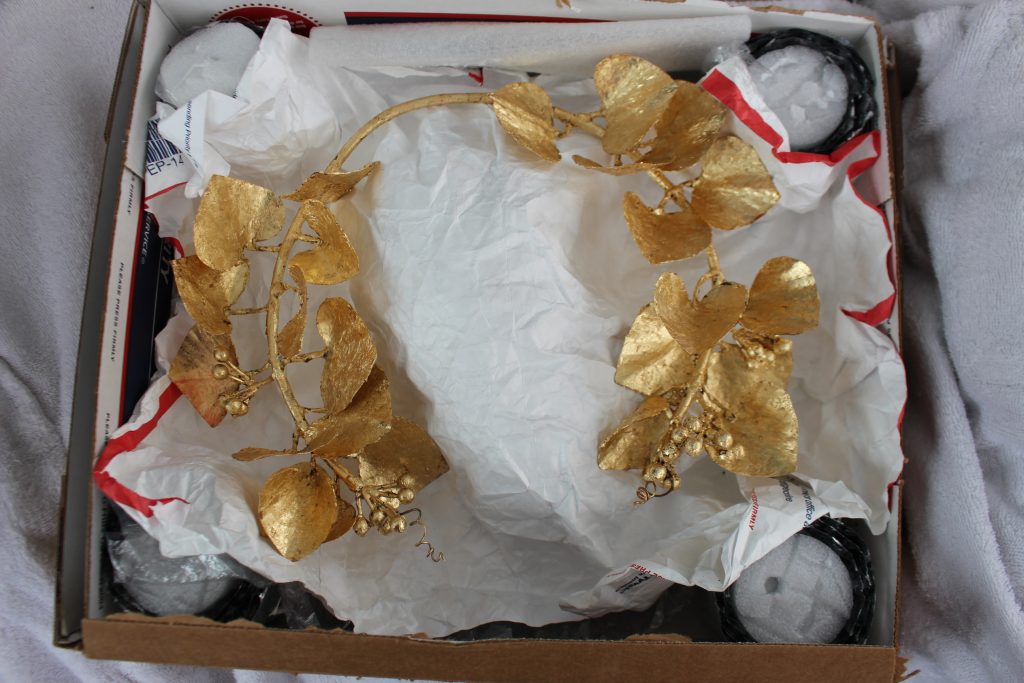
The crown was to be packed into my carry-on bag for the flight to Italy and then Cyprus. For that I needed to make a sturdy box and interior supports. A box and lid were constructed of carboard and hot glue. Inside, supports were made of bubble wrap and closed cell foam. Supports were placed in the four corners and the centre, so that the crown would not shift during transport. The interior was lined with crumpled Tyvek®. Tyvek® creates a smooth snag free, inert surface that is ideal for contact with delicate metal surfaces. The interior structure was fixed in place using hot glue.
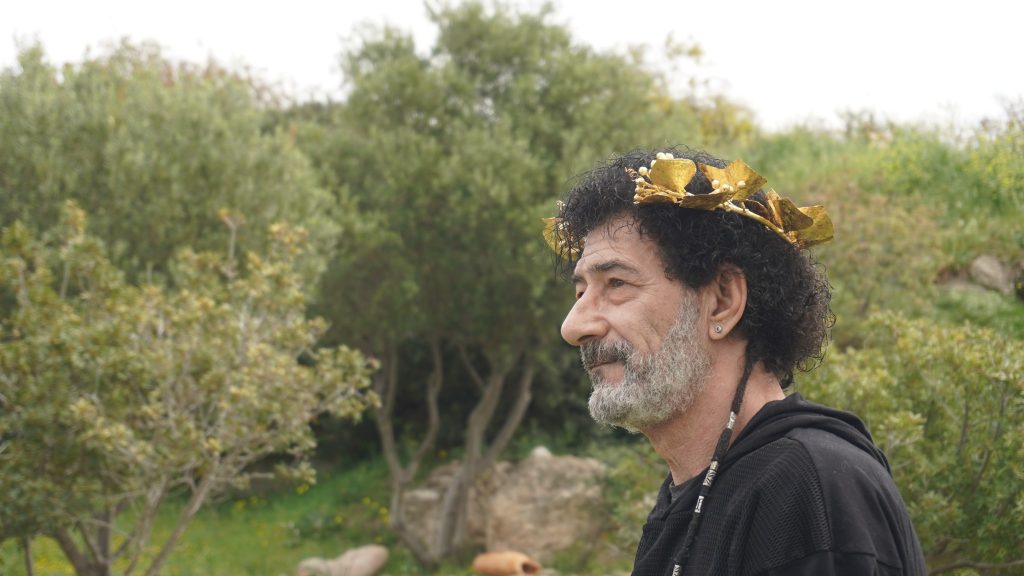
Despite my worries, airport security and customs did not notice the crown and it arrived safely. It was presented to Şenol Özdeverim, Rauf Ersenal, and Celal Dimililer during a meeting at the Çatalköy Belediye. The crown will be worn at the opening ceremonies of the 5th Annual Vounous Symposium in September 2023.
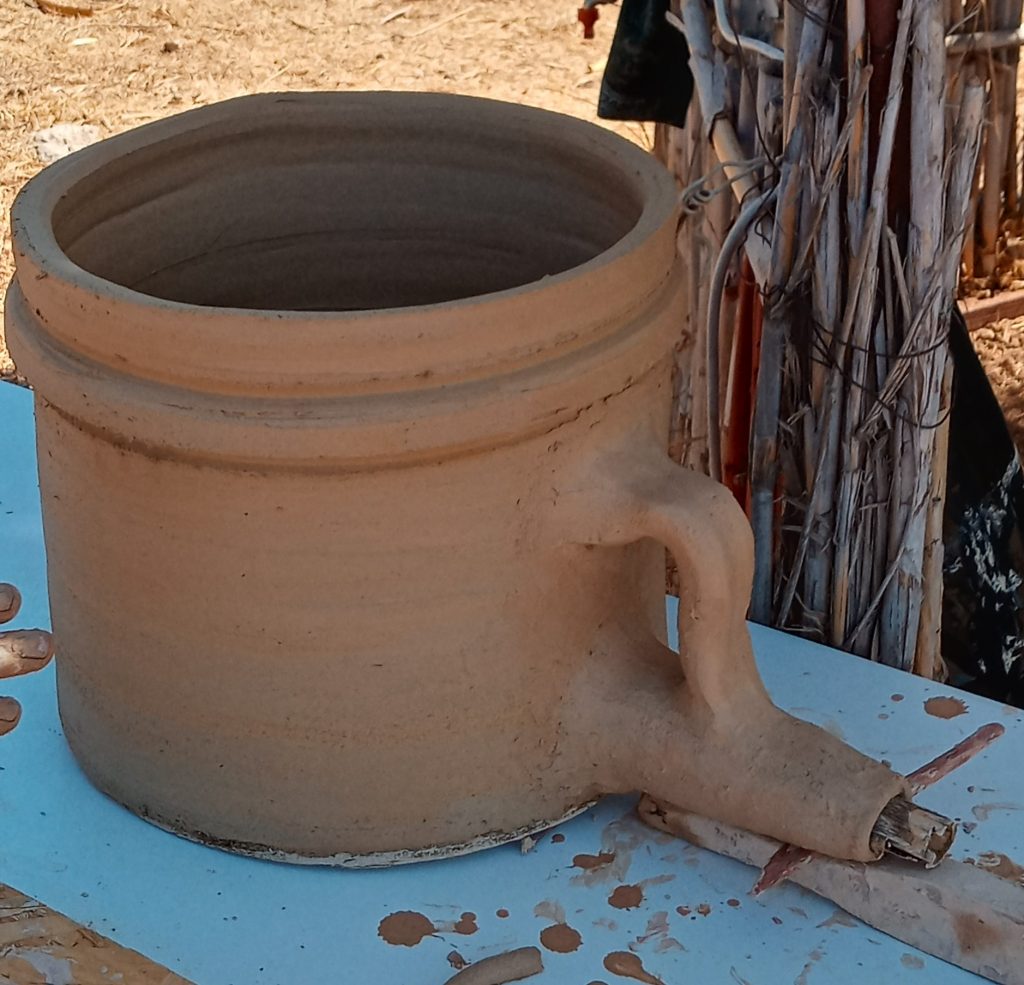
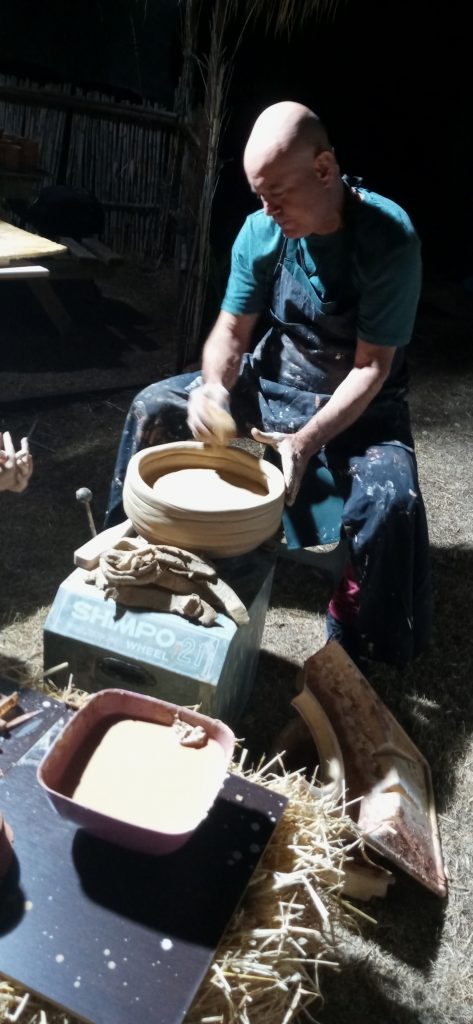
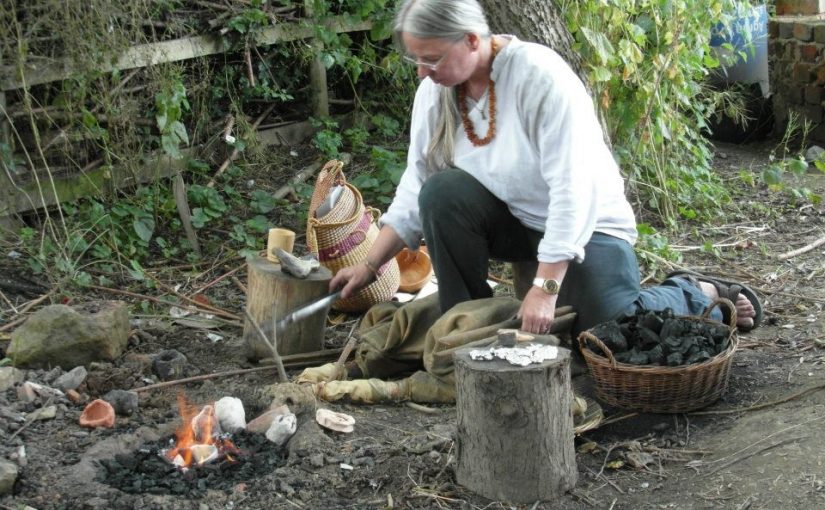
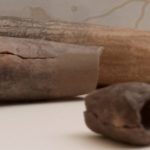
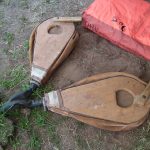
At the 4th Annual Vounous Symposium (2022) we wanted to make a set of pot bellows, based on ones that were excavated at Enkomi, an archaeological site in North Cyprus where metalworking was performed in the Bronze Age.
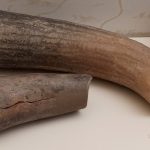
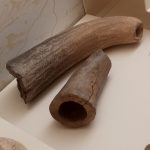
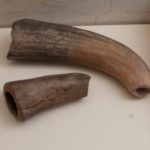
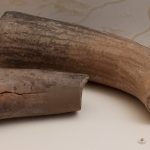
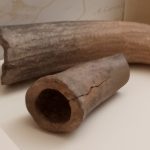
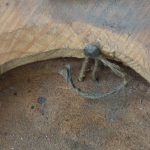
The process began by coil building and paddling şamot, a heavily grogged clay. As the bellows were formed a ridge was put near the top. This will help hold the leather tops in place, and prevent them from slipping off while they are being used. A tube was added and a hole cut in the bottom. The tuyeres, the pipes that connect the bellows to the furnace will fit inside these. The bellows were fitted with a handle. The handles aren’t strong enough to use for lifting the bellows, but later we found that they came in useful for adjusting the position of the bellows when we were getting ready to start work.
Coil building the base of the bellows
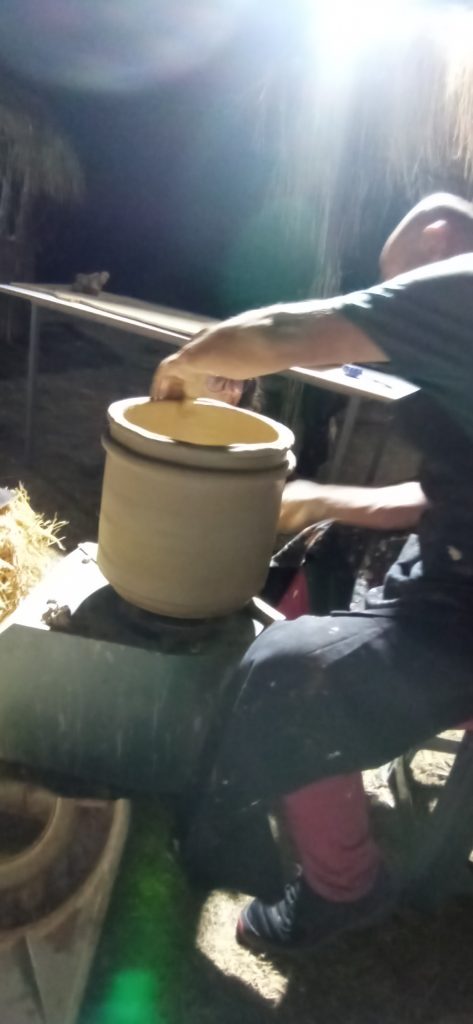
Adding the ridge
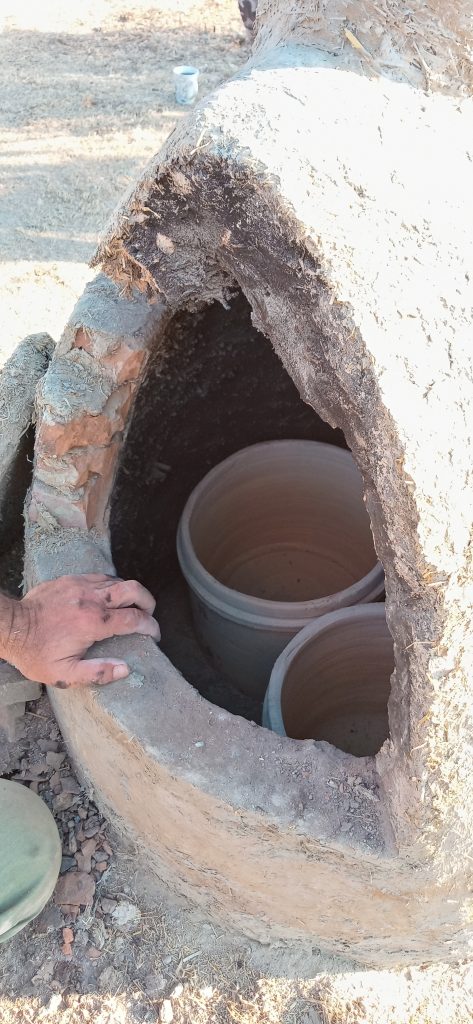
The bellows were too large for the kiln, so part of the side was torn out in order to fit them in. The wall was replaced and the kiln was filled with smaller pieces of ceramics. We had a nervous evening because we were uncertain whether the bellows would survive the firing. The walls were heavy and thick and we hoped that they had dried sufficiently to prevent cracking. The kiln was a primitive two chamber type, typical of the Bronze Age in Cyprus. The ceramics are loaded into the top, which has a perforated floor. A fire is built in a pit outside of the lower chamber of the kiln. The chimney (which was extended upwards for this firing) creates an updraft, pulling the heat through the furnace. Normally the fuel would be put in the chamber underneath the kiln, but there was concern that the concentration of heat would crack the bases of the bellows since the heat would be unevenly distributed, concentrating on the bottom of the bellows. This unevenness of the heat would cause the firing to be uneven and result in the bellows cracking.
In the furnace
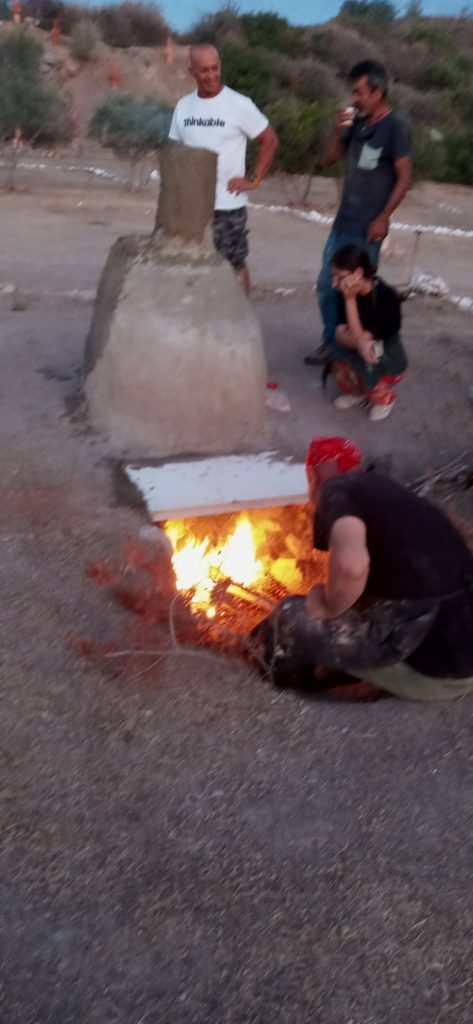
Firing the furnace
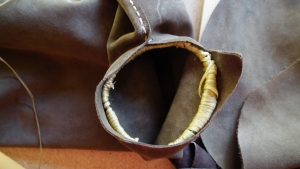
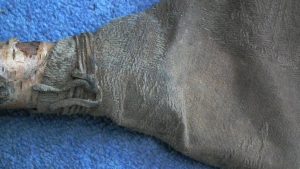
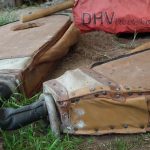
The next day they emerged perfectly fired. As soon as they were cool enough we put on the leather. The goat skins we bought were not large enough, so we used some soft cowhides. The hides are wrapped around the top of the bellows, with the edges overlapped by about 12 cm. When pulling up the overlap opens up and allows air in and then it closes on the downstroke. The result is a continuous and steady airflow. Thanks to Ergün Arda for his skills and expertise in making the pot bellows.
One of the invisible tools of the Bronze Age metalworker is protective gloves. It’s difficult to work with hot metal without some sort of protective hand gear. Even when using wooden tongs, it’s difficult to keep your hands away from the heat of the furnace. Handling heated stone or clay moulds is also difficult without gloves.
The most popular hand protection is to use commercial welding gloves. They do a good job and are fairly inexpensive. On the other hand when working with students, I have to regard them as being disposable. Someone will inevitably burn the leather, making the fingers stiff and difficult or impossible to work with.
When I was in Moscow for the Times and Epochs Festival, the bronze casters there had a nice alternative: felted wool mittens. They look like something that would have been used in the Bronze Age, do a great job of protecting hands from heat, and are repairable. When I got back to the US I wanted to make myself a pair.
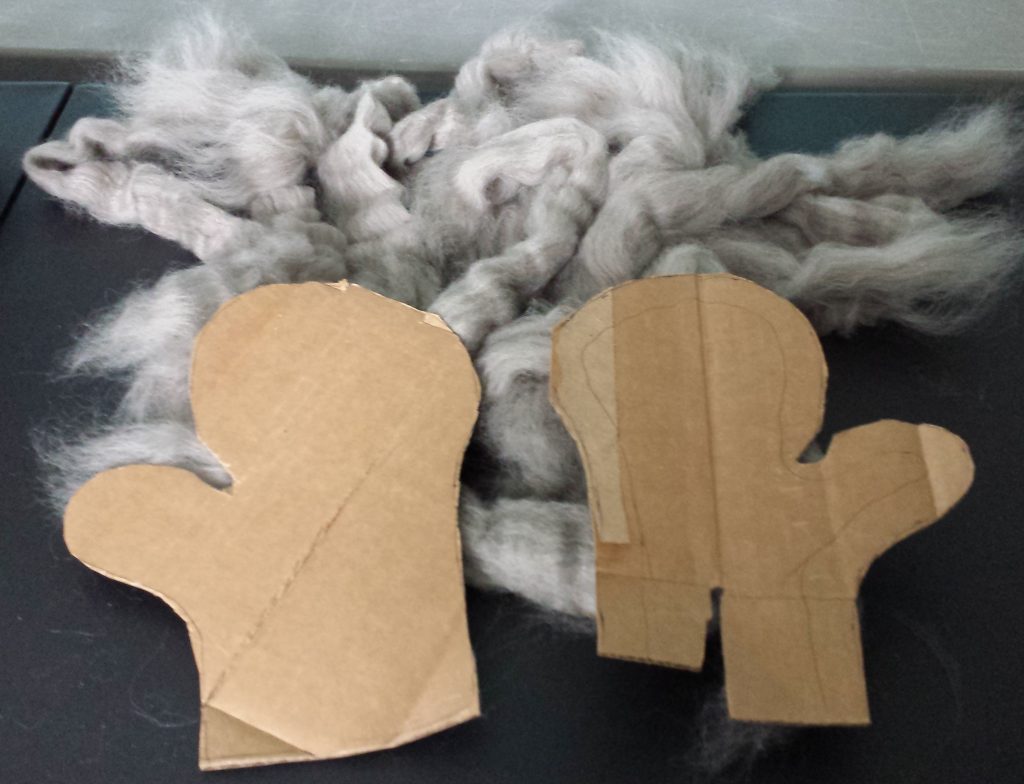
Cardboard forms for the gloves and clean wool roving.
Making the mittens is a fairly straightforward process. Make a pattern out of some heavy cardboard by tracing your hand and adding a couple centimeters all the way around (the wool will shrink). You will need some wool. I bought some roving, wool that’s been cleaned and made ready for spinning, but you could even use wool straight from the sheep. Just make sure that the wool you use is not labeled as ‘superwash’. Superwash wool has been processed to prevent shrinkage. Great if you’re knitting socks, but useless for felting. I have small hands (another advantage, you can make these to fit!) so I used about 170 grams of wool. The only other supplies needed are hot water and a bar of soap. This is a messy process and takes awhile. You’ll need a clean work table in an area where you don’t have to worry about getting the table and the floor wet. Not to mention yourself. My thanks to the staff at StevenBe who let me use their felting room for the process
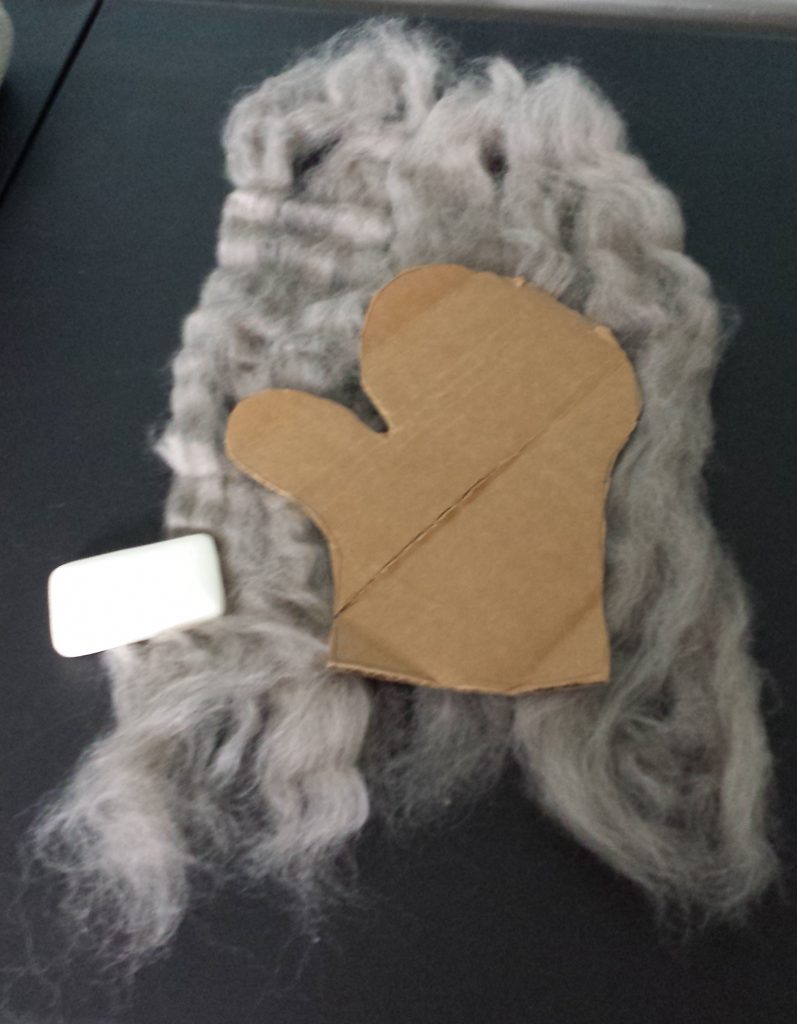
The wool is spread out and the pattern laid on top
Lay out the wool so there’s enough to fold over the edges and top. Make sure that the bottom stays open. Take off the pattern for the moment and wet the wool with hot water and scrub it with the soap. Get the soap all through the wool. This is going to be messy. Put the pattern back and fold the wool so it is completely covered, except for where your hand goes in. Now, pushing down on the wool scrub it around on the work table, keeping it wet and rubbing in the soap, flipping it over and doing the other side.
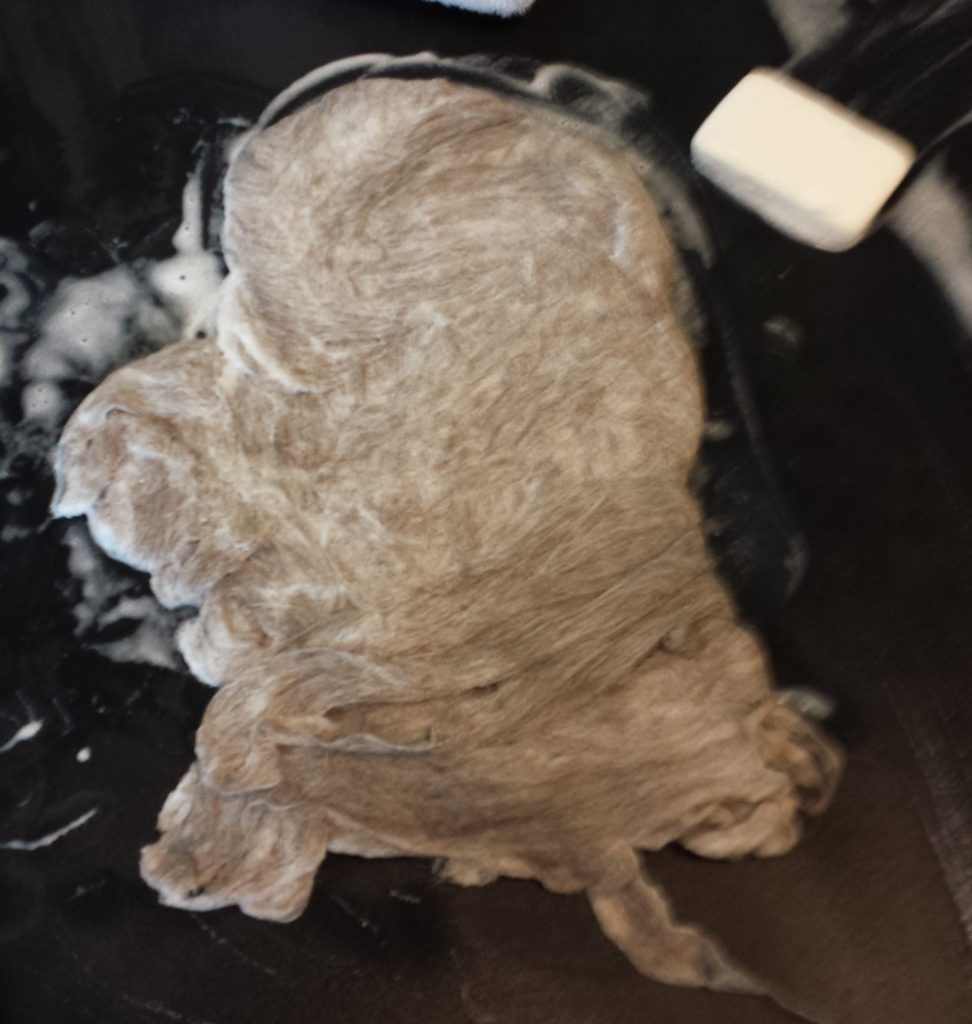
Lots of soap, hot water, and elbow grease go into the felting process.
When the first layer is completely wet and starting to hold together, add more wool wrapping it 90 degrees from the first layer. If the first layer was from the top to the bottom, the next layer should be side to side. Keep soaping it up, adding hot water and scrubbing it around. At some point the cardboard is going to start disintegrating, so put your hand in there and scrub from the inside. By now you’re losing the will to live, but keep going.
Felting works because wool has scales, almost like tiny hooks. The action of heat and agitation causes these scales to get tangled and bind to each other. This is why wool sweaters shrink when they get put into a hot washing machine or a dryer.
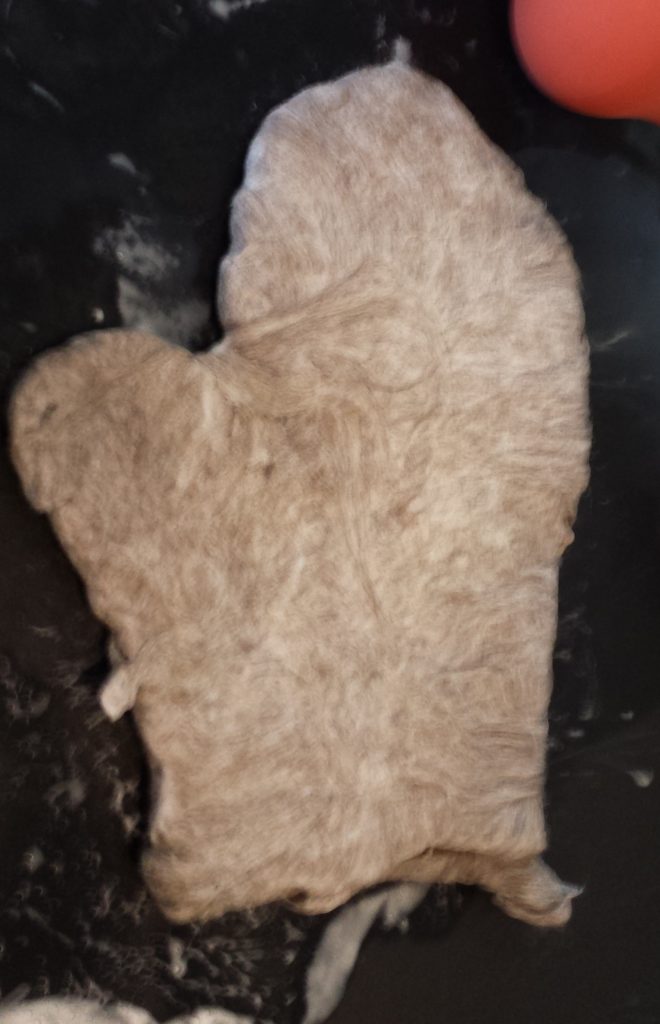
Keep adding layers to the wool until it gets almost as thick as you want it. The wool will compress and get a little thicker when it dries. Once it’s the size and thickness you want, rinse out the soap and let it dry. Drying takes a long time depending on the weather. You can put it in a dryer, but be careful that it doesn’t shrink. A dryer can reduce the size considerably and compress the wool to the point of being dense. If the mitten shrinks too much you can wet it down again and stretch it out some more. You can also put something inside the mitten to keep it from getting too small.
The glove is done. It needs to be dried now.
Once it’s done, you can twist it or pound it to get it a little more flexible. There’s nothing to say that you can’t also decorate it
I was invited to cast bronze at an event in Germany, but the catch was that I needed to dress in period costume. The skirt and tunic were easy enough, but I knew that the people there would look at my Iron Age shoes and comment on how anachronistic they were. I know, because it’s happened in the past. There are few Bronze Age shoes that have been preserved, and the most famous were the ones worn by Otzi, the Ice Man whose body was recovered in the Alps in 1991. There are a few websites describing how to make them, including one with a video,
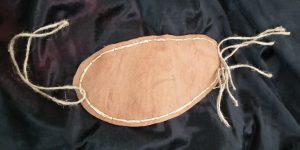
Following the instructions onthis website,I cut out a pair of soles from the same leather I used for the Iron Age shoes, and punched holes around the perimeter. I didn’t have leather lacing, so I stitched them with multiple strands of sinew. Then I got some jute cord. This is made from the inner bark of the lime, or basswood tree (tillia sp). It is essentially the same as the cord used for Otzi’s shoes. I cut several lengths and started plaiting and knotting.
Lacing the Bronze Age shoe sole
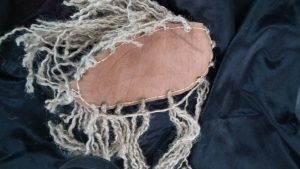
I quickly realised that it wasn’t going well. I couldn’t tie the knots while wearing the shoes, so I made a sort of shoe last out of socks. I just wasn’t enjoying the project and it was looking a mess. I just wasn’t getting the measurements right and the shoe was too large.
Putting the cords on the Otzi style shoe.
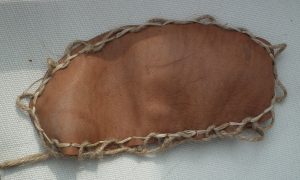
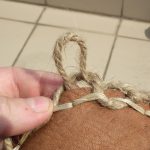
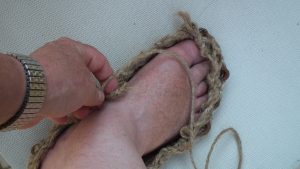
I just wasn’t producing what I wanted, so it went on the back burner. When it was about a month out from the event, I nagged myself into getting the shoes done. The problem was that I wasn’t happy with how they were turning out. It would be easier if I was making them for someone else, where I could tie the knots while they wore the shoes. It was then that I convinced myself that I didn’t need to slavishly copy this particular shoe. The materials were proper for period, I just needed to find a way to make them so I was happy while using a technique that would be consistent with the Bronze Age. I decided to make a netted upper rather than one that was plaited and knotted. I started over, this time using a single length of cord. I measured off a length that was 5 times the circumference of the sole (note, this finished about half the shoe. On the second one I measured 9 times the circumference and that worked out perfectly).
I wove the cord in and out of the sinew, skipping every other stitch and leaving a small loop at the top near the edge of the sole.
Weaving the cord through the sinew to make the upper part of the shoe
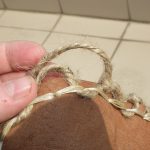
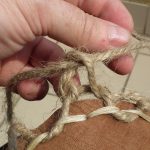
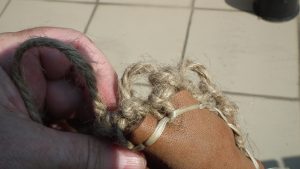
Then continuing around, I brought a loop through the loop next to the sole and then threaded the cord through that to make a knot. It was easily adjustable.
Bringing the cord through the loop
The loop in loop
Pulling the cord through the upper loop
Pulling the cord through the upper loop, another vieww
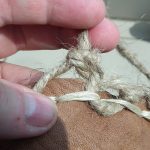
Pulling the knot tight
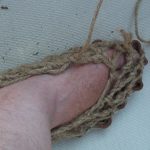
I made the first round fairly tight so that it would pull the sole up around my foot. I did the same for the second round.
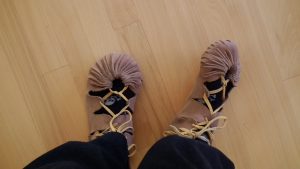
Fitting the shoe to my foot. At this point the netting is fairly tight.
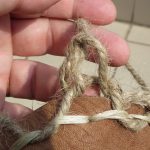
On the third round I made the loops larger because I wanted a netted effect. If I wanted, could continue making the loops smaller that would result in a denser fabric. At this point it was easy to work on the shoe while wearing it.
Making the loops larger to make a more open netting.
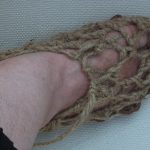
After a couple more rounds I started making the loops even larger. I brought the cord around the front of my ankle, looping the cord between it and the loops closer to my toes.
The netting continues with wider loops
The netting is finished and fits around the front of my ankle.
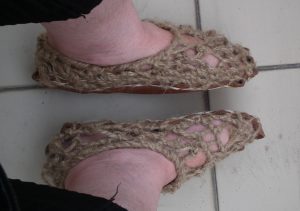
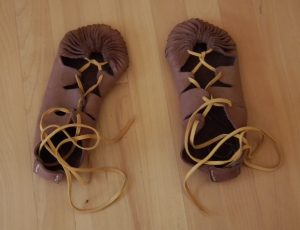
By this time I was essentially done. It took me about three hours for both shoes, working at a relaxed pace. I had a fair amount of cord left over, so I wound that around the top cord of the shoe to reinforce the opening and to give it a bit more of a finished look.
The finished shoes
I made this pair fairly tight because I figure that both the leather and cord will stretch over time. Still, they are easy to slip on and off, and are comfortable for walking. I could make some leather uppers to go over the netting. Otzi’s shoes had that, although there is debate as to whether the leather was on top of, or under the cording. A project for the future is to learn nålebinding to make some socks.
I was visiting my sister in the autumn of 2016. She has a bit of landjust outside Albuquerque, New Mexico, so I asked her if I could build a furnace and do some casting there. I’ve built plenty of pit furnaces, so this time I wanted to build one that was above ground and a bit more visible. It would also mean that no one would trip and fall if they forgot where I put the thing.
The first task was to get the basic materials: Clay, Sand, and Horse Manure.
I thought that the clay would be the biggest hurdle. However my sister’s neighbour happened to be a sculptor who works in both iron and ceramics. She went to her regular clay supplier and got a couple feed sacks full of dried clay for free. Potters who work at wheels, or work with students end up with a lot of clay that is scraped off of workbenches and wheels that is hard to re-use. It often has a mixed consistency, it’s lumpy or part dried. If they want to use the clay again, it has to be reconditioned. So, they take their sacks of scrap back to the place where they buy the clay and pay to have it put through the mill. Since it’s not really usable, some potters are willing to just give it away. So thanks to Liz Fritzsche, who does amazing and beautiful work in porcelain, I was able to get started.
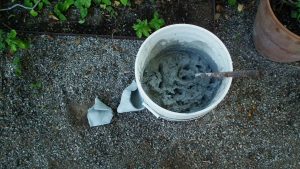
Mixing dried clay. Once it’s wetted, I’ll add sand and manure
I threw some of the dried clay into a five gallon bucket and poured in enough water to cover the clay and let it sit. It was squishy and workable in a few hours. Next up was locating horse manure. A friend of a friend has horses, and they were grateful to have someone who would haul away a couple of barn buckets full of manure. The final bit was the sand. My sister did have some beach sand that she’d bought for the garden, but I was more fascinated by the soil there. Her land is in the old Rio Grande River Valley, and the soil is a mixture of silty sand and a little clay that had been pounded to a powder. The soil was almost the consistency of dust. It mixed in perfectly and later I found the mixture was highly resistant to cracking.
The ingredients were mixed with some water, stomped, and the proportions were adjusted until it was perfect. New Mexico is a lot drier than England, so I ended up adding more water than usual as I worked. It was also nice knowing that it was unlikely for any rain to fall while I was working.
The silt/clay/dung mixture made a durable clay, and after I flew back to Minneapolis, I was please that the crucibles and moulds I packed in my check-in luggage survived airport handling.
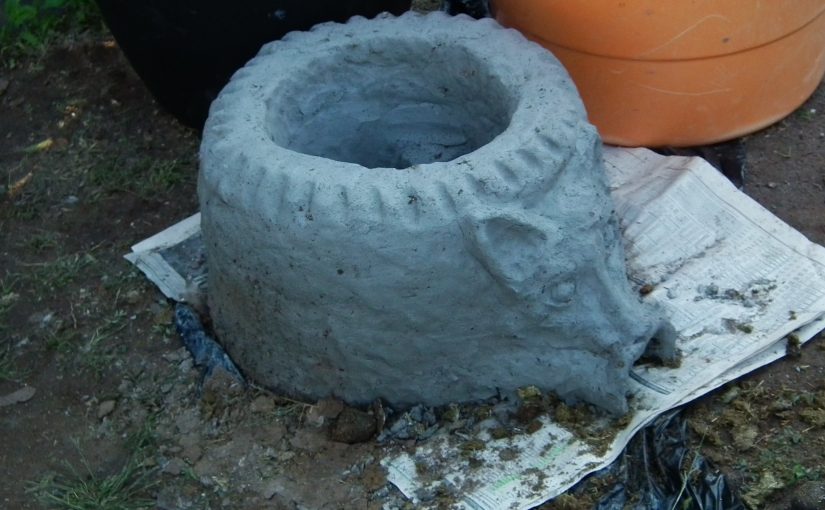
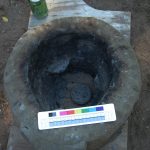
Note the small tabs inside that will support the teapot stand
The furnace walls are about 8 cm wide (about the width of my palm) and the inside diameter is about 25 cm in diameter. I let it dry for a couple days and then moved it over to an unused area behind a greenhouse where I would have more room to work. I set a small fire with cottonwood branches, fed it for a couple hours, and then let it die out overnight.
The thickness and upper dimensions of the furnace
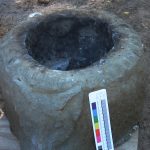
The height of the furnace
Mavis the dog immortalised in a furnace!Mavis in a calm moment. Her nickname is the Dog-nado.
We all like to put some decoration on our furnaces. My students have done everything from dragons to turtles to cats. I had been thinking about doing some decorations imitating the local petroglyphs, but as I was working it just seemed natural to do a portrait of Mavis, my sister’s exuberant German Shepherd.
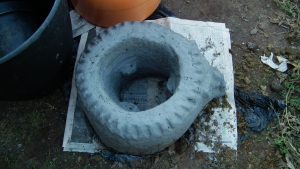
Finally I adjusted the mix to have a bit more of the silty sand and horse dung to make the teapot stand and crucibles. For more information about teapot stands and how they work in furnaces, check out my article on the Umha Aois website here.
Later I added more water to make the slip for dipping waxes in for the first stages of mould making. The silt made a wonderfully fine mould that picked up all the details. Honestly, this mix was as good as jeweller’s investment for picking up detail.
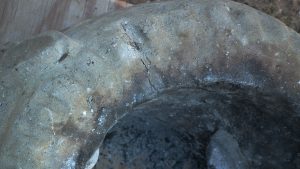
I had some cracking on the upper part of the furnace, and noted that the part that cracked was where I used the commercial sand. The silty New Mexico soil held up much better. If it weren’t so heavy (and probably not allowed) I would have hauled bags of the soil on the plane home to use for more projects.
Detail of cracking on furnace. It was fixed by rubbing in some of the clay mix.
Both Mavises performed very well (Mavis the Dog is into barrel racing and advanced obedience classes). I’ll be interested to see how it holds up over the winter. Winters in New Mexico tend to be mild, so I’m hoping that the Mavis furnace will be available for friends in Albuquerque to use for some time to come.
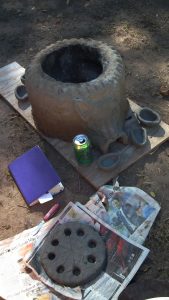
The Mavis furnace, teapot stand, and some crucibles
Sometimes you just need a new pair of shoes. I’d been wanting to make some of the replica shoes I’d seen online. there are a few good sites where you can find patterns and step by step tutorials.
Kelticos has a number of different patterns that you can download.
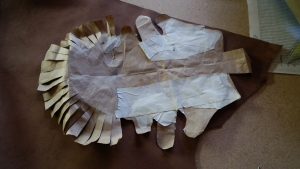
I followed the instructions on this site. It goes step by step and practically no-fail. I however am a bit more cautious and rather start with the leather I made a pattern out of brown paper.
brown paper pattern for a pair of Iron Age shoes.
Once I was confident that I had a good fit with the paper pattern, I bought the leather that I needed. One thing that few sites describe is the type and weight of leather needed. I bought some cow leather that was supple, but not stretchy from Cox Leather in Albuquerque. The place is an amazing resource for hides, rawhide, leather, skins, and really anything leather related. They also ship!
Leather thickness in the US is measured by the ounce, and in mm in Europe. The leather I bought was about 8 oz / 3.2 mm / 1/8 inch thick.
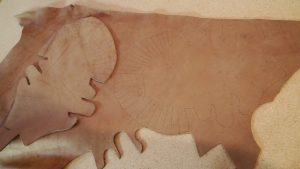
The pattern laid out on the leather. I traced the right foot and then flipped the pattern over to trace the left foot.
Once I traced the pattern on the leather, I cut the shoes out using good sharp scissors and punched the holes for lacing with an awl. It’s important to use an awl or punch rather than cutting the hole with a scissors since a round hole pushed through the leather is less likely to tear than a hole that is cut.
The shoes all laced up.
I stitched up the backs with sinew. I followed the directions and stitched the sides of the heel to the heel tab straight up. It ended up a little loose. When I get the time I’ll restitch them so they come in a little tighter on the top. Another modification will be to put more of a sole on them. Some options are to cut an insole out of rawhide and sew it between the inside of the sole with another, softer leather insole on top. I might line it with some sheep skin, too.
A comfy fit.
First posted on 16th November 2016
Since I first posted this I have worn the shoes often and have come in useful while working at the Bronzezeithof in Germany. They are holding up well after a year, although I don’t wear them every day.
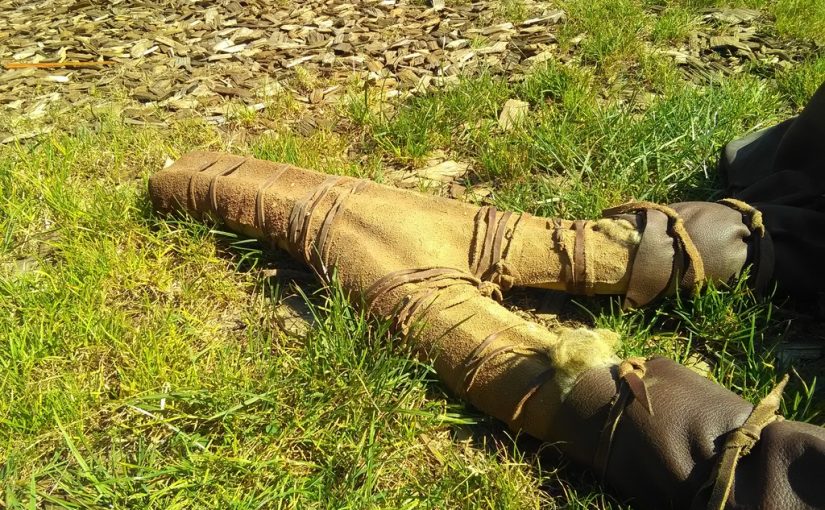
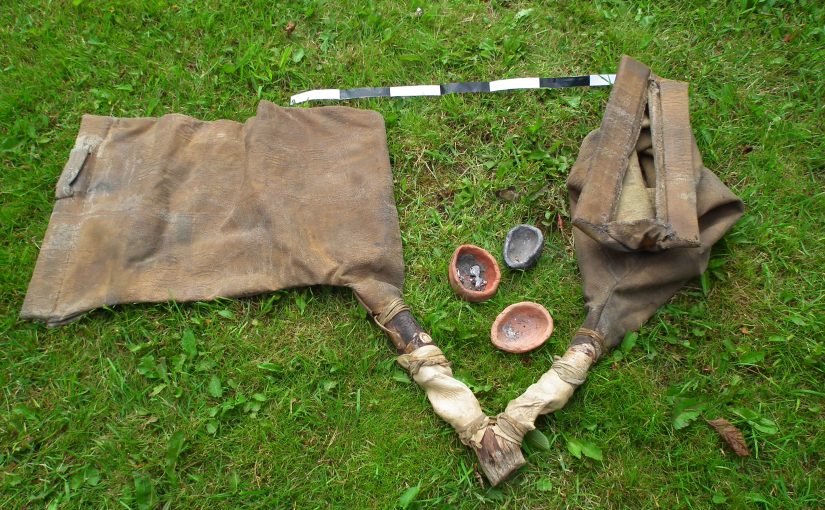
Bag bellows might be the oldest form of bellows used. We don’t know for certain because they are made entirely of organic materials, and so none survive in the archaeological record. Because they have the advantage of being portable, lightweight, and easy to make, this type of bellows are still in use for iron forging in parts of Africa and South Asia. When you make a pair, you can be as “authentic” as you want, using only wood and leather, or you can use more readily scrounged materials like vacuum cleaner hoses and pleather. There is a remarkable video of Kenyan metalsmiths using bellows made of cement bags here.
In addition to this tutorial, check out the Bellows Forum page where there are variations of bellows designs and some interesting variations.
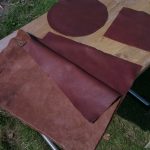
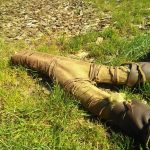
Traditionally bag bellows are made of pliable leather and the usual description is that a single bellow is made from one goatskin. The bellows I describe here are made with upholstery fabric. At the time I made them, leather was too much for my budget. After they were sewn I gave them a good coating of linseed oil that made them both waterproof and airtight. I find it ironic that in the Bronze Age leather would have been readily available, but hand-woven fabric would have been exorbitant. So, these are my ostentatious display of wealth bellows.
How big the bellows you make will depend on what’s comfortable for you. I’ve used very large bellows and ones so small you’d think that they’d never produce enough air to get the job done, but they did remarkably well. What is important is that the size works for you. You’ll be sitting on the ground, or close to the ground (I like a log or a short tree stump with a bit of padding). Sit down on the floor and raise your arm with your elbows bent so that they are lifted a little over waist high. Try not to move with your shoulders. You’ll be pumping your arms up and down for hours, so it’s good to find a height that works for you so that you don’t wear your arms out. Measure that height or get a good idea of how high that is. Then you’ll want to add a few more inches because you want to have the bellows rest on the ground. If you lift them too high, the sides will collapse and you won’t be able to trap the air in them. You also want to add another few inches to wrap around the handles.
Besides the leather (or whatever material you choose) the other supplies you’ll need are heavy waxed thread or sinew, leather or sail needles (depending on the type of material you’re sewing). The handles are made of two straight branches about 3-4 cm (1-1 ½ inches) in diameter, or four boards 3 by .5 cm (1 by ¼ inch) the length will depend on how wide the top of your bellows are. If you use branches, they’ll have to be split lengthwise so that they have a semi-circular cross section. My bellows are about 16 inches wide.
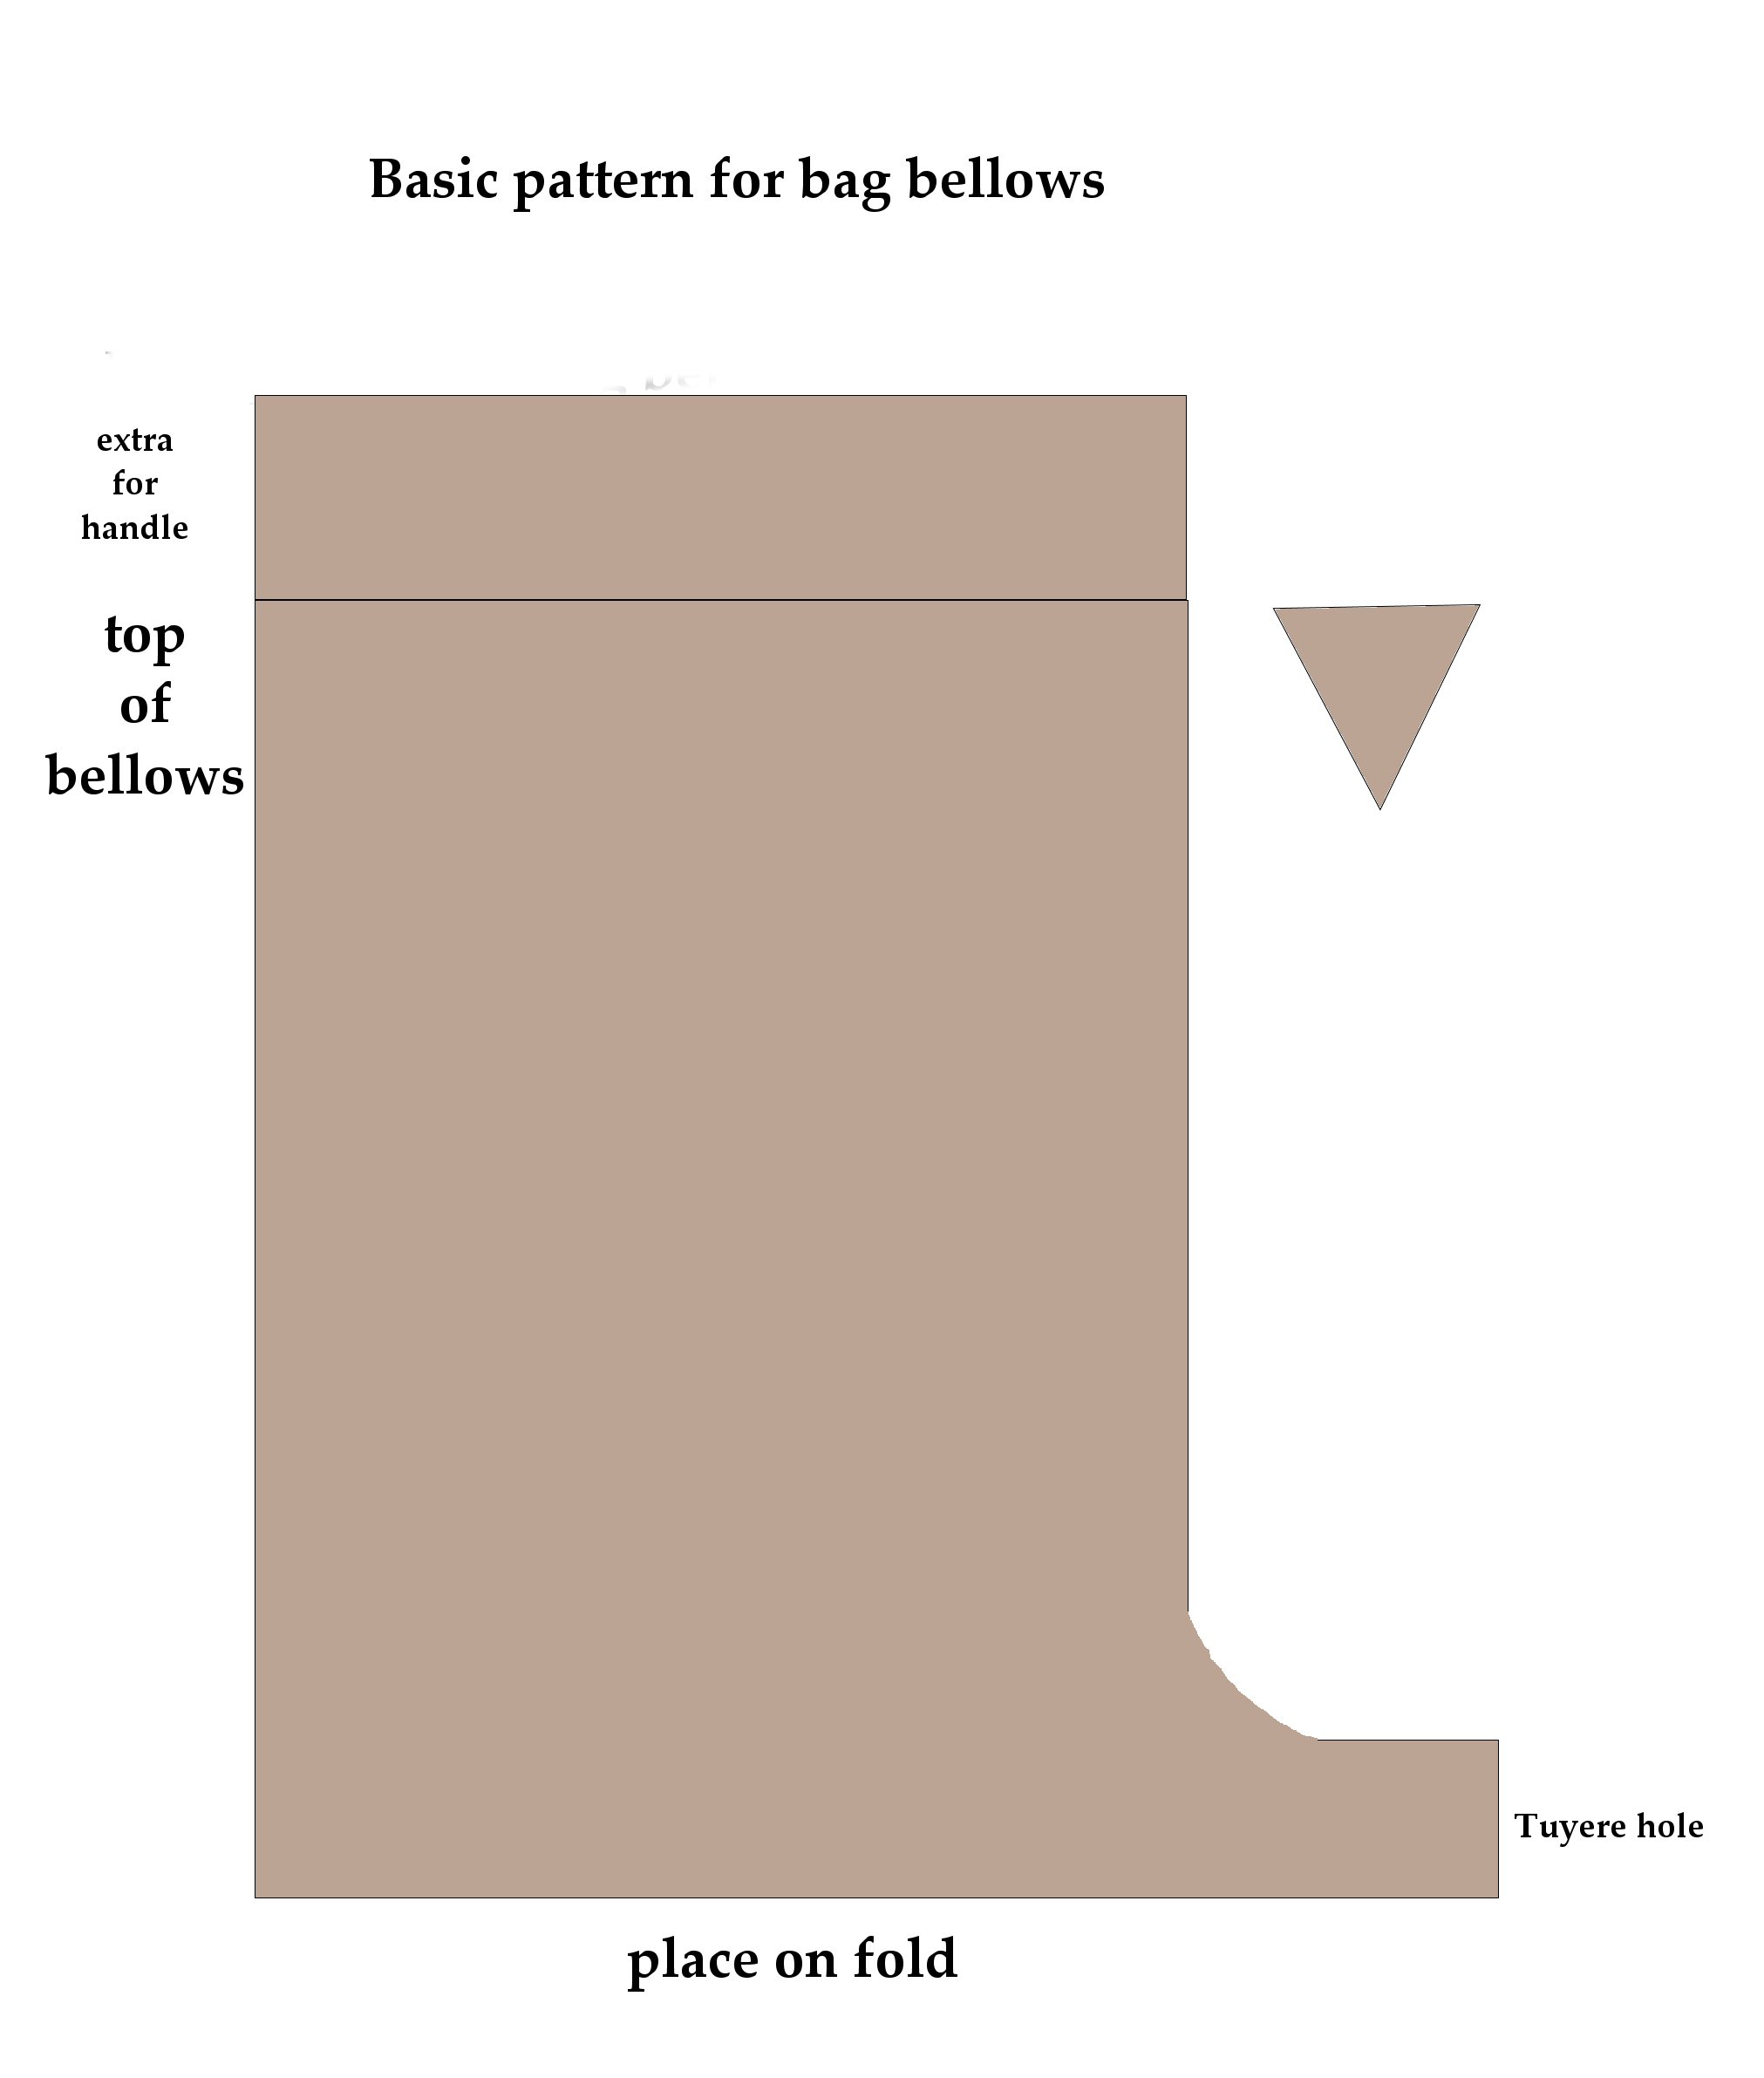
Using your own measurements, adapt the pattern below, adding about 3 cm/1 inch for the seams around the edges, and enough at the top to wrap around the handles. You’ll also need some scrap to make loops for your fingers. The loops are more important than you realise. Getting them right will mean the difference between being able to work for hours, and giving up because you keep getting blisters or losing your grip.
The basic pattern for cutting out a pair of bag bellows.
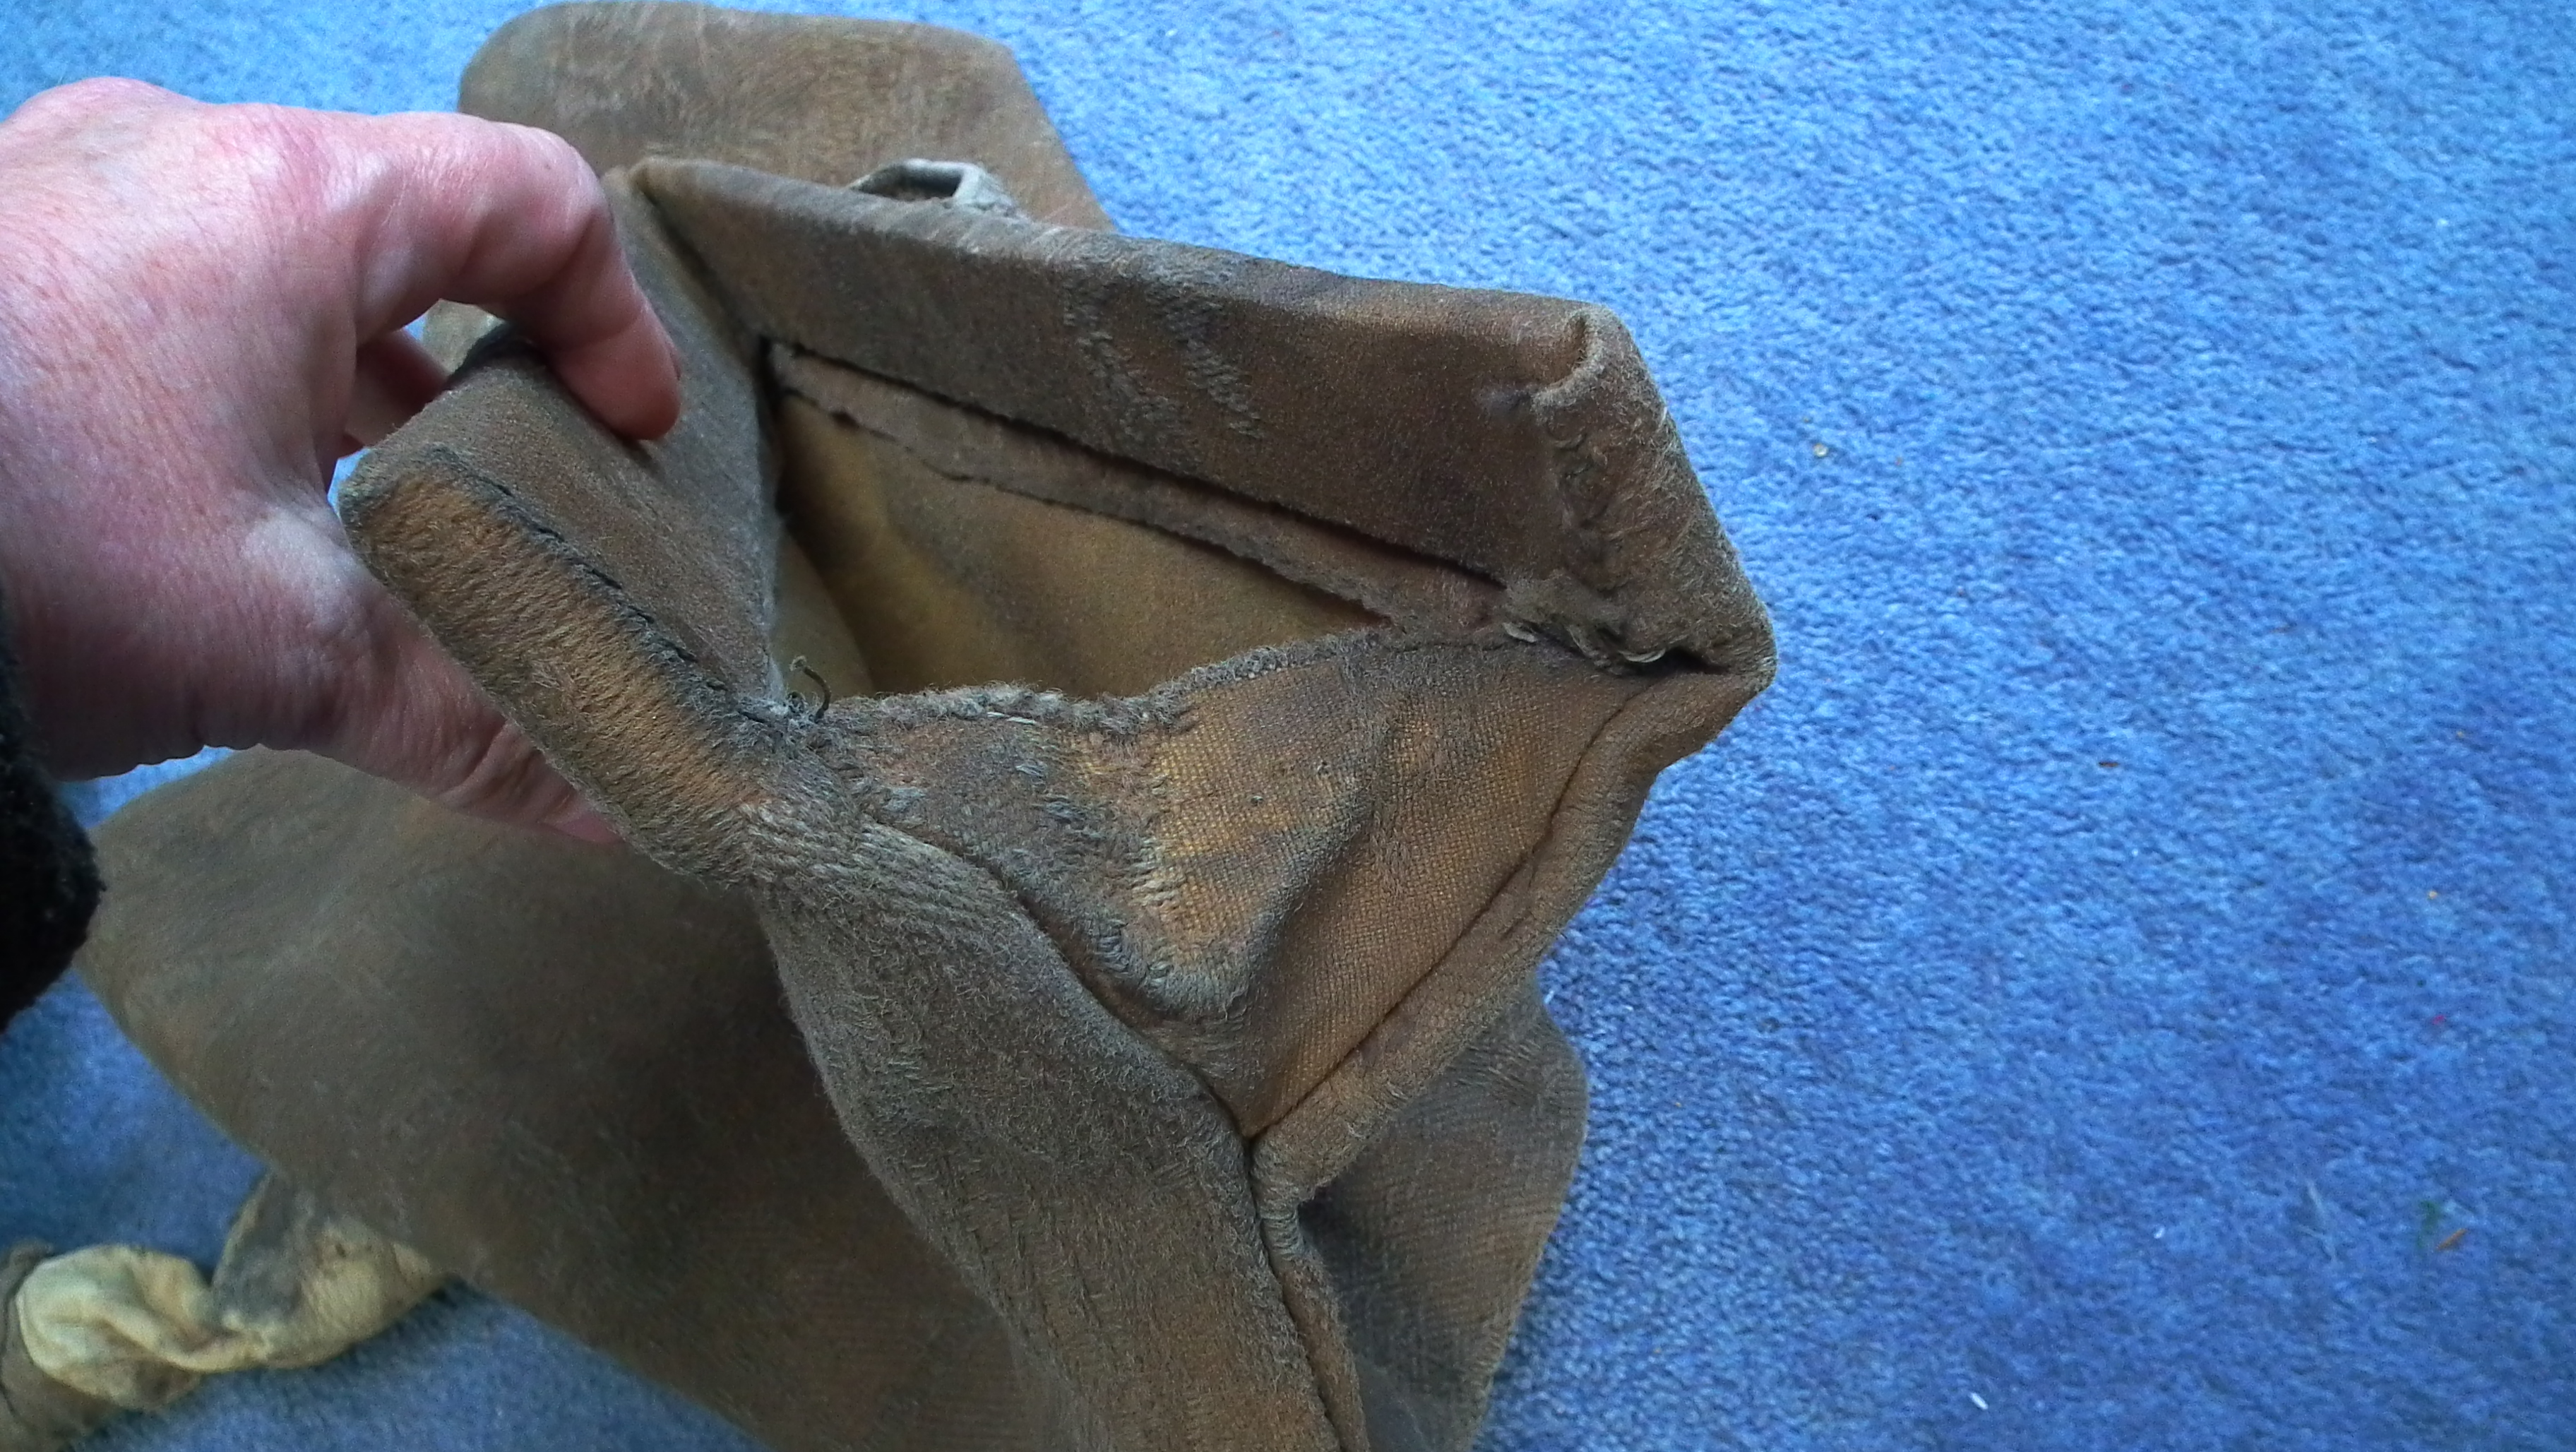
Another useful detail is to sew a small triangle in the front of the bellows, just below the handles. Holger Lonze taught me this trick. It makes it much easier to open the bellows wider and get more air in.
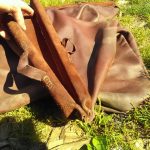
The small triangle set into the front of the bellows. Note that I put in a couple stitches so that when the bellows close, the triangle folds inwards.
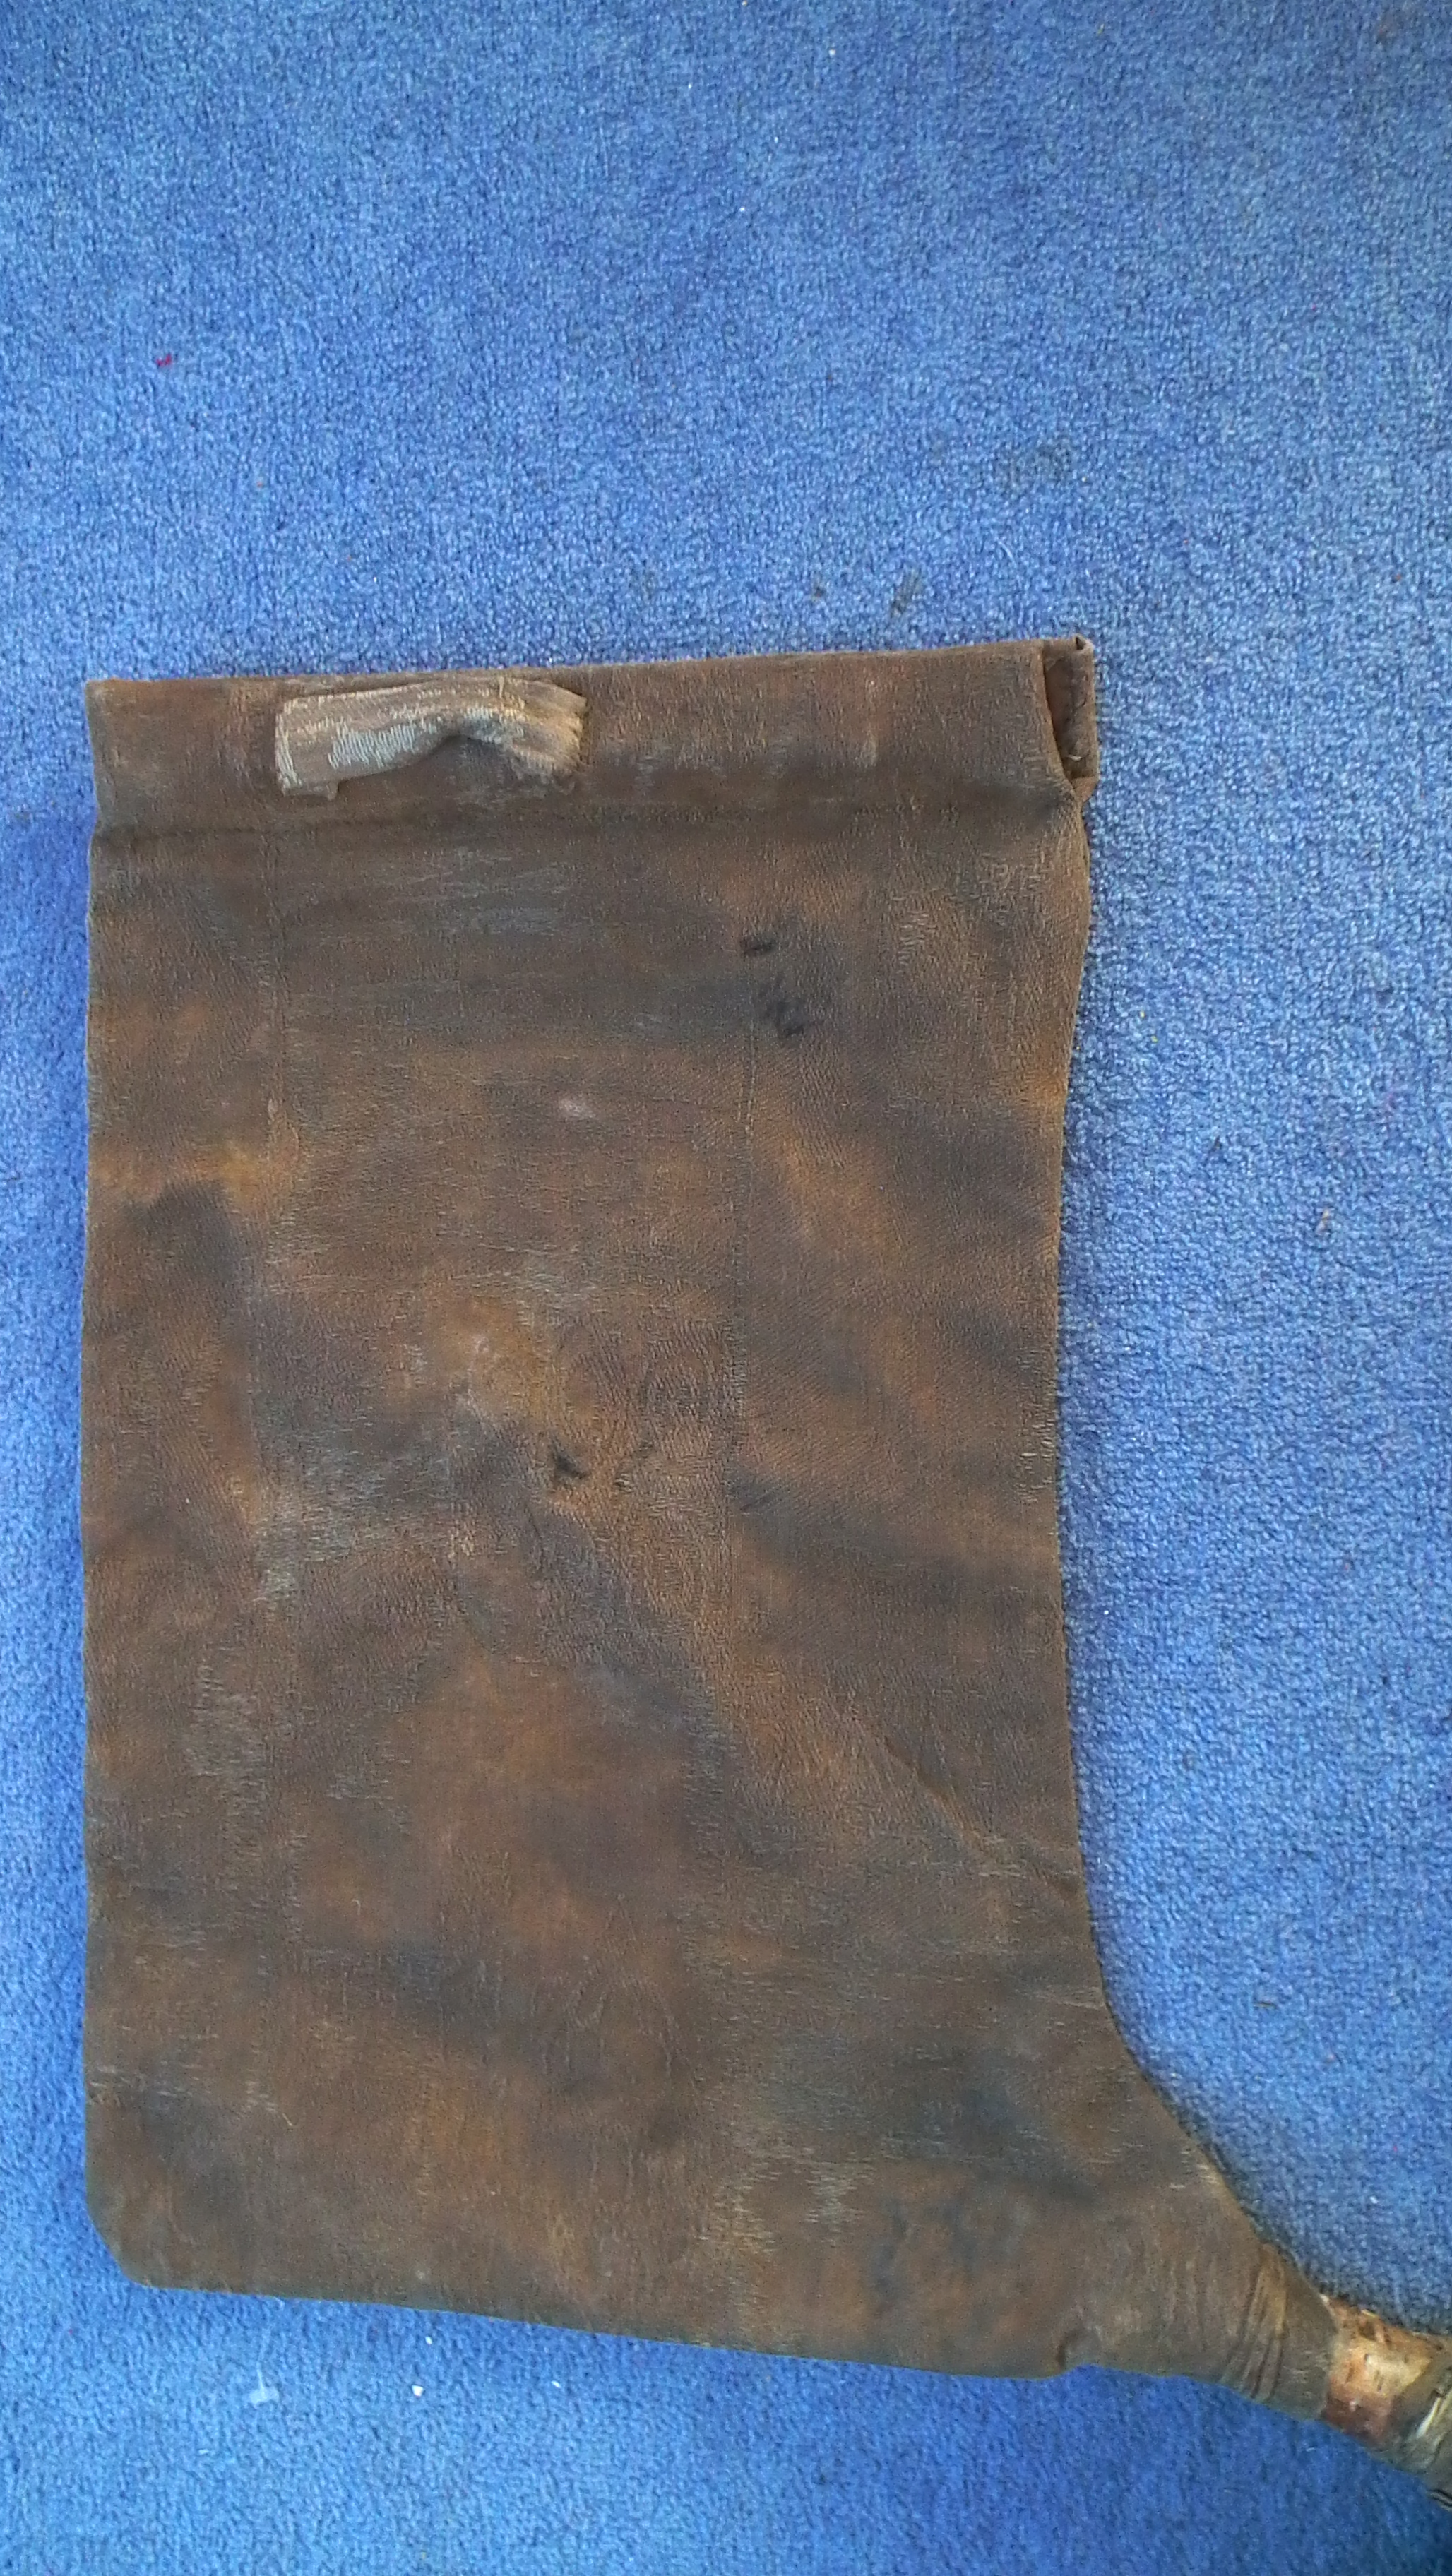
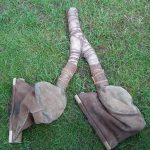
The other detail is the part at the bottom that sticks out. This is where the tuyere will fit. The size you make that will depend on the tuyere you make, and also how much air you want to push through to the fire. If it’s too narrow, you’ll be expending a lot of energy pushing air through a small space. Too large and you’ll be pumping furiously to get the volume of air through the tuyere. Mine is about 10 cm (4 inches) and tapers a little so I can fit different tuyeres to it in case I ever want to change it.
The other supply you’ll need is rawhide. Leather strips can work, but they aren’t as durable or tight as rawhide. The best source for rawhide I’ve found is the pet shop. Buy a rawhide chew bone for a dog and soak it in a bucket of water overnight. The rawhide will soften and you can untie the ends and unroll a nice sheet of rawhide. I cut it in a spiral so I have good, long pieces. While it’s wet, you can wrap it and tie it easily. Once it’s dry it shrinks to a hard, tight fit.
A close-up of where I tied the opening of the bellows to the tuyere
Cut out the leather or material and then stitch it with the outsides together so that when you turn it inside out, the raw edges will be on the inside. Don’t sew it all the way to the top. You want that extra selvedge to wrap around the handles. Make sure you fit the triangle in the front below the bottom edge of where the handles will be.
The next step was the hardest for me. It’s a bit of a pain. You need to wrap the upper selvedge of the bellows around the sticks and sew them tightly into place. If you’re using half-round branches, make sure the flat sides are on the inside so they meet and make a tight fit. Sew these in tight along the bottom of the sticks. It’s annoying if they wobble around.
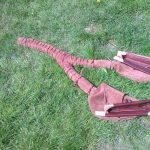
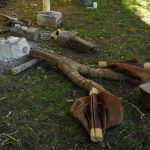
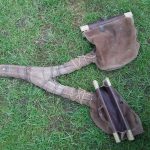
The finished bag bellows. Note that the handle is towards the rear of the bellows.
Turn the bellows right side out and admire your work.
If you used branches, you might not need loops for your fingers. Try pumping them a bit and see if you can open and close them easily without them slipping out of your hands. The action is to open them while the top of the bellows is close to the ground, Lift them, close them when they are as high as you want to lift them, close the bellows and then push down. If you lose your grip, you might want to put loops on them. They are simple, just strips of the same material that your bellows are made from. Sew them so your hand will be about 1/3 to 1/4 of the way from the back. When the bellows open, the little triangle in front will allow the bellows to open in a “V” shape and allow you to trap more air. Having the loops toward the back means that you don’t have to open your hands as wide. Since I work with kids a lot, this was a consideration when I designed them. Also, I have small hands.
This shows the handle at the top of the bellows and how to hold the bellows open while using them
The loops should accommodate four fingers on one side and your thumb on the other. The handles will stretch over time, so I periodically have to stitch them again to tighten them up.
There now, try them out. If you feel any air leaks in the seams you can seal them with linseed oil. If you made your bellows from fabric, the easiest way to coat them is to hang them on a clothes line outside and slather the oil on with a paintbrush. It takes a long time to dry and smells pretty strong. It’s definitely something to be done outdoors. Keep in mind that it might take a day or two for the linseed oil to dry.
Now in order to work, you’ll need at least a short tuyere. If you’re not fussed, some steel tubing from a vacuum cleaner works fine. If you want a more Bronze Age look, you can make them from wood. I took a short branch and drilled a hole in it using a 2 cm flat bit (1 ½” spade bit in the US). The branches are about 1 cm or ½” wider than the bit. If you don’t have a bit or don’t want to use power tools, take a branch of the right thickness (about 4 cm or 3”) and split it in half. Carve out the centre and fit them back together using glue and rawhide.
Fit one end of your tuyere into the opening at the bottom of your bellows (you didn’t sew that shut, right?). Now take the wet, sloppy rawhide and wrap it tightly around the part of the bellows covering the tuyere. If your tuyere is made of split branches, keep wrapping so that it holds the halves of the branch together. Depending on the weather and humidity, it might take several hours for the rawhide to dry.
Once everything is dry, try them out. They’ll be a bit stiff at first and will need to be broken in. It takes a bit of practice to get the Open-Lift-Close-Push rhythm going, especially if you alternate hands. Once you get into it, it gets easier. Think of a cat kneading its paws.
Another tip is to get some thin willow twigs, about the size used for making baskets. Make them into hoops that will fit inside the bottom of your bellows. It will help keep them open, especially if you have a tendency to lift them too high.
Next you’ll be wanting a “Y” shaped tuyere to connect the bellows together.
Tuyeres are the tubes that bring the air from the bellows to the furnace. They can be made of wood, ceramic, PVC pipes, copper pipes, old vacuum cleaner tubes, really whatever you can come up with that will do the job. They are usually connected to the bellows, but in some cases they can just be set close enough that the air is delivered through them to the furnace. If you have a set of two bellows, the tuyeres are in a “Y” shape, with two ends connected to the bellows that connect to a single end going to the furnace.
Archaeologically there aren’t many remains of tuyeres. There are some fragments of tubular ceramic objects that had evidence of burning on the end. However, the best example is a wooden one recovered from a Danish bog. This was the same sort of “Y” shaped one described below.
Quick and easy: Tuyere #1
One of the problems of working with kids is that they are so fascinated with flames that they sometimes don’t realise that the bellows aren’t the part that supposed to be burning. So I’ve been working on making a couple of new sets of tuyeres.
Poor tuyere. Burnt to a crisp! I guess that it’s time for a new set.
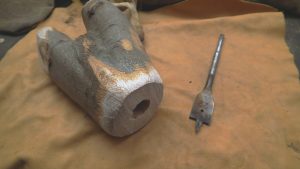
I’m under a deadline for one set, so this will be a quick and easy version. I pulled a good sized forked branch from the woodpile and cut the ends so they were fairly even. Then I got a 22 mm spade bit (in Britian it’s known as a flat bit). Then I just clamped it into a vise and drilled into the flat ends of the wood until the holes met near the centre. I removed the bark, rounded off and sanded the ends. I don’t want any bark that will work loose over time, or any sharp edges that will abrade the inside of the leather on the bellows.
Holes drilled. All that’s left is to attach it to the bellows.
I usually like one with a wider fork, but this will do in a pinch. It’s more important that the two ends are close to the same angle from the main trunk to minimise any kinks when connecting them to the bellows. The tuyere will be connected by leather tubes to the bellows and held in place by strips of rawhide. Skip down to the section on putting them all together for the details on that.
Note: Save that sawdust that you’re generating with all that drilling. It will come in handy for making moulds!
Larger and more labour intensive: Tuyere #2
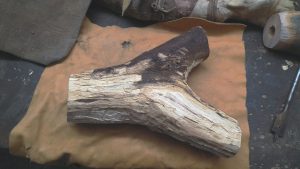
The next one is another wooden tuyere for a new set of bellows I’m making. It’s larger, so the spade bit isn’t an option. Instead I cut the wood in half lengthwise and then carved out the inside with woodworking gouges. It’s all handwork, so it takes longer, but one advantage is that the diameter of the air holes isn’t limited to the size and length of the drill bit.
This is a section of a branched silver birch trunk with a good angle. Most of the bark is removed and the wood looks sound underneath. Time to slice it in half.
Once the branch was cut, I marked off where I would carve out the centre and went at it with chisels and gouges. I made the interior as smooth and as even as possible. However, I don’t smooth the surfaces that will be glued together. They already fit well and the rougher texture will help the glue bond. If you’re going for authenticity, you can use birch tar or other natural glues. If you’re pressed for time Gorilla Glue works very well. Other tuyeres I’ve seen are held together with leather and rawhide.
The insides of the tuyere are seen on the right. They’ve been carved out and are ready to be put back together again.
Another variation was made by Morgan Van Es, who hollowed out a “Y” shaped branch and then covered it tightly with leather. This is far easier than drilling holes or carving two pieces of wood and trying to fit them back together again. The tuyere definitely works!
Note the depression along the top of the tuyere. The tuyere is made from wood in which a deep groove was cut. Then the tuyere was covered in leather. Much less labour intensive and it delivers the air very well.
Ceramic and other Tuyeres
If your tuyere might be placed close to the furnace (as mine accidentally was), it would be a good idea to make a ceramic extension. This is just a tube made of the same ceramic you used for making the furnace or moulds. It can be fit to the end of your wooden tuyere with leather and rawhide, as described below, and the end can go straight into the furnace. The only problem I find with ceramic tuyeres is the possibility of them breaking when being transported or if someone steps on them.
At the Terramare Village in Montale, the tuyeres they use there have a 90 degree bend. The tuyere sits on the edge of a small, shallow furnace and blows air straight down onto the crucible. It’s an Early Bronze Age design and does get hot enough to melt bronze and copper. If you don’t have much space for a furnace this would be an ideal solution. It’s also worth experimenting with different types of furnaces to get an idea of how many solutions there are to the basic question of how to melt and cast metal.
There are some beautiful ceramic tuyeres in the Musei di Palazzo Farnese in Piacenza. They are from the Terramare culture that spread through the Po Valley in northern Italy. Click on the thumbnail to get the entire photo.
Piacenza Museum Ceramic tuyeres excavated from Rovere di Caorso and Castelnuovo Fogliani. The longer one is about 20 cm long.
Piacenza Museum Ceramic tuyeres excavated from Rovere di Caorso and Castelnuovo Fogliani. The larger one is close to 20 cm long.
Piacenza Museum Ceramic tuyeres excavated from Rovere di Caorso and Castelnuovo Fogliani The larger one is about 20 cm long
Piacenza Museum Ceramic tuyeres excavated from Rovere di Caorso and Castelnuovo Fogliani
Piacenza Museum Ceramic tuyeres excavated from Rovere di Caorso and Castelnuovo Fogliani
Piacenza Museum Ceramic tuyeres excavated from Rovere di Caorso and Castelnuovo Fogliani
At the EAA in Glasgow, I saw a poster showing the reconstruction of a beautiful horse-headed ceramic tuyere by Katarina Botwid of Lund University. This is similar to the right-angled ones they use in Montale. You can see the tuyere in action here.
I’ve also made tuyeres using the stems of Japanese knotweed. The stems are hollow, similar to bamboo, but much softer. The plants can get over an inch in diameter and several feet tall. The stems can be easily cut with a knife, small garden shears, or secateurs, and then the membranes between sections can be broken by poking a straight stick through them.
Note:Japanese knotweed is a controlled invasive species in Britain. Any fragment of stem, leaf, or root will take root and start a new plant. They are almost impossible to get rid of once started. When I find a large stand of knotweed, I strip off any leaves and excess stems and leave them there. If I need to trim off any more once I’m home, I put it in a plastic bag and then put it in the bin.
As I said earlier, tuyeres can be made of anything that will get the job done. If you don’t need to have that “authentic” Bronze Age look, you can quickly whip something together with PVC plumbing or copper piping. It wouldn’t be glamorous, but as long as any flammable or melt-able parts are kept away from the heat of the furnace, it should get the job done.
Putting them all together
The tuyere still needs to be connected to the bellows. I usually make tubes of leather that fit the tubes coming out of the bellows and the ends of the tuyere.This allows for some flexibility and gives you a bit more distance from the furnace.
A tight stitch and a decent amount of overlap will make these pretty airtight.
Then I tie them in place with wet rawhide. Once the rawhide is dry, they are about as secure as you can get. If the leather is soft, the tubes have a tendency to twist or collapse, so a nice solution is to get some green willow twigs and roll them into a spring. Fit them into the tubes before doing the final attachment and they’ll keep the leather tubes open and prevent them from twisting.
I also fit twisted willow hoops into the ends of the bellows to keep the leather from collapsing.
A willow hoop wrapped and tied with sinew or other cord will help keep tuyere tubes from collapsing.
Everything is fit together and tied with damp rawhide. Once the rawhide is dry, the bellows are ready to go.
A close-up of where I tied the opening of the bellows to the tuyere
By the way, if you have a hard time finding rawhide lacing, buy a rawhide dog chew. Soak it in a bucket of water overnight and then cut it into long strips while it’s still damp. If you don’t need all of it right away, let it dry out. Then when you need it again just soak it for a few hours and it will be nice and flexible again.
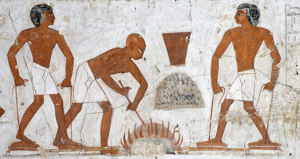
Bellows are a bit of a mystery. We know they had to have existed in the Bronze Age, but the only physical evidence we have consists of fragments of tuyeres. An Egyptian painting from the Tomb of Rekhmire, from 1450 BC shows a man using pot bellows that are operated by hands and feet. There are also Chinese documents depicting the use of box bellows. But bellows, after blowpipes, are likely to be one of the earliest forms of delivering air to the furnace. Unfortunately they are also constructed of ephemeral materials.
Scene from the Tomb of Rekhmire. The man on the right is operating a set of pot bellows. The valve is opened when he lifts both his foot and pulls on the cord attached to the top of the bellows. The air is pushed out of the bellows when he steps down. These require a lot of coordination.
Until a set of bellows is uncovered preserved in a bog somewhere a lot is left to the imagination. How big or small could they be? How can the valves be altered to be more efficient? How heavy should the leather be? Should sturdiness trump suppleness? How are all the parts held together and made airtight? Bellows are one of the most essential pieces of equipment that we have for casting bronze and yet very little information is available about their origins, and we rely on information for their use and construction from the community of experimental archaeologists and reenactment groups.
Over the years I’ve seen many different shapes and sizes of bellows and always thought that a forum where bellows design and use could be discussed would be invaluable for people to share ideas and experiences.
I would like to invite others to share photos of the bellows they’ve made on this site. This could be a welcome forum for discussing the pros and cons of different designs, what worked, what didn’t. Of course any news of archaeological bellows or tuyeres discovered would add to the fun.
Note the round bottom. a good way to keep the bellows from deflating if they are pulled up too high.
The new bellows, ready to use
Close-up of the new bellows showing how the valve and handles were assembled
An earlier set of bellows by Morgan van Es. These had smaller bags and took more work to deliver enough air to the furnace.
Note the depression along the top of the tuyere. The tuyere is made from wood in which a deep groove was cut. Then the tuyere was covered in leather. Much less labour intensive and it delivers the air very well.
A close-up of the tuyere that Morgan made for the bellows
Pump Bellows
Matthias’ bellows: I saw these at the 2018 Bronze Casting Festival at the Bronzezeitehof in Germany. The handles can be adjusted at an angle, and they have other nice features.
Note that a small nail and a bit of string can give you more control and make it easier to close the bellows when the valve is on top.
These bellows have the leathering on the outside. This decreases the possibility of air leaks, but also limits the height that the bellows can be drawn. That said, they did deliver a lot of air with little effort.
I would welcome others to send in photos of their bellows, and not just bag bellows, any bellows that could be considered to fit in with what we know or can surmise from archaeology would be interesting for this forum.
While this technically isn’t experimental archaeology, this is a good way to facilitate archaeological experiments in metallurgy. I regularly cast bronze and smelt metals using a small clay-lined pit furnace. However, there are occasions when I am asked to demonstrate Bronze Age metalwork, but am not allowed to dig a hole in the ground. Museums and schools do get fussy about grassy areas and holes that could be a tripping hazard.
I found the link below and I thought it would be a good solution to my portable casting problem. The tutorial was for a making a small iron working forge, but I decided to make one that would be a scaled up version that would enable me to do the same sort of casting that I do with a clay furnace. http://www.instructables.com/id/Make-a-Small-Blacksmith-s-Forge/?ALLSTEPS
When I say that I do Bronze Age casting, I have to be honest about it. So far, in Britain no intact Bronze Age furnaces have been excavated or properly identified. The furnaces I used are based on the work of others and best guesses as to how the technology was done[1]. I have used short shaft furnaces, similar to, but much smaller than bloomery iron smelting furnaces. I have also used clay bowl furnaces with the air supply coming across the top or from below. The most efficient type I’ve used is a two chamber furnace with the air introduced into a lower chamber with the charcoal and crucible supported above it. It fires up quickly and evenly, plus it has the advantage that the crucible has a stable support, so I don’t have to worry about spilling the metal because the charcoal is moved around.
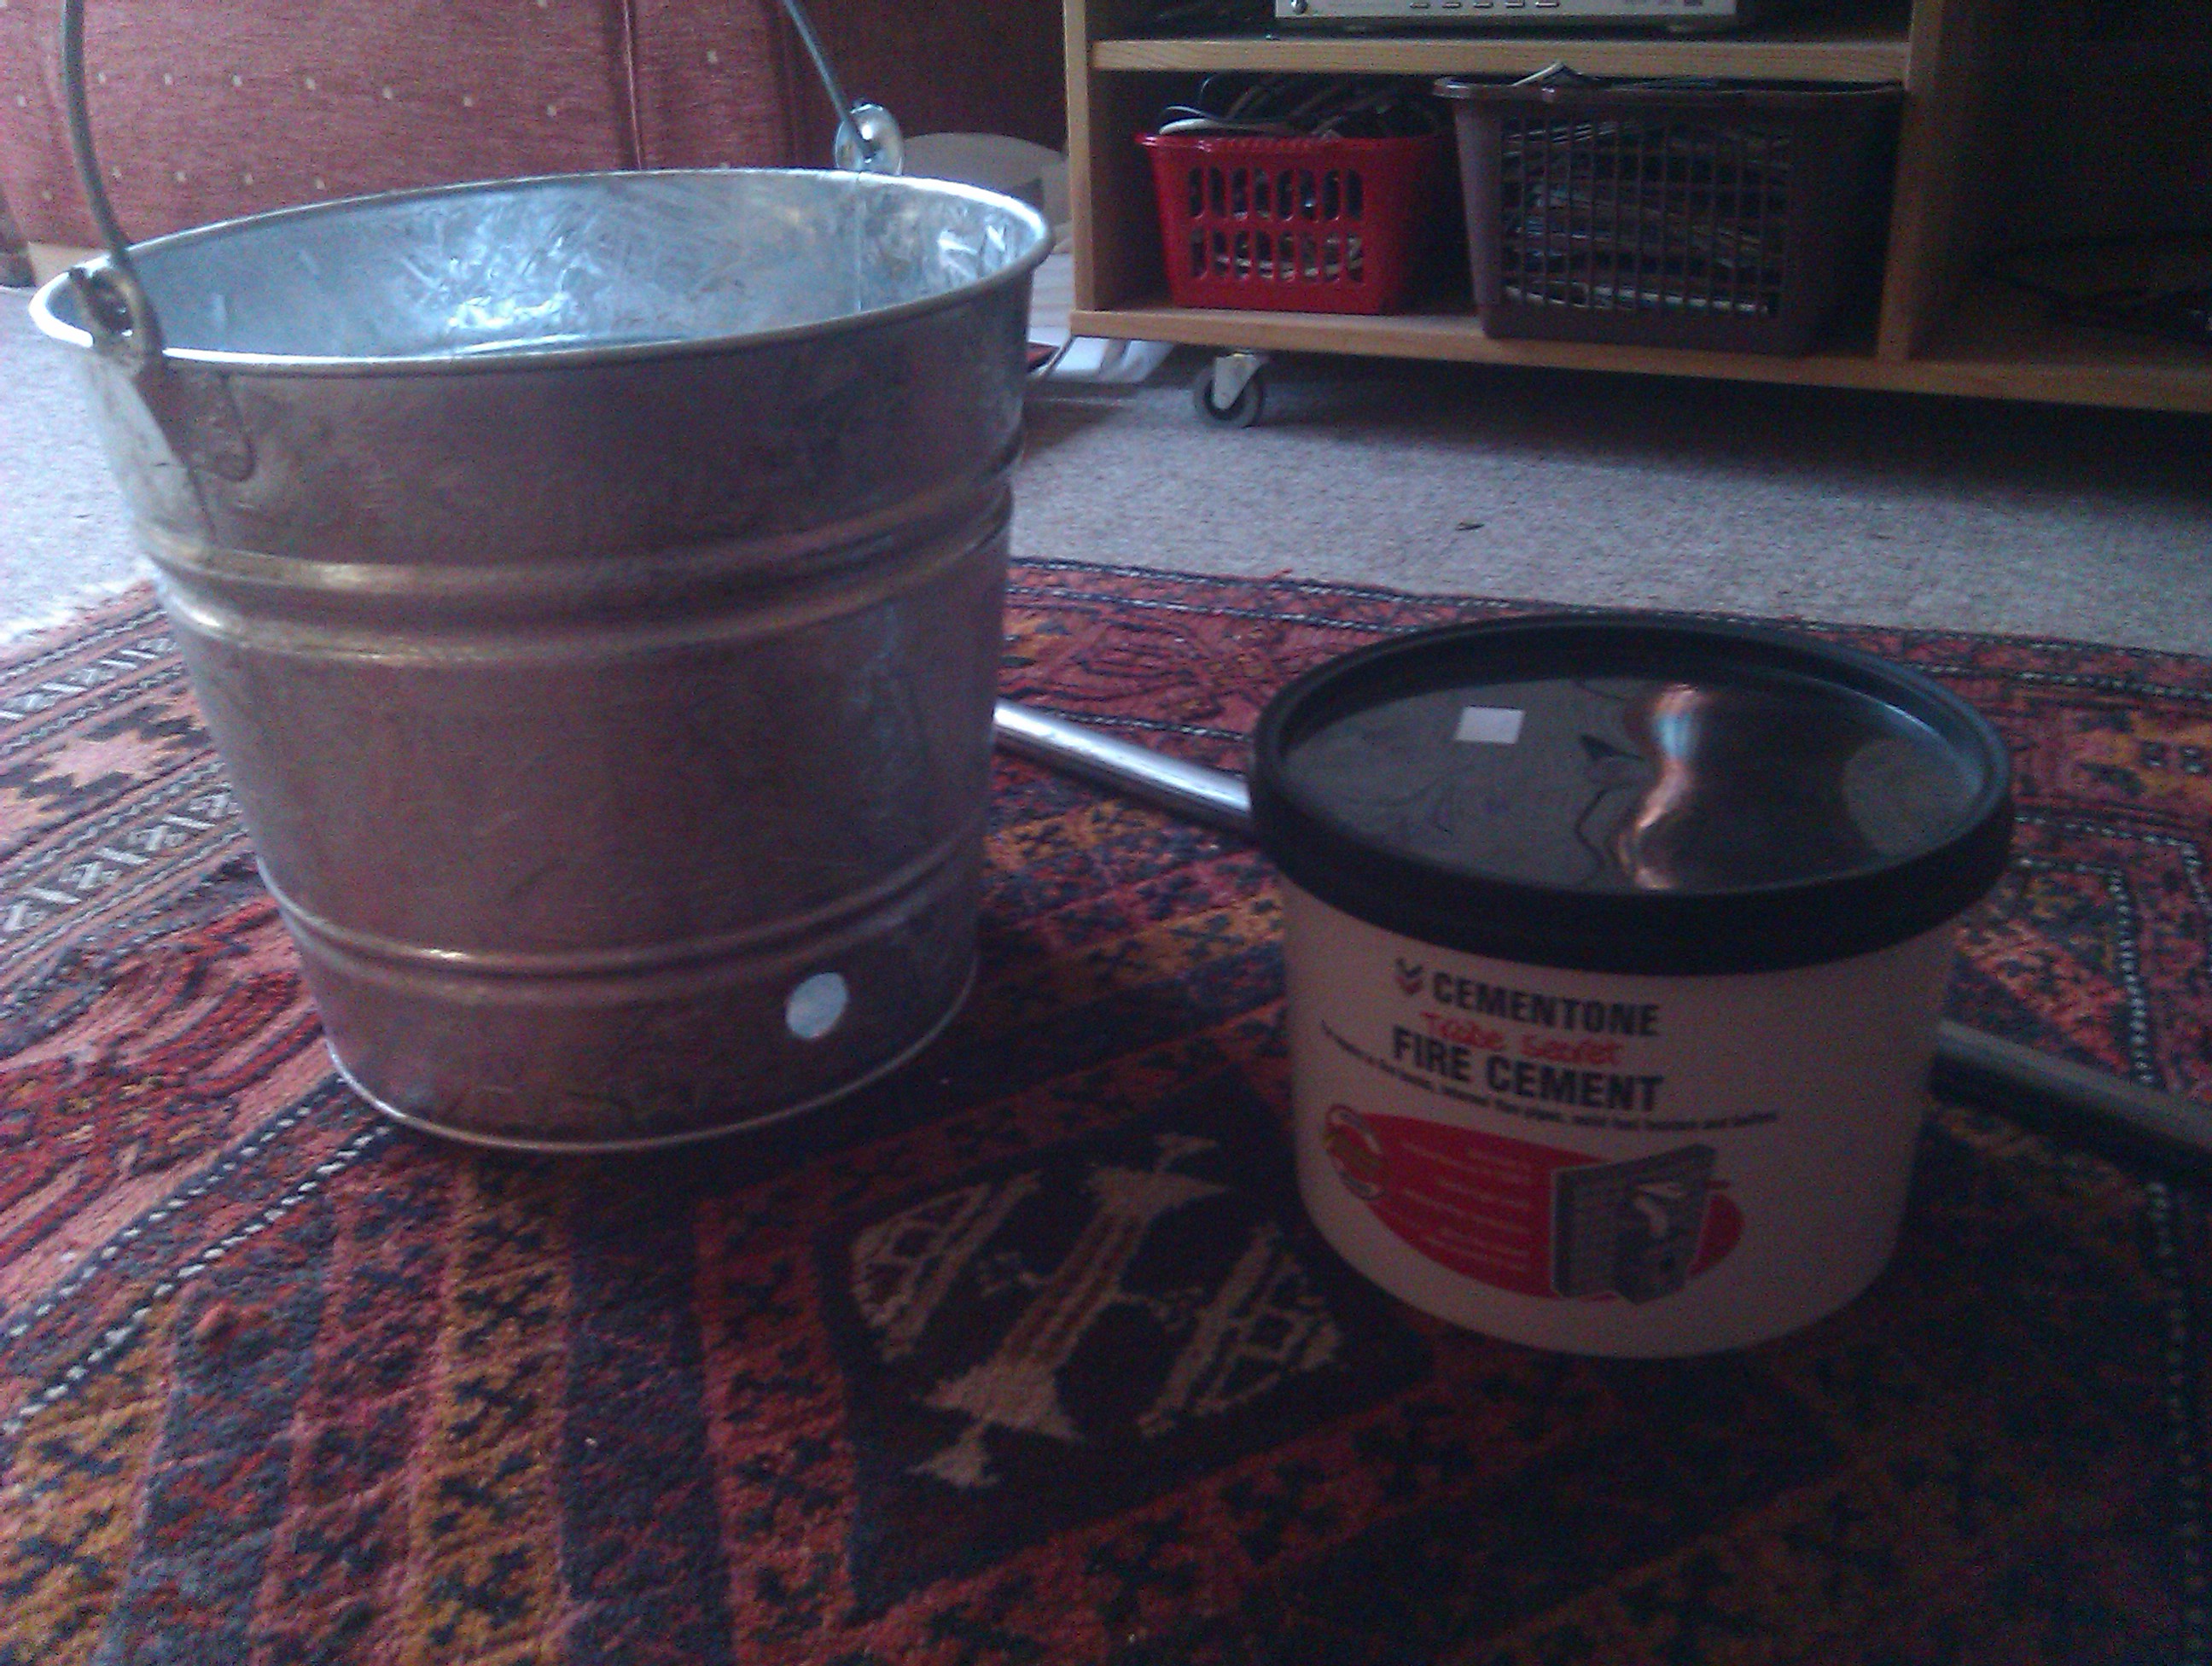
Step one was to find a sturdy steel bucket and drill a hole in the side near the bottom for the tuyere, the tube through which air is blown into the furnace. The air is needed to increase the heat.
A bucket, a steel tube, and furnace cement. Let’s get going!
I had a length of steel tube and a flat drill bit (spade drill bit in the US) of the same diameter. The hole was drilled about an inch and a half above the bottom of the bucket to allow for at least one inch of space for the furnace lining.
The view from above. It all fits nicely.
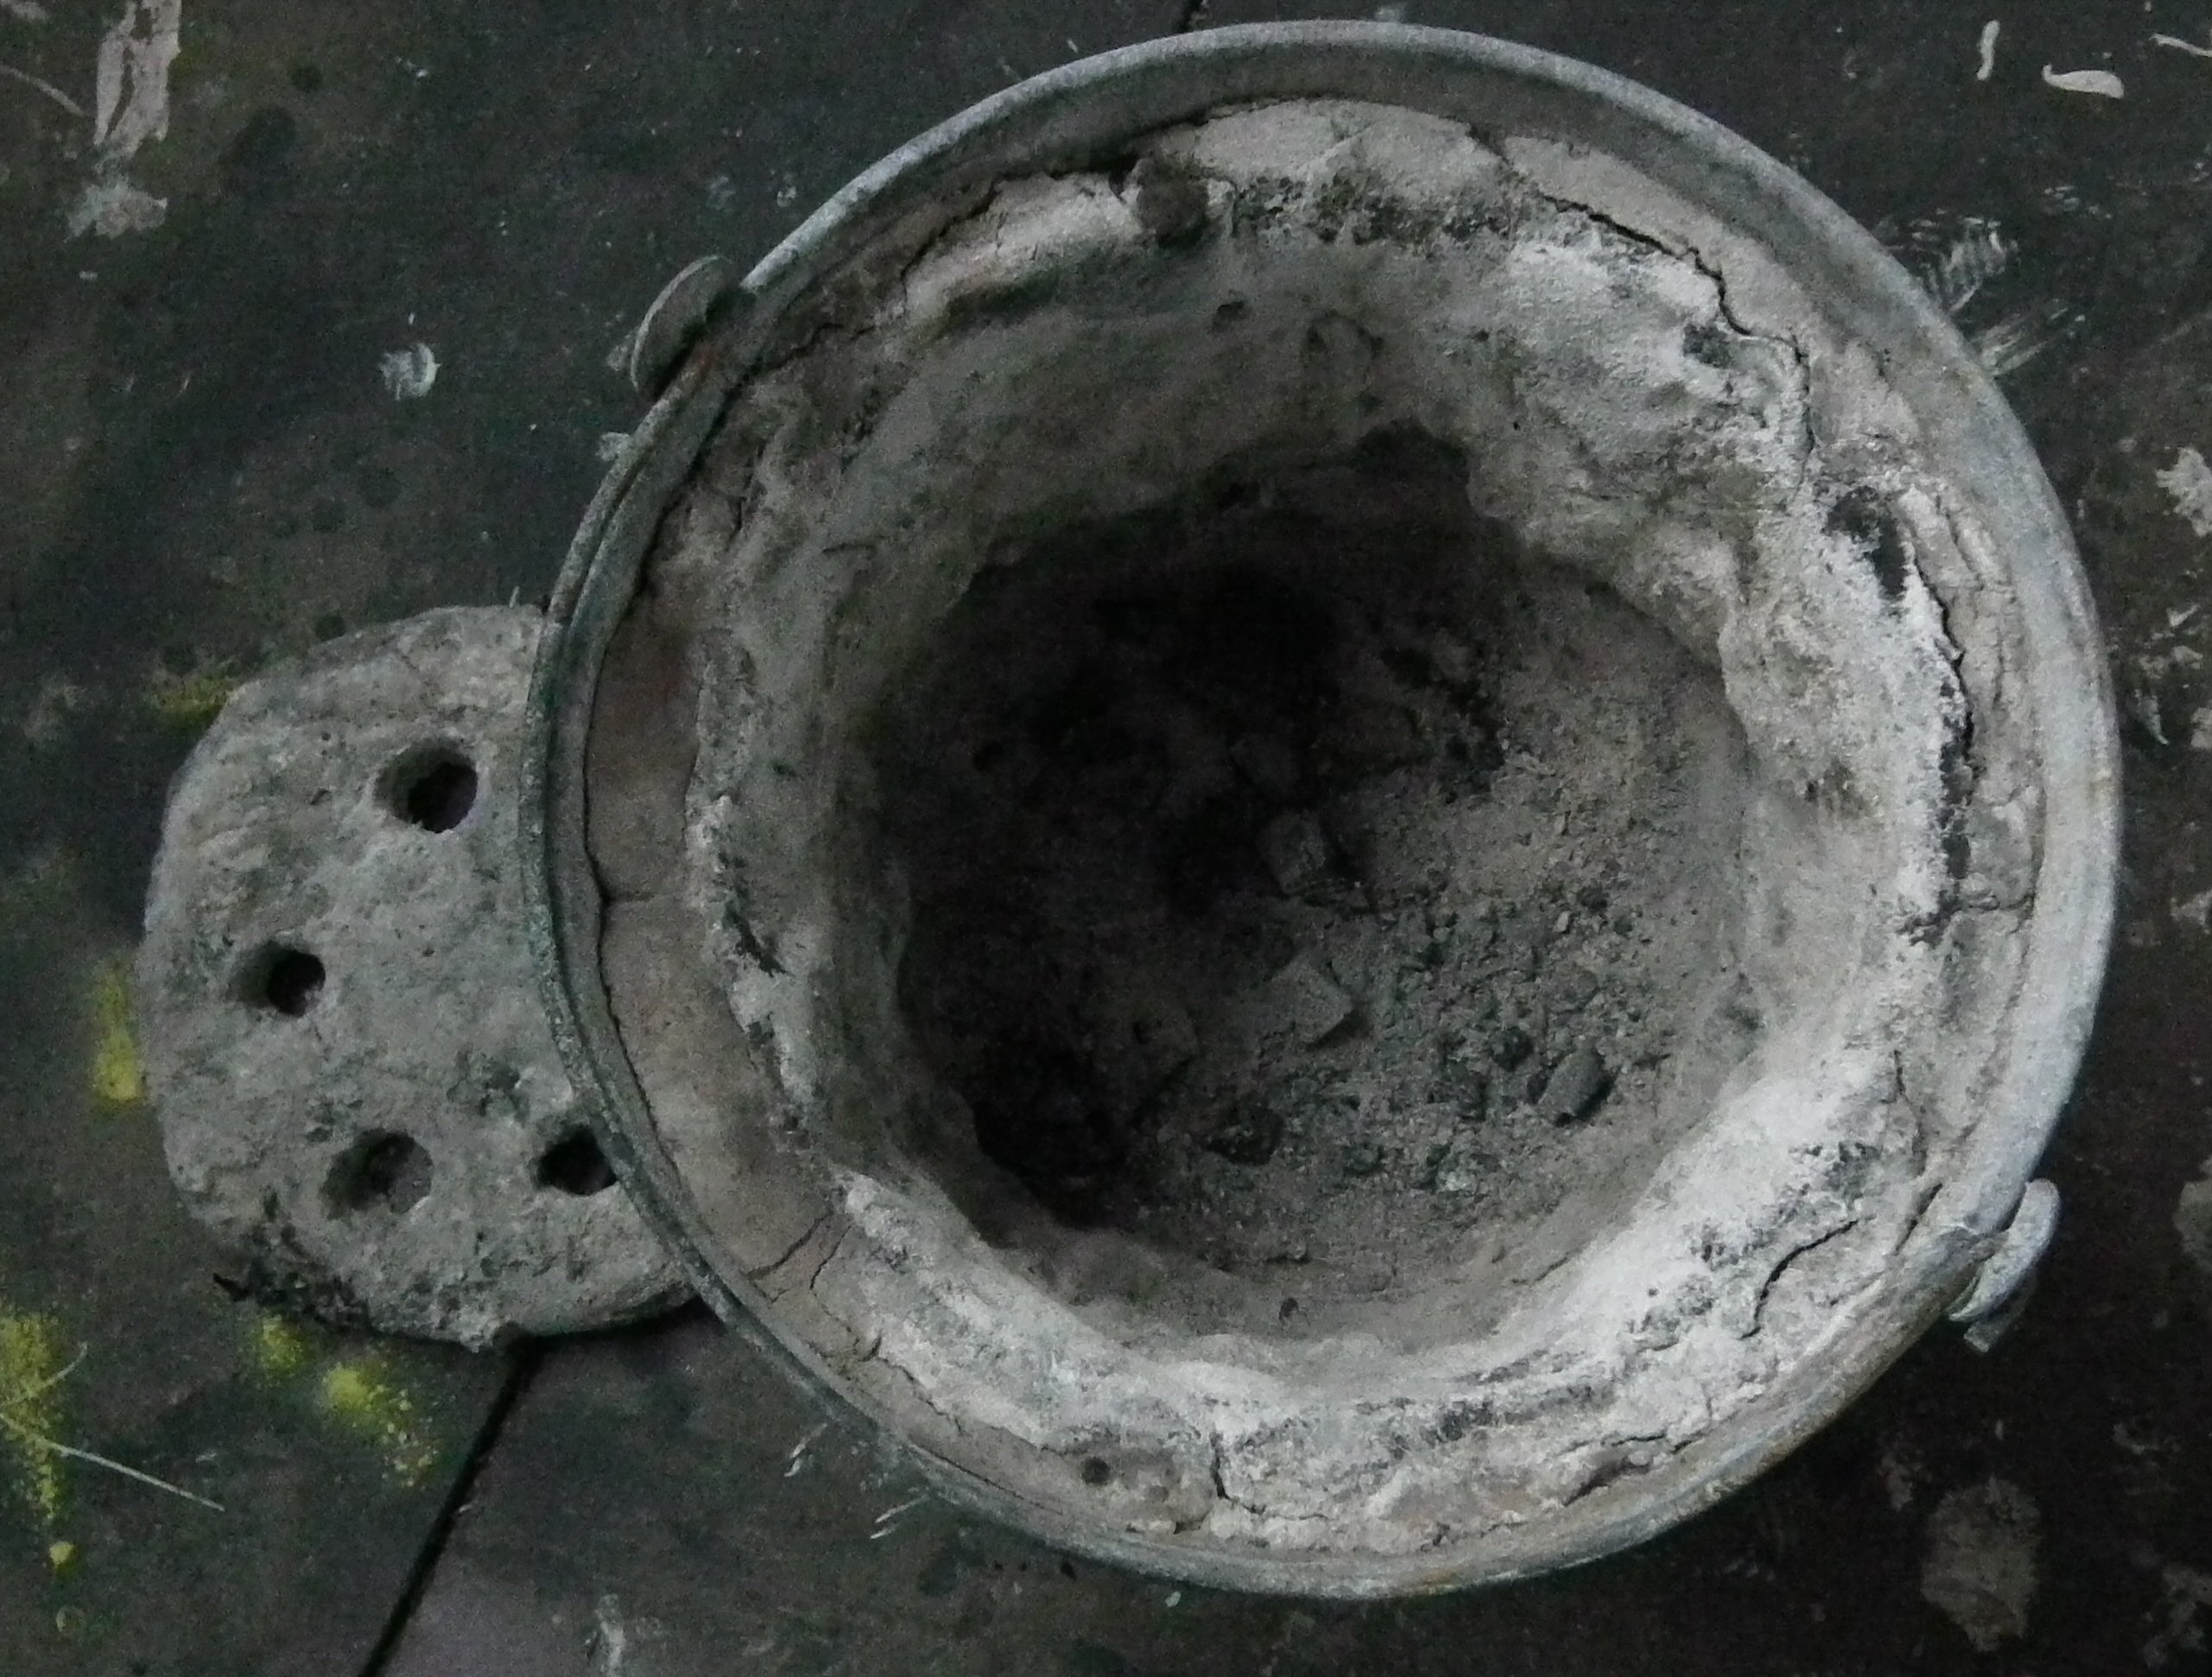
The original website used furnace clay, but didn’t say much about it. I bought a tub of Cementone Fire Cement for £8 at B&Q. As you can see it did about half the job, with the clay packed about an inch thick. The directions said to use a trowel, however the cement has a texture like gritty plasticene, but not quite as rigid. Getting it smoothed in the bottom of the bucket was awkward with the trowel (I’m more used to removing material with a trowel than adding it) so I put on some plastic gloves and pushed it into place.
That’s how far one 5 kg bucket of furnace cement will go. Time to go out and get another…
Now the instructions didn’t say anything about getting it on your hands, it just had warnings about getting it into your eyes. However, knowing that many materials like this can be caustic I decided to err on the side of caution and wore nitril gloves. The container had a handy link to the MSDS (Material Safety Data Sheet) so I could check out all the possible material hazards. The MSDS is a great online resource that will let you know exactly what’s in a product and every possible statistic for it. Check it out here http://www.bostik.co.uk/diy/product/cementone/Fire-Cement/109. Note that it is caustic and there are precautions against getting it on your skin. It also tells you what to do in case of contact with skin or eyes.
I used to work with someone who was severely health and safety challenged. I survived, but in the process learned the effects of being too intimately acquainted with carbon monoxide. It should go without saying, but I’ll say it anyway. Do this outside with plenty of ventilation and don’t hover over the thing while it’s being heated. It’s not a barbeque (at least not yet, there’s plenty of time for that later).
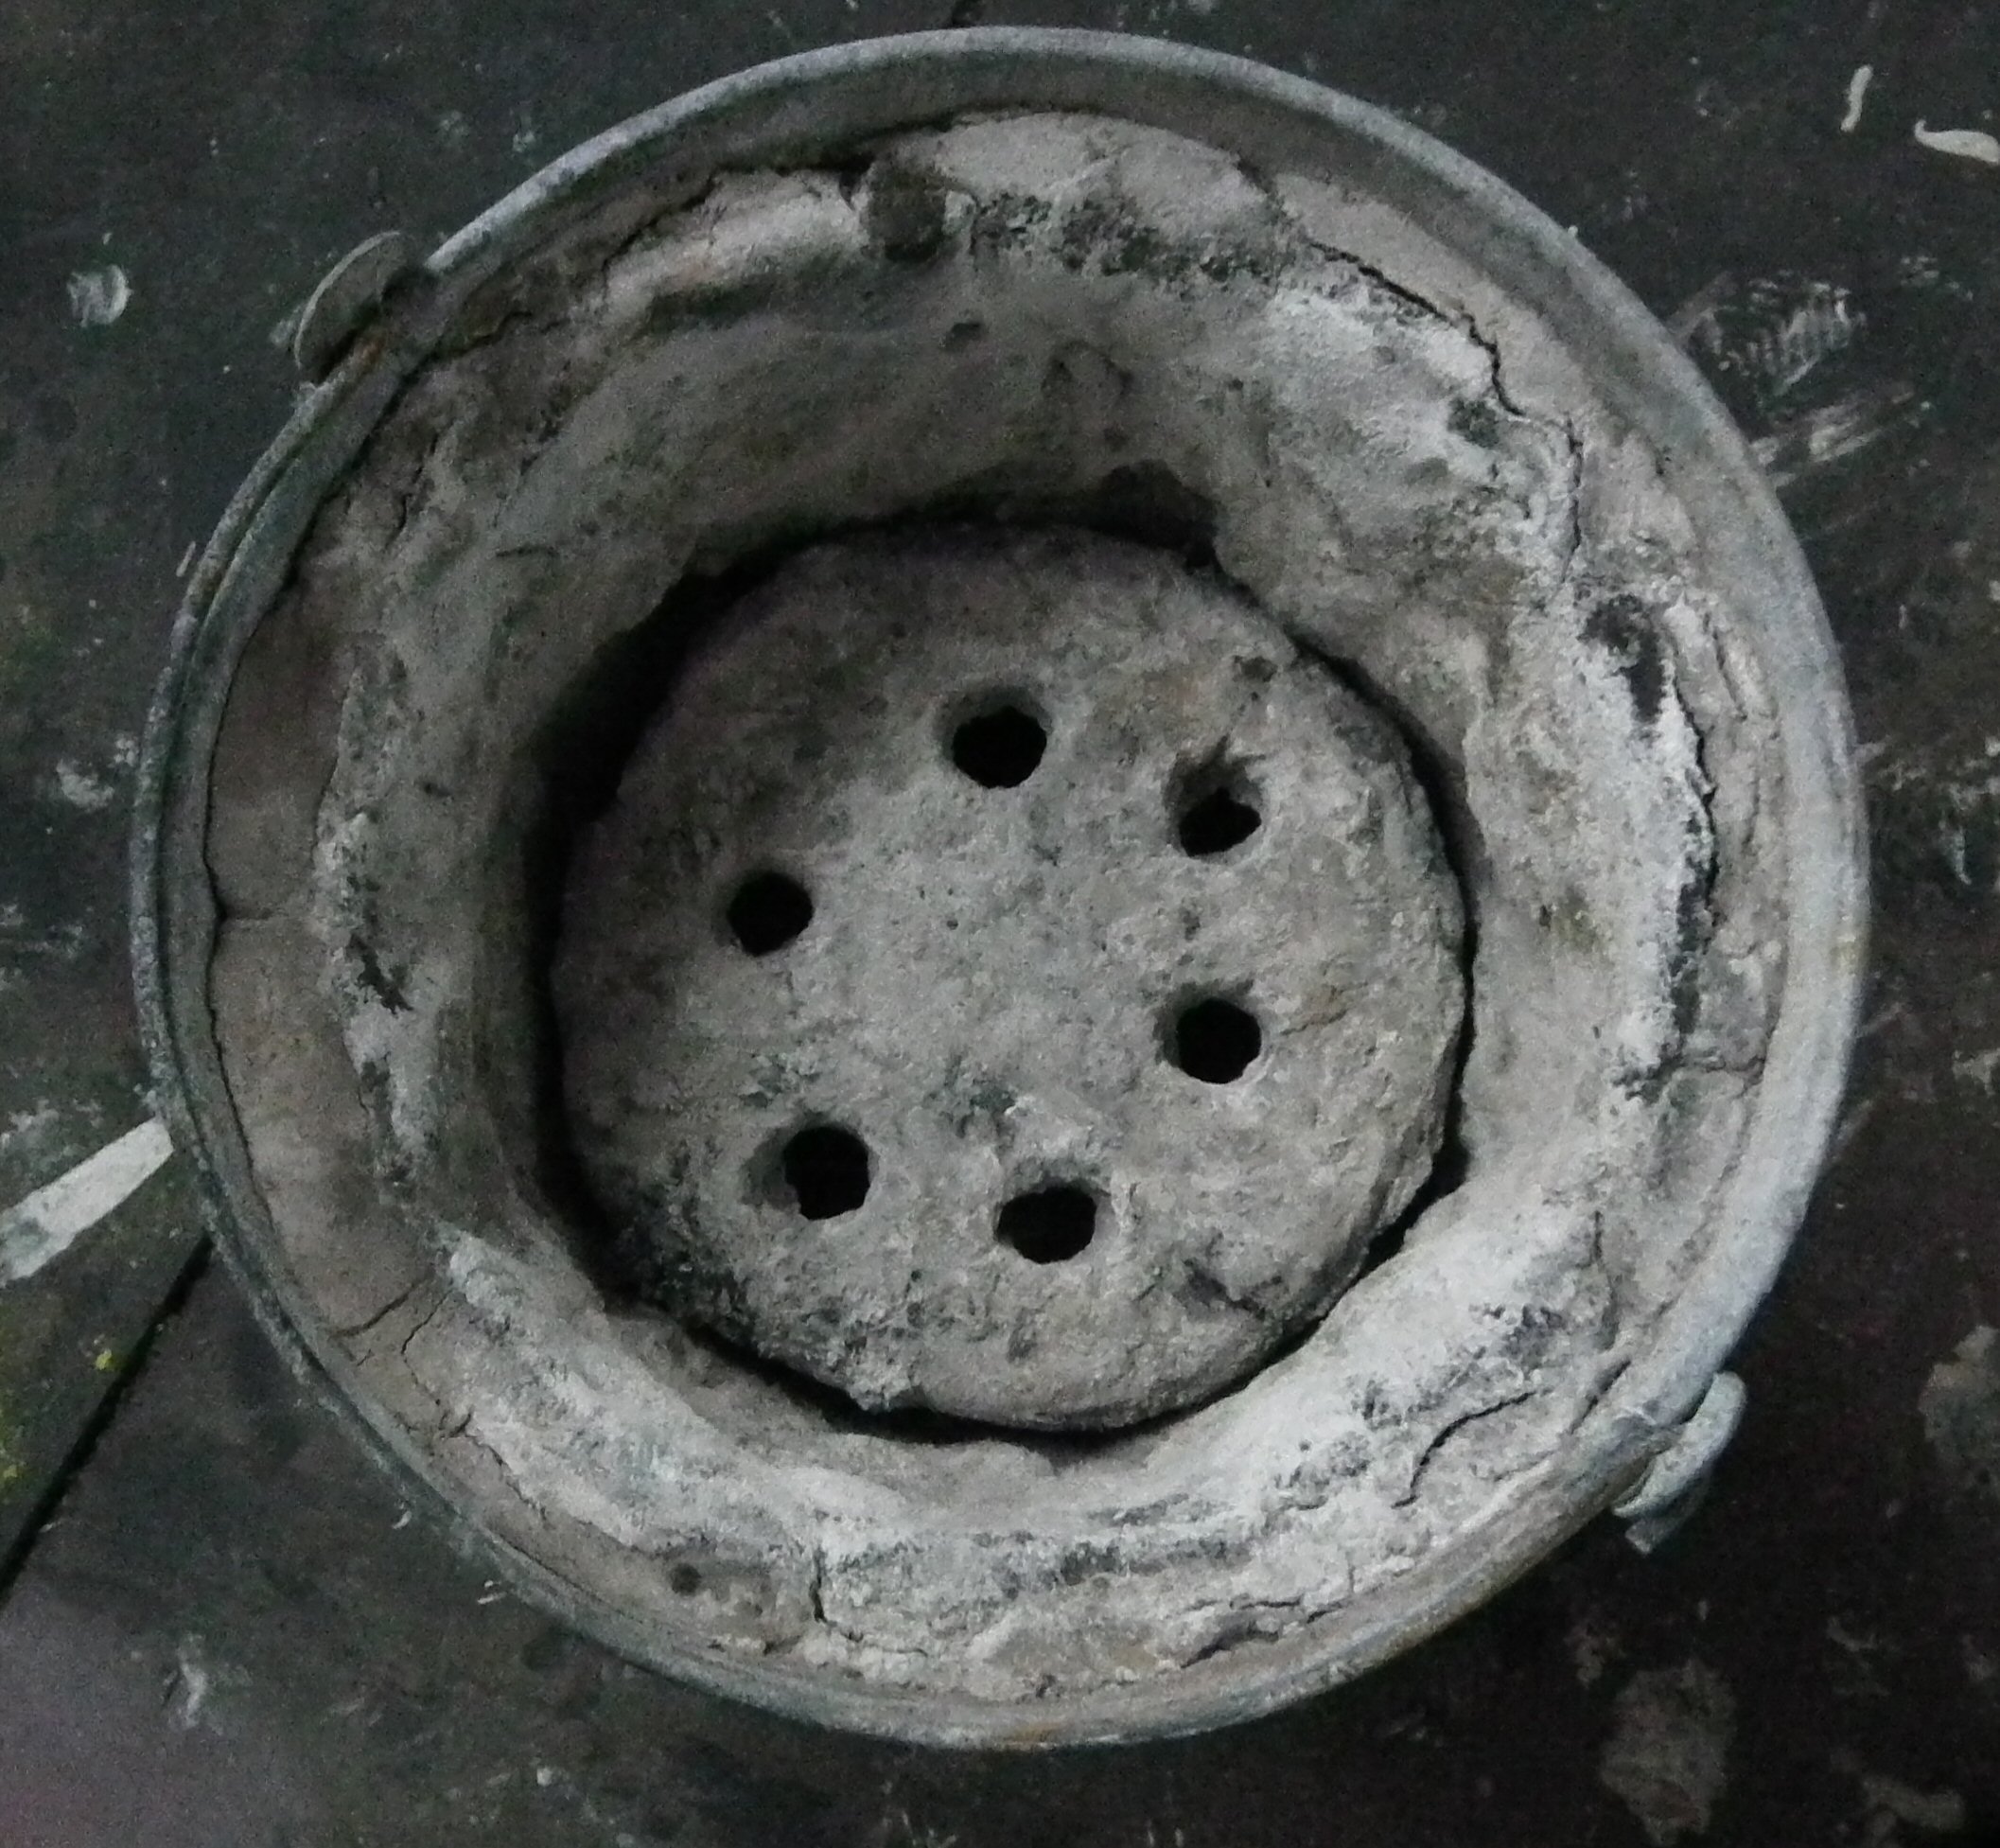
I took out the tube that I was using for the tuyere and built a small wood fire in the furnace and faced it so the tuyere hole faced the breeze. The fire lit quickly and I kept it topped up with scrap wood and a little charcoal and let the whole thing burn down. Once it was cooled, the material was hard as a rock. The next step was to make the tea pot stand. It’s simply a flat plate that fits the diameter of the interior of the furnace with holes about an inch from the edge. The tea pot stand allows the air to circulate freely below and then up through the holes to increase the heat of the charcoal. Once that was fired the furnace was ready to use.
Finished furnace after a few firings.
I’ve used the furnace now several times and it holds up well doing high temperature work. My initial fear was that the seams in the bucket wouldn’t hold, but it remains intact after melting bronze and copper. I’ve used it both with bellows and electric pumps.
Furnace with tea pot stand (AKA perforated clay slab in place.
After I made this, there was some discussion about experimental archaeology and authenticity on the EXARC Facebook Group (a group well worth checking out if you have an interest in any aspect of experimental archaeology). I made the point that this isn’t designed to replicate a Bronze Age furnace, but it replicates the conditions of how we believe Bronze Age furnaces performed. Many early experiments were done using modern gas or electric furnaces, however those have oxygen enriched atmospheres. Charcoal fires have reduced atmospheres, meaning that the air immediately around the crucible is free of oxygen. This is good news because less dross and slag is produced since the environment won’t allow the surface of the molten metal to oxidise.
As for electric pumps, sometimes it’s valuable to have a controlled air-flow. Having an electric air pump means that I can control how much air goes into the furnace and replicate conditions from one pour to the next. This way I will be able to have multiple experiments conducted under conditions as close as possible to each other. It would be difficult to replicate the controlled airflow of an electric pump with bellows since there might be times when I get tired or there is some distraction and the air flow is slightly less than for the previous pour. Control in these situations is important for experiments where I would I want to compare the melting times of different alloys and need to control as many variables as possible.
Another advantage is that this furnace always starts out at the same temperature. While a bowl furnace dug into the ground is well insulated, there are often problems getting it dried out or warmed up after a night of rain. While it’s good to have the experience of getting a cold, damp furnace going, it’s also nice to have one where I don’t use up a couple kilos of charcoal getting it dry and heated.
By the way, it’s not only good for metal casting, but with a small grate, it does a good job as a barbeque.
[1] I should note that while there haven’t been any of these types of furnaces excavated in Britain, twice now when I have been demonstrating using a small bowl furnace, field archaeologists have told me that they excavated something that looks identical to what I was working with, but didn’t know what it was and wrote it up as a cooking hearth.