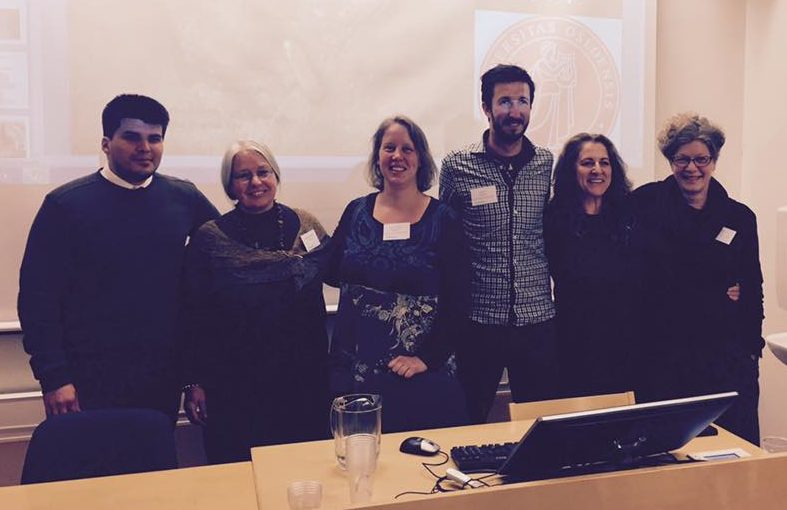
It was my pleasure to present a paper at the Nordic Bronze Age Symposium in Oslo . The conference focused on contrasts and connections in the Bronze Age. Presenters covered a wide range of topics from landscape, technology, social practices and materialities.
The session that I participated in was titled Nobody is Perfect: Contrasts in Craft. I spoke about recognising the learning process by examining mistakes in metalwork. It was a great session and I hope that the research presented here will spur others to examine the flaws in objects to understand the processes of craft production.
Too often artefacts are selected for examination and display because of their perfection, but perfection can limit us. We see the end product but by the very process of achieving perfection the traces of the journey to mastery are erased. When we examine flaws, both minor and major, the world opens up.We can follow the movements of the artisan’s hands and see the sequence in which an object was made. We can see the choices made during production. Was there a flawed section of decoration because a master artisan was momentarily distracted, or was it because an apprentice was still awkward using tools? We can also question why the flaws remain; why the object survives, rather than having been destroyed or repaired.
The flaws, repairs, and mistakes all contribute to the object’s biography and allow us a glimpse of craft and decoration in ancient cultures. The papers presented in this session examined these and more subjects on mistakes in craft, and generated lively discussion.
“Nobody is perfect: contrasts in craft – for the first time at an archaeological conference artists, craftspeople and archaeologists gathered together to discuss the potential of mistakes, failures and repair within material culture of the past. The results were stunning: mistakes, failures and repair can not only help to identify skill level and apprenticeship in craft, they also indicate the intention, the actual purpose of an artefact.” – Heide W. Nørgaard
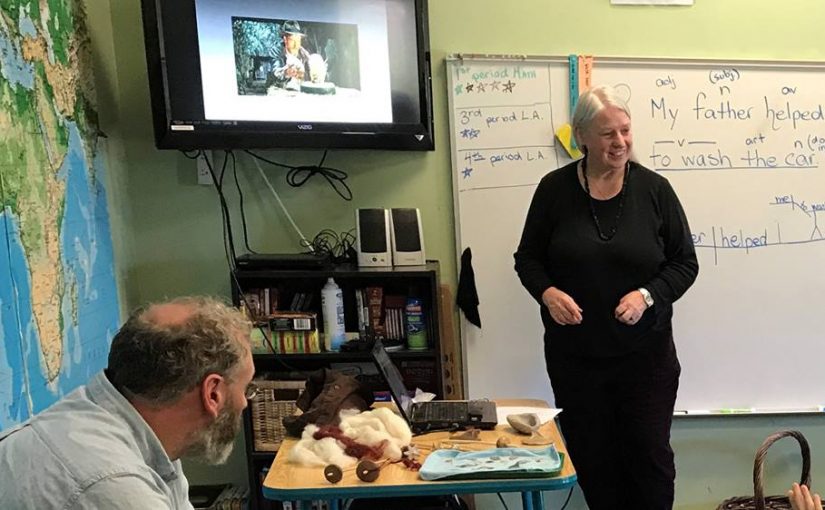
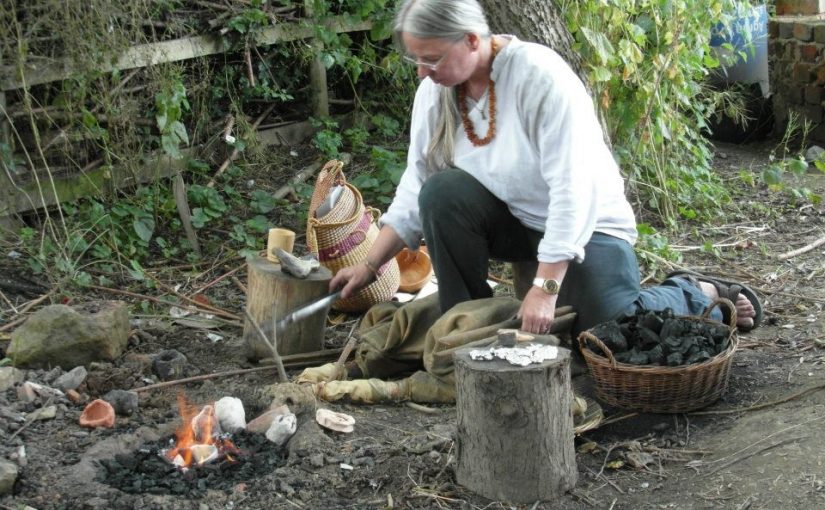
In March 2017 I had a great time talking to the students at Cyprus Classical Academy about what archaeologists do. Cyprus Academy is a Montessori school in which classes are organised by ability rather than age. The students I spoke to ranged in ages from 6 to 11. This is a great age for kids to learn about prehistory and the fascinating story of how people invented tools and developed crafts. The students had a chance to look at and handle artefacts, pump a set of bag bellows, and have a go at using a drop spindle to spin some wool. They will continue on studying prehistory and history, but I doubt they’ll ever think about ‘cave men’ the same way again. Apparently one of the teachers was amazed by finding out that Neanderthals made flutes and had music.
One of the unexpected benefits of my talk was that a girl in the class was excited to know that there are women archaeologists. There is the popular perception that archaeologists are men, and while field archaeology tends to have more men excavating, I pointed out that women also excavate, and also work in labs and museums. I included some slides showing kids volunteering cleaning finds, to let them know that there’s a place for them in archaeology too.
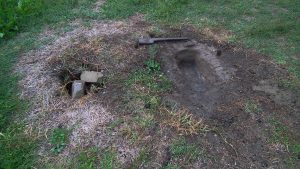
I was visiting my sister in the autumn of 2016. She has a bit of landjust outside Albuquerque, New Mexico, so I asked her if I could build a furnace and do some casting there. I’ve built plenty of pit furnaces, so this time I wanted to build one that was above ground and a bit more visible. It would also mean that no one would trip and fall if they forgot where I put the thing.
The first task was to get the basic materials: Clay, Sand, and Horse Manure.
I thought that the clay would be the biggest hurdle. However my sister’s neighbour happened to be a sculptor who works in both iron and ceramics. She went to her regular clay supplier and got a couple feed sacks full of dried clay for free. Potters who work at wheels, or work with students end up with a lot of clay that is scraped off of workbenches and wheels that is hard to re-use. It often has a mixed consistency, it’s lumpy or part dried. If they want to use the clay again, it has to be reconditioned. So, they take their sacks of scrap back to the place where they buy the clay and pay to have it put through the mill. Since it’s not really usable, some potters are willing to just give it away. So thanks to Liz Fritzsche, who does amazing and beautiful work in porcelain, I was able to get started.
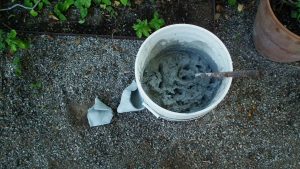
Mixing dried clay. Once it’s wetted, I’ll add sand and manure
I threw some of the dried clay into a five gallon bucket and poured in enough water to cover the clay and let it sit. It was squishy and workable in a few hours. Next up was locating horse manure. A friend of a friend has horses, and they were grateful to have someone who would haul away a couple of barn buckets full of manure. The final bit was the sand. My sister did have some beach sand that she’d bought for the garden, but I was more fascinated by the soil there. Her land is in the old Rio Grande River Valley, and the soil is a mixture of silty sand and a little clay that had been pounded to a powder. The soil was almost the consistency of dust. It mixed in perfectly and later I found the mixture was highly resistant to cracking.
The ingredients were mixed with some water, stomped, and the proportions were adjusted until it was perfect. New Mexico is a lot drier than England, so I ended up adding more water than usual as I worked. It was also nice knowing that it was unlikely for any rain to fall while I was working.
The silt/clay/dung mixture made a durable clay, and after I flew back to Minneapolis, I was please that the crucibles and moulds I packed in my check-in luggage survived airport handling.
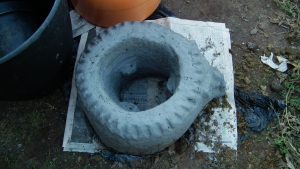
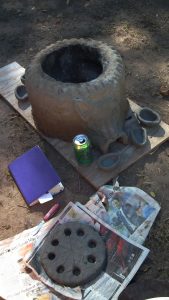
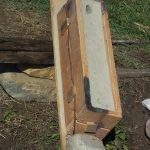
Note the small tabs inside that will support the teapot stand
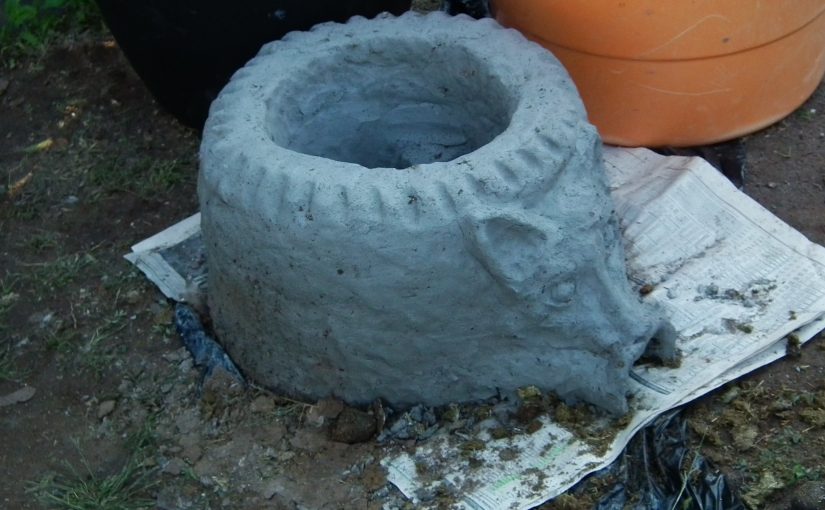
The furnace walls are about 8 cm wide (about the width of my palm) and the inside diameter is about 25 cm in diameter. I let it dry for a couple days and then moved it over to an unused area behind a greenhouse where I would have more room to work. I set a small fire with cottonwood branches, fed it for a couple hours, and then let it die out overnight.
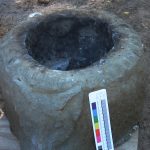
The thickness and upper dimensions of the furnace
The height of the furnace
Mavis the dog immortalised in a furnace!Mavis in a calm moment. Her nickname is the Dog-nado.
We all like to put some decoration on our furnaces. My students have done everything from dragons to turtles to cats. I had been thinking about doing some decorations imitating the local petroglyphs, but as I was working it just seemed natural to do a portrait of Mavis, my sister’s exuberant German Shepherd.
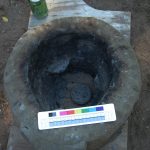
Finally I adjusted the mix to have a bit more of the silty sand and horse dung to make the teapot stand and crucibles. For more information about teapot stands and how they work in furnaces, check out my article on the Umha Aois website here.
Later I added more water to make the slip for dipping waxes in for the first stages of mould making. The silt made a wonderfully fine mould that picked up all the details. Honestly, this mix was as good as jeweller’s investment for picking up detail.
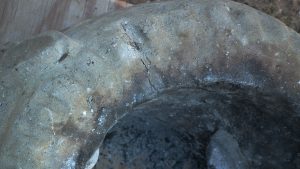
I had some cracking on the upper part of the furnace, and noted that the part that cracked was where I used the commercial sand. The silty New Mexico soil held up much better. If it weren’t so heavy (and probably not allowed) I would have hauled bags of the soil on the plane home to use for more projects.
Detail of cracking on furnace. It was fixed by rubbing in some of the clay mix.
Both Mavises performed very well (Mavis the Dog is into barrel racing and advanced obedience classes). I’ll be interested to see how it holds up over the winter. Winters in New Mexico tend to be mild, so I’m hoping that the Mavis furnace will be available for friends in Albuquerque to use for some time to come.
The Mavis furnace, teapot stand, and some crucibles
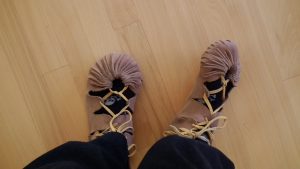
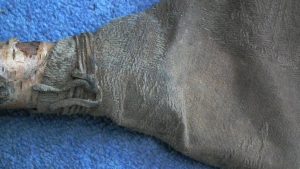
Sometimes you just need a new pair of shoes. I’d been wanting to make some of the replica shoes I’d seen online. there are a few good sites where you can find patterns and step by step tutorials.
Kelticos has a number of different patterns that you can download.
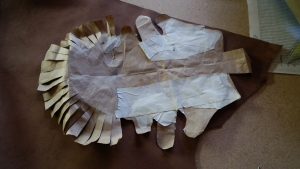
I followed the instructions on this site. It goes step by step and practically no-fail. I however am a bit more cautious and rather start with the leather I made a pattern out of brown paper.
brown paper pattern for a pair of Iron Age shoes.
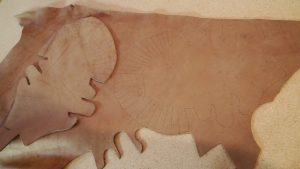
Once I was confident that I had a good fit with the paper pattern, I bought the leather that I needed. One thing that few sites describe is the type and weight of leather needed. I bought some cow leather that was supple, but not stretchy from Cox Leather in Albuquerque. The place is an amazing resource for hides, rawhide, leather, skins, and really anything leather related. They also ship!
Leather thickness in the US is measured by the ounce, and in mm in Europe. The leather I bought was about 8 oz / 3.2 mm / 1/8 inch thick.
The pattern laid out on the leather. I traced the right foot and then flipped the pattern over to trace the left foot.
Once I traced the pattern on the leather, I cut the shoes out using good sharp scissors and punched the holes for lacing with an awl. It’s important to use an awl or punch rather than cutting the hole with a scissors since a round hole pushed through the leather is less likely to tear than a hole that is cut.
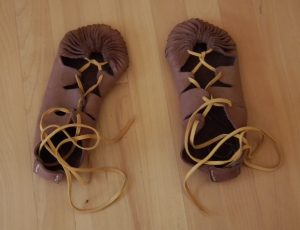
The shoes all laced up.
I stitched up the backs with sinew. I followed the directions and stitched the sides of the heel to the heel tab straight up. It ended up a little loose. When I get the time I’ll restitch them so they come in a little tighter on the top. Another modification will be to put more of a sole on them. Some options are to cut an insole out of rawhide and sew it between the inside of the sole with another, softer leather insole on top. I might line it with some sheep skin, too.
A comfy fit.
First posted on 16th November 2016
Since I first posted this I have worn the shoes often and have come in useful while working at the Bronzezeithof in Germany. They are holding up well after a year, although I don’t wear them every day.
I’ve been honoured to cast alongside Billy on a number of occasions while we were both at Umha Aois events. His recent article for the Pallasboy Project: Art, Craft, Archaeology, and Alchemy talks about his experience in both experimental archaeology and craftsmanship.
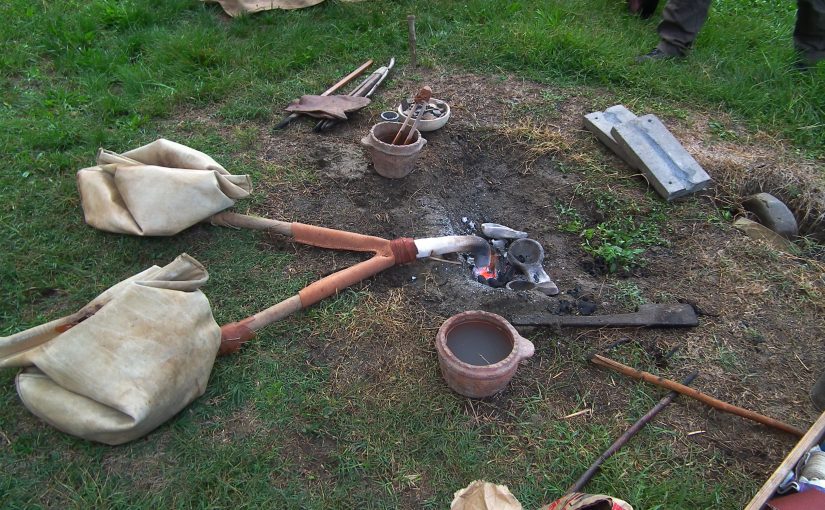
Bag bellows might be the oldest form of bellows used. We don’t know for certain because they are made entirely of organic materials, and so none survive in the archaeological record. Because they have the advantage of being portable, lightweight, and easy to make, this type of bellows are still in use for iron forging in parts of Africa and South Asia. When you make a pair, you can be as “authentic” as you want, using only wood and leather, or you can use more readily scrounged materials like vacuum cleaner hoses and pleather. There is a remarkable video of Kenyan metalsmiths using bellows made of cement bags here.
In addition to this tutorial, check out the Bellows Forum page where there are variations of bellows designs and some interesting variations.
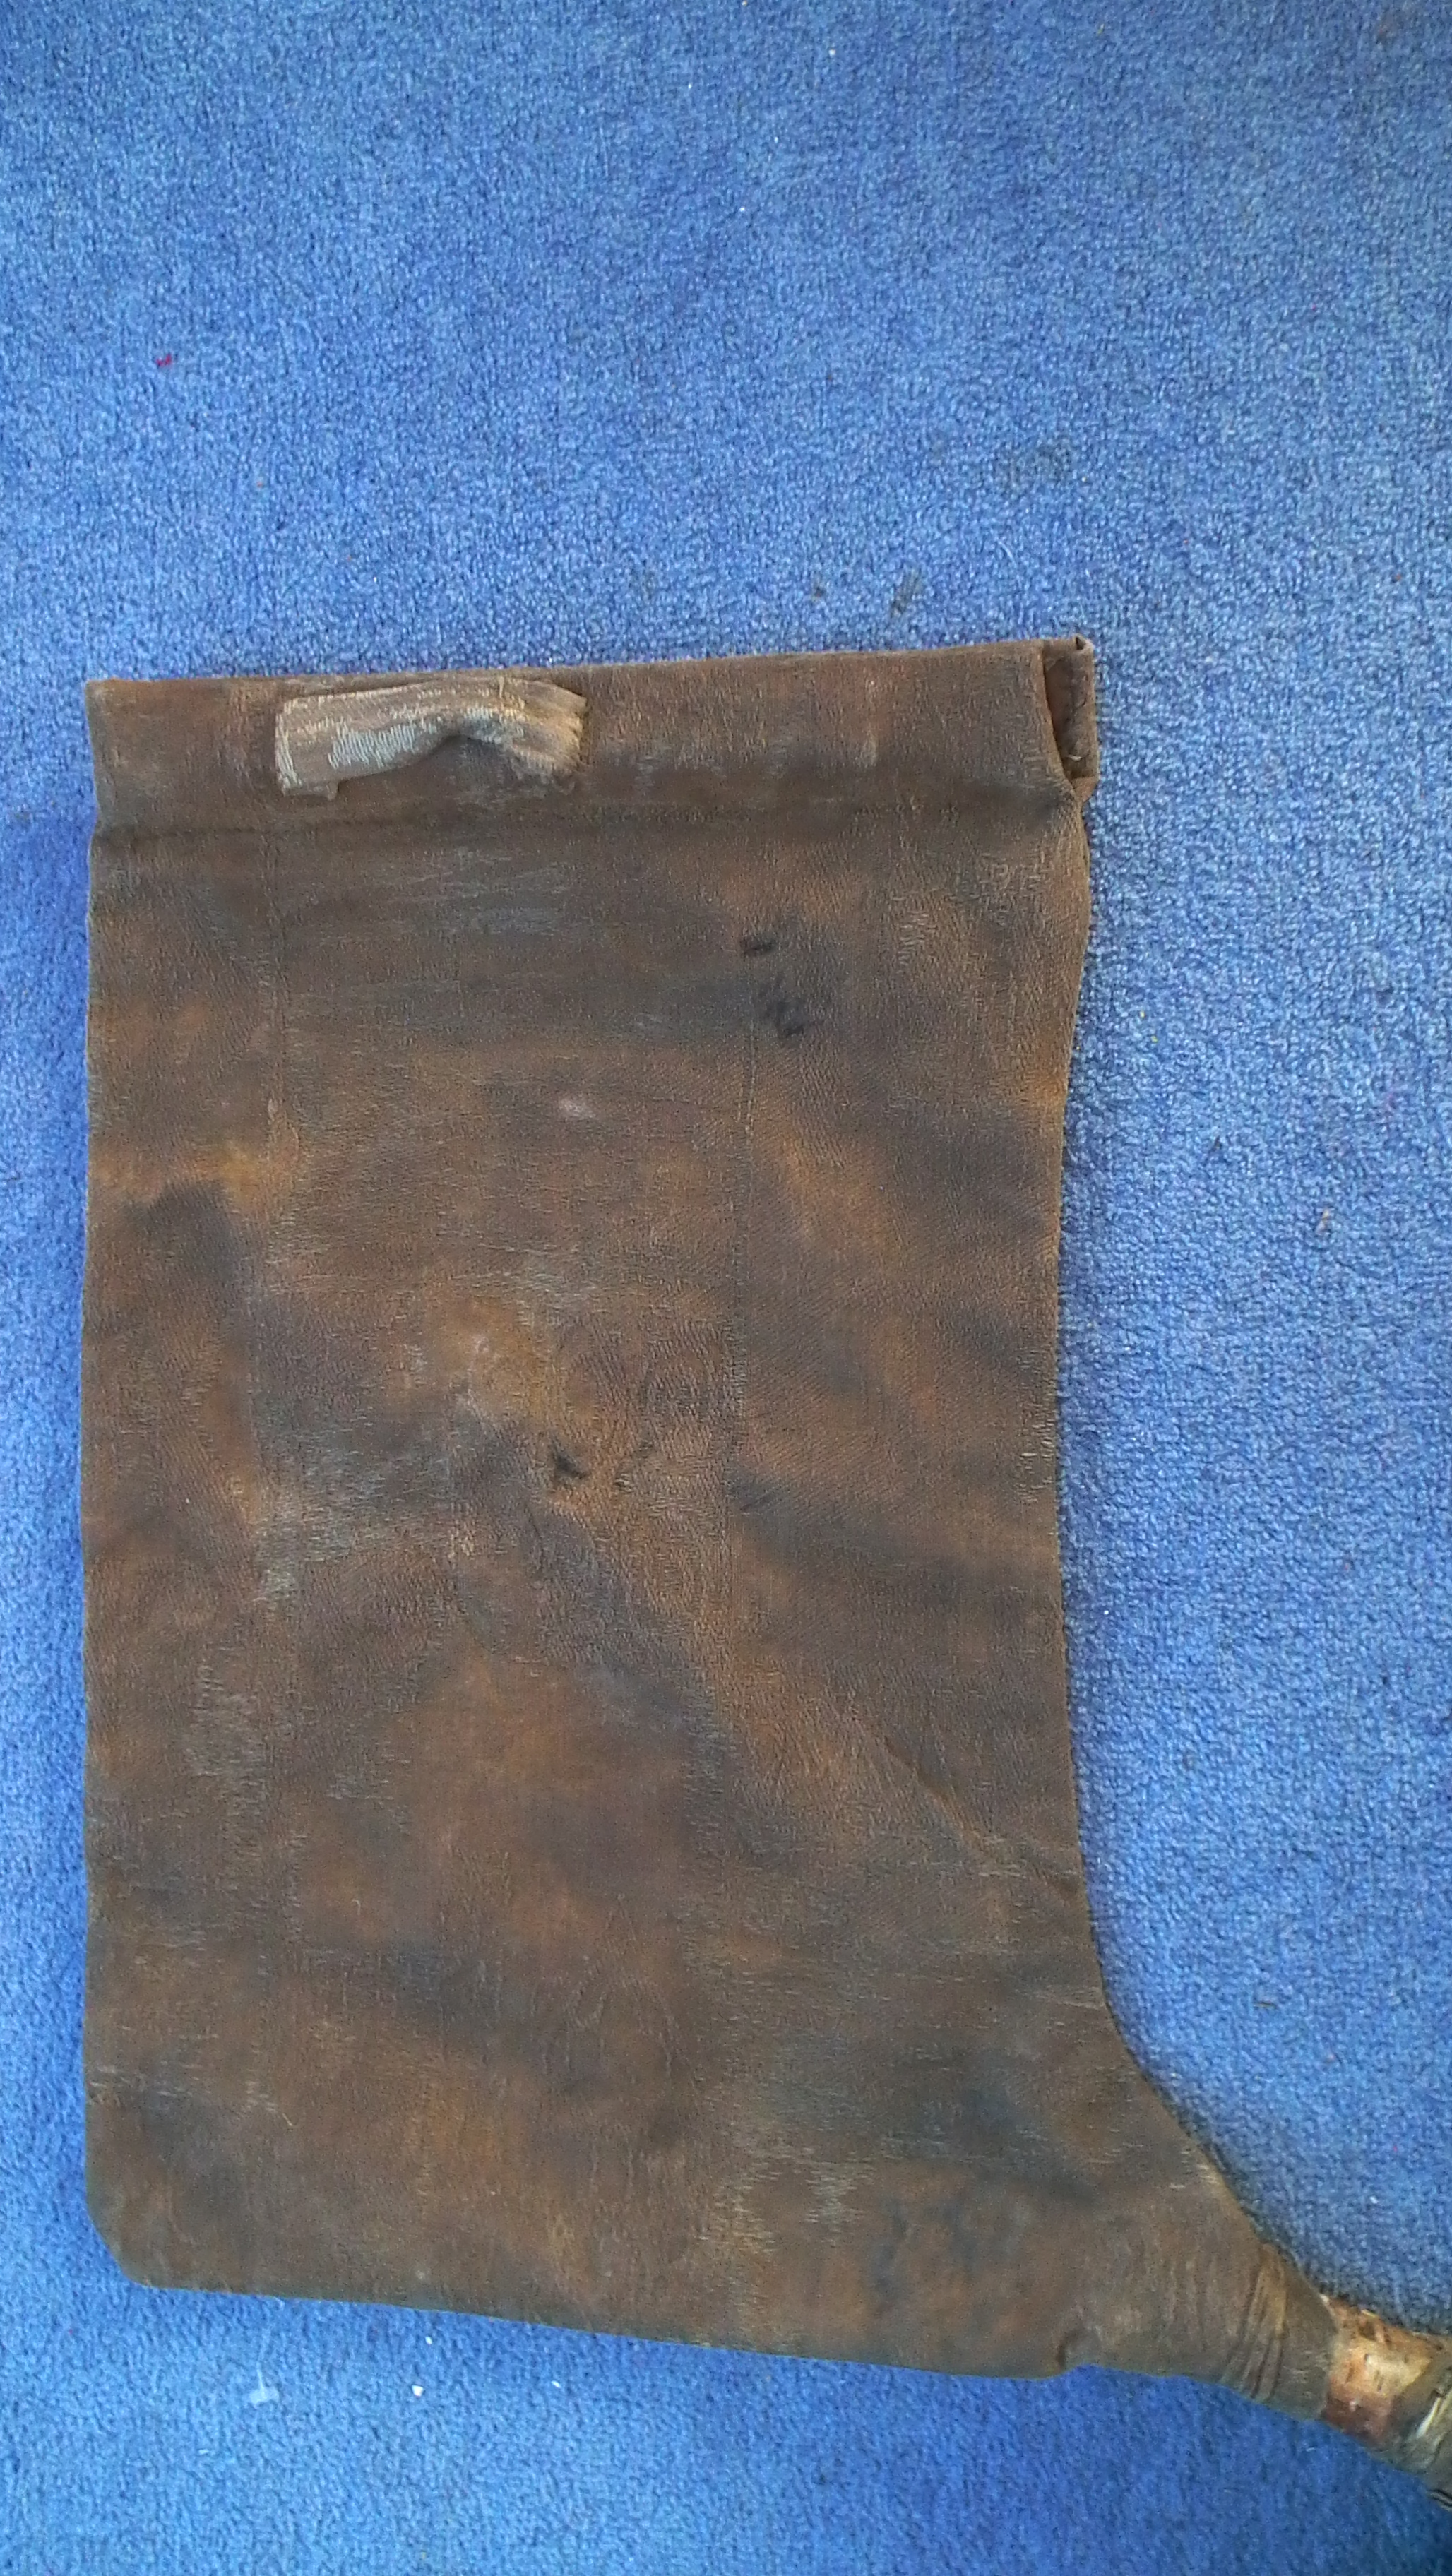
Traditionally bag bellows are made of pliable leather and the usual description is that a single bellow is made from one goatskin. The bellows I describe here are made with upholstery fabric. At the time I made them, leather was too much for my budget. After they were sewn I gave them a good coating of linseed oil that made them both waterproof and airtight. I find it ironic that in the Bronze Age leather would have been readily available, but hand-woven fabric would have been exorbitant. So, these are my ostentatious display of wealth bellows.
How big the bellows you make will depend on what’s comfortable for you. I’ve used very large bellows and ones so small you’d think that they’d never produce enough air to get the job done, but they did remarkably well. What is important is that the size works for you. You’ll be sitting on the ground, or close to the ground (I like a log or a short tree stump with a bit of padding). Sit down on the floor and raise your arm with your elbows bent so that they are lifted a little over waist high. Try not to move with your shoulders. You’ll be pumping your arms up and down for hours, so it’s good to find a height that works for you so that you don’t wear your arms out. Measure that height or get a good idea of how high that is. Then you’ll want to add a few more inches because you want to have the bellows rest on the ground. If you lift them too high, the sides will collapse and you won’t be able to trap the air in them. You also want to add another few inches to wrap around the handles.
Besides the leather (or whatever material you choose) the other supplies you’ll need are heavy waxed thread or sinew, leather or sail needles (depending on the type of material you’re sewing). The handles are made of two straight branches about 3-4 cm (1-1 ½ inches) in diameter, or four boards 3 by .5 cm (1 by ¼ inch) the length will depend on how wide the top of your bellows are. If you use branches, they’ll have to be split lengthwise so that they have a semi-circular cross section. My bellows are about 16 inches wide.
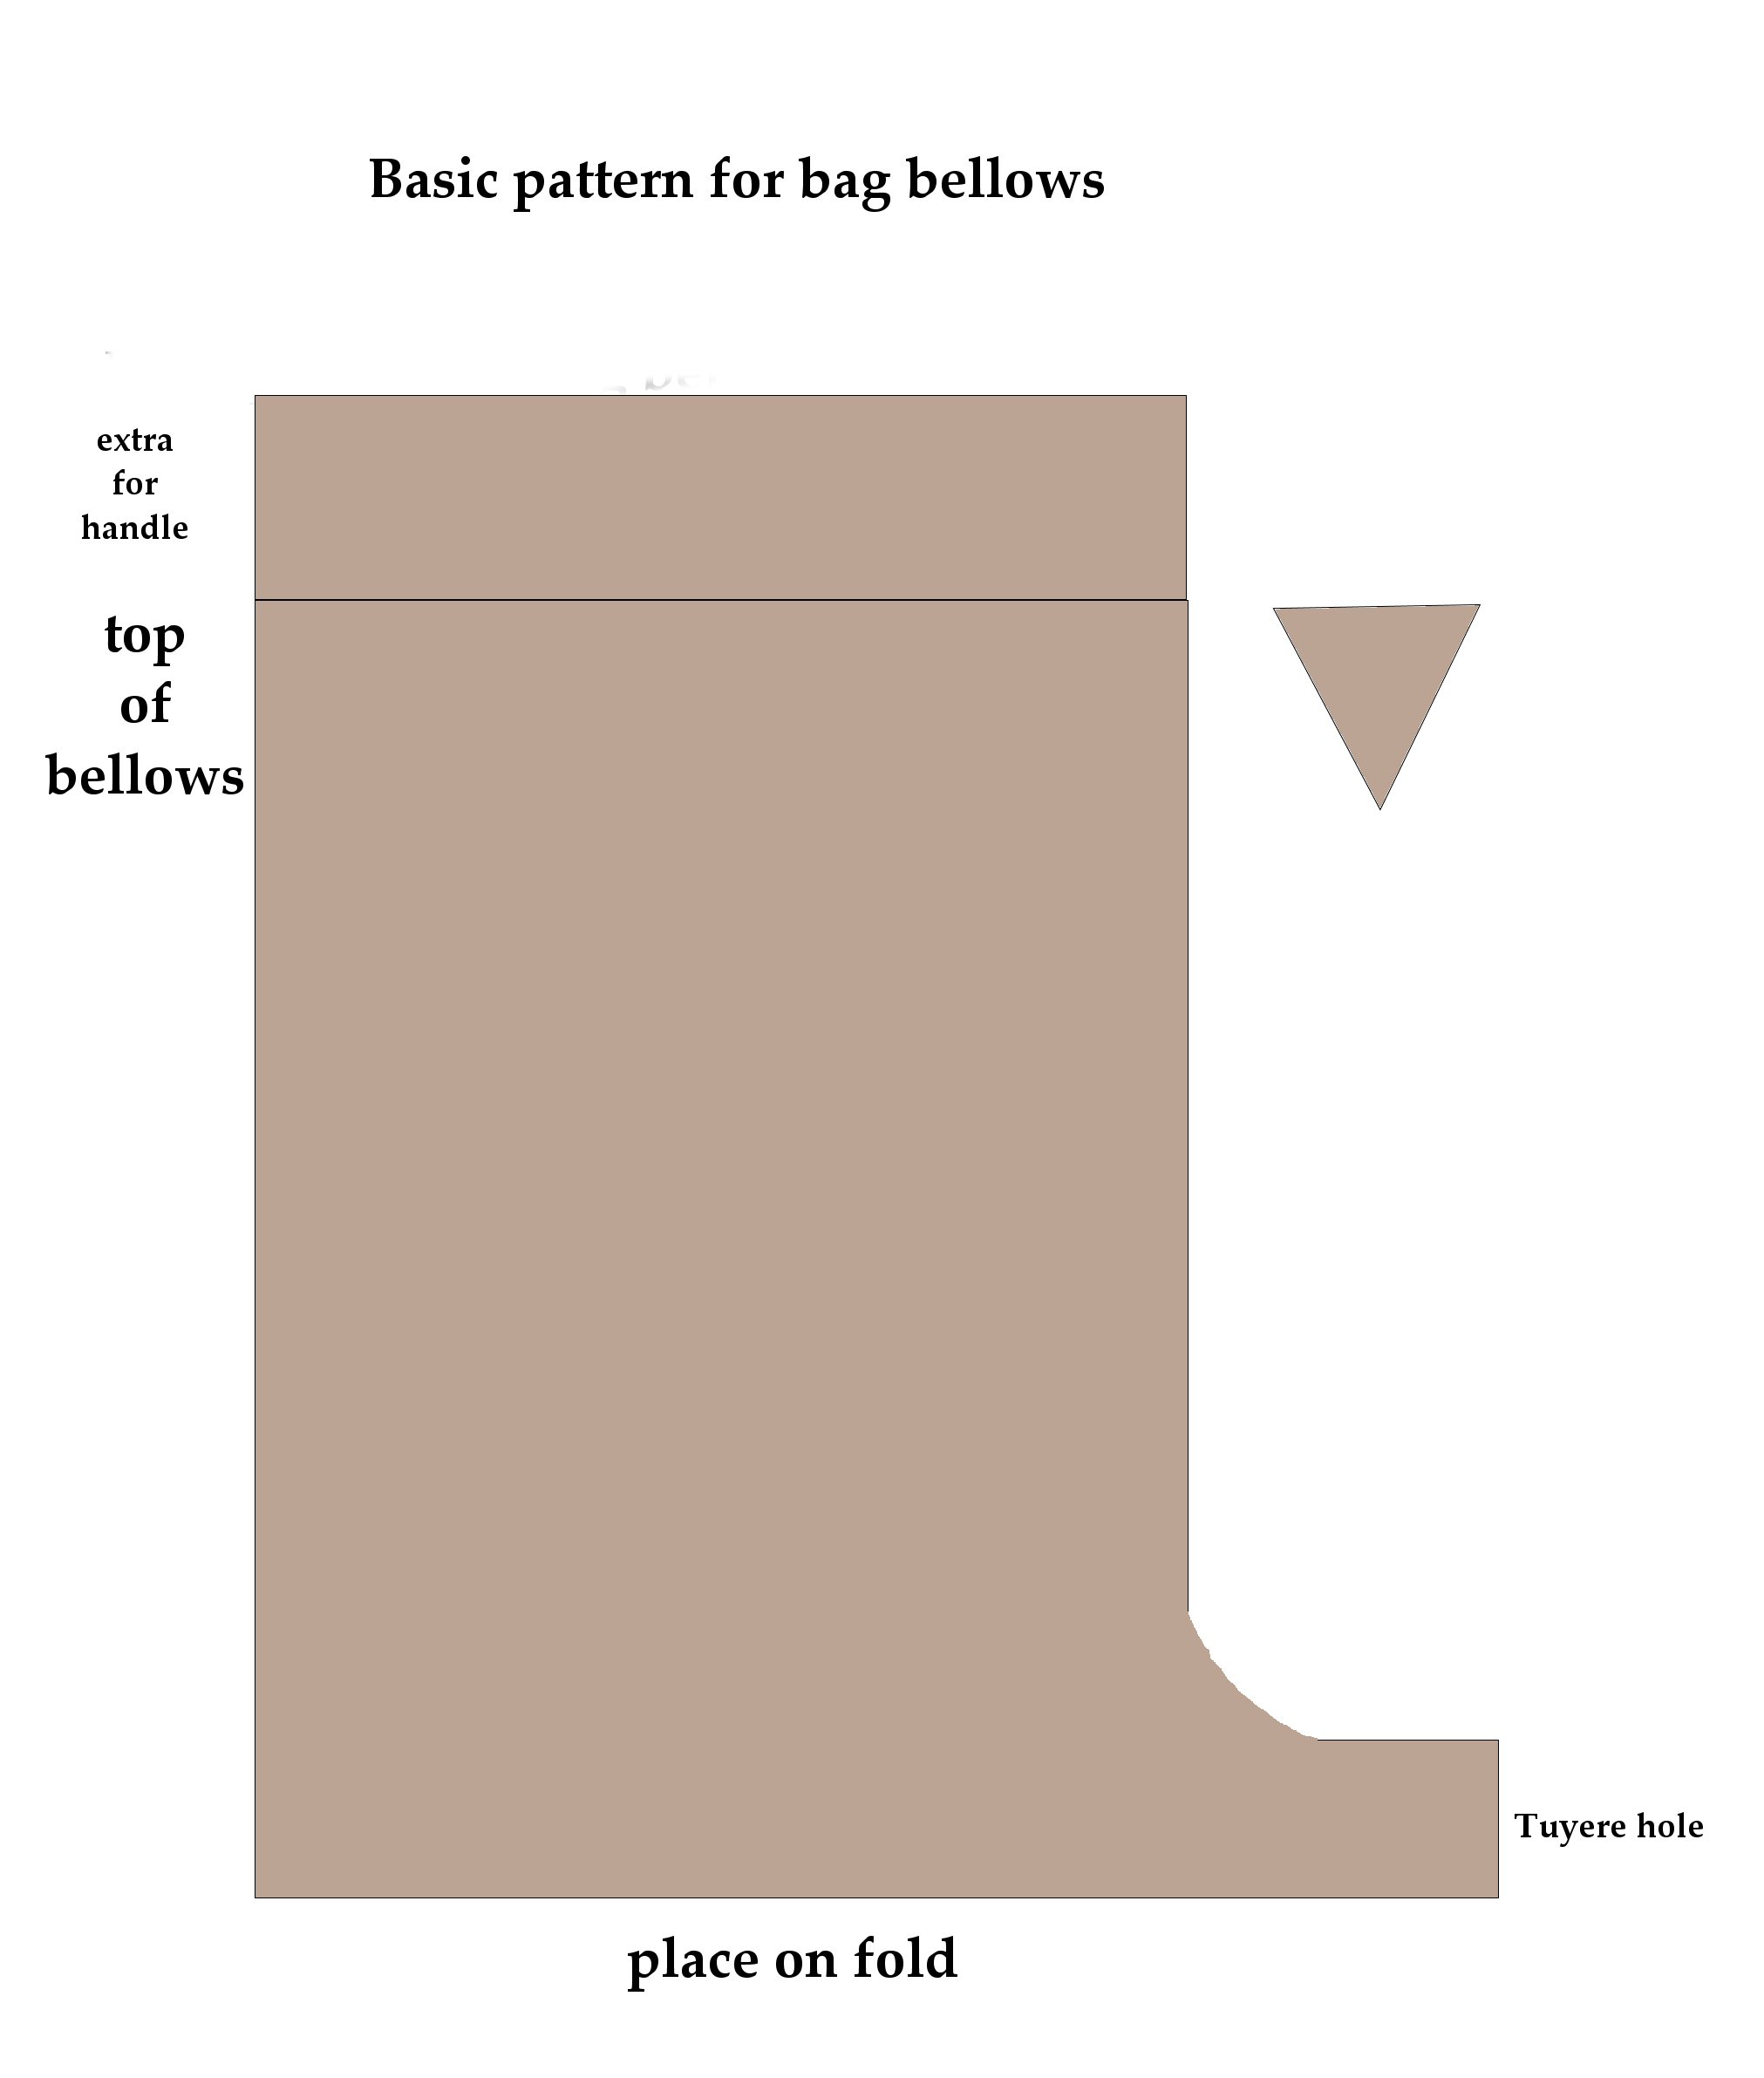
Using your own measurements, adapt the pattern below, adding about 3 cm/1 inch for the seams around the edges, and enough at the top to wrap around the handles. You’ll also need some scrap to make loops for your fingers. The loops are more important than you realise. Getting them right will mean the difference between being able to work for hours, and giving up because you keep getting blisters or losing your grip.
The basic pattern for cutting out a pair of bag bellows.
Another useful detail is to sew a small triangle in the front of the bellows, just below the handles. Holger Lonze taught me this trick. It makes it much easier to open the bellows wider and get more air in.
The small triangle set into the front of the bellows. Note that I put in a couple stitches so that when the bellows close, the triangle folds inwards.
The other detail is the part at the bottom that sticks out. This is where the tuyere will fit. The size you make that will depend on the tuyere you make, and also how much air you want to push through to the fire. If it’s too narrow, you’ll be expending a lot of energy pushing air through a small space. Too large and you’ll be pumping furiously to get the volume of air through the tuyere. Mine is about 10 cm (4 inches) and tapers a little so I can fit different tuyeres to it in case I ever want to change it.
The other supply you’ll need is rawhide. Leather strips can work, but they aren’t as durable or tight as rawhide. The best source for rawhide I’ve found is the pet shop. Buy a rawhide chew bone for a dog and soak it in a bucket of water overnight. The rawhide will soften and you can untie the ends and unroll a nice sheet of rawhide. I cut it in a spiral so I have good, long pieces. While it’s wet, you can wrap it and tie it easily. Once it’s dry it shrinks to a hard, tight fit.
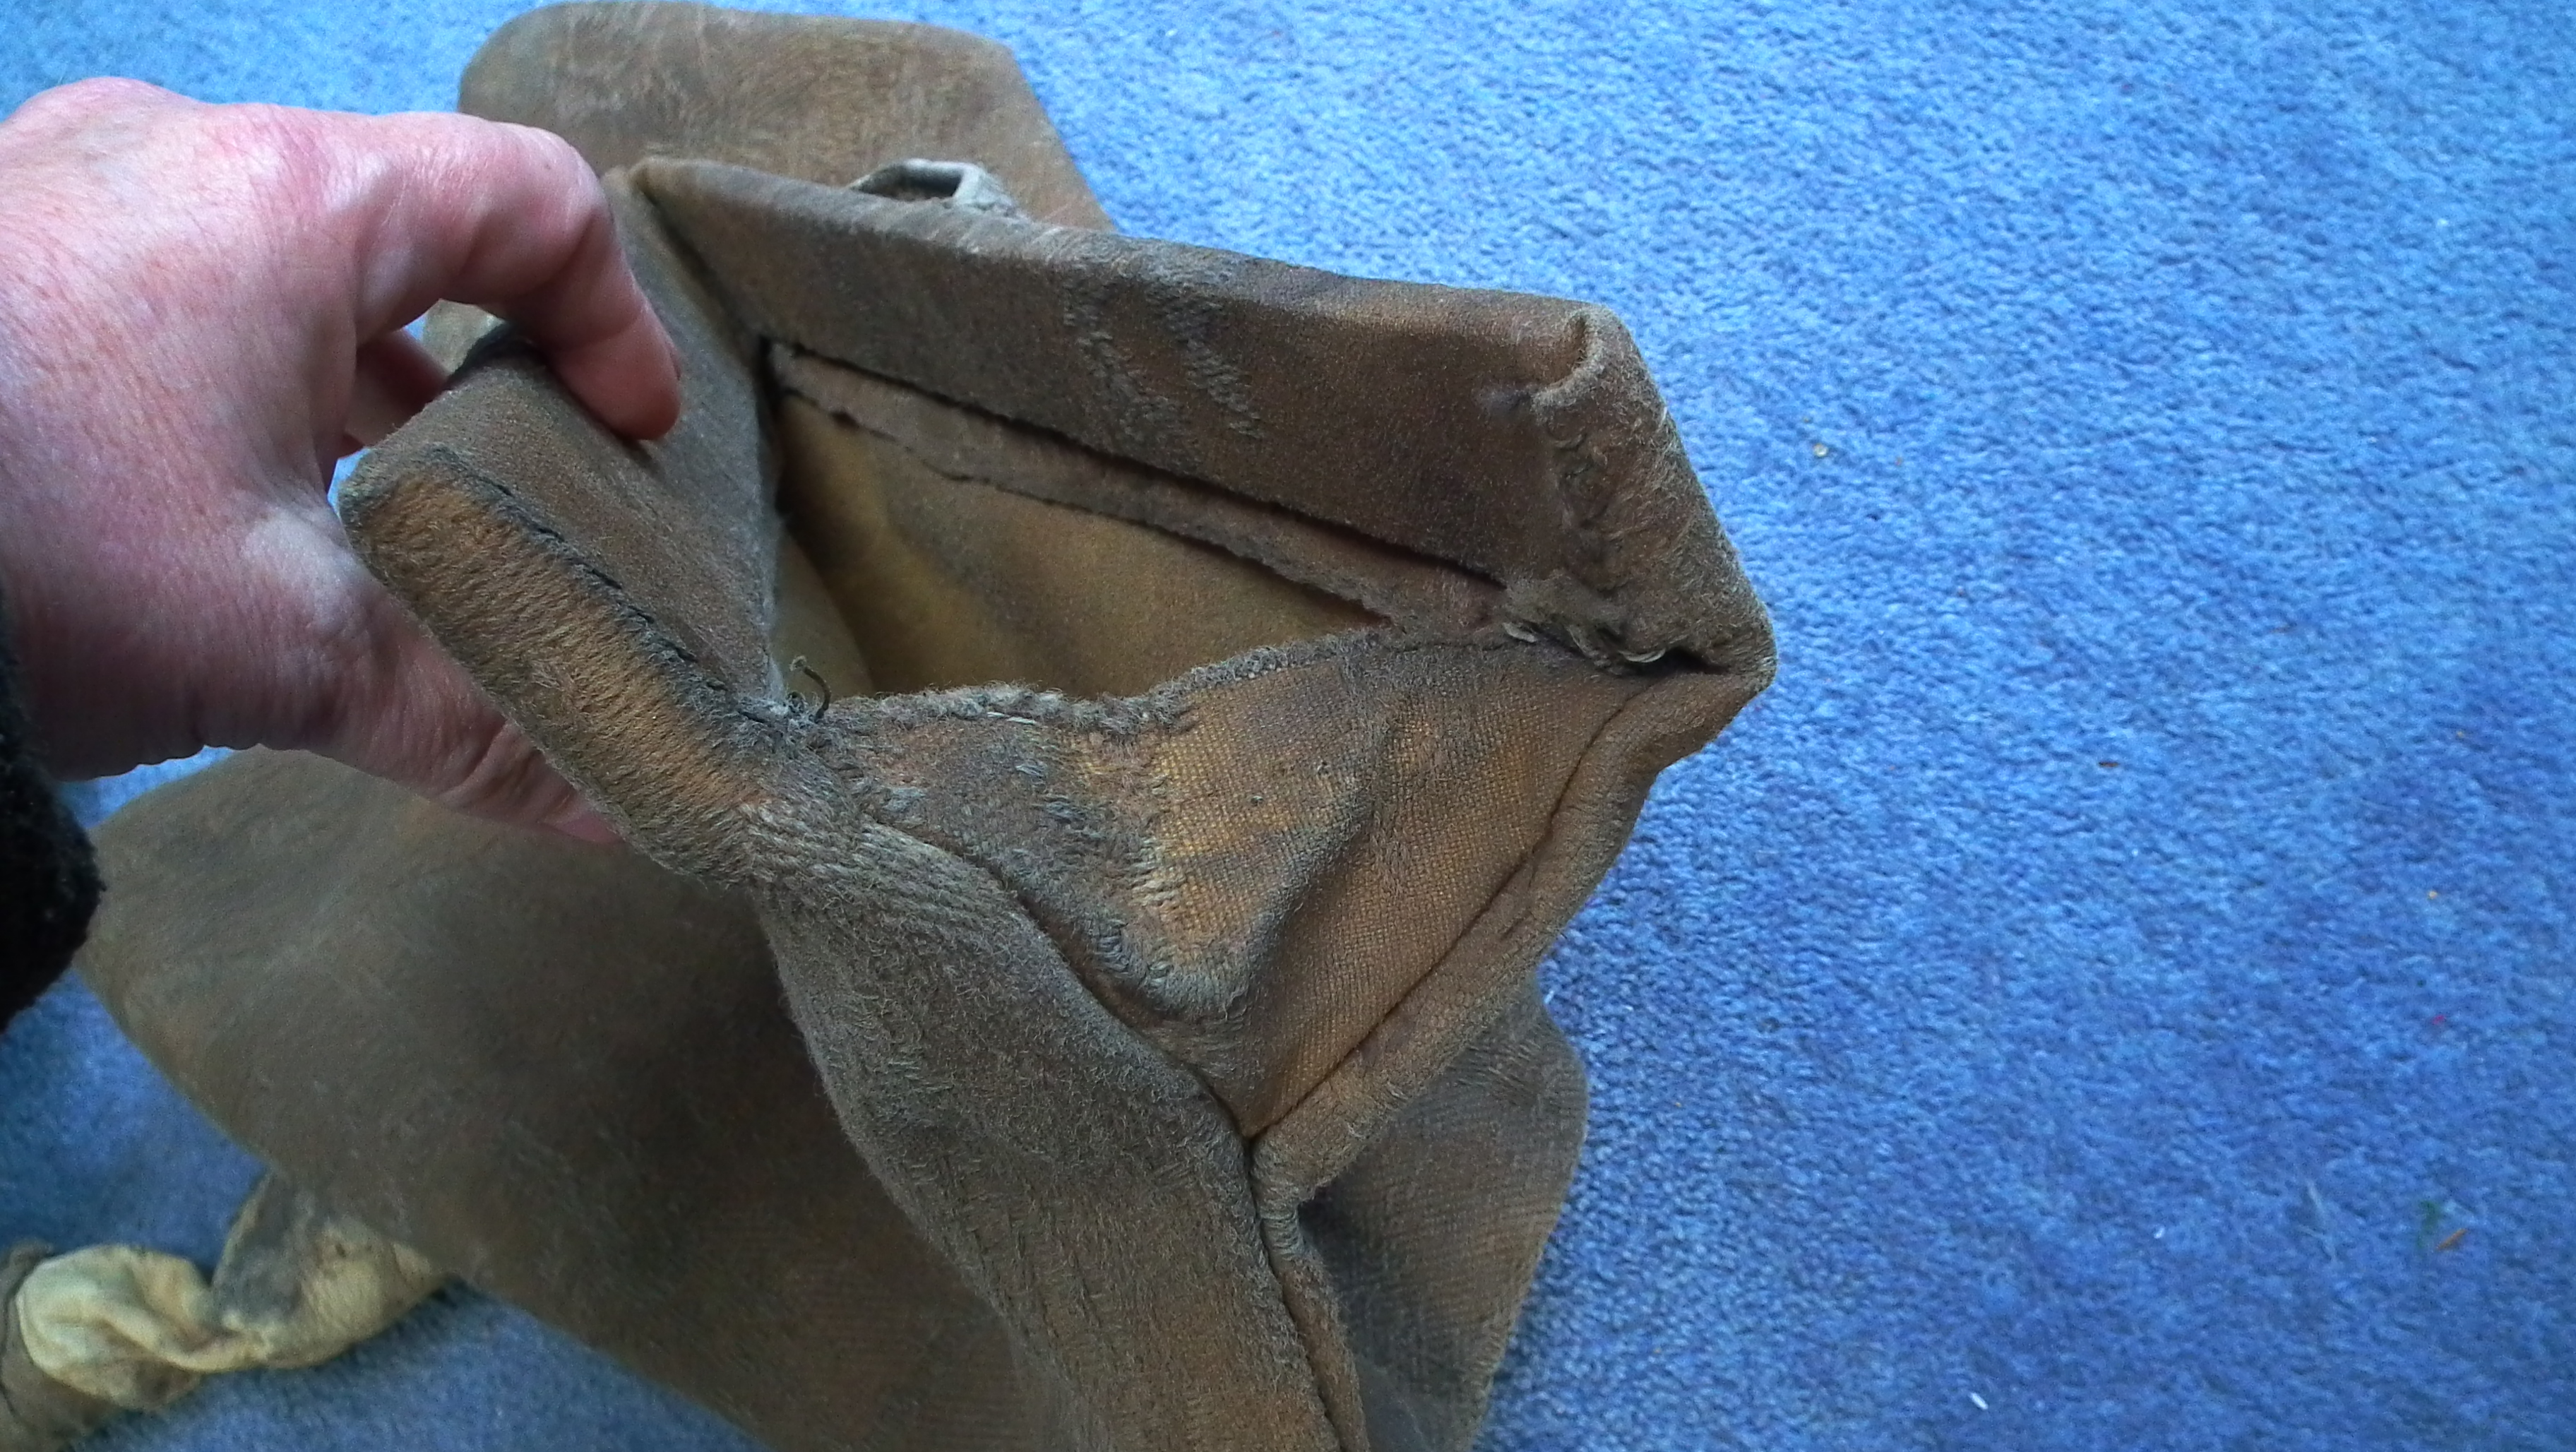
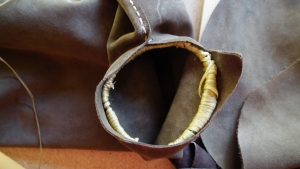
A close-up of where I tied the opening of the bellows to the tuyere
Cut out the leather or material and then stitch it with the outsides together so that when you turn it inside out, the raw edges will be on the inside. Don’t sew it all the way to the top. You want that extra selvedge to wrap around the handles. Make sure you fit the triangle in the front below the bottom edge of where the handles will be.
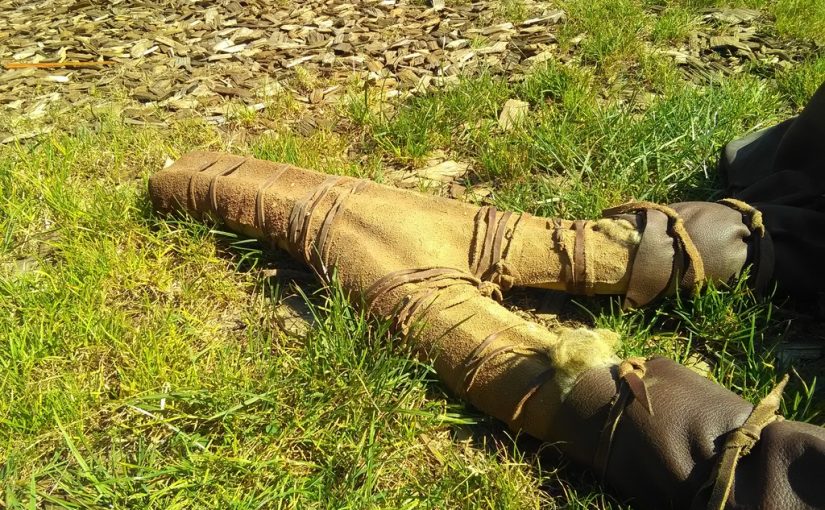
The next step was the hardest for me. It’s a bit of a pain. You need to wrap the upper selvedge of the bellows around the sticks and sew them tightly into place. If you’re using half-round branches, make sure the flat sides are on the inside so they meet and make a tight fit. Sew these in tight along the bottom of the sticks. It’s annoying if they wobble around.
The finished bag bellows. Note that the handle is towards the rear of the bellows.
Turn the bellows right side out and admire your work.
If you used branches, you might not need loops for your fingers. Try pumping them a bit and see if you can open and close them easily without them slipping out of your hands. The action is to open them while the top of the bellows is close to the ground, Lift them, close them when they are as high as you want to lift them, close the bellows and then push down. If you lose your grip, you might want to put loops on them. They are simple, just strips of the same material that your bellows are made from. Sew them so your hand will be about 1/3 to 1/4 of the way from the back. When the bellows open, the little triangle in front will allow the bellows to open in a “V” shape and allow you to trap more air. Having the loops toward the back means that you don’t have to open your hands as wide. Since I work with kids a lot, this was a consideration when I designed them. Also, I have small hands.
This shows the handle at the top of the bellows and how to hold the bellows open while using them
The loops should accommodate four fingers on one side and your thumb on the other. The handles will stretch over time, so I periodically have to stitch them again to tighten them up.
There now, try them out. If you feel any air leaks in the seams you can seal them with linseed oil. If you made your bellows from fabric, the easiest way to coat them is to hang them on a clothes line outside and slather the oil on with a paintbrush. It takes a long time to dry and smells pretty strong. It’s definitely something to be done outdoors. Keep in mind that it might take a day or two for the linseed oil to dry.
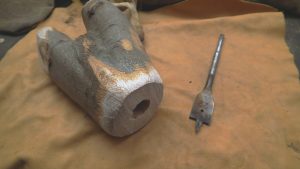
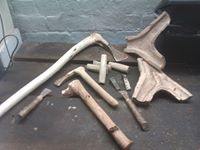
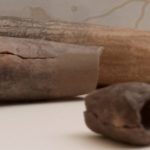
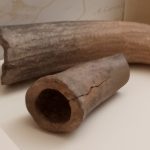
Now in order to work, you’ll need at least a short tuyere. If you’re not fussed, some steel tubing from a vacuum cleaner works fine. If you want a more Bronze Age look, you can make them from wood. I took a short branch and drilled a hole in it using a 2 cm flat bit (1 ½” spade bit in the US). The branches are about 1 cm or ½” wider than the bit. If you don’t have a bit or don’t want to use power tools, take a branch of the right thickness (about 4 cm or 3”) and split it in half. Carve out the centre and fit them back together using glue and rawhide.
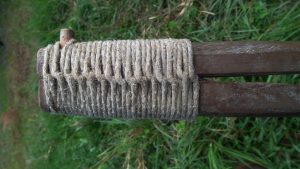
Fit one end of your tuyere into the opening at the bottom of your bellows (you didn’t sew that shut, right?). Now take the wet, sloppy rawhide and wrap it tightly around the part of the bellows covering the tuyere. If your tuyere is made of split branches, keep wrapping so that it holds the halves of the branch together. Depending on the weather and humidity, it might take several hours for the rawhide to dry.
Once everything is dry, try them out. They’ll be a bit stiff at first and will need to be broken in. It takes a bit of practice to get the Open-Lift-Close-Push rhythm going, especially if you alternate hands. Once you get into it, it gets easier. Think of a cat kneading its paws.
Another tip is to get some thin willow twigs, about the size used for making baskets. Make them into hoops that will fit inside the bottom of your bellows. It will help keep them open, especially if you have a tendency to lift them too high.
Next you’ll be wanting a “Y” shaped tuyere to connect the bellows together.
Original article from The Siberian Times: https://siberiantimes.com/science/casestudy/news/n0711-worlds-oldest-needle-found-in-siberian-cave-that-stitches-together-human-history/
Bone needles are one of those things that are a useful part of any experimental kit. They are easy to make, durable, and work better for sewing leather and hide than many steel needles. If they do break, then it’s easy enough to cut off a new bit, drill a hole and sand it down to a glossy, slender tool. The best bones to use are the long bones, a humerus or femur.
Recently a particular bone needle made the news. A 7 cm needle made from a bird bone was found during an excavation in the Altai Mountains in Russia. You can read the full articlehere. Finding a needle in an excavation is difficult enough, but finding one intact after 50,000 years is extraordinary.
However, in this context this needle is much more than just a needle. First we must think about the technology and tools that went into making the needle. It had to be cut and shaped with stone tools, and then there’s drilling out the eye. Once we start thinking about making something as simple as a needle, suddenly an entire toolkit for making needles appears, and then there’s the other direction: how was the needle used and what was it used for? Materials such as leather, string, and textile rarely survive in the archaeological record. Could the Denisovans have been sewing hides into clothes? Making shoes? Sewing smaller skins into something larger such as blankets or tents? Did they sew these together with sinew or hair, or cord made from plant fibre? A world of missing material culture suddenly becomes imaginable.
Small things like this needle should put to rest the image of the “caveman” with ragged animal skins. These people were likely to have been sewing clothing!
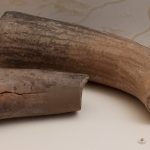
Tuyeres are the tubes that bring the air from the bellows to the furnace. They can be made of wood, ceramic, PVC pipes, copper pipes, old vacuum cleaner tubes, really whatever you can come up with that will do the job. They are usually connected to the bellows, but in some cases they can just be set close enough that the air is delivered through them to the furnace. If you have a set of two bellows, the tuyeres are in a “Y” shape, with two ends connected to the bellows that connect to a single end going to the furnace.
Archaeologically there aren’t many remains of tuyeres. There are some fragments of tubular ceramic objects that had evidence of burning on the end. However, the best example is a wooden one recovered from a Danish bog. This was the same sort of “Y” shaped one described below.
Quick and easy: Tuyere #1
One of the problems of working with kids is that they are so fascinated with flames that they sometimes don’t realise that the bellows aren’t the part that supposed to be burning. So I’ve been working on making a couple of new sets of tuyeres.
Poor tuyere. Burnt to a crisp! I guess that it’s time for a new set.
I’m under a deadline for one set, so this will be a quick and easy version. I pulled a good sized forked branch from the woodpile and cut the ends so they were fairly even. Then I got a 22 mm spade bit (in Britian it’s known as a flat bit). Then I just clamped it into a vise and drilled into the flat ends of the wood until the holes met near the centre. I removed the bark, rounded off and sanded the ends. I don’t want any bark that will work loose over time, or any sharp edges that will abrade the inside of the leather on the bellows.
Holes drilled. All that’s left is to attach it to the bellows.
I usually like one with a wider fork, but this will do in a pinch. It’s more important that the two ends are close to the same angle from the main trunk to minimise any kinks when connecting them to the bellows. The tuyere will be connected by leather tubes to the bellows and held in place by strips of rawhide. Skip down to the section on putting them all together for the details on that.
Note: Save that sawdust that you’re generating with all that drilling. It will come in handy for making moulds!
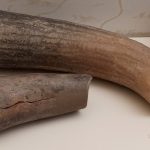
Larger and more labour intensive: Tuyere #2
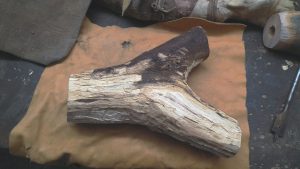
The next one is another wooden tuyere for a new set of bellows I’m making. It’s larger, so the spade bit isn’t an option. Instead I cut the wood in half lengthwise and then carved out the inside with woodworking gouges. It’s all handwork, so it takes longer, but one advantage is that the diameter of the air holes isn’t limited to the size and length of the drill bit.
This is a section of a branched silver birch trunk with a good angle. Most of the bark is removed and the wood looks sound underneath. Time to slice it in half.
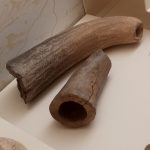
Once the branch was cut, I marked off where I would carve out the centre and went at it with chisels and gouges. I made the interior as smooth and as even as possible. However, I don’t smooth the surfaces that will be glued together. They already fit well and the rougher texture will help the glue bond. If you’re going for authenticity, you can use birch tar or other natural glues. If you’re pressed for time Gorilla Glue works very well. Other tuyeres I’ve seen are held together with leather and rawhide.
The insides of the tuyere are seen on the right. They’ve been carved out and are ready to be put back together again.
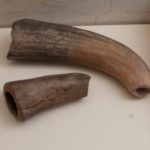
Another variation was made by Morgan Van Es, who hollowed out a “Y” shaped branch and then covered it tightly with leather. This is far easier than drilling holes or carving two pieces of wood and trying to fit them back together again. The tuyere definitely works!
Note the depression along the top of the tuyere. The tuyere is made from wood in which a deep groove was cut. Then the tuyere was covered in leather. Much less labour intensive and it delivers the air very well.
Ceramic and other Tuyeres
If your tuyere might be placed close to the furnace (as mine accidentally was), it would be a good idea to make a ceramic extension. This is just a tube made of the same ceramic you used for making the furnace or moulds. It can be fit to the end of your wooden tuyere with leather and rawhide, as described below, and the end can go straight into the furnace. The only problem I find with ceramic tuyeres is the possibility of them breaking when being transported or if someone steps on them.
At the Terramare Village in Montale, the tuyeres they use there have a 90 degree bend. The tuyere sits on the edge of a small, shallow furnace and blows air straight down onto the crucible. It’s an Early Bronze Age design and does get hot enough to melt bronze and copper. If you don’t have much space for a furnace this would be an ideal solution. It’s also worth experimenting with different types of furnaces to get an idea of how many solutions there are to the basic question of how to melt and cast metal.
There are some beautiful ceramic tuyeres in the Musei di Palazzo Farnese in Piacenza. They are from the Terramare culture that spread through the Po Valley in northern Italy. Click on the thumbnail to get the entire photo.
Piacenza Museum Ceramic tuyeres excavated from Rovere di Caorso and Castelnuovo Fogliani. The longer one is about 20 cm long.
Piacenza Museum Ceramic tuyeres excavated from Rovere di Caorso and Castelnuovo Fogliani. The larger one is close to 20 cm long.
Piacenza Museum Ceramic tuyeres excavated from Rovere di Caorso and Castelnuovo Fogliani The larger one is about 20 cm long
Piacenza Museum Ceramic tuyeres excavated from Rovere di Caorso and Castelnuovo Fogliani
Piacenza Museum Ceramic tuyeres excavated from Rovere di Caorso and Castelnuovo Fogliani
Piacenza Museum Ceramic tuyeres excavated from Rovere di Caorso and Castelnuovo Fogliani
At the EAA in Glasgow, I saw a poster showing the reconstruction of a beautiful horse-headed ceramic tuyere by Katarina Botwid of Lund University. This is similar to the right-angled ones they use in Montale. You can see the tuyere in action here.
I’ve also made tuyeres using the stems of Japanese knotweed. The stems are hollow, similar to bamboo, but much softer. The plants can get over an inch in diameter and several feet tall. The stems can be easily cut with a knife, small garden shears, or secateurs, and then the membranes between sections can be broken by poking a straight stick through them.
Note:Japanese knotweed is a controlled invasive species in Britain. Any fragment of stem, leaf, or root will take root and start a new plant. They are almost impossible to get rid of once started. When I find a large stand of knotweed, I strip off any leaves and excess stems and leave them there. If I need to trim off any more once I’m home, I put it in a plastic bag and then put it in the bin.
As I said earlier, tuyeres can be made of anything that will get the job done. If you don’t need to have that “authentic” Bronze Age look, you can quickly whip something together with PVC plumbing or copper piping. It wouldn’t be glamorous, but as long as any flammable or melt-able parts are kept away from the heat of the furnace, it should get the job done.
Putting them all together
The tuyere still needs to be connected to the bellows. I usually make tubes of leather that fit the tubes coming out of the bellows and the ends of the tuyere.This allows for some flexibility and gives you a bit more distance from the furnace.
A tight stitch and a decent amount of overlap will make these pretty airtight.
Then I tie them in place with wet rawhide. Once the rawhide is dry, they are about as secure as you can get. If the leather is soft, the tubes have a tendency to twist or collapse, so a nice solution is to get some green willow twigs and roll them into a spring. Fit them into the tubes before doing the final attachment and they’ll keep the leather tubes open and prevent them from twisting.
I also fit twisted willow hoops into the ends of the bellows to keep the leather from collapsing.
A willow hoop wrapped and tied with sinew or other cord will help keep tuyere tubes from collapsing.
Everything is fit together and tied with damp rawhide. Once the rawhide is dry, the bellows are ready to go.
A close-up of where I tied the opening of the bellows to the tuyere
By the way, if you have a hard time finding rawhide lacing, buy a rawhide dog chew. Soak it in a bucket of water overnight and then cut it into long strips while it’s still damp. If you don’t need all of it right away, let it dry out. Then when you need it again just soak it for a few hours and it will be nice and flexible again.
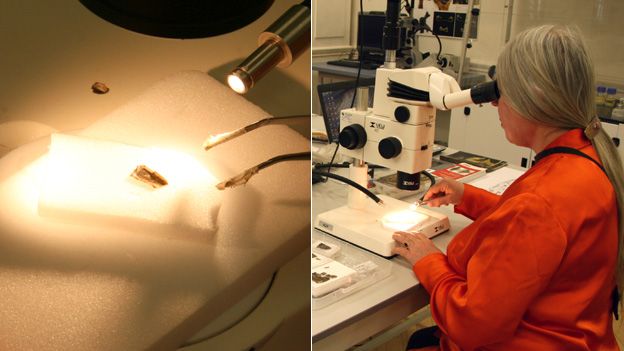
In 2015 I had the honour to be a part of the team that helped reassemble the fragments of the Staffordshire Hoard at the Birmingham Museum and Art Gallery.
Many articles have been written about the hoard, how it was found by detectorists and how the archaeological team carefully excavated the field in order to recover every fragment of gold and garnet. It was a monumental undertaking, not only for the excavation, but also for the conservation work. My job was to assemble the fragments of embossed sheet metal, some of which were a couple millimeters wide. I started by photographing and cataloguing all the fragments using a camera with the capabilities of a microscope and could stitch multiple images together. Then by rote memorisation of all the bits, and with the help of chemical analyses done by Dr Eleanor Blakelock, I started putting the fragments of the panels and friezes together. Most of my days were spent looking through a microscope while I worked, handling the tiny fragments with pairs of tweezers. I’m proud of the work I did for the Hoard and for Birmingham Museums. There are some articles and blogs that have highlighted the work I did there.
The articles and video below go into greater detail about the work I did on the Hoard and have some good photos of a few of the embossed sheet metal foil.
In October 2015 I had the great adventure of doing some bronze casting with Il Tre de Spade (The Three of Swords) at the Archaeological Park and Open-Air Museum of the Terramare in Montale. The museum is located just south of Modena and recreates Bronze Age houses surrounded by a palisade and a marsh, appearing as it would have in the central and later phases of the Bronze Age there (1600-1250 BC). The museum hosts demonstrations and activities, along with a recreation of the original excavation.
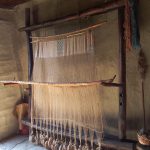
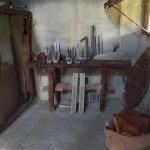
The houses are nicely furnished, with well laid out areas for cooking, sleeping, food storage, and workshops. One house has a workbench for wood and antler working, and another area set aside for weaving and textile crafts. The other has a metalworking workbench with stone anvils, moulds, bellows, and all the needed kit stored neatly on shelves and a work bench. Unlike the recreated roundhouses that are often seen in the UK, you can get a good idea about how the ancient people lived here and where they put their all the things they used in every day life.
The ubiquitous Bronze Age warp weighted loom. This one has some rather nice textile in the works.
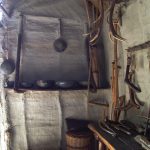
The cooking hearth and oven. The little device on the side is a wonderful little warming oven with charcoal in the bottom and the food on top. I like to think of it as a Bronze Age microwave.
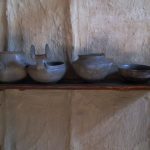
Pots on a shelf
Space for metalworking tools and supplies
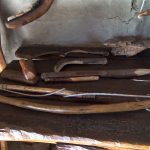
Some of the wood and antler working tools
The woodworking shop
I had been invited to join the casting demonstrations by Claude Cavazzuti, who is also a member of EXARC. He is one of Il Tre di Spade (along with Pelle and Scacco) , who were some of the first metalworkers at the museum after it opened several years ago. They do regular demonstrations (sometimes with hundreds of visitors per day) and also run workshops that introduce people to Bronze Age casting and metalworking with a focus on the Middle and Recent Bronze Age (1700-1150 BC) of Northern Italy.
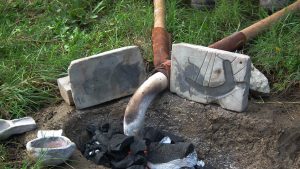
The furnaces there are small clay-lined trenches about 25 cm deep and 50 cm long, something that would be nearly invisible archaeologically and easily interpreted as a cooking hearth (and really, there’s no reason why they couldn’t be both). The furnaces heat up quickly and work efficiently. The charcoal is concentrated around the crucible with more warming beside it so that the fuel is hot before it gets raked around to cover the crucible.
The furnace. Not much to see here, and even less after a few thousand years!
My first new introduction was the bag bellows. They were larger than I have used in the past, and made of much heavier leather. They put out an enormous volume of air, and their size also allows the person pumping the bellows to sit on a low stool.
The real challenge for me was the valve and the way the bellows open at the top. The bag bellows I’d used before have straight sticks in the handles that either open parallel to each other, or are hinged at the back to open like a “V”. These bellows have two sticks on both sides, so that they open into a diamond shape making another hinge where your hands hold the bellows. It took a little bit to get used to them and to figure out where best to position my fingers. I never did get it quite tight enough and could feel a bit of air blasting on the back of my arms, but they still delivered a powerful amount of air. The tuyere was a large clay tube that curved downwards at a 90° angle, and was positioned so that it was directly above the crucible. This meant that the charcoal had to be moved frequently to keep the crucible covered. Without the layer of charcoal above, the air coming from the bellows would cool the metal in the crucible.
One nice innovation is that they put a large stone in the bottom of each bag. That prevents people who are new to bellowing from lifting them too high and causing the bags to collapse.
Casting in Stone and Sand
The crucibles are a flattened dish-shape, with some that were larger and a bit more of a bowl shape to hold more metal. They have a grooved tab on one side that is used as a handle, and have a small lip for pouring. The shallow design and lip cause the metal to pour more quickly and flow out in an arc, rather than almost straight down like the triangular bag-shaped crucibles used in Britain. It took a couple tries to get used to the trajectory of the metal in order to get all the metal in the pouring cups.
The shallow crucibles also mean that the pouring has to be done more quickly than with the deeper crucibles that I was used to.Because they are wide open, the metal cools quickly, so there is little time for dragging out charcoal and skimming. As soon as the metal was molten, we gave it a quick stir with a stick, pulled the crucible out with the wet tongs, and poured the bronze into the mould while holding the stick across the top to keep the charcoal back.
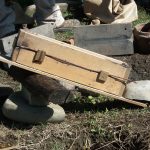
The tuyere with the moulds set next to it to warm up. The small bowls are the crucibles. Note that they are used without lids.
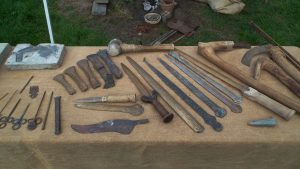
The tongs they use are beautifully crafted from wood and cord. They are kept in a bucket of water to keep them from burning when holding the heated crucible. The entire organisation of tools and materials is efficient and elegant, and there is nothing that could not have been made from materials available during the Early Bronze Age.
Beautifully constructed wooden tongs
For this session we used the stone moulds that were on display in the house. The moulds were made of a very fine-grained local stone, the same that had been used by the Terramare circa 3500 years ago. The moulds were warmed next to the furnace and then strapped together with leather strips. We took turns bellowing and pouring.
We cast sickles, knives, and daggers using the stone moulds. Later we moved on to using sand moulds. I borrowed one of the antler spindle whorls from the woodcarving house to see if I could try casting that as an experiment. It worked sort-of. It will take a bit of work to get finished up, but I think with a couple more tries we could have got it spot-on.
I was wearing my bronze torc bracelet that day and one of the new people wanted to try casting that. We used it as a model for a sand mould and after a couple tries, we got a cast that made a perfect duplicate.
Some of the replica tools and ornaments cast at the Terramare Museum
Casting a bronze sword
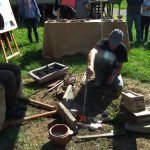
The museum was also performing public demonstrations that day. The main event was casting a sword using a sand mould. The sand they use is local, and perfect for casting. Commercial casting sand consists of fine sand mixed with dry bentonite clay. The sand from the Po River delta is exactly that, sand that has been reduced to almost a powder by erosion, combined with clay and silt that has been washed into the river (I encountered the same natural mixture in Albuquerque in the dry bed of the Rio Grande River Valley). The Po River sand leaves a much finer texture on the finished objects than the coarser commercial sand that I have used in the US and the UK. Looking at the quality of the sand, I was able to understand how different sands might affect the regional quality of casting, and might even have had value as a commodity.
The mould for the sword was made using the standard cope and drag method, with the pouring cup on the flat side of the sword, rather than pouring from the top. A large vent was also placed at the tip of the sword. Before casting, the mould was propped up at an angle. As the crowd gathered and settled onto benches under a marquee, Claude explained Bronze Age metalworking techniques, and then the sword was cast. The angle and the pour are calculated so that the metal cools just before it exits the vent hole at the bottom. Everyone was impressed and even more so when the perfectly cast sword was taken from the mould.
The sand mould is set up. The hole at the top is the pouring cup. There’s a smaller hole at the bottom, at the tip of the sword that acts as a vent.
Another view of how the mould was propped up to allow the metal to flow.
Getting ready to pour the bronze
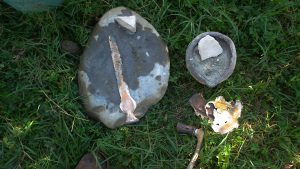
Often after the casting is done for demonstrations the bronzes are taken home and finished using drills and angle grinders, but not here. We had a relaxing time using wet sand on the hard, fine-grained anvil stones to grind off the flashing and excess metal. Some smaller stones that had a coarser texture could be held in the hand and used for working the inside curves and corners. I’d brought my small socketed hammer along and we used that to break off some of the excess metal. Between light hammering and patient grinding, the daggers were smoothed rather more quickly than I would have expected.
A nice flat anvil stone for grinding the flashing off of the dagger blade. There’s evidence from the originals from this area that the holes for rivets were punched rather than drilled, or cast in place. Other stones are used for coarser grinding. Note my hammer at the bottom. It came in handy for breaking off some of the flashing. A bit of time travel here since this is a replica of a Late Bronze Age hammer!
While we were casting, more tour and school groups came through to watch more casting demonstrations. School kids also had the opportunity to make their own copper bracelets. There was a square of tables set up with small stone anvils and hammerstones. Punches and chisels were available so they could decorate the strips of copper to make bracelets in patterns that would not have looked out of place in a Terramare village.
It was a great day, and one that was full of new experiences. It was particularly interesting to see how much variation there is in doing the same tasks and getting successful results. The different types of furnaces, moulds, bellows, and crucibles make for differences in how tasks are performed. Other small acts show variation between different metalworking groups. Tasks such as turning the crucible over to remove dross and leftover metal after casting was done into the furnace here, where in Ireland we have always done that on the ground next to the furnace. These are small things that could be seen archaeologically if excavation is done carefully, but also shows how customs and metalworking traditions develop with regional differences.
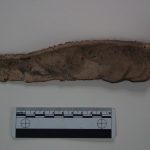
Knife: This is as cast in commercial casting sand. It will take a bit of polishing, but I am looking forward to finishing and using it.
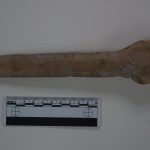
Dagger: This was cast in a stone mould and is partially cleaned (it’s the same one as in the photo above). The pouring cup will be cut off and rivet holes punched into the arched end.
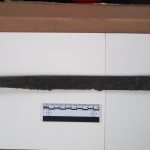
Sword: This was cast in the natural sand. It’s difficult to see, but the texture is much less gritty than the knife but smoother than the dagger that was cast in stone. It just needs to have the sprue and vent removed and a bit of the flashing taken off before punching the holes for the rivets.
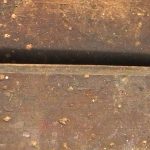
Sword seen from the edge. Note the wide shallow pouring cup, and the angled vent at the tip of the sword.
A special thanks to Il Tre di Spade, Claude, Pelle, and Scacco and the staff at the Parco archaologico e Muse all’aperto della Terramare for inviting me to participate in casting. I would also like to acknowledge Markus Binggeli & Markus Binggeli who are masters of bronze casting and replicating ancient metalworking techniques. They are mentors of Il Tre di Spade, and provide both inspiration and technical expertise for experimental archaeologists.
Useful links
If you’d like to learn more about the Early Bronze Age in the Modena area, the work of Il Tre di Spade, and the Terramare Open Air Museum in Montale you can find links below.